Genshin Impact Yun Jin Guide – 10 Tips and Tricks

Want to play Yun Jin but don’t know much about her? Do not worry. We are here with the Genshin Impact Yun Jin guide with some of the best tips and tricks.

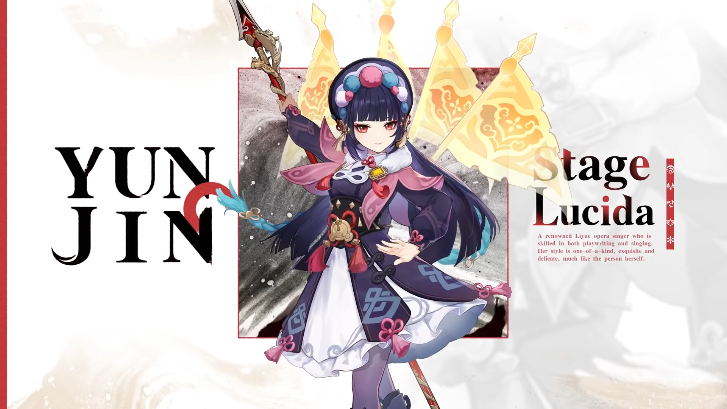
Known throughout Liyue for her plays, Yun Jin is a talented director, playwright, and singer. She enjoys this passion and is committed to extensive lengths to ensure that everyone who attends her performances leaves impressed. In addition to appearing in graceful and refined informal settings, she is also known for her exceptional friendliness. Her plays are inspired by a variety of sources; one of her hobbies is enjoying a wide variety of special drinks, so she can write a play about one if she enjoys it.

While she enjoys her passion, she also appreciates variety; while she works well with the troupe on theater-related issues, she often clashes with them on personal matters because she sees them as too traditional. She watches Xinyan’s performances at least three times a week, no matter how busy she is, because rock ‘n’ roll is one of her favorite genres. Since her elders would be disturbed by her interest in non-traditional music, she tries to keep her visits a secret.

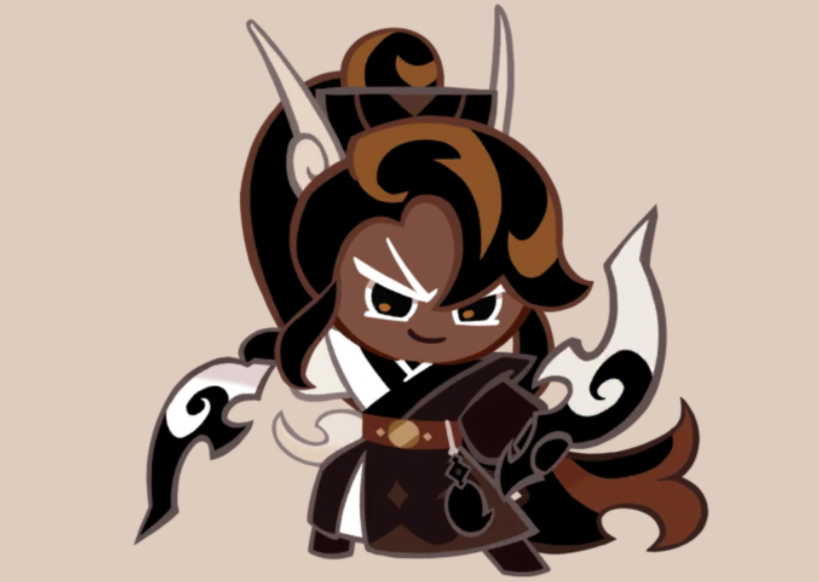
The 21st of May is Yun Jin’s birthday. She stands about 158 cm tall. Jin Yun is a charming, elegant woman, slightly below average in height with a fair complexion. In a hime cut, her jet black hair is styled with purple highlights. There is prominent red makeup on the corners of her eyes, and her eyes are a rich red color. To learn more about her gameplay, read our Genshin Impact Yun Jin guide.

Read Genshin Impact Thoma Guide – 10 Tips and Tricks

Genshin Impact Yun Jin Guide: Opening Flourish

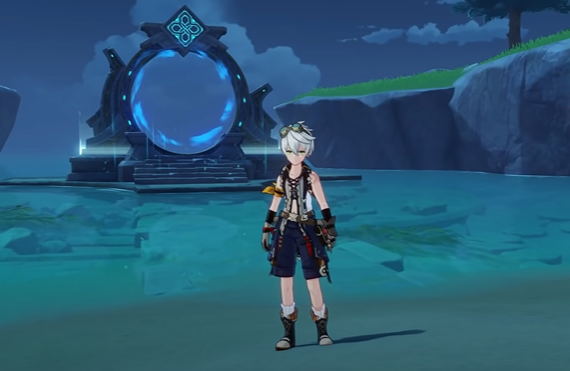
When you hold this skill, it is most effective. As a shield forms, the character adopts the Opening Flourish stance. DMG Absorption is based on Yun Jin’s maximum HP and has a 150% effectiveness against all physical and elemental attacks.  When she unleashes her Elementskill, the shield lasts until it wears off. Yun Jin releases his skill, ends the skill’s duration, or breaks the shield when it is released, resulting in a powerful attack that deals Geo DMG. Charge level 1 or 2 attacks are unleashed depending on how long it takes to charge.

Genshin Impact Yun Jin Guide: Artifacts

Yun Jin’s optimal results can only be achieved with the Husk of Opulent Dreams artifact set. If you assemble a set of artifacts, you’ll receive a bonus that boosts your character’s stats regardless of what you have.

As a result, this set of four artifacts will be able to give Yun Jin an Energy Recharge and increase the defensive stats. Her damage will be boosted for any time she is off the battlefield when she is wearing the Dreams set. The Slumbering Court Domain is the best place to find these artifacts.

Genshin Impact Yun Jin
Yun Jin Singing (YouTube)

Using Elemental bursts should be your priority

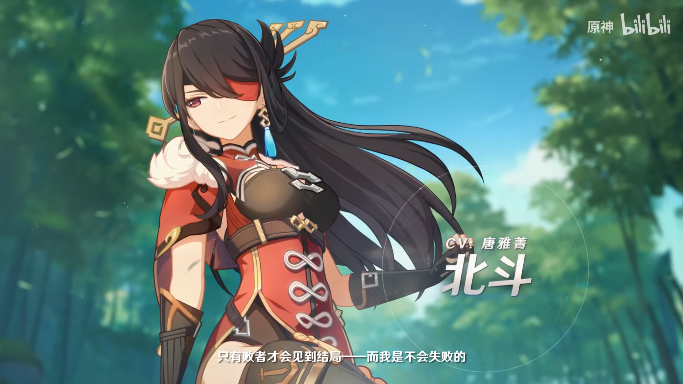
The Elemental Skill of Yun Jin is weaker than the skill of characters such as Chongyun and Beidou. However, the Elemental Burst she uses is useful and powerful without boosts. Therefore, you need to prioritize her burst and build it so it will provide great support and damage buffs for your team.

Genshin Impact Yun Jin Guide: Energy recharge

Her downfall is that she drains her energy fast due to her power. By equipping weapons with energy as a substat, you can boost her Energy Recharge stat. She loses a lot of energy after her Elemental Bursts even though they are very powerful and useful. As a result, you should equip Yun Jin with the proper artifacts and weapons to boost her energy recharge. Among her best polearms, Favorius Lance provides a huge buff to Energy Recharge.

Read Genshin Impact Diona Guide – 10 Tips and Tricks

Use defense build

The damage increase of Yun Jin is scaled with the DEF stat. It is best to stack as much DEF as possible to maximize this effect. But some players may still select a damage build regardless. When building her as a primary DPS, ATK/Phys/Crit is the best option. They will, however, not benefit from Yun Jin’s skill and burst, as they scale with DEF. 

Unfortunately, she also has a low ATK base, which makes building her on ATK not that beneficial either. In addition, her damage deals are slow if she is used as a Sub-DPS with DEF/Geo/Crit. She may deal damage with Burst only once per cast.

Genshin Impact Yun Jin
Yun Jin teaching an act (YouTube)
Read Genshin Impact Bennett Guide – Tips, Tricks, Weapons, Artifacts, and more

You can pair Yun Jin with anyone

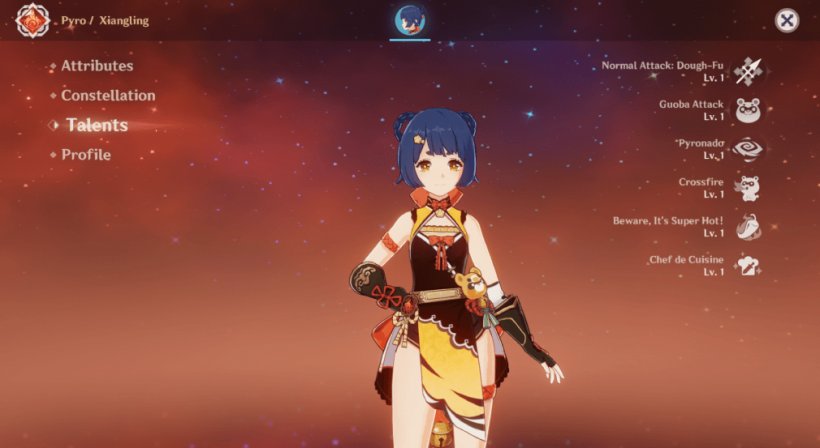
Geo users tend to have a higher degree of versatility with their teammates’ elements, compared to other elements in Genshin Impact. With Yun Jin, it won’t affect her stats and boosts, so it’s okay to pair her with anyone.

Considering what artifacts and weapons the other members of the team will have is the most critical in building Yun Jin’s team. This is so that she can react and support accordingly. Other than that, she can be placed comfortably with Cryo users, Pyro users, or even Hydro users without any noticeable changes to her stats.

Read Genshin Impact Xiangling Guide – 10 Tips and Tricks

Yun Jin is not a shielder

Players may assume Yun Jin is a shielder when looking at her Elemental Skill description. However, that isn’t the case. To parry an enemy’s attack, she uses her Skill to create a temporary shield. Because it’s only briefly available, travelers shouldn’t pay much attention to it because it will scale with HP. Despite not leveling up Yun Jin, this talent is still fully functional. Elemental Burst is the key to the opera singer’s kit, so always build her on DEF rather than any other stat.

Yun Jin gameplay
Yun Jin gameplay (YouTube)

Cooking is helpful

Genshin Impact players benefit a lot from Yun Jin’s passive cooking talent. Characters like Yun Jin who have special cooking abilities are needed if you want to make your characters stronger with food. Cooking certain dishes will reward you with bonus portions. Yun Jin sometimes gives you bonus dishes when you cook food.

Dragon’s Bane will not help you

Many of Yun Jin’s official clips feature her wielding the Dragon’s Bane Polearm. Players keep asking if the weapon is good for her. A character’s weapon in a Genshin Impact preview is usually aesthetically pleasing to the character. Although many argue that Dragon’s Bane isn’t a good fit for her. Yun Jin. Yun Jin barely benefits from Elemental Mastery, which is a sub-stat granted by Dragon’s Bane.

Read Genshin Impact Sucrose Guide – 10 Tips and Tricks

Be careful while teaming her with DPS

Yun Jin is a DPS support who depends on Normal Attacks. If the unit is impacted by the opera singer’s Flying Cloud Flag Formation, a buff generated by Yun Jin’s Elemental Burst, she will increase their damage. The DPS’s hits will deliver more damage over the next 12 seconds after casting, up to 30 triggers. As a result, while teaming Yun Jin with a DPS, players must be careful not to choose units that rely on other types of attacks.

Yun Jin gameplay
Yun Jin gameplay (YouTube)

For more Guides, Tips, and Tricks

You can also check our dedicated Video Games Guides section.

Tiny Tina’s Wonderlands Guide – 10 Tips and Tricks You Should Know

Are you up for an adventuresome game? Our Tiny Tina’s Wonderlands guide is just for you to start your adventure smoothly.

Like its predecessors, this game combines elements of an action role-playing game and a first-person shooter. Several multiplayer modes are available, including online multiplayer and local split-screen multiplayer. As with Tiny Tina’s Assault on Dragon Keep, this campaign is located within a fantasy-themed tabletop role-playing world. 

Tiny Tina will be its dungeon master and can change the game’s world on the fly. It is a real-time strategy game that includes an overworld that can be traversed by the game’s characters. Quests can only be completed in the overworld, where players can meet random combat encounters. Our Tiny Tina’s Wonderlands guide will help you to understand everything that you should know.

https://www.youtube.com/watch?v=3gJgj2ngCyA
Read Slime Isekai Memories Beginners Guide – Tips and Tricks

Tiny Tina’s Wonderlands Guide: Side quests

Traveling through Tiny Tina’s Wonderlands will reward you with golden (!) exclamation points marking your progress. The main story quests should be interspersed with these quests as you go. These stories are great for a few reasons: they’re engaging, they let you explore more of the Wonderlands map, and they also provide extensive experience upon completion.

In Tiny Tina’s Wonderlands, even on easy mode, there are recommended levels for the main quests. In a game where you blast through chapters defeating minimal enemies and taking on no sidequests at all, you’ll eventually reach a point where you’ll be unable to advance.

In key locations of the story, enemies will be extremely powerful, making it much harder to complete quests. For a steady increase in difficulty, you should complete around 3-4 extra quests between each major story chapter if you like challenges.

Read Figure Fantasy Beginner’s Guide – Tips and Tricks

Tiny Tina’s Wonderlands Guide: Brighthoof

Brighthoof is the main town in the game, from which players can buy supplies, upgrade their equipment, and head off on their next adventure. Even though Brighthoof constantly pushes players forward, it’s actually important to retrace your steps and return often to Brighthoof.

A Blacksmith can be found in the main square where you can upgrade your backpack and get ammo for your journey. Although ammo stock isn’t usually a problem in Tiny Tina’s Wonderlands – the game is generous with chests. However, you should make sure you have the best equipment at your disposal.

You should upgrade your guns whenever you earn a decent amount of money and be sure to sell any unneeded items while you’re at it. By doing so, you should be able to take down the endless hordes in the game more easily.

Tiny Tina boss
Bosses in the game (2K)
Read Marvel Future Revolution Beginner’s Guide — Tips and Tricks

Tiny Tina’s Wonderlands Guide: Photo Mode

Getting into Tiny Tina’s Wonderlands’ Photo Mode is pretty easy – just press the ‘P’ key or select it from the Pause menu – but the game doesn’t really explain how it works. Nowadays, adding a photo mode to any game is a genius addition. You were only required to give players access to the camera and they would create gorgeous pictures as free advertising for your game!

It’s difficult to get a natural-looking photo with people in it since you can’t change the pose of your character or the poses of any of the characters around you. Still, it’s a great way to capture landscape shots and some stills of your character in mid-fight.

Don’t hurry to loot

When you defeat a powerful opponent, they will explode into a mound of riches, so make sure to pick it up as quickly as possible! More opponents will undoubtedly arrive once you have dispatched them! You won’t have to worry about stuff despawning; everything will be there for you when you arrive! 

You don’t have time to evaluate the pricing or compare stats to what you already have when you’re hurrying to acquire stuff before they attack you again. As a result, your inventory will grow overloaded with useless objects, which you will have to spend time dropping or designating as garbage.

Island in Tiny Tina
Island (2K)
Read Botworld Adventure Tier List – March 2022

Shrines give buffs

The Shrines are separated into six types, with each requiring two to four components. After a few hours in the Wonderlands, you’ll locate and finish the first one, which will increase your Gold Gain by 10%. Other Shrines may be discovered strewn across the Overworld, and they are completed by gathering components acquired during confrontations and as part of side missions. After completing them, you will gain permanent bonuses to Experience Gain, Overworld Movement Speed, Critical Damage, Loot Luck, and Moon Orb Gain.

Read New World PvP War Guide – Best Tips and Tricks

High spot gives an advantage

Your high spot will allow you to see loot, chests, health, explosives, and enemy movements. The Weepwild Dankness, a twisty and vertical area, is particularly easy to find in some maps. Other places, like the Snoring Valley, are less convenient. 

You can avoid a fight

In order to save the Wonderlands and face off with the Dragon Lord, earning EXP and leveling up is pretty important. However, sometimes, you just want to get from one place to another. For example, there’s a side quest you’re working on, and you have to bring a scroll to the quest initiator after clearing out a dozen mobs. If you are unable to handle more mobs due to a quest, remember to use fast travel or your feet as needed. To finish a side quest, it is fine to skip around each mob of enemies.

Enemies in Tiny Tina
Enemies in Tiny Tina (2K)

Inventory upgrades

While loot is plentiful throughout Tiny Tina’s Wonderlands, the additional ammunition always comes in handy during a particularly challenging wave of enemies. Inventory upgrades are also useful during particularly difficult waves of enemies. We all know how limited inventory space can be in these games since we collect so much loot so quickly. Make sure you visit the blacksmith frequently.

Read Elden Ring Beginner’s Guide – 10 Things You Should Know

Co-op mode

Borderlands can be entirely played in co-op with friends, which makes it a great franchise. You’re better off getting a friend with the game and asking him or her to help if you are struggling in solo mode. It is possible to preserve this health loss if at least one of you survives long enough in battle. If you can still make it back to the battlefield before your friend dies, you can slowly chip away at the boss’ health bar.

You cannot swim in the game

The waters of Tiny Tina’s Wonderlands don’t allow swimming. A puddle that extends above your waist shouldn’t be touched. There are a few water areas that display a warning that lets players know they’re going to be killed and respawned. Some waters instantly kill players. Although the game looks very pretty and contains a number of water bodies that look enticing, they are dangerous and should never be trusted. Your coins and life will be wasted.

For more Guides, Tips, and Tricks

You can also check our dedicated Video Games Guides section.

Best Free To Play Team in Genshin Impact

Are you a Genshin Impact fan? If so, you’ll need a great team. Read our guide that will tell you the Genshin Impact best free to play team.

A player controls one of four interchangeable characters in a party in Genshin Impact, a role-playing game set in an open world. While fighting, you can switch characters quickly, allowing you to use a variety of skill combinations. Various methods can be used to enhance the strengths of characters, such as increasing the character’s level and improving his artifacts and weapons. In addition to exploration, rewards can be obtained by attempting challenges. On Teyvat there are challenges and bosses that reward highly valuable resources.

Stamina restricts the player’s ability to perform actions such as running, climbing, swimming, and gliding. The players can use their characters’ abilities to modify the environment, like freezing water to create ice bridges that can help them in overworld exploration. There are many places around the world where players can teleport as a means of fast travel; among them are landmarks known as Statues of the Seven. These are powerful healing and reviving characters, as well as providing bonuses such as increased stamina.

Genshin Impact Characters

There are two distinct combat skills for each character: an elemental skill and an elemental burst. Using the Elemental Skill is possible at any time, except for the time immediately following its use. Elemental Bursts have a cost in energy, which must be accrued through defeating enemies or inflicting elemental status effects. 

The seven elements, which correspond to ice, grass, fire, water, wind, thunder, and rock, are controlled by the characters: The Cyros, Dendros, Pyros, Hydros, Anemos, Electros, and Geos. To help you out, here is the Genshin Impact best free to play teams.

Genshin Impact best free to play team: Ningguang + Xingqiu + Diona + Bennett

Genshin Impact Bennett in free to play team
Bennett (YouTube)

As a DPS, Ningguang is the focus of this team, with three supporting characters. The Geo catalyst Ningguang uses her hands to shoot and create walls to defend herself from attacks. Ningguang can survive and hit enemies easier when Xingqiu and Diona can freeze their enemies and heal Ningguang. With Bennett, she will have even more healing power and will have an increased ATK so she can deal even more damage. This team is best for triple healing.

Read Genshin Impact Diona Guide – 10 Tips and Tricks

Genshin Impact best free to play team: Beidou +Fischl + Xingqui + Bennet

This is one of the most flexible free-to-play teams in Genshin Impact. The players should begin by using Beidou’s Burst, followed by Bennett, Xingqui, and Fischl. Thus, players can use Xingqui’s hydro powers and occasionally superconduct to deal tremendous damage inside an Electro bubble.

Genshin Impact Beidou
Beidou (YouTube)
Read Genshin Impact Bennett Guide – Tips, Tricks, Weapons, Artifacts, and more

Genshin Impact best free to play team: Xiangling + Xingqui + Chongyun + Bennet

In the Chinese community, this team is known as the Chinese National Team. The melt and vaporize team composition will help players trigger powerful Elemental reactions while also enhancing total damage potential. Sucrose can also be used instead of Chongyun to increase the amount of damage she causes with her swirls.

Genshin Impact free to play team includes Xiangling
Xiangling (YouTube)
Read Genshin Impact Xiangling Guide – 10 Tips and Tricks

Genshin Impact best free to play team: Kaeya + Bennett + Xiangling + Barbara

A comp that has a DPS supported by another 3 characters is always a good choice. According to the build you create for Kaeya, he can either be a Physical or Cryo DPS. No matter which builds you choose, he cannot be stopped. Bennett’s burst will increase his damage, and Xiangling and Barbara’s skills will create elemental reactions. Additionally, Barbara will heal your team with her burst. This team will help you in elemental reactions and give you double healing.

Genshin Impact kaeya
Kaeya (YouTube)

Genshin Impact best free to play team: Beidou + Fischl + Sucrose + Diona

The DPS is Beidou, who is held back by Fischl and Diona, while Sucrose acts as an enabler and crowd-controller. With Beidou, you get exceptional damage because she is a 4-star DPS. In addition to Diona’s shield, Beidou has a shield that can withstand any damage inflicted. Sucrose’s crowd control and Diona’s healing skills can be recharged by Fischl’s skill. 

Read Genshin Impact Sucrose Guide – 10 Tips and Tricks

Additionally, sucrose can decrease an enemy’s resistance to elements so that they are more susceptible to damage. This team will help you to counter and have a shield at the same time. Diona will be a great help with lots of energy.

Genshin Impact sucrose
Sucrose (YouTube)

For more Guides, Tips, and Tricks

You can also check our dedicated Video Games Guides section.

Caramel Arrow Cookie Guide – Toppings, Tips, and Tricks

The new Cookie has arrived. This time it’s the Caramel Arrow. To learn more about her, read our Caramel Arrow Cookie guide with some tips and tricks.

During the Heroes of Dark Cacao update, the Caramel Arrow Cookie was released. It is her job to be at the front, which puts her in the Ranged class. The Ranged Cookies benefit from her higher base HP and DEF because of this position. In the Dark Cacao Kingdom, she served as the first watcher before being expelled from the Black Citadel.

Caramel Arrow Cookie, the Black Citadel’s First Watcher, had shared her own rations with the abandoned citizens of the kingdom shortly before Snow on the Black Wall took place. To get rid of those who could interfere with his treachery, Affogato Cookie lied to King Dark Cacao Cookie about going to the village instead of fulfilling her responsibilities in the kingdom.

Read Cookie Run Kingdom: Dark Cacao Cookie Toppings build

Meanwhile, Dark Cacao Cookie realizes that she has been dispensing meals that have most likely been stolen from the citadel’s larder. As a result, she was permanently expelled from the Citadel. To learn more about her, read our Cookie run Kingdom Caramel Arrow cookie guide below.

Caramel Arrow Cookie Personality

Despite her small size, Caramel Arrow Cookie is determined, loyal, and has a strong mental fortitude. She recalls memories of her banishment as she recalls the events, but snaps out of it and turns her focus to other activities. As she focuses on her situation, she puts a more positive spin on it by explaining that there is still much she can do out in the wilderness.

Additionally, Caramel Arrow Cookie displays a clear sense of compassion and justice, as evidenced by her unwavering support of the kingdom’s forlorn citizens and complete lack of hesitation in saving GingerBrave and friends when confronted with a Snow Lion.

Save your crystals for her

Caramel Arrow cookie
Caramel Arrow Cookie (CRK fandom)

Caramel Arrow Cookie is an Epic rarity character who replaces the Affogato Cookie banner and arrives just before the Ancient Dark Cacao banner expires. Save your crystals: this one is likely to be good.

Read Pancake Cookie Guide – Toppings, Team, and more

Caramel Arrow Cookie Guide: Toppings

In order to create the best Cookie Run Kingdom Caramel Arrow Cookie, her position and abilities have to be considered. The ranged Cookie, Caramel Arrow, figures prominently on the front line. She does tend to jump to the back of the team and fire from there, which makes sense, as many of her skills require her to do so. See below for the toppings build

  • Firstly, you can try Solid Almond Toppings(Provisional)
  • The second option is Solid Almond Toppings + Swift Chocolate(Provisional)
  • The third option is Solid Almond Toppings + Searing Raspberry(Provisional)
Read Cookie Run Kingdom Team Guide – Tips and Tricks

Caramel Arrow Cookie’s bow

Caramel Cookie with her bow (CRK fandom)

It is likely that Cookie’s bow is a Korean horn bow, or gakgung bow, a type of reflex bow with a relatively small size and impressive firing power. 

For more Guides, Tips, and Tricks

You can also check our dedicated Video Games Guides section.

Genshin Impact Sucrose Guide – 10 Tips and Tricks

Want to play Sucrose but don’t know much about her? Read our Genshin Impact Sucrose guide, which has some of the best tips and tricks.

In Genshin Impact, Sucrose is an Anemo character. She is not just an alchemist who specializes in bio-alchemy, but she also supports Albedo, the chief of the Knights of Favonius’ alchemy department. On November 26th, she celebrates her birthday. Sucrose likes exploring and learning about the world’s mysteries since he is interested in bio-alchemy. 

Throughout her research, many different aspects are frequently labeled as their own outcomes, regardless of how useful the results may be. Because she spends so much time studying, she becomes bored whenever she takes a vacation. Sucrose has a fair complexion, amber eyes, and wears round black glasses. He has long, light green hair with a blue streak, a fair complexion, and amber eyes. 

Sucrose
Sucrose (YouTube)
Read Genshin Impact Tatara Tales Quest Guide – Complete Walkthrough

Her Anemo Vision is a brooch that she wears on her cloak’s collar. She wears her alchemical garb alongside her tutor, Albedo, as part of the Knights of Favonius investigation department. Thick white gloves, black-rimmed spectacles, a ruffled blue corset, white boots, and black thigh-highs with garter are among her accessories. To know more, read our Genshin Impact Sucrose guide.

Genshin Impact Sucrose Guide: Elemental Skill

Sucrose is known for its supportability. Astable Anemohypostasis Creation – 6308 is a Wind Spirit capable of pulling opponents as well as objects towards itself. Anemo deals DMG to its opponents and launches them in the AoE.

Use her wisely

Sucrose excels as a Support character, even though she can deal decent damage. As with many of the Anemo adventurers, she does nothing to heal the team but interrupts and displaces smaller enemies, pulling them into her circle of winds and keeping them there long enough for other characters to attack them.

Read Genshin Impact Qiqi Guide – Tips and Tricks You Should Know

Unlock talents and constellations quickly

Her Support mechanics really start to shine as her Talents and Constellations become available. The reduction in Cooldown takes effect through Talents, while at the First Ascension Passive level, she’ll increase the Elemental Mastery of any Element she swirls with her moves. The stat that she boosts for the entire team increases by 20% as she rises in ranks. Her goal is to set the team up for massive damage. 

Gameplay
Sucrose gameplay (YouTube)

Genshin Impact Sucrose Guide: Best Constellations

You should try to obtain the clustered vacuum field constellation in order to make your Sucrose even stronger. Your elemental attacks will be boosted as a result. With her C4 Alchemania, Sucrose is already stronger even if she does not excel as a DPS hand. By inflicting seven normal or charged attacks, she decreases the cooldown of her elemental attack. The C6 Chaotic Entropy also boosts the elemental damage dealt by Sucrose’s elemental rampage by 20%.

Read Genshin Impact Xinyan Guide – 10 Tips and Tricks

Genshin Impact Sucrose Guide: Best Weapon

The best choice is to play with the four-star Sacrificial Fragments. Using this weapon gives high elemental mastery and resets the cooldown of his elemental skill by 40% (at level 1). The blacksmith can make the four-star Mappa Mare for you if you do not already have it. After a reaction with this catalyst, elemental mastery and elemental damage are increased.

Best Teams for Sucrose

For some sublime elemental synergies, you’ll want DPS that uses Hydro, Pyro, Cryo, or Electro. As your primary damage dealers, use Pryo types such as Diluc or Xiangling, while Keqing or Chongyun can serve as secondary damage dealers. For sublime synergy, switch to your DPS right after Sucrose’s Elemental Burst or Elemental Skill, then attack it with an Element. Sucrose tends to leave flames behind, giving Pryo a large window for synergy.

Genshin Impact Sucrose gameplay
Sucrose gameplay (YouTube)
Read Genshin Impact Signora Guide – Best characters, rewards, and more

Sucrose’s Forbidden Creation is handy

As soon as possible, execute Sucrose’s Elemental Burst: Forbidden Creation – Isomer 75 Type II. Besides grouping monsters, it absorbs the Hydro, Pyro, Electro, and Cryo elements that are in contact with it, creating damage of this type. This can be helpful for hitting more than one enemy at a time. Sucrose will copy the elemental type of Blobs while causing no damage to them.

Best Artifact for Sucrose

Sucrose is best served by the Viridescent Venerer x4 set. The set increases her Anemo damage by 60% and spread damage by 20%. Additionally, it reduces the RES of enemies struck by Swirl by 40%, depending upon the element. It further increases the damage that her team can deal.

Avoid same attack type

Make sure no two party members have the same attack type unless you want your team to rely on one element. As a result, Sucrose will be able to be her most versatile self, allowing you to have the most flexible team possible.

Genshin Impact Sucrose gameplay
Sucrose gameplay (YouTube)
Read Genshin Impact Xiangling Guide – 10 Tips and Tricks

Boost Sucrose’s Swirl damage

Sucrose’s damage from Swirl will increase by 60% once she equips two additional pieces. In the Swirl, opponents will experience decreased elemental resistance for 10 seconds. As a result, Sucrose’s deadly elemental combo becomes much more lethal for a short period of time.

For more Guides, Tips, and Tricks

You can also check our dedicated Video Games Guides section.

How to Complete Patches Questline in Elden Ring – Guide

Don’t know how to complete Patches questline in Elden Ring? We are here to help you complete this quest with our guide.

In this open-world action-adventure game, players take on the role of the Tarnished as they try to become Elden Lord. They must journey through the Lands Between to achieve their goal, where they will encounter formidable bosses wielding the titular Elden Ring shards.

Elden Ring contains many NPCs who have side quests to complete, including Patches.  Elden Ring features him as a recurring character who sells players items, offers helpful information, and yes, even drops them off cliffs. To learn how to complete patches questline, read our guide.

Patches requesting not to kill him
Patches requesting not to kill him (YouTube)
Read How To Defeat Dragonlord Placidusax in Elden Ring – Guide

Where to find Patches?

To locate Patches in Elden Ring, players will have to locate and explore Murkwater Cave in Limgrave first. Murkwater Cave can be reached by following the river north from Agheel Lake and looking to the left for an entrance.

Once near the cave, players will encounter Bloody Finger Nerijus if this is their first time following the river like this. In order to explore the cave properly, players will need to eliminate Nerijus before the cave is blocked. After entering the cave, players will only have to follow the right-hand path from the first chamber after reaching the Site of Grace to reach a boss room. Opening the chest and entering the boss room will cause Patches to attack the player.

After reducing Patches’ health to half, the player should stop attacking him when he asks and, after a short delay, the player should be able to speak to him. If the player continues to forgive Patches and exhaust his dialog, he will open up a shop inside the boss room after a second rest at a Site of Grace or reloading. Patches sell Margit’s Shackle, which temporarily stuns Margit the Fell Omen twice during the first phase of the boss fight.

Read All Boss Fights in Elden Ring – Ranked

Elden Ring Patches Questline: Liurna of the Lakes

After completing the previous steps, the player will enter Liurna of the Lakes and find the patches in Murkwater Cave after defeating Godrick the Grafted. Patches will set up shop again at the Scenic Isle location of Grace.

If the player decides to take his advice, he will take them to the Foot of the Erdtree, where he tells them that he knows of an Abductor Virgin who has the ability to transport them. Following this advice leads to a short dungeon culminating in a boss fight against two Abductor Virgins.

Meeting Patches again

In his next appearance, Patches will be found by the Mt Gelmir Ninth Bonfire Site of Grace. Near the cliff’s edge, players can find a message informing them that treasure is located by following a rainbow stone trail.

Players who continue along the stones will encounter Patches who will kick them down the cliff and tell them to “Stay away from Volcano Manor.” This can prove useful if players survive the basilisk attack that follows. This leaves players at a location that can only be reached by circumnavigating Mount Gelmir and approaching from further south through a ravine.

Read Best Weapons in Elden Ring – Weapons You Should Be Using

Elden Ring Patches Questline: Volcano Manor 

Volcano Manor
Volcano Manor (YouTube)

If the player decides to join Volcano Manor, patches will arrive in the corridor immediately before the Volcano Manor Site of Grace, where they will set their business. He announces you to be his comrade by disclosing his real loyalty to the Manor. You will have to defeat Rykard, Lord of Blasphemy, and then exhaust Patches’ conversation.

Elden Ring Patches Questline: Shaded Castle

Patches make his final appearance in the game in Shaded Castle, which is located in the north of Altus Plateau, shortly before the boss chamber. If the region is reloaded after the player speaks to him, he will provide the Dancer’s Castonettes and then vanish. Lady Tannith can be granted Dancer’s Castonettes in the game, however this does not appear to have any effect on the game.

Complete Patches Questline to get rewards
Meet patches to get rewards (YouTube)

For more Guides, Tips, and Tricks

You can also check our dedicated Video Games Guides section.

Devour Beginner’s Guide – 10 Tips and Tricks You Should Know

Want to play a horror adventure game with your friends? This game is for you. To have a good start, read our Devour beginner’s guide with some tips and tricks.

Co-op horror survival game Devour allows 1-4 players to play together. Get to the bottom of a possessed cult leader before she drags you back to hell. Don’t look back. Run. Stay hidden. Stay out of sight. There may be content in this Game that is not suitable for all ages. 

Be aware that the game contains jumpscares if you would like to purchase it or have already purchased it. In the case of health issues, you can disable scream in the in-game settings. To learn more and have a good start, read our Devour Beginner’s guide with some of the best tips and tricks.

Read In Sound Mind Guide – Everything You Should Know

How to start

The first thing you see in Devour is a gated section in front of a creepy house. Your flashlight will be your only light. When you walk forward, you’ll see a barrel and a locked gate. To the left of the barrel there is a piece of geometry you can walk on top of, so use it to get to the top. 

After climbing over the gate, drop down the other side. After you have done so, you will see a pathway to your right. To get gasoline, follow this path to the back of the house. As you walk further back in the backyard, you will see an altar.

Devour Beginner’s Guide: Item Stacking

When engaging in nightmare mode, this is one of the most important concepts to understand. You should aim to gather all the items into one area of the map since they are scattered throughout. Gather enough fuel and drop it near the goat altar. Collect the hay and place it outside in an appropriate area. Alternatively, you can assemble med-kits in an area of your choice. Prior to having a goat sacrificed, it’s best to stack items. That way, she won’t run around too obnoxiously.

Devour gameplay
Gameplay (Straight Back Games)
Read Scariest Roblox Games to play in 2022

Devour Beginner’s Guide: Use UV

Use the UV to knock her out if she charges at you. However, you won’t need to do this because running puts you out of reach. To avoid losing all of your stamina when running, take your finger off the shift key for a half-second before striking it again. If you feel she’s getting too close, go inside the TV room and shut the door.

Hunt the goat

It’s time to go goat hunting once you’ve gathered your stockpile. Have your team look around and they should be able to tell you whether or not there are any. After that, simply drop some hay on the ground. The goat will begin eating when you do that, at which point they become vulnerable. Grab them and carry them to the altar.

Manage your time of hunting

Devour gameplay
Demon attacking (Straight Back Games)

Devour is at its chillest when no goats are being burned, which is why it is the best time to stockpile the hay and medkits. As soon as you start burning goats, you’ll have to deal with demons and possessed Anna. 

Read Remnant From the Ashes Guide – Everything you need to know

Devour Beginner’s Guide: Multi-sacrifice

This has a stronger impact when employed in the middle of the game than when used at the beginning. When you have four people, make sure two or three of them grab goats and sacrifice them all at the same time. In this manner, you theoretically spend less time in each rage stage than if you did them all separately, as you move right from the 6/10 goat rage state to the 9/10 goat rage state. You’ll have a higher chance of survival.

Devour Beginner’s Guide: Floor Demons

The sacrifice of many spawns a small problem. Burning three goats at once spawns quite a few demons as they spawn every time a goat is burned. Don’t forget to burn all the goats before grabbing more. Otherwise, you’ll be captured and killed. Particularly if you are running away!

The game becomes more difficult as you play further

As you sacrifice more goats, the game becomes more difficult. As more demons appear, Anna becomes more aggressive and faster. Your screen will show a red indicator when you are hurt by demons crawling on the floor. Your UV light should be pointed directly at your feet in the direction the indicator is pointing. As long as you make it to the enemy before they burn you up, you can fight more.

Demon approaching
Demon (Straight Back Games)
Read Hello Neighbor Act 1 Guide – Tips and Tricks

Face to face with Azazel

Before starting the ritual, if you come face-to-face with Azazel, don’t worry. He won’t attack you unless you stare at him for too long. In fact, the odds are extremely slim that he would just start hunting if he didn’t stare.

Get the keys before

Be sure to check every door, cage, and trash can, since it will be a pain to search for a key while being hunted. When the starting event has been made, the keys will appear. The locations of the keys are not completely random. Remember that keys can spawn behind locked doors. Since the names of the rooms are simple, you will remember them over time.

For more Guides, Tips, and Tricks

You can also check our dedicated Video Games Guides section.

Total War: Warhammer Guide – Tips and Tricks

Are you a fan of war games? You can learn more about this game by reading our Total War Warhammer guide, which includes some tips and tricks.

Total War: Warhammer features turn-based strategic battles between armies. Unlike previous Total War titles, Warhammer centers on a fantasy setting and features characters from the Warhammer universe. A player or computer controls the character, which includes monsters, warriors, and heroes. In this game, Karl Franz ascends to the imperial throne as newly elected Emperor, amid the turmoil caused by a civil war uprising and the counts of the empire resenting his rule. 

Before battling the other realms surrounding them and restoring peace to the Old World, he must unite his fractured kingdom and assert his dominance. Despite this peace, the Dwarfs retain a grudge against the Greenskins. Meanwhile, the Von Carsteins in Sylvania, who rules an undead army, attempt to seize the throne of the Emperor. To know more, read our Total War Warhammer guide with some tips and tricks.

Read New World PvP War Guide – Best Tips and Tricks

Total War Warhammer Guide: Mix units in your army

It is hard to defeat an opponent if your units are not adequately mixed before to the combat. Others can beat you simply because you did not mix your units well. Spear, pike, sword, mounted, cavalry and one to two artillery battalions are recommended. As long as there aren’t too many special units in the mix, they can be advantageous. Berserkers, dogs, and other special troops existed in the past.

Total War Warhammer Guide: Units positions

Total War Warhammer gameplay
Gameplay (SEGA)

Don’t spread out your units too much in battle, don’t get outflanked, don’t fracture your middle, and don’t be too wide. As a rule of thumb, keep your heaviest units in the center and your light to medium units on the outside. When facing an enemy, it is better to route him than completely obliterate his force.

Total War Warhammer Guide: The Empire

Oddly enough, Empires are by far the most balanced class, which makes them more difficult from the start. You probably don’t know what kind of combat you should prefer when you first start playing the game. In addition, due to their building trees, it is hard to build all units in the same region, which makes managing production in your empire more difficult.

Read Mortus Horn in Warframe – A Complete Guide

Make a city and settlement plan

Total War: Warhammer allows you to completely rule the map by seizing control of cities and villages. Provinces are made up of cities and settlements. Each province has a capital as well as one to three settlements. You can give a commandment to all of the cities in a province, which will bring them a significant benefit. Once you have captured all of the cities in a province, you must determine how you will develop structures.

Upgrading the Capital

Total War Warhammer gameplay
Gameplay (SEGA)

It is possible to upgrade the capital five times, and the buildings within it can be upgraded as well.  The higher your level is, the higher level of building you can construct, and the higher level of training you can conduct.  Buildings may only be upgraded three times at a time, so it doesn’t make sense to erect a building with five upgrade tiers when you can only gain access to three of them.

Read Elden Ring Beginner’s Guide – 10 Things You Should Know

Maintain the public

In order to win the long game, it is crucial to maintain public order in your territory. Immediately following the conquest of a province, public order will fall into disarray.  The people are angry that the ruler just died.  Over the course of ten turns, this “provincial instability” penalty will gradually disappear.  It is important to focus on stabilizing the territory you have just conquered instead of trying to expand further.

Choose from a variety of army stances

fighting scene
Gameplay (SEGA)

There are five stances in which your army can move around the map. They are: normal, marches, raids, ambushes, and encampments. It is important to choose the right stance for any given situation, and you can switch between them in the bottom left corner of the screen. 

  • March stances increase movement range, but also disable recruitment and make all of your troops tired during battle. 
  • If you use the raiding stance, you will both increase your faction’s income and decrease public order in the province in which you are located. This will make it a great way to make the other faction angry and send their armies after you.
  • An ambush stance hides your army, so you can spring out and attack the enemy army if it walks within range. 
  • No matter where you are, the encampment stance will allow you to recruit new troops, as well as provide a defense and morale bonus for your troops if you’re attacked. 
  • In addition, if you’re playing as a dwarf or orc, you can use the “underway” stance, which lets you move over otherwise impassable terrain, for example, mountains, helping you move around quickly.
Read Blue Archive Raid Guide – Strategies for different bosses and enemies

Use your cavalry wisely

In general, the cavalry that you possess should always either flank the enemy or charge at their ranged units with the fiercest charge in the world if they leave their ranged units open. Ranged forces are essential to an army’s success.

Battle
Gameplay (SEGA)

For more Guides, Tips, and Tricks

You can also check our dedicated Video Games Guides section.

Honkai Impact 3rd Guide – Tips and Tricks

Are you an Honkai Impact fan? We have brought you the Honkai Impact 3rd guide with some of the best tips and tricks.

A catastrophic event has engulfed mankind, and a team of elite Valkyries under your command is essential to the survival of humanity. Anime-inspired action RPG Honkai Impact 3rd is available for Android and iOS devices. Stunning hand-drawn art is featured along with fluid gameplay. However, it is not the same as other games from the genre. In contrast to some automatic-play grinders, Honkai Impact 3rd doesn’t provide any fan service or fancy lighting. 

Players are kept on their toes with its unique combat system. Combat effectively by evading and using combos. Additionally, you can equip hundreds of weapons and stigmata. To succeed, you’ll need to combine the right Valkyries and equipment. To know more, read our Honkai Impact 3rd Guide.

Read What is Stigma in Honkai Impact 3rd — Guide

Honkai Impact 3rd Guide: Events 

In order to maximize the rewards you can get from the events tab, you should complete missions there as soon as possible so that you can get the rewards before the events expire. You won’t usually need stamina for the events. In that case, make sure your stamina is prioritized here.

Honkai Impact 3rd Guide: Co-op Raids

Divine Keys are rewarded for completing Co-op Raids missions. By completing these missions, you will be able to significantly increase the power of your Valkyries.

Learn to evade

Honkai Impact 3rd cutscene
Cutscene (YouTube)

One of Honkai Impact 3rd’s unique features is the ability to evade. Evasion functions differently in this game, albeit it is not a novel idea. You won’t be able to dash in this game until you crush the buttons. It will be vital for you to wait for the appropriate time to flee. 

To dodge an approaching attack, press the evade button as soon as you see a faint flash on the screen. Once you’ve completed this successfully, you’ll be ready to unleash a fast counterattack. If you are not confident, you can always run away from the attacker to avoid an assault.

Read Honkai Impact 3rd all active codes – March 2022

Honkai Impact 3rd Guide: Character Types

The third installment in Honkai Impact has three different types of characters, each with its own strengths and weaknesses. There are mecha characters, creature characters, and psychic characters. Likewise, there are mecha characters, creature characters, and psychic characters. Gaining an advantage requires an understanding of how they interact. 

Creatures have a difficult time defeating Mecha characters. Psychic characters are strong against Creatures. Mechas are weakened by psychic characters. Your enemies can’t be easily identified based on their character types. The color scheme will dictate how you should approach it. Once you’ve fought a few times, you should be able to tell what type your opponent is right away. This information can help you win the battle.

Read Princess Connect Re: Dive Tier List – Best Characters (March 2022)

Honkai Impact 3rd Guide: Ultimate move

Honkai Impact 3rd gameplay
Gameplay (miHoYo)

In the battle system, you mainly perform combos by mashing the large attack button. By doing so, your ultimate move will be charged up. You can then use it on your enemies. If you have a charged ultimate, you can use it at any time, but saving it until you encounter a boss is best. As you will not always have enough time to charge up another ultimate, keep it tucked away until you need it.

Side Objectives gives you crystals

Despite the fact that crystals are the game’s premium currency, there is a simple way to obtain them without paying real money. You may earn extra Crystals by completing side missions. For achieving each side objective, you will get 5 Crystals. After completing a few tasks, you’ll have enough to access prize boxes. Completing the side tasks will allow you to open more treasure boxes, letting you get more Valkyries, weapons, and stigmata.

Read Genshin Impact Bennett Guide – Tips, Tricks, Weapons, Artifacts, and more

Complete hidden quests

character
Character’s reflection (miHoYo)

Go to the Help tab and you will find some hidden quests under the Academy tab. Upon completing these quests, you will earn Crystals. These quests will help you learn the basics of the game. These hidden missions are even better because you won’t have to use your stamina on them. Learning more about the game rewards you with free premium currency when you take the time to do so. Don’t miss out on this!

Farm gold coins

You won’t have an issue with gold coins until you reach level 50 or above, when things start to become problematic. Even if you don’t max up the girls’ talents, levelling them up may easily wipe out a million coins in an instant. Not to mention that the stigmas and weaponry must be improved. There are just a few methods for obtaining coins.

  • Look for Homi/Homu goodies when undertaking open world (Sakura Samsara) tasks.
  • Avoid participating in weekday activities or experience stages to save Planeroid Tokens.
  • The weekend is ideal for spamming tokens to unlock the gold coin stages.
  • Every day, you receive a modest quantity of gems for fulfilling chores. You may trade them in for coins.
  • Exchange worthless items for coins.
  • Gold may also be obtained by improving your refinery.

For more Guides, Tips, and Tricks

You can also check our dedicated Video Games Guides section.

Lagoon Island in Lost Ark – A Complete Guide

Do you want to know everything about Lagoon Island? We have brought you the Lost Ark Lagoon Island guide that will tell you everything you need to know.

While Lost Ark Lagoon Island is a short and sweet island, it comes with a lot of rewards. Island Token collectibles can be earned by completing varied quests and objectives throughout Lost Ark. Our Lost Ark Lagoon Island guide will tell you everything you need to know about the island, such as its location, its Island Token, and its other rewards.

island gameplay
Island gameplay (YouTube)

Lost Ark Lagoon Island Location

For players to travel via ship on Arkesia’s World Map, they first had to unlock sailing in Lost Ark. As part of the East Luterra storyline, the Set Sail quest unlocks the sailing ability. Short distance south-west of Bern, across the ocean, lies the island of Lagoon. The island lies at the western end of the Lost Ark Tooki Island, just past Ister Island. 

There is no guarantee that it will appear every day since it’s an adventure island that only spawns at certain times during the week. The alarm clock on the top left of the minimap can be used to check whether Lagoon Island is up, or you can directly use Procyon’s Compass. To access this island, you should have a combat level of 50 and equipped item level of 250, as the boss on this island can be quite challenging. 

Lost Ark Lagoon Island quest

Island quests
Island quests (YouTube)
Read Asura Island in Lost Ark – Everything you need to know

A co-op mission, similar to many of Lost Ark’s Adventure Islands, will begin 3 minutes after players drop anchor and visit Lagoon Island. In this mission, players must assassinate the island’s boss, Iar Kaya.

When players arrive to Lagoon Island, they may begin a quest line by conversing with the NPC Boatman. Players will acquire various helpful engravings as well as Lost Ark Pirate Coins as a reward for finishing this questline.

About Iar Kaya

Located in the depths of the deep sea, Iar Kaya is the self-proclaimed mistress of Lost Ark. It turns out, however, that she is a powerful witch who was brokenhearted by a frigate captain. Despite swearing to love her and never hurt her, he turned on her by instructing his sailors to catch her wand in a net. Iar Kaya was able to escape, but she grew hateful of all surface dwellers and vowed to drive them from the oceans.

Thousand of innocent sailors were killed as a result of one man’s actions and betrayal. For this island, players should have a Combat level of 50 and an Item level of 250 at the very least, as taking down this boss is quite a challenge:

Read Phantomwing Island Guide – Tips and Tricks

To prepare to fight this boss, you will need about three minutes, and to complete the objective will take approximately 30 minutes. Once you defeat this boss, a bid for three items will begin.

quest gameplay (YouTube)

Lagoon Island Rewards

In addition to some useful Lost Ark items, players who complete the Lagoon Island objectives and questline may also receive some rare and valuable drops. You can find special collectibles and even high-end items to enhance your skills and abilities.

Lagoon Island Token, or Island Heart, allows players to represent their acceptance into the island. With Opher on the Lonely Island, you can exchange these tokens for awesome rewards. Iar Kaya, the island’s boss, drops the Lagoon Island Token as a random drop. The Lagoon Island Token can only be obtained by defeating the boss. Due to Iar Kaya’s random drop, players may need to defeat the boss multiple times in order to obtain it.

Read Lost Ark Ghost Ship Guide – Location, Rewards, and more
Lagoon Island rewards
Island rewards (YouTube)

In addition, players have a chance of receiving an epic and powerful Skill Rune Effect named Wealth after defeating Iar Kaya. Lost Ark has a special type of rune, Wealth Runes, which increases the player’s identity gauge upon skill hits, depending on how rare the rune is. 

Although the Identity Gauge is unique to each class, any boost in your identity is extremely valuable no matter what your class is. Iar Kaya drops the Epic Wealth Rune, which will grant players a 30% Identity Gauge boost. Skills generating plenty of Identity are best suited for these runes.

Read Lost Ark Drumbeat Island Guide – Everything you should know

In addition to the rewards that can be acquired by completing the Lagoon Island objectives, players can also obtain useful items from the Lagoon Island merchant by purchasing various clams. According to the rarity of the clams, players will receive Ability Stones.

Lost Ark Lagoon Island Mokoko seeds 

Laoon Island mokoko seeds location
Mokoko seeds location (YouTube)

Only one Mokoko Seed location is available on Lagoon Island, where players can get awesome rewards from the Mokoko Seed vendor. See the above image for the location.

For more Guides, Tips, and Tricks

You can also check our dedicated Video Games Guides section.