The Genshin Impact Spices from the West Event is here, and we have a guide that will explain everything about it to you.
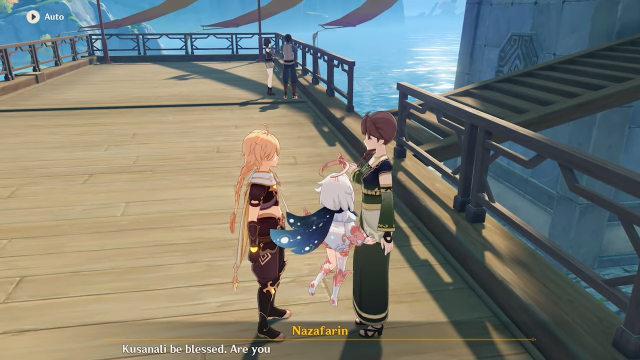
A new event has arrived for the Genshin Impact players. The Genshin Impact Spices from the West event is a cooking event that players can play to get some exciting rewards. An NPC called Nazafarin will travel from Sumeru to Liyue for research on seasonings. Players will have to follow the recipes that Nazafarin gives them and in exchange for that, you can earn great rewards.
In this guide, we will tell you everything you need to know about the Genshin Impacy Spices from the West Event. We will also tell you how to get companionship EXP. So, read till the end in order to understand the event totally.
"Spices From the West" Event: Creation of Special Seasonings
Help Nazafarin conduct her research by making seasonings according to the recipes provided to obtain rewards!
The latest Geshin Impact event has already started on May 14, 2022. Players can complete it till June 7, 2022. So, do not worry about the time, you have plenty. Keep in mind that your Adventure Rank should be 28 or more than that if you want to participate in the Spices from the West event. Furthermore, you will need to complete the “Idle Teapot Talk” quest so that you can cook some particular dishes and also invite other characters to taste them.
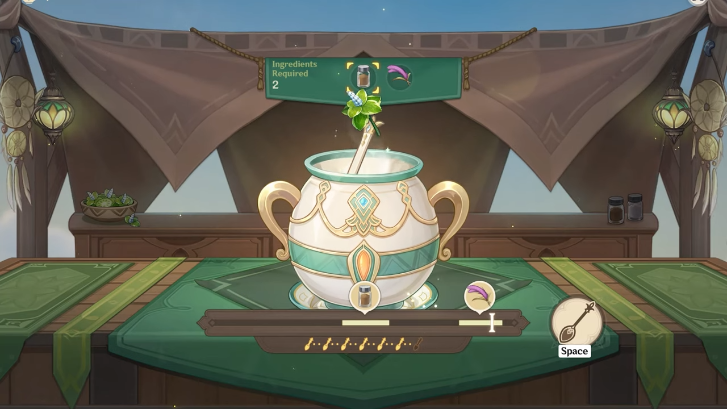
There is no complication in the event as it is really simple to understand the first time. You will be playing a minigame where you will have to time and pick the right ingredients of the recipe that will be given to you by Nazafarin. Remember that each seasoning will be having its own ingredients and you will have to collect all of them before you start to prepare the seasoning. However, it is not a difficult job to find these ingredients as you can get them very easily. The ingredients will be horsetail, mint, and other common ingredients.
Remember that a new seasoning recipe will be unlocked every first seven days of the event. The needle should continue to move back and forth from edge to edge and the slider should be pressed when it hovers over the correct ingredient in the same order as the recipe indicates. Keep in mind that you can only make three attempts in order to create a seasoning.
You can have fragrant dishes by adding some seasonings on top of your dishes. For this, you will have to create some fresh seasonings first. These dishes will help you in increasing the companionship EXP of characters. This can happen when you invite the characters to the Serenitea Pot.
How to get companionship EXP from Genshin Impact Spice from the West event
Gameplay (YouTube)
You can create fragrant seasonings by mixing some ingredients in them. Each recipe has a different ingredient. After this, you can add fragrant seasonings to the selected dishes in order to make them fragrant dishes. Keep in mind, however, that fragrant seasonings should only be used in delicious dishes.
To get the companionship EXP, you can invite the desired characters to the Serenitea Pot. Then, tell them to taste the fragrant dishes. Every character will give a different reaction based on the taste. This will give you different rewards and will also increase the Companionship EXP.
Want to know how to beat Cleanrot Knight? Well, there are not just one, but three of these bosses that you will have to beat. Our guide below will help you in this fight.
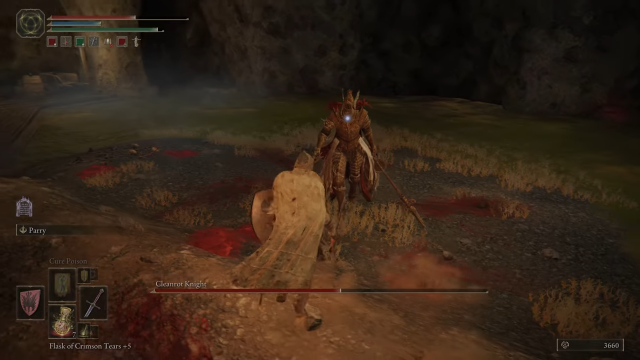
Elden Ring has many bosses and even optional bosses that you can fight and get great rewards after you beat them. The Cleanrot Knight is one of them. He was an esteemed warrior of Malenia the Severed. Malenia is a demigod who is cursed with the affliction known as Scarlet Rot.
Cleanrot Knight is super strong and also possesses a fraction of the Demigod’s power. He has a great speed and can attack you very hard. Cleanrot Knight is an optional boss, but defeating him will give you great rewards. If you are wondering how to beat Cleanrot Knight, then you are at the right place. Our guide will help you beat this optional boss in the game easily.
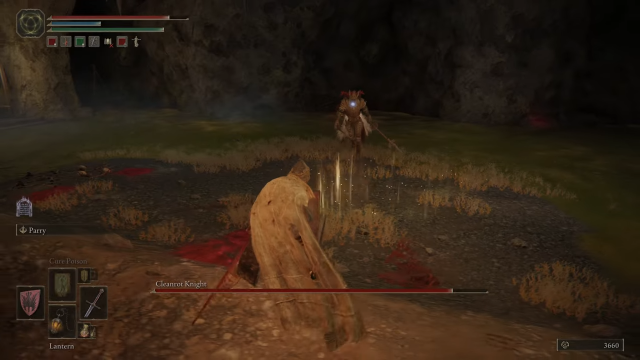
There are three Cleanrot knights in the Lands Between. The two appear together while the third one is in the Stillwater Cave in Liurnia of the Lakes. To go to this cave, you will need to travel northwest of Stormveil castle which lies at the base of a cliff. This Cleanrok Knight is weaker than the other two. However, you will still face quite a challenge fighting against him. In addition to the boss, there is one more threat. You will have to face the poisonous liquid inside the cave.
If you want to go for the other two Cleanrot Knights, you will find them in Caelid in the depths of the Abandoned Cave there. You can find this abandoned cave southeast of the caelem ruins. If you want to reach the cave, the only option is to cross the canyon dividing Caelid that is on the branch of a grand tree. The two Cleanrot Knights fight alongside and are better than the Cleanrot Knight in the Stillwater Cave.
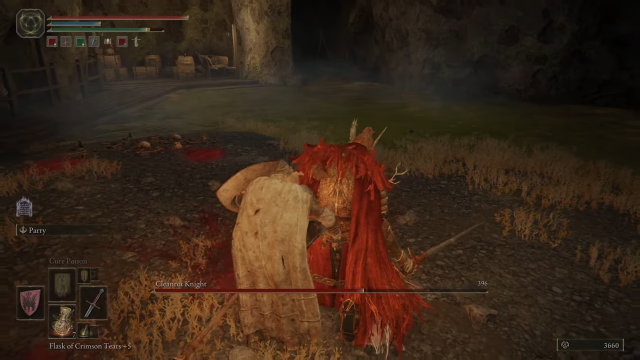
The Cleanrot Knight is a powerful boss in Elden Ring. He is very fast and has a variety of moves up his sleeve. The knight also uses the Scarlet Rot. This makes the boss more powerful and difficult to deal damage. If you get hit by its attacks, a big amount of your HP can be lost, so always be aware of them. However, every powerful boss has a weakness and so does Cleanrot Knight.
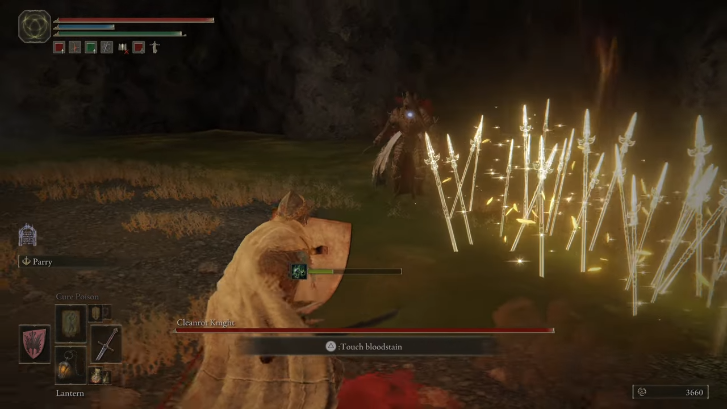
The boss uses a spear and sickle that has a lot of different attacks. Remembering all those attacks will be time-consuming, so we will tell you about its weakness and other things you can do to beat the Cleanrot Knight. The boss is very vulnerable to fire damage and also weak against lightning damage. Therefore, the best option for you is to use attacks of these two types. Weapons, spells, and items that deal with lightning and fire damage are recommended. This will deplete the knight’s HP quickly.
We do not recommend you to have a range strategy against Cleanrot Knight. Using the melee strategy can be beneficial for you in this fight. The knight has a low Poise Stat and is easily parried. As a result, players can make use of these flaws to evade strikes that might otherwise be deadly.
The Cleanrot Knight’s defenses will be shattered by wailing on it during its Counter Shove attack. As a consequence, players will be able to launch deadly attacks against the Cleanrot Knight. Many attacks can be Parried, allowing players to counterattack effectively. When doing so, players should be cautious, as a failed Parry will almost result in death.
In this way, you can defeat the Cleanrot Knight. If you face the duo, then you will have to be more careful and should be more on the defensive. Try to take out one first and then go for the other. The strategy is the same as we said above.
Cleanrot Knight fight gameplay (YouTube)
Rewards
Rewards for defeating the Cleanrot Knight at Stillwater Cave:
3,300 Runes
Winged Sword Insignia Talisman (helpful for character builds)
Rewards for defeating the duo of Cleanrot Knights at Abandoned Cave:
7,000 Runes
Gold Scarab Talisman (increases the runes after defeating the enemies)
We have brought you the Genshin Impact Bennett Hangout Guide. Learn about all the endings and achievements of this event.
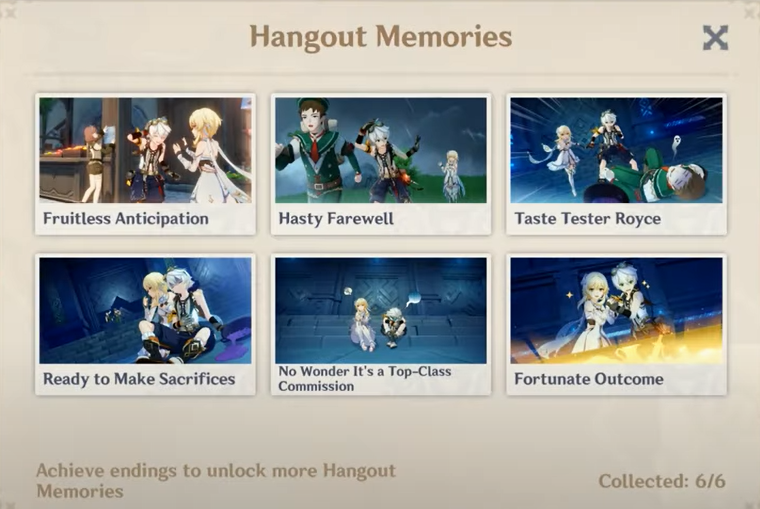
If you are a fan of Bennett, then you will be very happy with this Genshin Impact quest. This quest will tell you to be with Bennett all the time, and the best part is that this quest will have a total of six different endings. All these depend on the dialogue choices you choose. This is a fun journey, and we are here to help you out with our Genshin Impact Bennett Hangout Guide that will explain to you everything that you need to know.
If you do not know about Bennett, then let us tell you that he is a Pyro in Genshin Impact with a 4-star rating. He is without a doubt one of the game’s greatest supporting characters. He not only heals your warriors, but he also increases their attacks! Bennett is a good supporter, caring for and motivating his teammates at the same time. He is a natural fit for practically any squad. To know more about him, we will give you a link in which we have explained everything about the character.
To unlock the event, you will first need to reach the adventure rank of 26 and also complete the Archon quest. The quest is “Prologue: Act III – Song of the Dragon and Freedom.” The Bennett Hangout event will display on your quest’s page once you’ve accomplished all of these tasks.
But it does not end here, you will need two story keys to unlock the event. Getting the story keys is not very difficult, as you can get them by completing some of your daily commissions. To unlock the key, you will need to complete at least eight daily commissions. However, you can only play four daily commissions every day. Therefore, you will need to wait for a little. You will have to follow this process only one time. After that, you can play all the six endings without any trouble.
How to unlock alternate endings
If you want to unlock the other endings, you’ll have to make active choices on your part. As we said above, the endings depend on the dialogue choices you make, so if you want to unlock other endings, you will have to be aware of your choices.
Genshin Impact Bennett Hangout Guide: First Ending
The first ending in the Bennett Hangout event is the Fruitless Anticipation. For this ending, you will just need to have a normal day around Mondstadt with Bennett. Here is what you need to do:
Bennett: “I don’t want to get you in any trouble, so just let me watch from the sidelines,”
You: “We could just do something else instead.”
Bennett: “So, where are we gonna go,”
You: “How about we hang out around town?”
These are the only important choices you will have to take care of. After all this, you can do whatever you want to complete the quest, and eventually, you will unlock the first ending called “Fruitless Anticipation”.
Conversation with Bennett (YouTube)
Genshin Impact Bennett Hangout Guide: Second Ending
The second ending in the Bennett Hangout event is the Hasty Farewell. For this ending, you will need to have a simple walk with Bennett in the wilderness. The weather will slowly change and will spoil many things for you. However, you will get the Archaic Lord of Lightning and Blitz hidden achievement. You will need to find Bennett near the Adventurer’s Guild desk and talk to him:
Bennett: “I don’t want to get you in any trouble, so just let me watch from the sidelines,”
You: “We could just do something else instead.”
Bennett: “So, where are we gonna go,”
You: “How about a walk in the wild?”
These are the only important choices you will have to take care of. After all this, you can do whatever you want to complete the quest, and eventually, you will unlock the Hasty Farewell ending.
Genshin Impact Bennett Hangout Guide: Third Ending
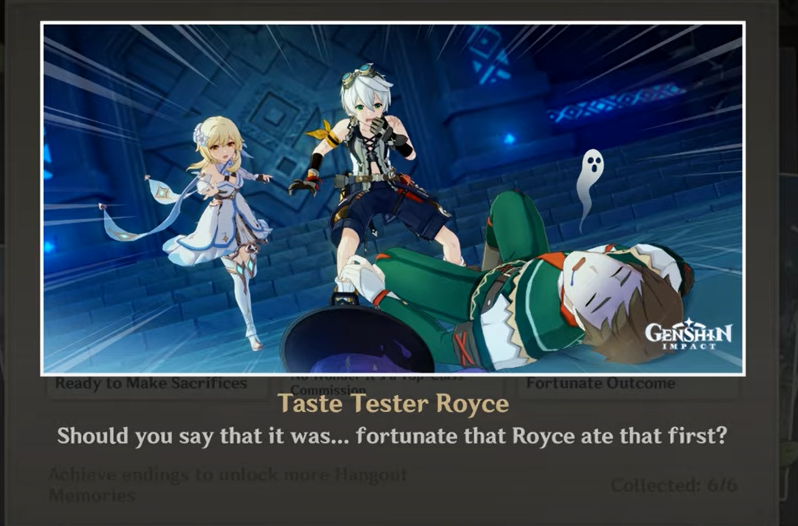
The third ending in the Bennett Hangout event is the Taste Tester Royce. For this ending, you will need to get Royce to eat the awful dish that Bennett whips up. After all this, you will need the following choices to get the ending. You will need to find Bennett near the Adventurer’s Guild desk and talk to him:
Bennett: “I don’t want to get you in any trouble, so just let me watch from the sidelines”
You: “Sure, let’s go on an adventure!”
Bennett: “Do you usually make some food before you set out on an adventure”
You: “I do.”
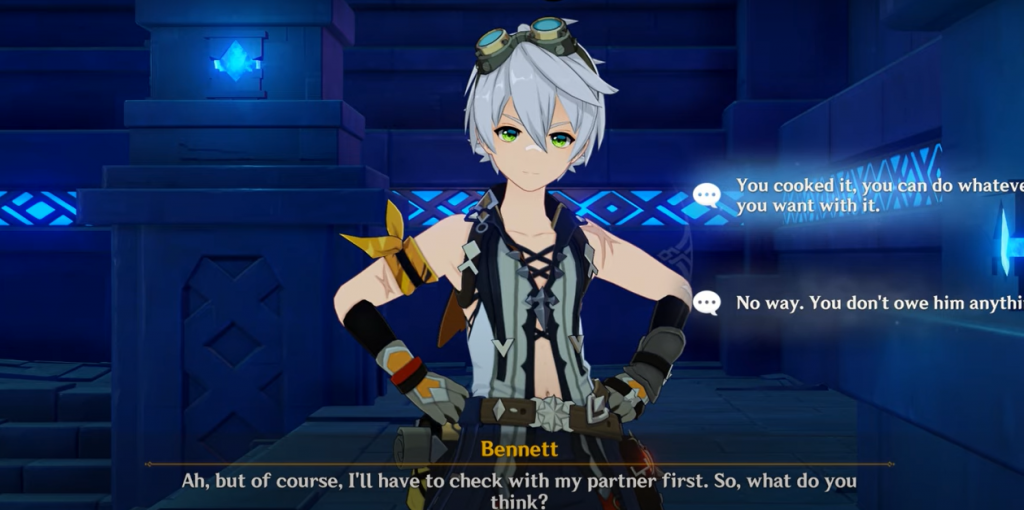
After the conversation, you will need to help Bennett to gather the ingredients he is looking for. After some time, you will again have a conversation with him. So you will have to say this:
Bennett: “I’ll have to check with my partner first. What do you think?”
You: “You cooked it, you can do whatever you want with it.”
These are the only important choices you will have to take care of. After all this, you can do whatever you want to complete the quest, and eventually, you will unlock the Taste Tester Royce.
The fourth ending in the Bennett Hangout event is the Ready to Make Sacrifices. You will need the following choices to get the ending. But first, you will need to find Bennett near the Adventurer’s Guild desk and talk to him:
Nice to meet you Bennett!
You … admire me?
That’s just coincidence.
Aren’t you going to give me a hand!?
Sure! Let’s go on an adventure!
I’ve always wanted to go adventuring with you too!
Does defeating Stormterror count as an S-rank mission?
I do.
Nice, and thank you!
Are you sure it’s okay to eat?
Well, that’s pretty much our only option.
Does that mean … we’re locked in here?
How can you blame it all on someone else?
Bennett didn’t volunteer for this bad luck.
You don’t owe him anything.
Stop trying to accommodate others all the time.
Bennett, you did nothing wrong.
What if help does arrive in time?
You might get food poisoning if you eat it.
No, you’re sacrificing yourself for others again.
All the above choices are the ones that you need to make. The fourth ending has lots of choices, so we just showed you all the choices. Do it as it is to get your fourth ending.
The fifth ending in the Bennett Hangout event is “No Wonder It’s a Top-Class Commission”. You will need the following choices to get the ending. But first, you will need to find Bennett near the Adventurer’s Guild desk and talk to him:
Bennett: “I don’t want to get you in any trouble, so just let me watch from the sidelines.”
You: “Sure, let’s go on an adventure!”
Bennett: “Do you usually make some food before you set out on an adventure?”
You: “No, I usually leave straight away.”
Bennett: “How about letting me try it out first?”
You: “Go ahead! We won’t get anywhere just staring at them.”
These are the only important choices you will have to take care of. After all this, you can do whatever you want to complete the quest, and eventually, you will unlock the “No Wonder It’s a Top-Class Commission”.
The fifth ending in the Bennett Hangout event is “Fortunate Outcome”. You will need the following choices to get the ending. But first, you will need to find Bennett near the Adventurer’s Guild desk and talk to him:
Bennett: “I don’t want to get you in any trouble, so just let me watch from the sidelines.”
You: “Sure, let’s go on an adventure!”
Bennett: “Do you usually make some food before you set out on an adventure,”
You: “No, I usually leave straight away.”
Bennett: “How about letting me try it out first?”
You: “Hmm, how can I let you face the danger alone?”
After the conversation, you must complete the puzzle Expansive Eya Bennett Hangout. This should be completed without errors. You will receive the Power of Luck hidden achievement if you complete it successfully. After all this, you can do whatever you want to complete the quest, and eventually, you will unlock the “Fortunate Outcome”.
So, these were all the six endings in the Bennett Hangout event. Follow the choices carefully so that you can unlock all the endings easily.
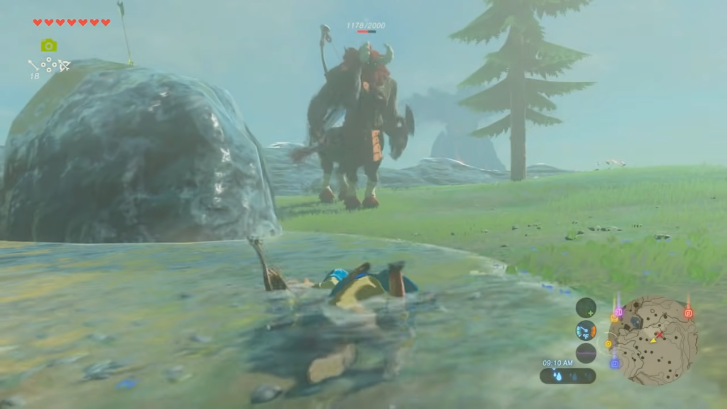
Want to know how to beat Lynel Zora’s Domain in Breath of the Wild? Our guide will help you out to win this fight easily.
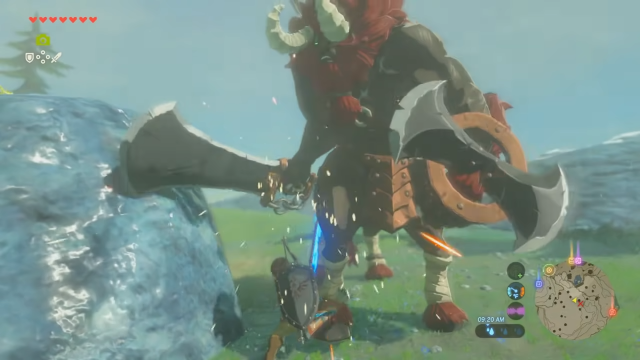
Lynel is an enemy that you will face in the Breath of the Wild. This enemy is optional and you can find many across Hyrule. However, you will face one for sure at the Zora’s Domain. You have to visit Shatterback point in Zora’s Domain on Ploymus mountain in order to get the shock arrows. You will be told to get 20 shock arrows when you speak to King Dorephan and complete the Reach Zora’s Domain quest.
Furthermore, you require these shock arrows so that you can restore the Divine Beast Vah Ruta. As we said above, it is found near the Shatterback point on Ploymus mountain in a Lynel den. Therefore, you will have to face this enemy and beat him. But how to beat Lynel Zora’s Domain? In this guide, we will be helping you to win this fight.
Head to the east by taking the bridge, that goes towards the cliffs. It is on the same level as the Mipha stature. After that, you need to head to the giant waterfall. You will be wearing the Zora Armor as you received it from the King. At the base near the waterfall, you will see an option to swim upward. Swim till you reach the top and keep doing it until you reach a clifftop area.
You will know that this is the right place because there will be a story slate on the right and also one more waterfall to scale. Now after you cleared the water area, go up through the trees till the hill. Keep going until you reach the Ploymus mountain. Lynel will be waiting for you there.
After you reach the location, the question arises that how to beat Lynel? Well, Lynel is a mini-boss that you will face, and it will give you a tough fight. In this fight, you will need to have some patience as you will be dodging and blocking a lot. Following a perfect guard, you can rush for an attack as it is the best chance to deal damage to Lynel.
The Stasis rune ability will be a great help for you in this fight against Lynel. Long-range might be bad for you. Lynel is great in both close-range and long-range attacks. He can hit you strong from the close range, but his long-range attacks are very difficult to avoid. Therefore, we recommend you to stay near Lynel.
The only time you need to get away from Lynel is when he summons the fireballs. To avoid this attack, get behind something so that you will be safe from the blast of the fireballs. You can do the aerial attack when the fireballs hit the ground. This is because it creates an updraft so that you can paraglide and attack Lynel. The best weapon you can use to attack while in the air is a bow and arrows.
Try to aim for its head, as it will stun the mini-boss. If you use the Ice arrow, you will freeze him. This is a great opportunity to deal some more damage to Lynel. You can go top of it and quickly attack as much as you can. This fight is all about patience, so you will need to wait for the right opportunity to attack.
Things to keep in mind
Upgrade your equipment to its best.
Be light. Use one hand weapon and light armors so that you can be quick enough to dodge attacks by Lynel.
Practice for the perfect guard. This will help you a lot in the fight against the mini-boss.
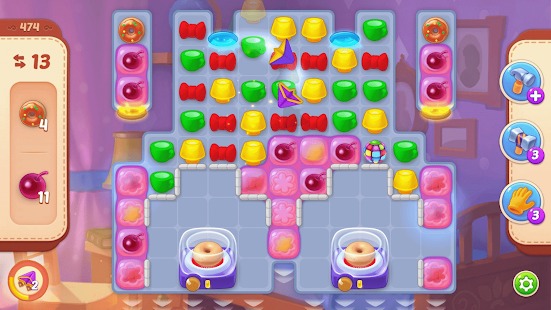
Ready for some cool and interesting puzzles? Homescapes is the right game for you. Read our Homescapes guide for some tips and tricks.
Homescapes is about Austin, a former youth worker who returns to his childhood mansion to restore it. While maintaining the house, he attempts to convince his parents that they don’t need to sell it. By solving match-3 puzzles, players can help him complete tasks on the To-do list. You might have to install new stairs or restore the statues in the main hall, or pet a cat.
The player receives in-game currency and a Star reward if they complete all puzzle levels. With coins, you can buy more than 100,000 design patterns for the mansion or buy lives and power-ups for puzzle levels. In this Homescapes guide, we will tell you all the cheats, tips, and tricks that will help you in the game.
Rockets are the most important special blocks in the game. The game will be more difficult as you move ahead. You will have to clear jellies and boxes that will make your problems bigger. To solve this problem, rockets are your savior. Rockets can clear an entire row for you.
Homescapes Guide: Paper Planes
You can create paper planes by matching four pieces in a square or box pattern. Activating the paper planes will automatically direct them to your next objective. The plane will clear one piece for you if you are at a level that needs a certain number of pieces cleared. The plane will target an uncarpeted area if you need to carpet the area. It will also break one of the locked pieces free if you have locked pieces.
Moves are very important in Homescapes as they help you to solve the puzzles and even give you extra bonus. If you have some extra moves left after you have completed a puzzle then they will turn into rockets or bombs and do a big explosion that will help you to get more coins. Therefore, if you save extra moves, then you will get the bonus coins that will help you in the game.
Gameplay (Playrix)
Do not just group three blocks
Yes, just grouping the three blocks might seem easy and quick, but it will not help you in the long term. As you progress in the game, the puzzles will be more difficult. If you group a row of four blocks, it will create a rocket and that will clear the entire row either horizontally or vertically. Similarly, if you group four blocks it will make paper planes. This is how you can make different powers and clear the blocks easily. So it is always best to group more than three blocks.
Start with a bang
Whenever you are starting the puzzle, always keep in mind to have a good start or to get as many points as possible. You can carefully look for the best way to have a big chain. You can also go for the special block. All this will help you to get a head start so that the puzzle later will end easily.
Creating matches near the bottom is always a good idea. As a result, you can re-shuffle the board more completely or at least create some waves. This will result in more matches and a faster journey to the end of the level. If you feel that you can’t solve the puzzle from the upper side, clearing it from the bottom side will help you a lot, you can target some extra tiles automatically by clearing the bottom.
Gameplay (Playrix)
Play with friends
You might feel that you can solve the puzzles all by yourself. However, there will be some puzzles that will be fun for you if you play them with your friends. You can even join a team and play with them. You can connect to Facebook so that you will have even more friends. The best part is that when you connect to Facebook, you will immediately get a reward of 1,000 coins. What is more fun than a free reward, right?
So, this was all you need to know about Homescapes. If you follow all these tips and tricks then you will surely solve the puzzles quickly without any trouble.
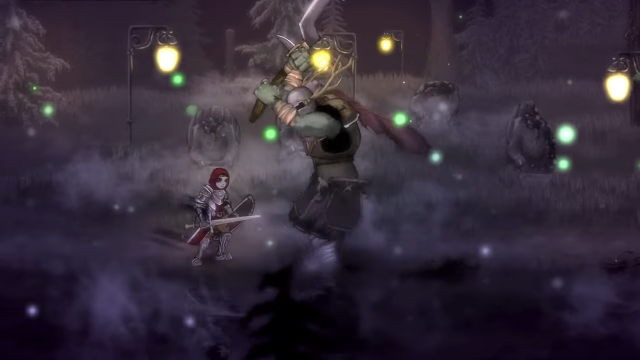
Do you want to know the best Salt and Sacrifice classes? We have listed them down below for you. Read and decide the best one for you.
Classes have always played an important role in RPG games. Deciding the best class builds up lots of trouble and confusion for the players. Salt and Sacrifice to have classes that players can choose from. There are around eight classes in the game.
However, deciding on the best Salt and Sacrifice classes can be difficult. It actually depends on how you want to play the game or how your playstyle is. But if none of these things matter to you then you can read our guide below which will tell you about the best Salt and Sacrifice classes.
First, let us tell you about the classes in Salt and Sacrifice. After that, we will tell you about the best classes that we feel.
Assassin
If you want to play in a close combat style then you can go with the Assassin class because they are very fast and can deal high damage. The assassins are meant to deal good damage by surprising the enemies with their speed, so if you are a player who wants some speed in close combat, the assassin is a great choice.
Cleric
Clerics are the best option when it comes to healing. You can heal yourself, and it has a balanced stat in all the areas that make it decent for any job.
Cleric in Salt and Sacrifice (YouTube)
Highblade
The highblade weapons are great when you use them as the DPS. If you level up then the highblades are very strong and powerful.
Paladin
The paladin is a class that you can see in lots of RPG games. They are very popular and can wield heavy armors and weapons together. These can give you a high damage bonus and will also absorb the high damage given by the opponent.
Sages are one of the best classes in many RPG games because they have the magic ability. They can deal with magic attacks and building or leveling up them will make them more powerful.
Sage in Salt and Sacrifice (YouTube)
Duelist
The duelist just focuses on dealing damage. It is all about damage for this class. If you want to ignore everything and just want to deal as much damage as possible, then duelist is a good choice.
Fighter
A fighter is someone who has the ability to attack and defend. You can choose from a variety of armors and weaponry for the combatants. If you enjoy weapons and prefer to use them, the fighter class is for you.
Ranger
The name itself tells about this class. It is totally opposite to the assassins. Here, if you do not want close combat, you can choose a ranger so that you can attack from a distance and avoid the enemy who is trying to get close.
Now that you know about all the Salt and Sacrifice classes, you can decide according to your playstyle. For us, the best classes are Paladin, Cleric, and Sage.
Paladin in Salt and Sacrifice (YouTube)
The shield of a Paladin blocks 95% of physical damage and has high elemental resistance. The sword boasts one of the finest combo strings and one of the quickest attack speeds in the game. The Vanguard weapon of the Paladin has a Runic Art that increases damage by 20% for around 10 seconds.
The cleric has the ability to heal themselves. This is the best ability because in RPG games, you will continuously need to heal yourself, and if you can do it on your own then what can be better than that? If you want to heal yourself then we recommend that a cleric is the best choice.
Sage is always fun and powerful. With the magic attacks, you can deal some high and affective damage to the opponents. The Sage has the magic ability, so it is different from the remaining classes.
Do you need Fortnite plant saplings? Don’t worry, we’ve included all of the sites in this guide to make things easier for you.
In Fortnite, you have a job planting saplings at Bomb Carter Clusters. This is a big battle because of the fight between The Seven and the Imagined Order. If you complete this quest, the island will be restored to its previous glory. However, many gamers are experiencing difficulty locating Fortnite Plant Saplings. If you are one of them and can’t find the locations, then read our guide that will help you find the places and complete this Fortnite quest.
Let us tell you that at Bomb Crater Clusters, there are nine different sites where you can find the Fortnite plant saplings. However, for this week’s seasonal quest, you will need to plant three saplings. There are three points of plant saplings at the Bomb Crater Cluster. We will tell you all the locations, and it is up to you to decide which three sites you are going to choose. Once you plant at three sites, you will be rewarded with 20k XP.
The problem is that the site locations for the Fortnite Bomb Crater Cluster are not available on the map. Therefore, it is very difficult for the players to find it. Below, we have mentioned all the locations for you.
Plant saplings site (YouTube)
Catastrophe Crater Saplings
Catastrophe Crater’s sapling planting points surround the Unremarkable House Landmark. The Fortnite plant sapling can be found right in front of the house, next to the crater. A second location to plant a sapling can be found directly behind the house next to a bush. Taking a left after the Unremarkable House, follow the dirt path. Next to a smoking Bomb Crater, you can plant a sapling.
Plant saplings site (YouTube)
Crispy Crater Saplings
Search the Bomb Crater Cluster area just east of Seven Outpost I and north of Windbreakers for the next set of sapling blueprints. The east side of the location of the Bomb Crater Cluster has a place to plant a sapling between some craters. One more sapling can be planted just southwest of the last one. It should be planted in the grass near the pine trees. There is a third sapling nearby the Seven Outpost near a giant crater.
An old shack with a red roof stands on the northwest corner of Infiltrator Crater. A sapling can be planted west of this building. One more spot to plant a sapling can be found south of this same shack, close to where the Desert Biome starts. Consider planting the sapling next to a smoke crater and dead trees. The stone head statue is located in the northeast corner of Infiltrator Crater. Another sapling planting location can be found next to the statue.
Are you new to this insane racing game? Do not worry, our Redout Enhanced Edition guide will help you with some of the best tips and tricks.
This arcade racing game is designed to be uncompromising, fast, tough, and satisfying, with a strong sense of vertigo at its core. A floating system and driving model will create a force for the ship depending on how is the track, slopes, hard brakes, accelerations, and turns. This creates a stunning and instantly recognizable visual style. Stunning coastlines, eerie frozen landscapes, and vast desert plains: the dynamic, tense, and beautiful futuristic racing clashes in the semi-abandoned Earth’s melancholy atmosphere provide the backdrop.
In short, Redout Enhanced edition is a game that gives you all the racing atmosphere with a very hard difficulty. Even the bots in this game are strong enough to defeat you. Therefore, you will need our Redout Enhanced Edition Guide that will help you with some tips and tricks. If you are a beginner, then this guide is a must for you.
In the game, there are powerups that greatly assist you in the races. It assists you in winning several close races. You have the option of taking simple sharp corners or getting a boost at the start of the race. All of this is possible thanks to powerups, therefore we advise you to keep as many as possible. The best powerups you can use as a beginner are Extra Magnetic Grip Lv 4 and Turbo Boost Lv 4. These will help you in taking great smooth turns and give you high-speed boost. Also, you can upgrade these powerups and make them stronger.
Redout Enhanced Edition Guide: Wall barriers
In the game, there are wall barriers that might cause major troubles for you. In Redout, there are two types of barriers: green barriers and red barriers. The green barriers are completely secure. This implies you don’t have to slow down and you can break it down to get through it. The red barriers are now tough to overcome since you will just crash into them. As a result, if you encounter a red barrier, decrease your speed and do a slow turn.
If you want to unlock the maps and races, you will only have to complete the events in the career mode. Therefore, do not worry about completing all the events. Play the career mode and unlock the tracks to play the online and quick race.
Redout gameplay (34BigThings srl)
Drive slow in corners
This is the most important tip that might seem easy and a very general thing, but it is very important. Redout is a very fast racing game, therefore the controls will be hard for you, especially if you are new to the game. The best way to win is to slow down in the corners. The maps are difficult and the corners are sharp. Therefore, with a very high speed, it will be impossible for you to make a smooth turn. So, we suggest you slow down your speed whenever you are going to turn.
Although it is true that you must slow down when taking a corner, this does not imply that you must stop speeding. If you want a smooth turn, maintain accelerating while also using the brake. This will let you take a turn without hitting the corners by slowing down your speed. Keep in mind that timing is everything.
Redout gameplay (34BigThings srl)
Upgrade your ship
This is very much needed because even the AI upgrade their ship. So, you will have to upgrade and make your ship even better so that you can win the races easily. Remember, the AI in Redout is not weak. They are very strong and you can easily lose races against them. So, keep everything upgraded.
Replay old events
Yes, you can do it. If you want to get more XP to upgrade or progress further in the game, you can just go back to the events that you have already completed. This will help you to earn more XP. In addition to this, you can improve your stats because if there is an event that you could not finish in the top 3, replaying it and winning will improve your stats.
We have already told you the importance of the powerups in Redout. However, the turbo boost powerup is one of the best powerups you will find in the game. All you need to do is quip this powerup and use it when you see a straight path in front of you. This is because you can use it fully in a straight path, as if there are turns, then you will eventually crash.
Use the boost powerup (34BigThings srl)
Lunare ships
Lunare ships are one of the best if you are a beginner. This ship has great handling, and it can guide you to at least learn about racing in Redout without having any trouble. It might be possible that you will not win many races with the lunare ships. However, you can learn the maps and see how you can race effectively against the opponents with the help of Lunare ships.
Do not worry about winning
To proceed in the game, you do not need to place first. Leveling up unlocks new events, thus you don’t have to place in the top three to progress because you get XP just by finishing the race.
Want to know how to get and use the Lost Ark Token of Protection? Our guide will give you all the important details about it.
The Chaos Line is a feature in Lost Ark. It’s a weekly Dungeon, and players will require a token of protection to enter. This is the most crucial component, as, without it, players would be unable to access the dungeon. Don’t worry if you don’t know how to obtain the Lost Ark Token of Protection; this guide will assist you.
The procedure is not difficult, although it is a little complicated. The game does not provide you with clear instructions on how to access the Chaos Line dungeon. This is why many players have trouble getting into the game and obtaining the Lost Ark Token of Protection. To find out more, see our guide below.
As we said above, a token of protection is needed to access the Chaos Line dungeon on South Vern. For this dungeon, you will need only one token. However, just one token is making players frustrated because it is not easy to find it.
You will find the token of protection through the Roster Quest, “I Must Protect”. The best part is that you can get two tokens of protection here for free. All you need to do is collect it from an NPC called Professor Farhat. Keep in mind that you will need to unlock Farhat’s services before you unlock the Roster Quest.
The tiring part is that you will need to complete all the content of South Vern that is newly added. This includes the main story questline that is before traveling to Vern Castle. Spean to Magick Scholar Jeneca at the Military District in Vern Castle. This will trigger the “I Must Protect” Roster Quest. Go to the west of the Chaos Line Dungeon entrance to speak with Professor Farhat. After having a conversation with this NPC, you will get the Token of protection.
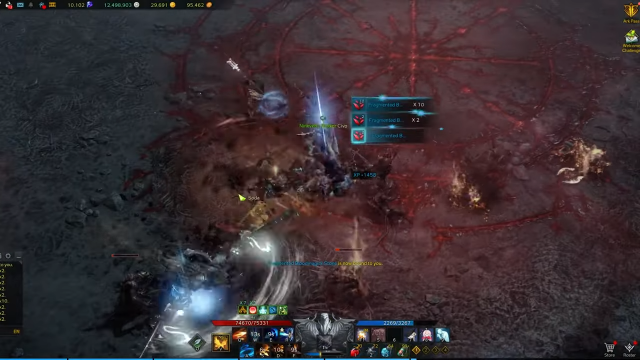
Gameplay (YouTube)
How to use Lost Ark Token of Protection
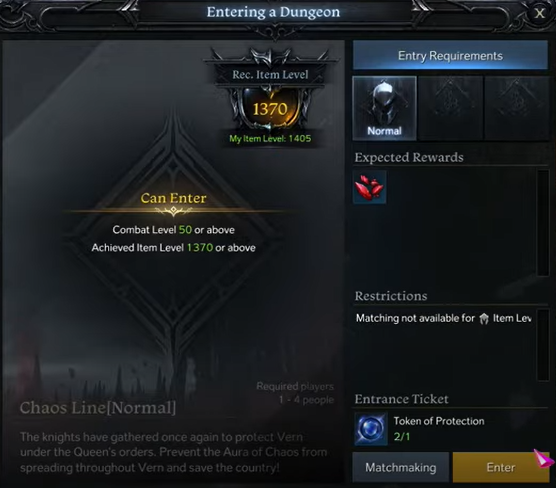
Now once you spoke to Professor Farhat and receive your two free Tokens of Protection weekly, you can use one as an entry into the Chaos Line Dungeon for the “I Must Protect” Roster Quest. Keep in mind that you can complete the Chaos Line Dungeon once a week. The Item Level requirement before entering the Chaos Line Dungeon should be 1370. In addition to that, you should have a combat level of 50 or higher.
Keep in mind the Roster Quest’s objectives and use Token of Protection to enter the dungeon. To complete the Roster Quest, you must obtain the Soundstone while defeating all enemies. You will receive Mission XP as a reward for finishing the Roster Quest. The Fragmented Bloodmagick stone is obtained by completing the weekly chaos line dungeon. Professor Farhat can trade it for other rewards if you wish.
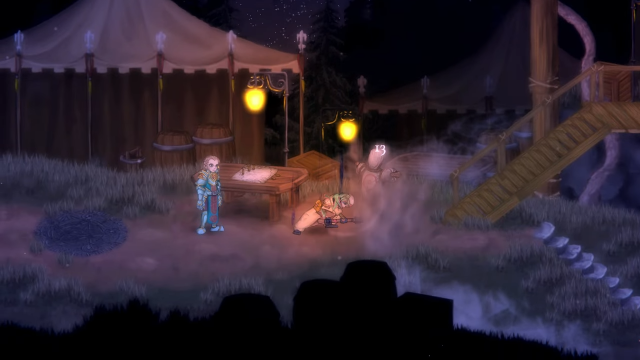
Want to know how to beat Dreadstone Peak Mages in Salt and Sacrifice? Our complete guide will give you all the details to win against these mages.
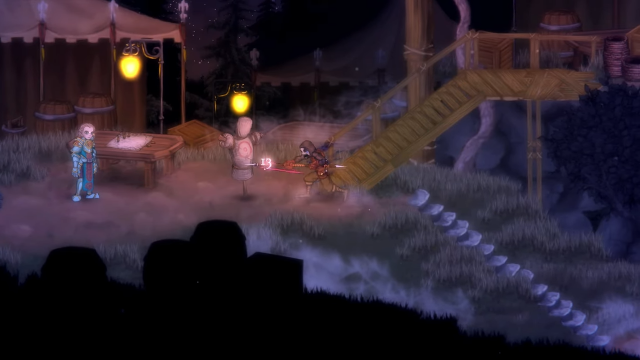
Salt and Sacrifice broadens the realm of Salt and Sanctuary. You play as a Marked Inquisitor tasked with slaying Mages that wander the planet and pose a danger to civilization for the rest of your life in Salt and Sacrifice. You’ll need to prepare for each expedition in Pardoner’s Vale, a center full of compassionate Inquisitors. As you progress further in the game, the enemies will get stronger, and you will have to be ready to face them.
Few of those enemies you will face are in the Dreadstone Peak. Five mages will be in front of you one by one, and you will have to defeat them all in order to progress further. But how to beat dreadstone peak mages in the game? We will give you the answer in our guide. Follow the guide carefully, so you can defeat all the mages easily without having trouble.
The first mages you will face are not that tough. You can easily defeat them with normal skills and move forward. You will be facing creatures like Scatterminds, Royal Minds, and Gray Nobles. All of them are very easy to defeat in Salt and Sacrifice.
Keep in mind that they will use three types of attacks. The first one will be light threads. In this, they will conjure some orbs and connect them with light threads. These are very easy to dodge and roll.
The next attack is called Mind pulse where the Neuromancer will emit a blast of psionic energy. This attack is big and can deal good damage, but you will easily know when this attack is going to come. The final attack is Whip tendril. In this, the mage unfurls a tendril and whips at you. Keep in mind that he uses it twice and if you get hit by the first one, the second will hit you too.
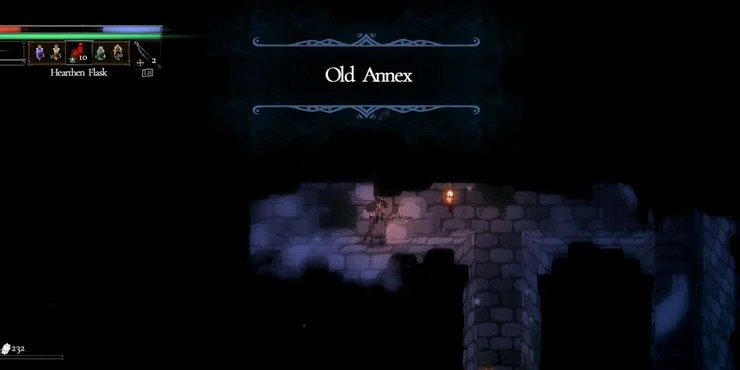
After you’ve defeated the Neuromancer, you can explore the dungeons under the Temple of Eleven. The Dracomancer’s mission takes place in the Old Annex, which is located close to the temple and west of the first fall down. The Dracomancers are very aggressive and have giant swords to attack you. They can also summon reptilian creatures called Drakelings and Darkscale Wyrms. While the Drakelings are easy to defeat, Darkscale wyrms will be some threat for you. Therefore, you should deal with them as soon as possible.
Old Annex (YouTube)
The Dracomancers will use different types of combos against you. They will attack you with melee combo, shockwave combo, and bursting combo. These are very easy to dodge but you should remember that there is a melee combo after their shockwave and bursting combos. You will have to be aware of their fire beam and fire ball attacks as they will deal high damage if it hits you.
The key to winning this fight is to dodge as much as possible and attack when they hit their third attack in a combo. This is the safest time to go for an attack. In this fight, you need to be quick and you cannot just rush any time to attack the Dracomancers.
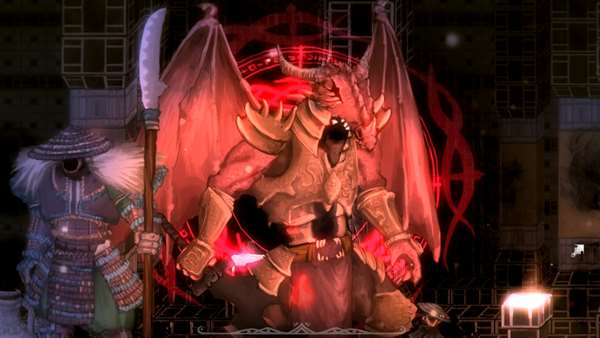
You’ll start the hunt at Pilgrim’s Respite, which is between Whitecrag Path and the Old Annex. If you travel west from the Old Annex entrance on the upper floor, you’ll locate the hunt. The Diablomancers are huge, but they are not very dangerous for you to defeat. They will summon Inphyrean drones which are bugs that can be destroyed very easily.
Moreover, they will summon large orcs called Chasm lords and huge demons called Red Baronets. Both of this summons can take quite a time for you to destroy them. The Red Baronets are the most difficult to defeat among all the Diablomancers’ summons.
These mages will use different types of Glyphs attacks against you. The first will be crossbow glyphs, followed by cannon and Giga cannon glyphs. The attacks used by the Diablomancers are not very hard to dodge. Although, they can deal some good damage to you if not timed properly. Do not get greedy and go for an attack when you see Diablomancers open because if the melee combo hits you, it can be a serious problem.
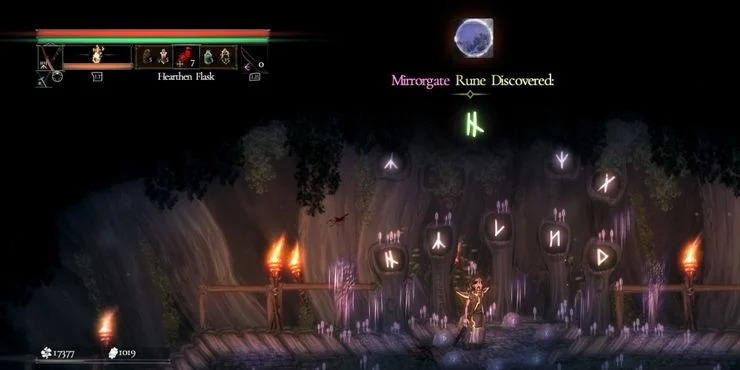
Behind the sealed door which is at the top of the Temple of Eleven, you will get the clue for the Chronomancer. Fighting against a Chronomancer involves a whole mess of time-slowing effects and devastating physical and ranged attacks. In addition, you’ll face a few monsters like Glasskeepers, Pendul Deacons, and Larval Samayavoras. Use ranged attacks against the glasskeepers and be aware of the remaining two because they are very dangerous. They can deal some serious damage and will consume lots of your time.
Entering a Pillar or the Sphere of Frozen Time is not permitted under any circumstances. It will be difficult for you to break out once you’ve slowed down, and the mage will be able to attack you as he pleases. If you feel that it is unavoidable, then make sure that you are healed up already.
When launching arrows or using other ranged attacks, you will undergo a slowing time effect, so be mindful of that before attempting to perform it. A good strategy is to learn the timing of the mage’s melee attacks, and stay close to him until he cannot slow you down or destroy you with Portal Arrows. The mage also uses portal attacks that you need to be aware of. A portal will be opened in the arena and blades and arrows will come from it that can deal high damage to you if you take a hit.
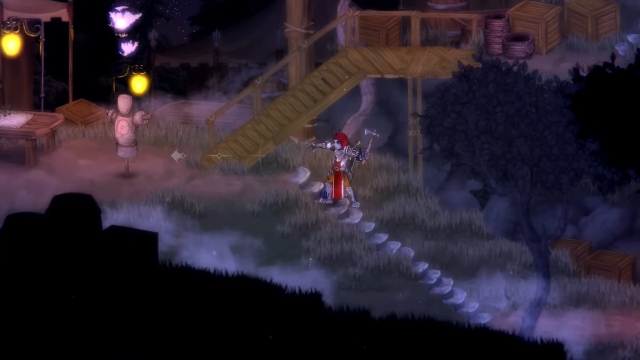
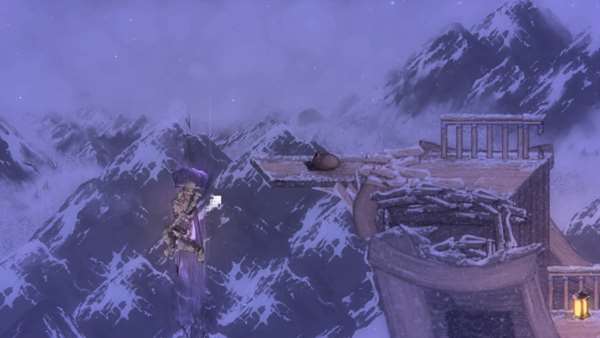
You will find the Umbramancers in Sentinel Caves which is known as the darkest part of the Dreadstone Peak. The Umbramancers will use attacks like sword slam, sword beam, sneaking slash, thrusting blade, shards of darkness, and sword explosion. The best way to avoid these attacks from the Umbramancers is to keep rolling. You will have to roll and dodge the attacks if you do not want to get hit by them.
Be aware of the shards of darkness attack because it can leave you staggered, and you will be unable to defend yourself. This will help the Umbramancers to deal you more damage. The Umbramancers are very aggressive and you will not have much time to think about when fighting against them. Healing yourself will also become very difficult during the fight because of the back-to-back attacks by the enemy.
If you want to win this fight against the Umbramancers, then craft and equip the Ever-Parched Ring, which you will unlock after defeating the Diablomancer. We recommend this because the speed you drink from your Hearthen Flask will be increased.
If you learn to avoid Sword Beams, then you have almost won this fight. This is because many players die due to this attack. Now, how will you do it? Stay close to the Umbramancer every time and go away only when you want to roll or dodge. You can also use stamina-boosting items with a low equipment load. This will make you fast and help you win this fight.