Genshin Impact Xiangling Guide – 10 Tips and Tricks

Want to use Xiangling but doesn’t know much about her? Do not worry. We have brought you the Genshin Impact Xiangling guide with some tips and tricks.

As Teyvat’s very own Master Chef, Xiangling is probably too young to run her own restaurant, but she’s happy to cook a storm at Liyue’s premier establishment, the Wanmin Restaurant. Because of her mastery of the stove, she is also adept at handling high temperatures and pointy objects, giving her excellent combat potential. The below Genshin Impact Xiangling guide will give you some of the best tips and tricks about her.

Read Genshin Impact Ayaka Guide – 10 Tips and Tricks

Genshin Impact Xiangling Guide: Best Artifact

When only focusing on the Crimson Witch of Flames, you are taking advantage of its specific Pyro-boosting abilities, along with some surprisingly high stacking damage increases. Xiangling will gain a 15% elemental attack bonus when she equips two pieces, and she will receive a suite of frightening benefits when she equips four pieces: 

DMG from Overloaded and Burning are both increased by 40%; DMG from Vaporize and Melt increases by 15%. Using her Elemental Skill adds 50% additional DMG on top of what she gains from the two pieces for a 10-second period.

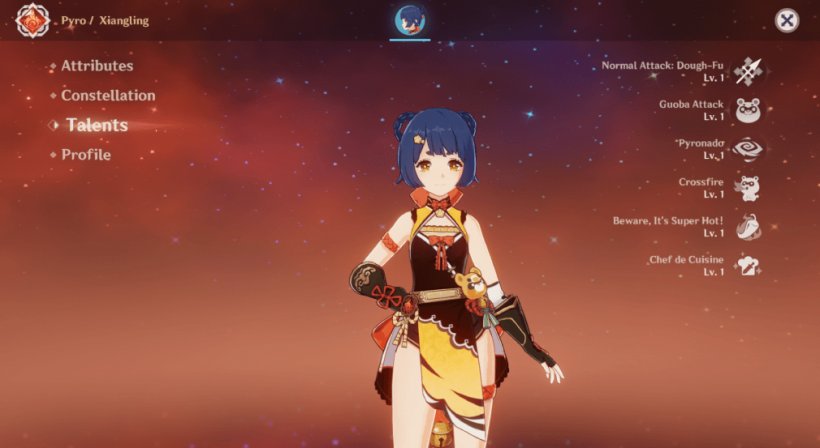
Genshin Impact Xiangling Guide: Constellations

  • Crispy Outside, Tender Inside (C1): For 6s, enemies hit by Guoba’s attacks have their Pyro RES lowered by 15%.
  • Oil Meets Fire (C2): The last attack in a Normal Attack sequence gives the adversary the Implode state for 2s. When this period expires, an explosion will erupt, dealing 75 percent of Xiangling’s ATK as AoE Pyro DMG.
  • Deepfry (C3): Increases Pyronado’s level by 3. The highest upgrade level is 15.
  • Slowbake (C4): Pyronado’s duration has been boosted by 40%.
  • Guoba Mad (C5): Increase Guoba Attack’s level by three. The highest upgrade level is 15.
  • Condensed Pyronado (C6): All party members gain a 15% Pyro DMG Bonus for the duration of Pyronado.
Gameplay (YouTube)
Read Genshin Impact Signora Guide – Best characters, rewards, and more

Use her as a Sub-DPS

A sub DPS like Xiangling has a lot of power. Her elemental burst triggers a lot of elemental reactions, which make her one of the best 4-star sub DPS. As a quick swap team with Dragon’s Bane and another hydro sub DPS, she will destroy anyone she comes into contact with.

You can create dangerous elemental reactions

As you play Xiangling, you will feel like you are playing a hybrid of Zhongli and Amber. As well as her own adorable mascot to take into battle, she is a quick-attacking spear user. The right build allows her to be the main DPS, but using her as a support with the right characters can result in dangerous elemental reactions that can eliminate your opponent. She is also capable of being both a DPS and a support character due to her constellations.

Read Genshin Impact Xinyan Guide – 10 Tips and Tricks

She is easy, so take advantage of her speed

Xiangling’s constellation layout is among the most versatile in the game. With her skill and burst, she can easily deal major damage to your party or aid characters such as Razor while they fight. With her normal attacks, Xiangling is an easy character to manage, and she has a lot of speed over claymores, which makes her appealing to players who enjoy speedy attacks.

Xiangling Talents
Xiangling Talents

Use Guoba wisely

The Guoba Attack is an elemental skill used by Xiangling to summon a friendly red panda, who deals base AoE damage to Xiangling while he’s out. While some players find Guoba’s inability to direct her attacks frustrating, others prefer to focus on Pyronado Elemental Burst. This is because it leaves Xiangling free to unleash flaming chaos upon her enemies.

Read Genshin Impact Qiqi Guide – Tips and Tricks You Should Know

Best team for Xiangling

  • Main DPS: Xingqiu
  • Sub DPS: Xiangling
  • Healer: Bennett
  • Support: Sucrose

Xiangling’s combination with a Hydro DPS allows them to repeatedly apply the Vaporize elemental reaction, a powerful effect that boosts incoming damage significantly. Although like Xiangling, Xingqiu is really better suited to sub-DPS duties, he is the best 4* character for this role.

Bennett is always an excellent healer, but in a party with Xiangling, he’s even more effective because he automatically triggers the Fervent Flames elemental resonance, which increases all party members’ attack by 25%.

A second 4* character of the highest tier joins Sucrose in the party. Combined with Hydro or Pyro, Sucrose’s Anemo powers trigger the Swirl effect, which enables the team to deal elemental damage to multiple targets at once.

Keep control of the field

Genshin Impact Xiangling gameplay
Xiangling gameplay (YouTube)

Keeping control of the field is important when playing Xiangling, especially when using Guoba to deal pyro damage. Guoba also has a punch, but only when he hits the enemy. When he hits the enemy, he does not turn or move. Upon being thrown out, he will face in a single direction and spit out fire after two seconds. In order to be hit by the fire, enemies need to get close to Guoba.

Read Genshin Impact Tatara Tales Quest Guide – Complete Walkthrough

Genshin Impact Xiangling Guide: Engulfing Lightning

With this weapon, the ATK is increased by 28% over the base value of 100% Energy Recharge. A maximum bonus of 80% can be earned. Utilize an Elemental Burst to gain 30% energy recharging for 12s.

Make Banjo-Kazooie combo

Combination attacks are also appealing to Xiangling. You may make a “Banjo-Kazooie” combination using Fischl. As a result, gamers must fight adversaries in one location, then send out Oz and Guoba. Xiangling will have time to recover in addition to doing tremendous amounts of damage to foes. It comes in handy, especially while battling bosses.

How To Defeat Dragonlord Placidusax in Elden Ring – Guide

We have brought you the Elden Ring guide that will tell you how to defeat Dragonlord Placidusax and also where to find him.

Dragonlord Placidusax is an Elden Ring boss. The Dragonlord Placidusax is a massive dragon with two heads who dwells in Crumbling Farum Azula. Players do not have to defeat this boss to advance in Elden Ring, since it is an optional boss. However, defeating it rewards players with Items and Runes. In this Elden Ring guide, we will tell you where to find and how to defeat Dragonlord Placidusax.

Dragonlord Placidusax fight gameplay
fight gameplay (YouTube)
Read All Boss Fights in Elden Ring – Ranked

Dragonlord Placidusax Location

As you progress in Elden Ring, you’ll need to defeat the Fire Giant in order to find Dragonlord Placidusax. Your character will wake up in Crumbling Farum Azula after making a decision in the Forge of the Giants. Enjoy your time exploring, looting, and defeating foes until you reach a Site of Grace called Beside the Great Bridge.

Make your way back down the lift that you just used and look at the Temple’s entrance since this is the closest fast travel point. There are ledges on the other side of that cliff. Head on down that pathway until it slopes. Your character sleeps by using the command indented here. You will then be in the arena of Dragonlord Placidusax once a cinematic has begun.

Read Best Weapons in Elden Ring – Weapons You Should Be Using

How To Defeat Dragonlord Placidusax 

Make sure you have an improved ranged weapon, enough arrows, and plenty of points assigned to a stat that gives higher scaling if you wish to. You may approach Placidusax from a distance if you hide behind the pillars right behind the circle. 

If you have the talismans Arrow’s Sting and Arrow’s Reach, you can deal a lot of damage from that range. Placidusax’s main attack will be Red Lightning. Lightning will strike the red lines on the ground in an instant. We haven’t been one-shot yet, but it does take a toll on your health.

Fortunately, you can dodge it by shooting one arrow, dodging to the side, and shooting once more. You may mistime your roll if you are too greedy, and you could get blasted for your actions. Placidusax appears to have AoE and melee abilities, but these won’t trigger if you’re too far from it.

Dragonlord Placidusax fight gameplay
Gameplay (YouTube)
Read Best Armor in Elden Ring – Ranked

The main challenge

Lastly, the main challenge here is to maintain your attack roll sequence while you have a lot of ammunition. Instead of changing your ammo in the middle of the fight, bring a lot with you before you face this boss. You can do it, but you will certainly take a hit, which is dangerous.

The Remembrance of the Dragonlord is awarded to you after you defeat Dragonlord Placidusax in Elden Ring. Upon exchanging this, you may replace it with the Dragon King’s Cragblade, a heavy thrusting sword that scales with Dexterity, or the Ruin Incantation spell of Placidusax, which scales with Faith.

For more Guides, Tips, and Tricks

You can also check our dedicated Video Games Guides section.

Rune Factory 5 Guide – 10 Things You Should Know

We have brought you the Rune Factory 5 guide with some of the best things that you should know while playing the game.

Marvelous developed and published the role-playing simulation video game Rune Factory 5. When a hero loses their memory, they join a group of rangers in the small town of Rigbarth. As a hero, you are expected to tend the land as well as fight monsters to keep the peace. Each player controls either a male or female character named Ares or Alice. 

The gameplay of this game features farming and taming monsters, as with previous entries in the series. The game also allows players to develop relationships with its townsfolk, including ones that lead to marriages. To know more about the game, read our Rune Factory 5 guide.

Read Stranger of Paradise Final Fantasy Origin Guide – Tips and Tricks

Rune Factory 5 Guide: Harvest Report

Inquire about the weekly harvest report if you want to know which crops will be abundant and which will have low yields. Crops with a high yield will yield more crops per plant, whereas crops with a low yield will yield fewer crops per plant. If the crops are bountiful that week, you will receive up to two harvests more than normal, however weak crops will give only one or two crops.

Rune Factory 5 Guide: Pickled Turnip

You’ll grow turnips as one of your first vegetables. During the early hours of Rune Factory 5, vegetables such as these can be turned into a dish called Pickled Turnip, which restores 100 RP. Get a Cooking Table from Studio Palmo in order to make a Pickled Turnip. It’s actually free to take this piece of furniture when you visit Studio Palmo. You can collect it by asking the people working there on the wooden platform near the door. To unlock the recipe, make sure to pick up some sweet hearth bread from Sweet Hearth.

Read Top 10 Apex Legends Characters for March 2022

Rune Factory 5 Guide: Seed points

female character in the game
Female character (Nintendo)

After completing the story, you will unlock new directives from Eliza at Rigbarth Outpost. Some of these are very handy, but they cost quite a bit. Therefore, only use seed points for things that you really need such as expanding your bag or storage and any festivals that you can’t miss. A lot of seed points are provided when completing wanted monster quests but you don’t double-up on them if you complete the same wanted monster quest multiple times. Consider saving at least 3000 seed points for post-game fun.

Plant in vertical lines

During the early gameplay stages when you don’t have an upgraded watering can, you might grow impatient watching every single square’s animation. You can, however, till the soil and water plants faster. First, plant in vertical lines then press the interaction button at just the right moment. Do this right before the animation is finished. 

By completing the animation faster and moving your character to the next square automatically, you will be able to accomplish your task in half the time. You can also use your sickle on plants, harvest plants, or hit rocks or wood that happen to be in a line.

cropping in rune factory 5
Crops (Nintendo)
Read In Sound Mind Guide – Everything You Should Know

Save items

It may appear enticing at first to sell every item you wind up acquiring. However, you should avoid doing so, especially if your items are stone or timber. Never undervalue the importance of these items, whether you’re creating furniture or cooking a meal. Weeds may even be used to make fertilizer!

Splitting item stacks is useful

The process of separating items from a stack is actually pretty straightforward. Press A again once you have interacted with the item in your inventory (on Switch). In this step, one item will be removed from the stack and placed in a separate slot. From now on, instead of shipping or gifting the whole stack of items, you can select only one.

Use the Magnifying Glass

The magnifying glass may be used to check your crops and the soil’s condition. The magnifying glass may be obtained from the General Store, but switching between your instruments and the magnifying glass will get tiresome. With the magnifying glass, you may enhance your tools in the game’s crafting system.

Read Cities Skylines Guide – 10 Tips and Tricks Everyone Should Know

The game includes same-sex marriage

You can marry the same sex in Rune factory 5
You can marry with the same sex (Nintendo)

This is the first Rune Factory game to feature same-sex marriage. Hence, if you are worried about whether you will be able to get a character that catches your eye as a male or female, then you can marry him/her.

A sickle is a great help to harvest and get high-level seeds

You should harvest your crops with a sickle rather than by hand. By doing so, you’ll get seeds that have a higher seed level than what you planted. Seed level one is the starting point for the seeds sold at the shop. Therefore, if you plant seeds with a seed level of 4, their crops will turn into seeds of a seed level of 5. 

Signposts can guide you

There are signs dotted across Rigbarth that make it easy to check instructions that you may have forgotten during tutorials or information that you might not have known. Near the Rigbarth Outpost is the closest signpost to your farm.

For more Guides, Tips, and Tricks

You can also check our dedicated Video Games Guides section.

Lush Reed Island in Lost Ark – A Complete Guide

Want to know everything about Lush Reed Island in the Lost Ark? Our Lush Reed Island guide will help you learn everything about this island.

There is an Adventure Island called Lush Reed Island located near Preche (Flecheche) and Anihc. The quest requires players to use a ship to get to the location, and it is a PvP co-op quest. Getting Lost Ark currency and special items from Lush Reed Island can be tricky, but it’s a great location to collect Lost Ark currency. Lush Reed Island can seem difficult to reach and to participate in the events in order to receive its rewards.

Even so, getting to Lush Reed Island and enjoying all that it has to offer can be fairly straightforward with the right approach. Lush Reed Island offers a variety of fun and exciting activities. You may also collect useful or special Lost Ark items as part of the tense and thrilling quest. Here is our Lush Reed Island guide that will help you to learn everything about this island.

island gameplay
Lush Reed island gameplay (YouTube)
Read Phantomwing Island Guide – Tips and Tricks

Lush Reed Island Guide: Location

Because Lush Reed Island can only be accessed by ship, players must first obtain the sailing skill. To obtain the sailing skill, players must complete the Set Sail questline as part of the East Luterra questline. Players can keep a watch on Lush Reed Island’s availability with Procyon’s Compass, a tool that lists upcoming events and dungeons.

Lush Reed Island Guide: Quests

The cooperative quest on Adventure Island is a PvP free-for-all, with a deathmatch starting 3 minutes after you visit the island. Kills are worth 10 points, while assists are worth 5 points, and both are depending on the player’s performance during the mission. Each player will have the opportunity to earn 1,000 points before the quest ends. If a player earns at least 30 points and reaches 1000 points within the time limit, they will receive a reward.

Upon completing Lush Reed Island’s PvP quest, players will receive the Reed Field Treasure Chest. The Lush Reed Island Token, Silver, and Protection are all possible drops from this chest. Players may obtain some or all of these rewards from drops depending on their luck.

In Lush Reed Island’s cooperative quest, getting good performance can be quite difficult since it is not equalized. Compared to other players on their server, players should select characters that have gear and levels that are at least above average.

Read Asura Island in Lost Ark – Everything you need to know

You can use an assist-based strategy

It’s possible that other players will greatly outmatch you in this task, so choosing an assist-based strategy over a kill-based strategy might be the best choice. Due to the fact that assists are still scoring, you can focus on tagging players that are already dying.

On Lush Reed Island, you can also benefit from a stealthy approach. The reeds will conceal you from players standing outside the reeds, so you can stand inside. Players can also resurrect by spending Phoenix Plumes on their corpses. When you resurrect normally, you’ll spawn on the edge of Lush Reed Island, which is also fine if that’s what you want.

Lush Reed Island Guide: Quest Rewards

rewards is lush reed island
Rewards (YouTube)

Everyone on the island contributes to the ultimate point total, but only those with the most points will win. The prizes for participating in the PvP co-op mission are listed below.

  • If you placed first, you will get Reed Field Treasure Chest and 20,000 Silver
  • If you placed second, you will get Reed Field Treasure Chest and 15,000 Silver
  • For placing third, you will get Reed Field Treasure Chest and 10,000 Silver
  • For participation, you will get Reed Field Treasure Chest and 2,000 Silver
Read Lost Ark Ghost Ship Guide – Location, Rewards, and more

You can find different Buffs

Players can find many useful buffs on Lush Reed Island. Here are some of the benefits each buff provides:

  • The green buff recovers 25% of a player’s HP.
  • Players will receive a 100% attack buff that will last for 3 minutes if they choose the red buff. It is stackable up to five times.
  • The Player’s movement speed will be enhanced by 40% for 8 seconds with the blue buff.

Lush Reed Island Guide: Chests 

all chest locations
Chests Location (Papunika)

Lush Reed Island has four types of chests players can open. The chests are brown, green, blue, and red. Chests sometimes spawn on Lush Reed Island, and there are specified spawning spots. You will need a long channel time to open a chest, and other players on the island will be alerted. The Lush Reed Island Token can also be obtained by opening a chest, along with other goodies. You will not receive any points by opening these chests. 

Read Lost Ark Drumbeat Island Guide – Everything you should know

Mokoko seeds location

Lush reed island mokoko seeds location
Mokoko seeds location (Papunika)

Players can pick up Mokoko Seeds at 5 locations on Lush Reed Island. You can gain more Mokoko Seeds by collecting these, which will help you unlock higher-tiered rewards from the Mokoko Seed vendor. Players will need to unlock the Minuet of the Forest Song to access later Mokoko Seed locations.

For more Guides, Tips, and Tricks

You can also check our dedicated Video Games Guides section.

How To Defeat Hoarah Loux, Warrior in Elden Ring

Are you facing difficulties on how to defeat Hoarah Loux Warrior in Elden Ring? Do not worry. Our guide will help you to defeat this boss easily.

Hoarah Loux, Warrior is an Elden Ring boss. In Leyndell, Ashen Capital, you will find Hoarah Loux. The Legacy Dungeon boss cannot be skipped, as it must be defeated for the player to advance. Godfrey, the First Elden Lord, is revealed to be more than you might expect in Elden Ring. Hoarah Loux, the chieftain of the badlands, has been mentioned throughout the game along with him. Interestingly, Hoarah Loux was the name Godfrey went by long ago.

Toward the end of the game, you begin to learn more about the last few bosses in Elden Ring. The demigods you’ve been picking off throughout Elden Ring are descendants of Hoarah Loux, a powerful human warlord who married the goddess Marika. As you battle Godfrey again, he channels his inner warrior and becomes Hoarah Loux once more. Read our guide that will help you on how to defeat Hoarah Loux Warrior.

Hoarah Loux Warrior's ground attack
Hoarah Loux, Warrior slamming on the ground and destroying everything (YouTube)
Read All Boss Fights in Elden Ring – Ranked

Location of the Boss

Godfrey will be battled in the same arena as you fought Morgott the Omen King. You return to the spot where you previously battled Godfrey, but this time he isn’t bathed in golden light and is more inclined to engage you in conversation. The way you approach the boss battle and when you do so is heavily influenced by your gameplay. What happens to the Erd Tree during the scenario will be a dead giveaway.

Read Best Weapons in Elden Ring – Weapons You Should Be Using

How To Defeat Hoarah Loux Warrior: First Phase

fight with godfrey
Fight with Godfrey, First Elden Lord in phase one (YouTube)

As opposed to the ghostly figure we faced earlier in the game, Godfrey, First Elden Lord will be fought in human form in the first phase. This second battle shows that his move set remains largely the same, but he has a lot more health. In a similar vein to how you’ve handled previous encounters, summon Mimic Tear Ashes at the very beginning and let it take aggro while you sneak behind the enemy for some easy hits. 

It’s recommended that you prioritize Bleed damage, using your Focus Points to trigger the Bloody Slash ability of Ashes of War. Every time it connects, you will be destroying large chunks of its health. Following a cutscene transformation, it’s time to fight Hoarah Loux, Warrior at 50% health.

Read Best Armor in Elden Ring – Ranked

How To Defeat Hoarah Loux Warrior: Second Phase

Hoarah Loux Warrior in phase two
Fight with Hoarah Loux, warrior in phase two (YouTube)

The Warrior, Hoarah Loux, takes off his clothing and focuses on attacking with his dagger and bare hands in this second phase. You can be thrown into the air by the boss if he grapples you. Such a move deals massive damage. Additionally, he has a more aggressive area of effect attacks, which cover more of the arena and take a lot more damage. His attacks shoot flames upward once they are activated.

However, it makes little impact on the actual boss encounter. Keep in mind that you only have half a health bar left. You should still have a decent amount of HP in your Mimic Tear Ashes at this point, so let it take aggro while you utilize the same technique you used before: go behind the boss and start slashing. Repeat this technique until the boss is defeated.

Read How to beat Malekith The Black Blade in Elden Ring – Guide 

Things to keep in mind

beware of these attacks
Fight gameplay (YouTube)
Read How to beat Mohg, Lord of Blood in Elden Ring – Guide
  • As far as ferocity and speed are concerned, Horah Loux is completely different from Godfrey. 
  • The biggest attack Hoarah Loux uses is a giant stomp and a lunge which causes massive damage but is easily avoided.
  • Stay on your feet and keep circling him until an opportunity presents itself. The same strategy applies to magic and ranged users, but they must be careful not to get caught by him.
  • You may also hit him a few times before he recovers after each frame since he leaves himself vulnerable for several frames.

For more Guides, Tips, and Tricks

You can also check our dedicated Video Games Guides section.

Ghostwire: Tokyo Guide – 10 Tips and Tricks

Want some undead survival adventure game? Ghostwire: Tokyo is for you. To get started, read our Ghostwire Tokyo guide, which has the best tips and tricks.

Tango Gameworks will develop the next ghostly adventure video game, Ghostwire: Tokyo. The game will be available as a one-year exclusive for PlayStation 5 and Microsoft Windows on March 25, 2022. There have been mysterious disappearances in nearly all of Tokyo, and otherworldly spirits have invaded the city. KK, the game’s protagonist, is possessed by a spirit detective who grants him supernatural powers, while also pursuing his own agenda.

As Akito battles the spirits haunting the city, he encounters a group of Hannya mask-wearing individuals who may reveal the mystery behind Tokyo’s strange events. The player can implement a range of psychic and paranormal powers to battle the ghosts and spirits that plague Tokyo. Here is our Ghostwire Tokyo guide that will tell you everything you need to know with some of the best tips and tricks.

Read Dying Light 2 Guide – Tips and Tricks

Ghostwire Tokyo Guide: Bow and Talisman

The bow is a great weapon for killing enemies before engaging in combat. In this manner, you’ll be able to kill more enemies. It is, like everything else, limited. You can only have a limited quantity of ammunition at any given moment. You can increase the bow’s speed and ammo capacity via the upgrade menu.

The talisman is an enigmatic artifact. Talismans have a variety of applications and effects. They may be highly useful if employed appropriately, although their usage is restricted throughout the game. Make the most of them.

Ghostwire Tokyo Guide: Melee Core Grab skill

Melee Core Grab skill in Ghostwire tokyo
Melee Core Grab skill (YouTube)

Melee Core Grab is among some of the game’s best skills. It’s horrible to be dropped on the head by a dead enemy just as you’re about to finish your core grab. You can take advantage of this skill if you want to get in close to grab something that can’t be interrupted. 

Read God of War PC Guide – Tips and Tricks for Your Journey

Ghostwire Tokyo Guide: Counter

Take care to protect yourself every now and then. It’s easy to get caught up in the offensive. When you use L1, you can parry the block, allowing you to follow it up with a barrage of your own. Depending on the skill you unlock, you may be able to parry better. 

Blocking is the key

At first glance, blocking may seem unintuitive, but there’s actually a crucial technique you can employ to turn it into a key skill that makes fights much easier. This move is called Perfect Block, and it lets you block an opponent’s attack without suffering damage. Simply block before the attack lands. Additionally, it causes your opponents to stumble, making them vulnerable to follow-up attacks. It can also be used on ranged attacks, knocking down targets and opening them up to ground core purges.

Read Vampyr Guide – Best Tips and Tricks for beginners

Keep collecting the food

Food should be collected where it can be found. In addition to helping you regenerate, it increases your overall health. In addition, it provides a variety of temporary benefits. It provides elements, prayer beads, etc. You will find both of these at different stages in the path; elemental idols will enhance element spells, while prayer beads help you become stronger and are found in many shrines.

Increase Katashiro spaces

Use your abilities
Using abilities (YouTube)

Katashiro are little paper dolls used to absorb spirits. You start with a few and can carry up to 50 if you buy more from a convenience shop. You will spare yourself the trouble of repeatedly going to and from phone booths if you do it as soon as feasible.

The Katashiro spaces should be expanded to absorb spirits – it’s quicker to level up this way than fighting. To find ghosts, you should look in every alley and on every roof, and use spectral vision often. When you’ve filled up your Katashiro, you can bank your souls at a phone booth for some extra XP. 

Aim at the knees of walking enemies

If you aim at their legs, you may utilize this fighting trick to force your Walker enemies to their knees. When your Slender-Man-like opponents are blocking, you can get in a number of effective shots. This method allows you to keep any enemy from approaching you.

Read Lineage 2M Beginner’s Guide – Tips and Tricks

Upgrade wind ability more

You’ll often switch between three different abilities during combat: wind, water, and fire. While all three have their uses, it’s a good idea to focus on upgrading and equipping wind, given that it’ll serve as your main weapon against monsters and holds the most ammo. 

No matter how well-stocked your SP supply is, if you make sure it’s as strong as possible, you’ll always be able to fight Ghostwire’s most powerful enemies. The skill tree in the game allows you to upgrade the wind projectile speed and the number of projectiles fired during charged strikes.

Get more ammo by breaking crystallized ether 

Crystallized ether are important in Ghostwire Tokyo
Crystallized ether (YouTube)

Floating, corrupted objects called crystallized ethers are common around Tokyo. The best way to ensure you have ammo between encounters is to break these. Even though they will spawn during battles, it’s worse to run out of SP in the middle of the fight, so smashing the floating spectral items will keep you out of trouble.

Read Skyrim Survival Mode Guide for Skyrim Anniversary Edition

Ghostwire Tokyo Guide: Propane Tanks

It is common for bright red propane tanks to float in the air during combat encounters. Upon being shot, these explode, causing significant damage to nearby enemies. If you are facing tougher opponents like Shiromuku, Crimson Kuchisake, Lamentation, and Relentless Walker, this can turn the tide of the fight, so keep your eyes on them.

For more Guides, Tips, and Tricks

You can also check our dedicated Video Games Guides section.

Snowpang Island Lost Ark – A Complete Guide

There are a lot of things in  Lost Ark Snowpang Island. Do not worry if you are not aware of it. Read our guide to learn everything.

This island, which gets its name from its look, is a beautiful snowy place with various tasks and goodies to reward the player. This island is located in the Guinea Sea. To enter this island, you must have an item level of 250. Because the island is located at sea, it can only be reached by ship. You must first enable sailing in order to do so. Snow-Pang coins may be obtained as a prize for completing certain missions and assignments.

The continents of Lost Ark are dotted with islands, each of which is based on a different part of Arkesia’s rich history. On Snowpang Island, you can find helpful resources, even special items, and have a great time doing so. To know more about the island, read our Lost Ark Snowpang island guide below.

Snowpang island gameplay
Snowpang island gameplay (YouTube)
Read Lost Ark Drumbeat Island Guide – Everything you should know

Lost Ark Snowpang Island

In Lost Ark, PvP events with unique rewards are also held on some special islands. Lost Ark’s Snowpang Island is an Adventure island that involves a PvP snowball fight and a unique quest chain that rewards your efforts. Snowpang Island is a combination of the brutality of battle and the harshness of harsh winters. 

You may be surprised to find a mystical atmosphere once you reach Snowpang Island. The event is a classification that means the island can only be visited while it’s active. Snowpang Island offers plenty of things for players to see and do, and they can leave the island with plenty of useful items, currencies, and even unique rewards.

Read Lost Ark Ghost Ship Guide – Location, Rewards, and more

Lost Ark Snowpang Island Location

Before traveling via ship on Arkesia’s World Map, players will need to unlock the sailing ability in Lost Ark. After completing the Set Sail quest in the East Luterra storyline, which is the last quest in that storyline, you will be able to unlock the sailing ability. The Procyon’s Compass can be used to determine Snowpang Island’s availability. There are many scheduled events and dungeons that you can view in this tool.

Snowpang island (YouTube)

Lost Ark Snowpang Island Quests

The PvP quests on Snowpang Island are far more whimsical than expected despite its cold and harsh environment. In order to complete the first quest, players must engage in a snowball fight. The snowball fight is so amazing and fascinating, as everyone loves playing it. Play snowball wars by picking up snowballs from the ground and throwing them at other players. 

As a result of Snowpang Island’s climate conditions, this age-old and beloved tradition becomes more interesting and fun. During the first quest, players must keep their eyes open for spine-chilling threats, such as fierce winds and blizzards. So, it is necessary for players to seek refuge in the safe spots that appear when they are in need.

By completing this quest, a player who placed first will get Fun Snowfight Commemorative Pouch and 6000 Silver. The player in the second place will get Fun Snowfight Commemorative Pouch and 3000 Silver. The Snowpang Island Token can be obtained by completing the first Snowpang Island Adventure quest from the Fun Snowfight Commemorative Pouch.

snowpang island soul
Snowpang island soul (YouTube)
Read Asura Island in Lost Ark – Everything you need to know

Other Quests

  • Little Sister’s Wish: Players will receive 15,000 Silver for completing this quest on Snowpang Island, given by Sister.
  • Sister, Have You Grown Up?: Players will receive 10,000 Silver for completing this Snowpang Island quest from Mary.
  • Sister, Are You a Snowman?: After finishing this quest given by Mary, players will be awarded an Offense Battle Item Random Chest. This chest includes many types of grenades as well as a variety of other important fighting tools.
  • Help, Ice Spirit!: You will receive 500 Gold for completing this Snowpang Island quest given by Ice Spirit Enri (Ice Butterfly Cliff).
  • With the Power of Snowflakes: Ice Spirit Enri (Ice Butterfly Cliff) offers this quest on Snowpang Island, and players who complete it will receive a Pink Snowperson Muffler, a Blue Snowperson Muffler, or a Red Snowperson Muffler, as well as Kindness +1.
Read Phantomwing Island Guide – Tips and Tricks

Mokoko Seed Locations

snowpang island mokoko seeds location
Mokoko seeds location (YouTube)

The players can boost their Mokoko Seed count by visiting both of the Mokoko Seed locations on Snowpang Island. The Mokoko Seed vendor will be able to reward you with awesome higher-tiered rewards if you have more Mokoko Seeds.

For more Guides, Tips, and Tricks

You can also check our dedicated Video Games Guides section.

How to Defeat Draconic Tree Sentinel in Elden Ring – Guide

In our Elden Ring guide, we will tell you how to defeat Draconic Tree Sentinel easily. Defeat this boss to get great rewards. 

It is a Draconic Tree Sentinel that guards the entrance to Leyndell, the Royal Capital, and is regarded as one of Elden Ring’s most difficult Tree Sentinel variations. Tarnished will encounter this great mounted warrior at the end of the route, far east of the Outer Wall Battleground Site of Grace. The protagonist must first escape or dodge an enemy convoy and multiple Golems in Elden Ring. After all of this, you must battle the Draconic Tree Sentinel in order to obtain access to the Capital Rampart.

If the Tarnished cannot defeat the horseman after their first attempt, a Stake of Marika is nearby. The closest Site of Grace, however, is the Outer Wall Battleground, where those who wish to rest there must return. Draconic Tree Sentinel possesses ranged abilities that deal massive damage, which makes it so challenging to defeat. In the game, the Field Boss blows fireballs at the player consecutively and summons lightning bolts from the sky. 

Fight gameplay
Fight gameplay (YouTube)
Read All Boss Fights in Elden Ring – Ranked

Moreover, the boss’s moves can be unpredictable and sporadic, making its combos especially challenging to navigate. If you want some help, then read our guide that will tell you how to defeat Draconic Tree Seninel.

How to Defeat Draconic Tree Sentinel: Phase one

Due to his two phases, the Draconic Tree Sentinel differs from one of his earlier incarnations. This boss is a challenging one with both melee and ranged attacks with hard-hitting damage. Starting on a horse is a great idea, especially if you have a summon. As a result, the fight begins faster, and you can land several free hits before the initial animation is complete.

As a general rule, the first phase is easier, and doubly so if you remain on your horse throughout. There are four primary attacks the boss uses in this phase. First, he slashes with his weapon, but the direction and speed differ – so you have to be prepared.

Another common attack he uses when you get close is an overhead slam or shield swipe, depending on the angle at which you’re standing. Additionally, the Tree Sentinel occasionally performs a far-reaching jump followed by an overhead slam. By dodging around him, you can easily avoid this attack. It will likely hit you if you dodge backward away from it.

Get close to Draconic Tree Sentinel
You can get close and attack (YouTube)
Read Best Weapons in Elden Ring – Weapons You Should Be Using

Staying too far won’t help you

The horse will shoot fireballs at you if you stay far from its range for a long time. You can anticipate this wind-up animation and dodge it by either sprinting to the side or dodging into any direction. The fireball itself travels slowly enough, so you can either outrun it or dodge it. 

Outside that, you may see him use a horse stomp, which does roughly the same amount of damage as that of a normal Tree Sentinel. It’s important not to let the boss get you stuck in a corner, or else you won’t be able to get out of it. The boss has a large hitbox, so be careful not to get stuck in it.

Read Elden Ring – Which Keepsake Should You Pick

How to Defeat Draconic Tree Sentinel: Phase two

Stay away from Draconic Tree Sentinel's attacks
Sentinel attacking (YouTube)

During phase two, things become much more challenging. Lightning has now been infused into the Draconic Tree Sentinel’s weapon. He will also have a little bit of splash/area-of-effect damage added to the few that slam the ground in addition to increasing the damage of his normal attacks. It is very difficult to dodge his most devastating attack. 

Whenever he raises his shield, he can summon lightning to strike you. There are however two possible outcomes, and one of them is particularly difficult to avoid. A couple of seconds later he spawns several columns of lightning with a swipe that creates a pool of lightning around him. Once you see the ground turning red, you can easily escape this area.

Read Best Armor in Elden Ring – Ranked

One of his other attacks allows him to summon a bolt of lightning that can strike you even if you are moving or rolling. There is barely a fraction of a second to avoid it. You may accomplish this by keeping an eye on his shield and rolling it when it snaps down. The only way to dodge successfully is to time it correctly, else you will take a lot of damage. 

As a last resort, the Draconic Tree Sentinel will sometimes drag his weapon across the ground to create a lightning wave. This wave has a wide arc, but it’s relatively easy to avoid if you see it coming. If you do all this properly, then you can defeat the boss without any sweat.

Rewards

In addition to 37,500 Runes, you will also receive the Dragon Greatclaw Colossal Weapon and the Dragonclaw Shield, which is excellent for deflecting physical attacks.

Read How to beat Malekith The Black Blade in Elden Ring – Guide 

Things to keep in mind

You can fight without your horse too
Fight gameplay (YouTube)
  • Although he wears ornate gilded armour, the Draconic Tree Sentinel is essentially a human. Each tick makes it closer to taking the boss down, as though the damage isn’t massive.
  • Frost damage also occurs, though it is temporary. His movement will be slowed for a while if he is treated with this element. If you have it, the Icerind Hatchet (+4) can be very useful.
  • When riding its horses, the boss can cover ground in seconds thanks to its agility and reach. There are times when it will spew projectiles, which can range from single projectiles to multiple ones.
  • Phase two of the fight is difficult, so save your energy for the second phase.

For more Guides, Tips, and Tricks

You can also check out our dedicated Video Games Guides section.

How to beat Mohg, Lord of Blood in Elden Ring – Guide

Facing difficulties on how to beat Mohg Lord of Blood in Elden Ring? Do not worry, read our guide for some best tips to defeat this boss.

The Elden Ring‘s Mohg, Lord of Blood is an entirely optional boss. All of the game’s endings can be reached without beating him. Moreover, Mohg is a demigod Shardbearer, which means beating him will reward you with a Great Rune. However, this Great Rune is really geared toward PvP players, so its powers will not be useful to most PvE players.

In this fight, you’ll experience an unusual gimmick if you’re looking for a challenge. To sum it up, defeating Mohg is a lot easier with the right tools, a good strategy, an understanding of his moves, and patience. Read our guide that will tell you how to beat Mohg Lord of Blood easily.

Mohg, Lord of Blood
Mohg, Lord of Blood (YouTube)
Read All Boss Fights in Elden Ring – Ranked

How to beat Mohg Lord of Blood: Phase one

It is by far the easiest phase of Mohg’s fight. Begin by summoning your Spirit Ash. He has a few attacks during this phase. His trident attacks can be dodged or blocked, as well as delayed. He has two forms of his Blood Claw attack, which is more deceptive. 

Every Blood Claw attack causes an explosion when it connects, regardless of the damage it does. Avoiding one might prevent you from avoiding the other. You should keep your eyes on his left hand. Front-handed Blood Claw attacks are the easiest to avoid since they are slower and more obvious. They are usually followed by a trident swipe.

With the backhanded attack, the trident rushdown follows. Blood Claws with the backhand usually come out faster than those with the front hand. In addition to avoiding the claw attack, if you dodge towards him you can escape the trident attack.

fight scene
Combat gameplay (YouTube)
Read Best Weapons in Elden Ring – Weapons You Should Be Using

Use fewer flasks in this phase

The real fight will begin in the second phase, so try to use as few flasks as possible now, knowing that you’ll need them later. With his left hand, Mogh sometimes reaches up into the air and sprays blood into the air. You can avoid it by moving away from him. Additionally, Mohg will launch two other trident attacks during this phase. He will plant his trident in the ground. 

Whenever you see him doing that, run away from where the trident was planted, because you’ll be damaged when he pulls it out. A blood shower is created for a short time by raising the trident, and it is also buff for a single move. Rolling away is a great way to avoid both. At several points in this phase, Mohg casts a curse mark (red ring) around your body. It’s impossible to avoid this effect, but you’ll hear him yell Tres, Duo, or Unus with each one – and each one represents health.

Read Best Armor in Elden Ring – Ranked

How to beat Mohg Lord of Blood: Phase two

Mohg gains the ability to fly and permanently buffs his trident with bloodflame, in addition to all the attacks he gained from Phase 1. A few new moves are also used by Mohg during Phase 2. In the air, Mohg stabs, slashes, and throws bloodflame at you. His trident will slash if he winds it horizontally. 

He will stab you with his trident if he points it at you. Bloodflame will erupt from his left arm if he winds up that arm. You need to dodge all three attacks. Mohg will rain down bloodflame if he reaches his left hand into the air. Avoid this attack at all costs.

Mohg, Lord of Blood has wings in phase two
Mohg can fly in phase two (YouTube)

Avoid Mohg when he strikes the ground with his trident. Shortly after, Mohg will pierce the ground, causing a large explosion. Mohg will perform a large swipe with his left hand once he strikes the ground with the hilt of his trident, resulting in a small explosion. Avoid getting damaged by this attack by either running away or dodging Mohg’s swipe.

Mohg may attempt to charge at you while on the ground while pointing his trident at you. If Mohg is about to impale you, dodge to avoid this attack. If Mohg raises his trident above his head, move left or right. You should sprint to avoid the bloodflames created by him smashing it down towards you. As with the first phase, the optimal moment to damage Mohg is between his melee combinations. When Mohg is flying or bloodflame is raining down, you should avoid fighting him.

Read How to beat Malekith The Black Blade in Elden Ring – Guide 

Things to keep in mind

Fight gameplay with the boss
Fight Gameplay (YouTube)
  • Use gear that boosts Robustness to counter Mohg’s attacks, which build up Bleed. You can choose from General Radahn’s armor, Lionel’s armor, the Mottled Necklace talisman, and the Stalwart Horn Charm.
  • The irony is that Mohg is susceptible to Bleed and Scarlet Rot. If you can, use items, spells, or weapons that cause these status effects. With either, you’ll deal significant bonus damage to Mohg, which will help to end the fight quickly.
  • As with many of the major bosses in Elden Ring, Mohg, Lord of Blood delays some of his attacks slightly, though not quite as much.
  • His Blood Claw attacks are the real threat, since one of them is delayed damage, and can be combined into a major trident charge. 
  • The Purifying Crystal Tear, mixed into your Flask of Wondrous Physick, negates Mohg’s blood curse before Phase 2 begins. You will be able to avoid using three healing flasks to survive the curse. 
  • Mohg can be paralyzed twice by the Mohg’s Shackle item found beneath Leyndell, Royal Capital. You can use it during Phase 1 of the game only. 
  • Besides Morgott, Mohg is the only other Shardbearer who is able to activate the Great Rune at the Divine Tower of East Altus. The tower should already be in your possession if you defeated Morgott. You can now power up Mohg’s Great Rune by returning to the top. It is the only Divine Tower capable of activating more than one Great Rune.

For more Guides, Tips, and Tricks

You can also check out our dedicated Video Games Guides section.

Genshin Impact Ayaka Guide – 10 Tips and Tricks

We have brought you the Genshin Impact Ayaka guide with some of the best tips and tricks. From our guide, you’ll learn everything about Ayaka. 

Ayaka is a sweet-tempered young lady with a pleasant demeanor who treats people with kindness and respect. She adores the people of Inazuma and goes out of her way to help them in any way she can; as a member of the Yashiro Commission, she feels responsible to meet their needs. 

She has a serious demeanor and is a perfectionist. Her dedication has affected others, and those close to her have given her the honorary title of Shirasagi Himegimi. People in the neighborhood have a lot of respect for her. 

She is 156 cm tall, which is a bit shorter than average. Ayaka was born on September 28th. She wears a black armored helmet with gold ornamentation and has her long, pale white-blue hair in a high ponytail. Her hair is trimmed in a hime style, and she frames her face with equally chopped strands connected by pink cords tied in cloverleaf knots. Her blue-gray eyes are accented by thick lashes on her left eye and a mole on her left temple. Learn more about Ayaka from our Genshin Impact Ayaka guide.

Read Genshin Impact Signora Guide – Best characters, rewards, and more

Genshin Impact Ayaka Guide: Mistsplitter Reforged

The arrival of Ayaka brings into play her signature sword, the Mistsplitter Reforged, a powerful katana enhanced with Electro energy to boost her Elemental ability. As part of the Inazuma Series, this weapon emits a blazing violet light, providing great versatility and a powerful option to generate devastating Elemental Reactions. In addition to gaining 12/15/18/21/24% elemental DMG bonuses, Ayaka will receive the Might of Mistsplitter’s Seal when she wields the Mistsplitter Reforged.

Ayaka is best as the main DPS

With Akaka’s Element, she can apply powerful Cryo-based reactions like Melt and Superconduct to her attacks. Due to her consistent use of the Cryo Element, she seems like a Sub DPS, DPS. However, due to the potentially devastating damage, she can do, it is recommended to consider her as a Main DPS.

Read Genshin Impact Xinyan Guide – 10 Tips and Tricks

Genshin Impact Ayaka Guide: Primordial Jade Cutter

Genshin Impact Ayaka's Jade cutter
Primordial Jade Cutter (YouTube)

Next in the list of recommended weapons is the Primordial Jade Cutter, a 5-star sword that, although not refined to the fullest extent, grants more damage with each hit based on your HP stats. This will definitely help Ayaka increase her DPS.

A passive effect of this ability is Protector’s Virtue, which increases the wielder’s HP by 20/25/30/35/40%. Further, increases the wielder’s maximum HP by 1.2/1.5/1.8/2.1/2.4%. In addition, the Primordial Jade Cutter is the only five-star weapon that starts at 44 Base ATK and scales from there.  It scales between levels, however, at a lower rate than 44 Base ATK four-star weapons.

Read Genshin Impact Qiqi Guide – Tips and Tricks You Should Know

Best Artifact for Ayaka

Blizzard Strayer: We recommend that you choose the Blizzard Strayer set for her artifacts, the series of artifacts introduced during the addition of Dragonspine Mountain since their Cryo DMG bonus will increase your Elemental skills’ power significantly.

When you get four pieces from this set, Ayaka’s CRIT Rate will rise by 20% when she attacks an opponent who is affected by Cryo. A 20% increase in CRIT Rate will be applied if the opponent is frozen. The Gladiator’s Finale set, which increases your ATK by 18% as well, can be combined with it if you don’t have all pieces.

Best Constellations for Ayaka

Ayaka's constellations
Ayaka’s Constellations (YouTube)

C1: Snowswept Sakura – Charged attacks and normal attacks have a 50% chance of reducing an elemental skill’s cooldown by 0.3 seconds.

C6: Dance of Suigetsu – The “Usurahi Batou” effect increases Ayaka’s charged attacks’ damage by 298% every 10 seconds. Charge attacks will end this effect when they strike an enemy, and the 10-second timer will start over.

Read Genshin Impact Tatara Tales Quest Guide – Complete Walkthrough

Ayaka’s Alternate Sprint

The alternate sprint is an essential part of Ayaka’s kit. Rather than running along like the rest of the adventurers, Ayaka envelops herself in a cloud of frozen fog, moving extremely fast over land and water. Her body reappears when she stops sprinting, and she applies Cryo to any enemies standing nearby. Cryo is also infused into her blade, causing her to deal an extra amount of elemental damage for a few seconds.

Best team for Ayaka

Using Ayaka as the main DPS in Genshin Impact will require you to use Cryo and Hydro’s reaction to freeze enemies. This is where Xingqiu excels, as it provides excellent support without having to spend a lot of time on the battlefield.

The addition of Diona and Kaeya enables Diona to gain the Cryo Resonance bonus and reduce her dependency on Elemental Mastery. The squad is rounded out nicely by a character from Anemo like Venti, Kazuha, or Sucrose, as they typically group up enemies for the Elemental Burst.

Read How to beat the Golden Wolflord in Genshin Impact – Guide

Kanten Senmyou is the best passive of Ayaka

During Senho, Ayaka restores 10 stamina and gains 18% bonus Cryo damage for ten seconds if Cryo is applied to enemies.

Say No to Physical Ayaka Build!

Having Ayaka build on Physical will minimize her potential, as her attacks are infused with Cryo after her Alternate Sprint. By building Ayaka with Cryo, players will maximize her damage. As a result, her entire kit will be enhanced; Normal attack, Elemental Skill, and Elemental Burst. Also, the cryo build allows Ayaka to assume the role of Sub-DPS at any time.

Kamisato Art – Soumetsu

Genshin Impact Ayaka gameplay
Ayaka’s Kamisato Art – Soumetsu (YouTube)

In the wake of the storm, Ayaka unleashes Frostflake Seki no To and it surges forwards. Ice storms inflict Cryo damage on enemies they touch and explode when they are done, dealing AoE damage.

For more Guides, Tips, and Tricks

You can also check out our dedicated Video Games Guides section.