Cookie Run Kingdom – A Complete Class Guide

Want to know about the classes in the Cookie Run Kingdom? Our Cookie Run Kingdom Class guide will help you out.

In this RPG game, you will have to fight as cookies. These cookies come in different classes and have different abilities in the game. It depends on your gameplay and choice that which class is best for you. However, to know about all the classes in the game, we have a Cookie Run Kingdom Class guide for you. Read the guide below and decide the best class for yourself.

Related Cookie Run Kingdom Guide – 10 Tips For Beginners

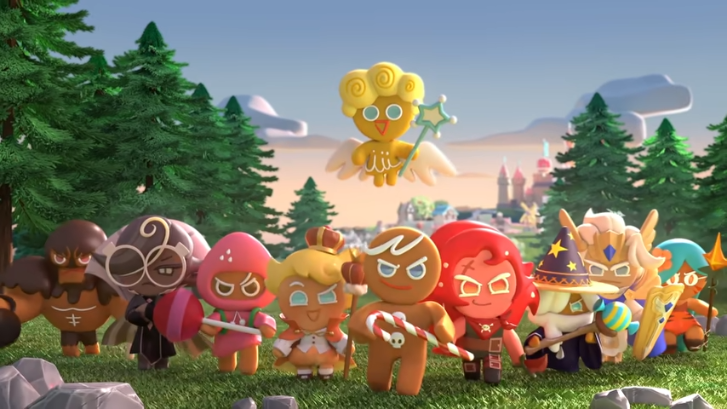
Cookie Run Kingdom Class Guide

Magic

Cookies in this class have magic attacks that can attack a single target. It also stuns the enemies so that you can attack them very easily. It is recommended to place the magic cookies either in the middle or in the rear row. This is because they can deal with their magic attacks from behind and stay safe. 

Related Top 10 Cookies in Cookie Run Kingdom

Charge

Charge cookies are the ones who stay at the front lines in the battles. They have good attack power and deal lots of damage to the enemies. They also have quick cooldowns so they are best to charge at enemies. Boosting their attack speed and HP will make them very dangerous to the enemies. 

Dark cacao cookie
Dark Cacao cookie is a great charge cookie (CRK fandom)
Related Cookie Run Kingdom: Dark Cacao Cookie Toppings build

Defense

These cookies are opposite to the Charge class. They soak up all the damage given by the enemies and protect your team. They provide a great defense to the team by giving shields and kind of help in healing the teammates. This class is a must in the team if you are looking for a victory. 
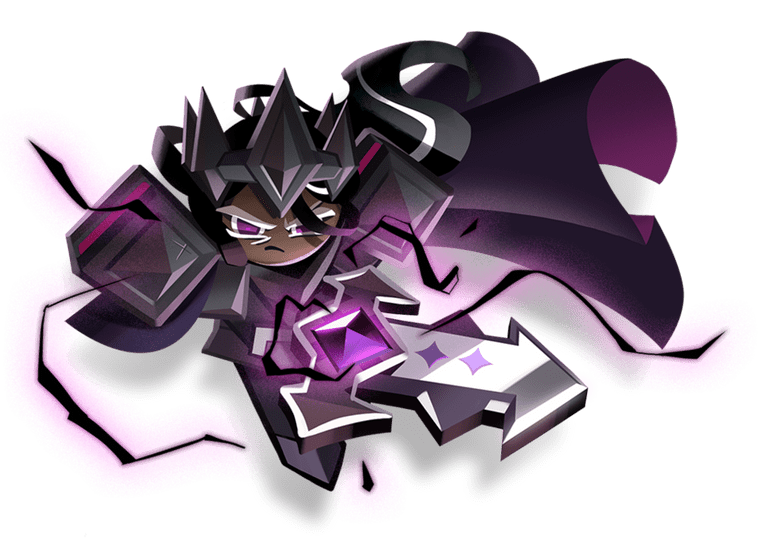
Ambush

If you like to attack like assassins, then use Ambush cookies. The cookies from this class usually stay in the middle or rear rows and have abilities to attack and deal massive damage to the enemies. These cookies will help you to attack enemies that are out of your reach. Their builds allow them to focus only on dealing high-damage damage. They also have AoE strikes from the air.
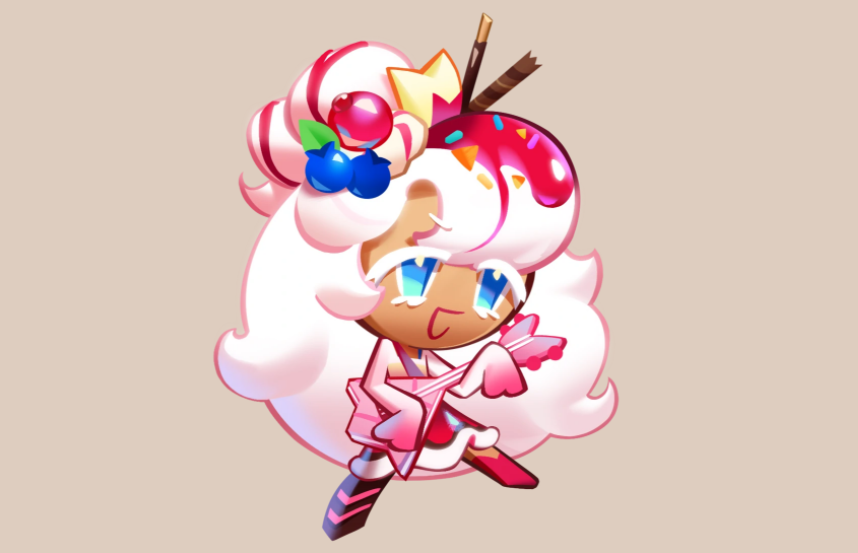
Healing

You can attack with these cookies, however, they are meant to heal all the teammates. Without a healer, it is not possible to win the battles. If your main charge cookie or defense cookie has low HP, the healing cookie will help them to heal and let them continue to attack and block the enemies. 

Support

You can use the support cookies as ranged cookies too. They help to buff your team with their skills. Their main focus is buffs, debuffs, and regeneration. Do not think that they will be alongside in attacking with the charge cookies. They do not have a great ability to do that. They will just support you with the buffs and debuffs. So keep them safe and make use of their abilities as much as possible.

Parfait cookie
Parfait cookie is a great support cookie (CRK fandom)
Related Cookie Run Kingdom Team Guide – Tips and Tricks

Bombers

Bombers help you to attack enemies in groups. They deal very high damage to the enemies. Not only that, but it also deals some debuff to the enemies. All this makes the bombers a very crucial part of the team. The only thing you need to keep in mind is to improve its attack speed. This will surely make them deadly.

For more Guides, Tips, and Tricks

Check out our Video Games Guide Section for more dedicated guides.

Pokemon Unite Defender Guide – Tips and Tricks

Want to play as a defender? Read our Pokemon Unite Defender Guide which has some of the best tips and tricks for you.

There are several types of Pokemon in the Pokemon Unite, each with its own set of powers, perks, and other abilities. Many players prefer to have an attacker Pokemon so that they can just go forward attack and win the battles. These Pokemon do not think much about the defense. 

To improve your defense, you will need a good defender Pokemon. Without a good defense, your team will not be able to win. Defender Pokemon play an important role in the victory for the team. To help you out, we have the Pokemon Unite defender guide with some tips and tricks.

Related Pokemon Unite Speedster Guide – Tips and Tricks

Pokemon Unite Defender Guide: Crowd control skill

Crowd control skill helps a lot and results in great support for the team. However, do not expect a defender to deal high damage during the battle. They are not meant for this. They have high endurance and help mostly in the defense part. The crowd control skills can be used to leave attackers powerless, allowing your teammates to strike and eliminate them.

Pokemon Unite Defender Guide: Hold Lanes

When you play with a skilled defender Pokemon, you will have to take control of the lanes by holding it. The enemy attackers will attack with lanes. As a defender, your job is to hold it as much as possible till your attacker teammates arrive and defeat the enemies.

Defender Pokemon Gameplay
Defender Pokemon Gameplay (YouTube)

Pokemon Unite Defender Guide: Be aware

You can’t lose concentration as a defender. You will have to be aware of everything happening in your surroundings. If an attacker needs you, you will have to rush and support him by using your defensive powers. Attackers do not have high HP, therefore it is your job to protect them with your high endurance. If the attacker dies and you fail to help it, you will lose. Therefore, the role of a defender is very crucial.

Related Pokemon Unite Supporter Guide – Tips and Tricks

Don’t play solo

Yes, the defender Pokemon has high endurance and can stay alive for long in battles. But, the damage they deal is very low. Therefore, it will be of no use if you are playing solo against an attacker. 

Team up with the attacker Pokemon

As a solution for the above problem, it is best to team up with the attacker Pokemon. It surely makes a formidable team. While you help in the defense and guard the attacker against the enemies, the attacker will quickly attack them and deal massive damage. Both together can form a great team and win battles easily.

Related Pokemon Unite Attacker Guide – Tips and Tricks

Low mobility

One of the major problems a defending Pokemon faces is a low mobility. It has a low speed compared to other Pokemon in the game. Therefore, if you are at some other lane and your team needs you somewhere else, it will be very difficult for you to reach them quickly and support them. This is why it is recommended that you stick to a specific lane, plan about it before the battle, and stop the enemies in that particular lane. 

Defender Pokemon Gameplay
Defender Pokemon Gameplay (YouTube)

Best Defender Pokemon

Crustle

Although Crustle is a Defender, it is the most attacking compared to others. It has a number of defensive tools, such as Rock Tomb, which can be used to create barriers, and Stealth Rock, which can be thrown into a group of opponents to slowly deal damage. Crustle is a great Defender that can turn a battle on its own with a single shell smash.

Related Pokemon Unite Tier List – Best Pokemon for each role

Mamoswine

Mamoswine is another fine choice that can provide substantial damage while also giving crowd control. All of his abilities include crowd control, which includes slowing them down and manipulating their position. His Unite ability can deliver a lot of damage while also making him impervious to barriers. In the endgame, he doesn’t scale well, so it is recommended that you finish the battles as soon as possible.

Blastoise

Blastoise is said to be the best defender Pokemon in the game. With slightly low endurance compared to another defender Pokemon, Blastoise provides great crowd control and decent damage. It relies on its durable shell. The Hydro Pump is among its best skills that will help you to displace lots of enemies and help the attackers to destroy them easily.

Blastoise in Pokemon Unite
Blastoise gameplay (YouTube)

For more Guides, Tips, and Tricks

You can also check our dedicated Video Games Guides section.

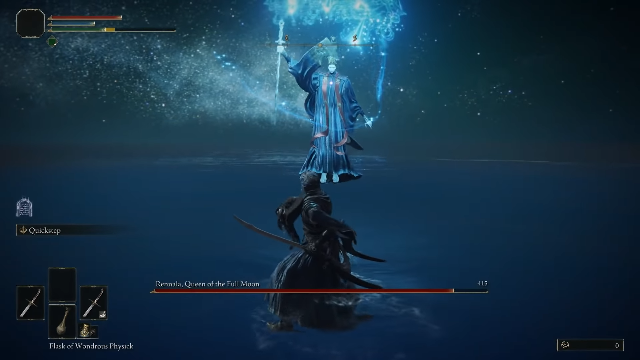
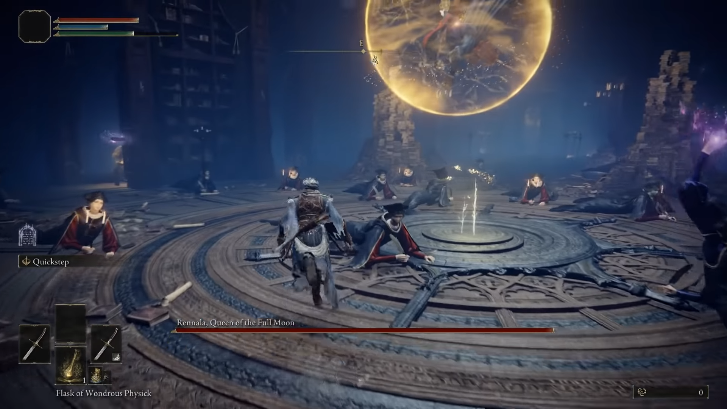
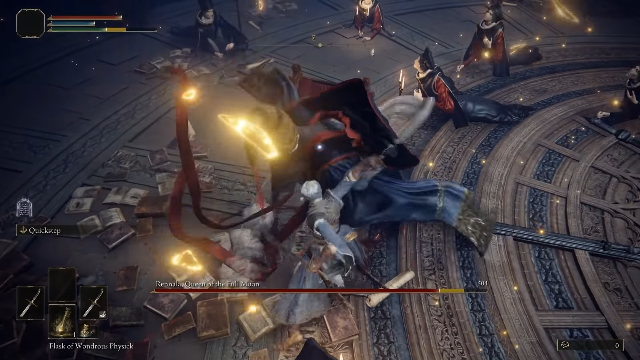
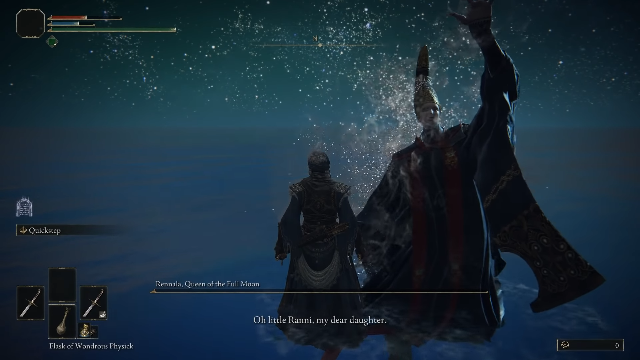
How to Beat Rennala, Queen of Full Moon in Elden Ring

Is Rennala troubling you? Do not worry, our guide will tell you how to beat Rennala Queen of Full Moon in Elden Ring.

Rennala, the full moon’s queen, is in the Raya Lucaria Academy, one of Elden Ring’s most important locations. Rennala is not very difficult to beat. However, due to the two phases in her fight, it could be a little trouble for you. In Elden Ring, she is the first boss with two distinct phases. You need to have some patience in order to beat this boss. But how to beat Rennala, Queen of Full Moon? The answer is in our guide. Read our guide carefully that will give you some tips to win this battle.

fight gameplay
Fight Gameplay (YouTube)
Related How to beat God Devouring Serpent in Elden Ring

How to Beat Rennala Queen of Full Moon: Phase one

The first phase is quite easy as Rennala will be floating in the air and summoning her minions. One of the minions will create a strong barrier around the boss, you will have to find and defeat it. This won’t be so hard as that minion will be having a golden glow around it, throwing magical books at you. One more way you can find them is by listening. There will be a lullaby that you can hear once you reach closer to them. 

When you find and hit the golden minion, Rennala will transfer all that power to the other minion. This will happen three times, which means you will have to hit three golden minions for Rennala to fall on the floor. Therefore, this will result in her losing her shield. Now take advantage of the situation and attack as much as possible. This is the only thing you need to do repeatedly during the first phase. 

Related All Boss Fights in Elden Ring – Ranked
Attack the boss when she falls down
Attack the boss when she falls down (YouTube)

How to Beat Rennala Queen of Full Moon: Phase two

Before phase two begins, it is recommended to use your Ashes and summon an ally. The three wolves can be the best option to attack Rennala from a close distance. When phase two starts, Rennala will shoot a light beam at you. All you need to do is a dodge. Try to get close to her and attack her quickly. 

Rennala will throw some magic attacks at you like icy crystals and magic spears. You just need to learn the attack timings and dodge them whenever they come to attack you. She will also use a green burst of magic that will follow you around to hit you. Do not take this attack lightly because it can kill you once in contact. Dodge to any side and start running before Rennala uses this attack. When Rennala reaches half of her health, she will start summoning giant creatures such as dragons and golems. 

Therefore, you will have to end the fight very quickly as facing these creatures altogether might not be possible for you. To avoid the summons, just run away, and do not even try to fight them because this will be death for you. Just run away till they disappear on their own and then go back to Rennala to defeat her. Do not give her another chance to summon the creatures again. Rennala is weak to bleeding. Therefore, use bleed attacks. This will reduce her health very quickly and will help you to beat Rennala Queen of Full Moon. 

Related How to Complete Patches Questline in Elden Ring – Guide

Rewards

Defeating Rennala Rennala Queen of Full Moon
Defeating Rennala (YouTube)
  • Rewards for beating Rennala will be:
  • 40,000 Runes.
  • Remembrance of the Full Moon Queen, and Great Rune of the Unborn.
  • Rennala’s Full Moon spell or the Carian Regal Scepter can be exchanged for Remembrance of the Full Moon Queen with Enia in Roundtable Hold.

For more Guides, Tips, and Tricks

You can also check our dedicated Video Games Guides section.

Genshin Impact Sayu Guide – Tips and Tricks

Here is the Genshin Impact Sayu guide with some of the best tips and tricks that will help you understand the character even more.

Sayu is the laziest character in Genshin Impact. She is a ninja who hides from all the work and responsibilities with the help of her skill. She is a very skilled ninja. Born on October 19, Sayu is unsatisfied with her height of 138cm. She believes that all the rest and sleep will help her to regain all her energy and grow taller. While doing all this, she successfully perfected her ninjutsu.

She wears Mujina attire. It is funny that she wields a claymore that is taller than herself. This is because due to her Anemo Vision’s power. She believes that even her ninjutsu wouldn’t be able to help her wield it. She believes that she is able to accomplish this because of her vision. To know more about Sayu, read our Genshin Impact Sayu guide below.

Sayu character demo
Related How to Beat the Electro Hypostasis in Genshin Impact – Attack Patterns, Strategy, Rewards, and more

Genshin Impact Sayu Guide: Elemental Skill

Yoohoo Art – Fuuin Dash is Sayu’s elemental skill. Sayu will curl up into  Fuufuu Windwheel which will deal AoE anemo damage to the opponents. After the duration ends, Sayu attacks with a Fuufuu Whirlwind kick dealing more AoE anemo damage. 

While holding, she will roll and can be directed toward opponents that will help to gain resistance and trigger elemental absorption for elements that she comes into contact with. You will have to play by pressing and holding this skill. This will result in a powerful attack.

Genshin Impact Sayu Guide: Elemental Burst

Sayu uses her elemental burst called Yoohoo Art – Mujina Flurry. With the elemental burst, she summons a pair of helping hands that will deal anemo damage to the opponents that are near them. It also helps to heal the party members in their surroundings. 

This does not stop here, she also summons a Muji-Muji Daruma that will help you in intervals depending on the situation. If the HP of the characters around is above 70%, it will attack opponents with anemo damage. If the HP of the characters around is 70% or less than that, then it will heal the characters.

Genshin Impact Sayu gameplay
Gameplay (YouTube)
Related Genshin Impact Aloy Guide – 10 Tips and Tricks

Sayu’s Constellations

  • Multi-Task no Jutsu: The Muji-Muji Daruma created by the elemental burst will ignore the HP limits and assist in attack and healing at the same time. 
  • Egress Prep: Damage from the elemental skill is increased by 3.3% when you just press it. The damage is increased every 0.5 seconds spent. The damage can be increased to 66%.
  • Eh, the Bunshin Can Handle It: Munjina flurry’s level is increased by three. It can reach level 15 max.
  • Skiving : 1.2 energy is recovered when Swirl reaction is triggered. It occurs every two seconds.
  • Speed Comes First: The Fuuin Dash’s level increases by three. It can be upgraded to 15.
  • Sleep O’Clock: The Muji-Muji Daruma gains a 0.2% attack. It can be reached 400%. Every point of elemental mastery raises the amount restored by 3, up to a maximum of 6,000 extra HP.

Best Weapon for Sayu

The 5-star weapon, Skyward Pride is one of the top best weapon for Sayu. When you use it, it emits a deep hum, signaling Dvalin’s complete mastery over the sky and wind.

With its Sky-ripping Dragon Spine passive, it can increase all DMG from 8 to 16%. And if you use an Elemental Burst, Normal, or Charged Attack, it will produce a vacuum blade that deals DMG to opponents in its path equal to 80 to 160% of your ATK. This will last 20 seconds, which is the equivalent of eight vacuum blades.

Sayu's gameplay
Gameplay (YouTube)

Best Artifact for Sayu

It is recommended that you use the Viridescent Venerer set. It will help you to increase the power of the elemental skill, giving a 15% anemo damage bonus. The swirl damage will increase by 60% and decrease the opponent’s elemental RES for ten seconds if there are four pieces of the set. You can obtain the artifacts from this set from the Valley of Remembrance Domain.

Related Genshin Impact Thoma Guide – 10 Tips and Tricks

Best Characters to pair up with Sayu

  • Razor
  • Ganyu
  • Kaeya
  • Venti
  • Fischl
  • Zhongli 
  • Diona

This was all about Sayu that you should know. We have shown how its weapons and skills work so that you can use them as an advantage in the game. 

Sayu's rolling attack
Sayu’s rolling attack (YouTube)

For more Guides, Tips, and Tricks

Check out our Video Games Guide Section for more dedicated guides.

Riverbond Guide – Tips and Tricks for Beginners

We have brought you the Riverbond guide with lots of tips and tricks for beginners. Follow the guide and have a smooth gaming experience.

This easy and fun game needs you to shoot and slash dungeon crawler. In Riverbond, you have to rid the world of evil. Do it alone, or with your friends, it is up to you. This is a fun game that you can play alone or with friends. But how and what to do? You will find everything in our Riverbond guide with some of the best tips and tricks. 

Read Insurmountable Beginner’s Guide – 10 Things Every Player Should Know

Riverbond Guide: Chests

You’ll always start with the standard sword and gun because weapons aren’t swapped between adventures. Here comes the chest to help you. Chests, which can hold either a skin or a weapon, can be found throughout the levels as well. However, you should make every effort to open each chest because certain weapons are definitely stronger than others. 

Riverbond Guide: Enemies and breakables

Enemies and breakables can reward you with many things. They frequently drop healing potions. As a result, keep an eye out for them to help you live longer. You’ll also receive coins or gems, but they have no effect on your accomplishment progress, so do not worry about gathering them.

Gameplay (Cococucumber)

You cannot save in mid-game

This might be a problem for you. It is not possible for you to save your game in the middle of an adventure. The option will be available only when you complete the adventure by defeating the boss. If you quit the game in between, you will have to start the adventure all over again.

Read Mobile Legends Adventure Beginners Guide – Tips and Tricks

Chicken eggs quest

In this quest, you have to collect chicken eggs. You can drop the bridge by shooting a blue pedestal across the gap. You can use lilypads to jump out of the water if you fall in. In order to continue through the level of collecting the chicken eggs, you will need to kill about 10 more turkeys with your sword. You can find a star just up from the next bridge after crossing it. 

You will unlock the achievement called steel yourself once you have killed 20 turkeys with your sword. Then switch to a Lollipop to work on club kills. You can get skin from a chest near the lighthouse. Complete the quest by collecting the seven chicken eggs, then drop down to the dock and enter the boat to move on to the next level.

Gameplay (Cococucumber)
Read LEGO Star Wars: The Skywalker Saga Guide – 10 Things You Should Know

So this was one of the quest that we explained to you. There are many more you have to complete. Follow this guide and enjoy your game. It is an easy game so these tips will be just fine for you to play further.

For more Guides, Tips, and Tricks

You can also check our dedicated Video Games Guides section.

Amnesia: Rebirth Guide – Everything You Should Know

We have brought you the Amnesia Rebirth guide. This guide will give you all the information that is required in order to survive in the game.

Amnesia: Rebirth is a first-person horror survival game. In the game, you will play Tasi Trianon. Your role is to find the whereabouts of your companions in the desert caves and ancient tombs. The game is very dark. Dark means actually dark. It will be difficult for you to see a few things, therefore, you will need light sources like fuel lamps, torch, candles, and so on. 

Find this quickly so that you can clearly see the path in front of you. You can even use matches to light up the candles and mounted torches. The game will require you to solve different puzzles in order to progress in the game. But how to do all this and what things you should keep in mind? All the answers lie in our Amnesia Rebirth guide. Read the guide below to start your survival horror journey.

Read Insurmountable Beginner’s Guide – 10 Things Every Player Should Know

Amnesia Rebirth guide: Do Not Explore

Yes, you read it right. You might be wondering that each game requires you to explore and every guide says to do so. But this game is different. You can’t just go out recklessly and explore. As we said in the beginning, the game has a very dark atmosphere. Therefore, just randomly going out when you don’t have any light source might be trouble for you. The items are not hidden very deeply. You will find them eventually.

Amnesia Rebirth guide: Try everything to find items

Now we’ll speak about where to look for the items. As previously said, you will ultimately locate them. You will, however, have to put in some effort for it as well. You will have to lift, turn, or rotate everything or object you find in order to get some clues. Sometimes, there are notes under baskets, boxes, etc. Sometimes there are inside it. Therefore, do everything and check carefully so that you don’t miss any clues.

Amnesia Rebirth darkness
Darkness in the game (YouTube)

Amnesia Rebirth guide: Fear

Tasi has a fear of the dark. So, when you go to dark places without any light source, she’ll slowly succumb to fear.  She will even fear when she sees grotesque things and corpses. You might not be scared of all these things, but remember it’s not you in the game. Therefore, you will have to keep all these things in mind. You will get to know about Tasi’s fear on the edge of the screen. When you experience this more and more, this will result in uneasy visions.

Read Mobile Legends Adventure Beginners Guide – Tips and Tricks


What to do about the fear?

All you need to do is avoid the darkness. You can do it by always having a light source with you. There are many areas that have lamps and torches, find them and keep the lights active so that whenever there is a serious situation, you can go in light that will give you some relief. You can also light a match and move. However, if you move too quickly, the light will go out. Another thing you can do about the fear when you look at a dead body is simply not look at it for too long.

Leave doors open

Doors play an important role in the game. It is recommended that you leave the doors open when you are leaving. This is because if there is an emergency and you feel that the rooms you visited have a place to hide, leaving the doors open will be very beneficial for you. You can quickly find them and hide inside.

Leave the doors open
Leave Doors Open (YouTube)

Puzzles

There are lots of different puzzles in Amnesia Rebirth. However, they are not very difficult to complete. It can take some time to complete. You cannot skip these puzzles as they are required to move forward in the game.

Read LEGO Star Wars: The Skywalker Saga Guide – 10 Things You Should Know

Run and sneak

Not only the horror atmosphere, but the monsters in the game are also trouble. The worst part is you do not have any weapon to deal with them. Your only option is either to run or sneak around. You can run as fast as possible when a monster sees you. Yes, this will alert the other monsters nearby too but if you are fast enough, escaping them will be very easy. 

On the other hand, if you don’t think you’ll be able to flee quickly, try sneaking away. Stay low as much as possible and look for the right time to escape. These are the only two options that will help you to survive so use them wisely.

So, this was everything in our Amnesia Rebirth guide that you should know. Follow this guide because it will really help you in the game to survive. 

Amnesia Rebirth gameplay
Gameplay (YouTube)

For more Guides, Tips, and Tricks

You can also check our dedicated Video Games Guides section.

Genshin Impact Razor Guide – Weapons, Artifacts, and more Tips

Here is the Genshin Impact Razor guide with some of the best tips and tricks that will help you understand the character even more.

Razor is a Genshin Impact four-star, claymore-wielding electro character. He is known as the wolf boy because he was raised by the wolves. People are confused about whether he was really raised by wolves or is actually a wolf in the form of a human. Razor lives in Wolvendom of Mondstadt, away from the humans. Razor is generally a kind-hearted person because he is far away from human society. For him, his wolf family is everything and he can do anything for them. He sometimes seems upset due to the fact that he is not fully like the wolves.

The wolf boy has long grey hair, red eyes with pale skin. As he was raised by the wolves, he has lots of scars on his body. He wears camouflage pants, an orange shirt, a dark hooded coat, and dark boots. Razor was born on September 9. His height is around 164 cm. To know more about him, read our Genshin Impact Razor guide below.

Razor in Genshin Impact
Razor in Genshin Impact (YouTube)
Read How to Beat the Electro Hypostasis in Genshin Impact – Attack Patterns, Strategy, Rewards, and more

Genshin Impact Razor Guide: Normal Attack

Razor’s normal attack is called Steel Fang. It is a 4-hit strike when you tap. If you want to attack continuously then you will have to ‘hold’. However, this will consume your stamina quickly. In Plunge, there is non-elemental AoE DMG.

Genshin Impact Razor Guide: Elemental Skill

Claw and Thunder is Razor’s elemental skill. When you tap for the elemental skill, you will deal with electro DMG that will grant one electro sigil that will increase the energy recharge stat. Only three electro sigils can be active at one time.

On the other hand, when you hold, you will deal AoE electro DMG and each electro sigil will be converted into energy.

Genshin Impact Razor Guide: Elemental Burst

When the elemental burst is active, Razor’s ATK SPD and Electro RES will be boosted by a wolf spirit. This makes him immune to the DMG caused by electro-charged. In addition, the use of his charged attacks is disabled and uses a normal attack with its own electro DMG attack.

Genshin Impact Razor gameplay
Razor gameplay (YouTube)
Read Genshin Impact Aloy Guide – 10 Tips and Tricks

Razor’s Constellations

  • Wolf’s Nature (C1): After picking up an elemental orb or particle, the ATK DMG increases by 10% for 8 seconds.
  • Suppression (C2): A 10% increase in CRIT rate and attacks enemies with less than 30% Max HP.
  • Soul Companion (C3): Lightning Fang’s level increases by 3.
  • Bite (C4): Enemies lose 15% DEF for 7 seconds when using the tap effect of Claw and Thunder.
  • Sharpened Claws (C5): The level of Claw and Thunder is increased by 3.
  • Lupus Fulguris (C6): The next attack deals 100% of his ATK as electro DMG every 10 seconds. It also grants an Electro Sigil if the lightning Fang is not in effect.

Best weapon for Razor

Wolf’s Gravestone is the best weapon you can use for this four-star character. This weapon increases his attack by 20%. When you attack enemies that have less than 30% of HP, all party member’s attacks will be increased by 40% for 12 seconds. It can only occur every 30 seconds, so use it carefully.

Read Genshin Impact Thoma Guide – 10 Tips and Tricks

Best Artifacts for Razor

Pale Flame is one of the best Artifacts for Razor. When you equip the 2-piece effect, the physical DMG is increased by 25%.

When you equip the 4-piece effect, the ATK is increased by 9% when the elemental skill hits an opponent. This effect can be used once every 0.3 seconds and stacks up to two times. After these two stacks are reached, the 2-set effect is increased by 100%.

If this does not feel good for you then you can go for Thundering Fury. When you equip the 2-piece effect, the electro damage increases by 15%. 

When you equip the 4-piece effect, the damage caused by overload, electro charge, and superconduct increases by 40%. This will also decrease the elemental skill cooldown by one second. This effect can occur once every 0.8 seconds.

Artifacts
Artifacts (YouTube)
Read Genshin Impact Diona Guide – 10 Tips and Tricks

Razor’s strengths and weakness

Strengths

  • Razor has a high HP.
  • His attacks can do physical as well as electro damage.
  • The elemental burst unleashes a beast that provides a great amount of damage while boosting the defense at the same time.

Weaknesses

  • Melee range attacks only.
  • Elemental burst can only be used while him on the field.

Best characters to use with Razor

  • Kaeya
  • Fischl 
  • Diona
  • Bennett
  • Barbara
  • Lisa
Read Best Free To Play Team in Genshin Impact

So this was all about Razor that you need to know. You can experiment with different weapons, artifacts, and a different team if you want. 

For more Guides, Tips, and Tricks

Check out our Video Games Guide Section for more dedicated guides.

How to beat God Devouring Serpent in Elden Ring

Don’t know how to beat God Devouring Serpent in Elden Ring? Our guide will help you in that. Read the guide carefully and win this fight.

God Devouring Serpent is an optional Elden Ring boss. You don’t need to beat this boss to advance the Elden Ring story. You might face some difficulties to beat this boss, as he is not so easy. In this guide, we will tell you how to beat God Devouring Serpent in Elden Ring. Follow the guide carefully and defeat this boss easily

God Devouring Serpent fight gameplay
Gameplay (YouTube)
Related How To Defeat Sir Gideon Ofnir, The All-Knowing in Elden Ring

Get Serpent-Hunter before the fight

When you enter the boss chamber of God Devouring Serpent, you will find a corpse to the left of the mouth of the cavern. There will be an item available at the corpse. The item is Serpent Hunter. While the boss is largely immune to most types of damage, he is highly vulnerable to Great-Serpent Hunt, the Ash of War that comes with the weapon.

It is recommended that after grabbing the item, do not fight with the boss immediately. Runaway from the location of the boss and return to the roundtable hold to upgrade the weapon. Upgrading the weapon will increase its damage more and will help you a lot in defeating the God Devouring Serpent.

Related All Boss Fights in Elden Ring – Ranked

How to beat God Devouring Serpent 

God Devouring Serpent has few attacks on his hand and you can dodge them easily. He will use a basic lunge attack called snake bite. You just need to dodge roll from this attack and it won’t harm you. However, you will have to keep in mind that there can be follow-up attacks and you have to be aware of that. Also, look for any opening and charge for an attack on the boss. A punishing attack from the boss can cause you half of your health or even more. 

However, he will use some stance before attacking. All you have to do now is concentrate on when this attack will appear and time your dodge accordingly. If you time too early or late, this can result in a massive loss of HP. The God Devouring Serpent has two AoE damage as well. He will spit either poison or magma around the arena. This attack might be difficult to dodge as you won’t have much space to move freely. So, keep all these things in mind when the boss uses this attack. 

Serpent's poison
Serpent throwing poison (YouTube)

The Serpent will thrash and spin in circles, stirring up the molten pool in which it resides. This can be dangerous for players close to the boss, but the Serpent-Hunter’s incredible range should allow them to stay far enough away to dodge this attack. The Serpent’s highly dangerous attack is when it plunges its head into the ground and explodes, producing a magma eruption beneath your feet. This attack can be avoided by charging perpendicular to the Serpent and jumping or rolling right before the eruption, although it’s typically preferable to just try to block.

Related How to Complete Patches Questline in Elden Ring – Guide

Use defensive strategy

You will just need to block and dodge the attacks as much as possible. This boss can attack from long-range and short-range. So, if you are a player who loves and is an expert in defense, you can beat God Devouring Serpent very easily. If you decide to use the Serpent-Hunter, strike him regularly in between his attacks. Enough head hits will briefly put the Serpent unconscious, providing you with a much-needed window of uninterrupted attacks.

For more Guides, Tips, and Tricks

You can also check our dedicated Video Games Guides section.

Genshin Impact Rosaria Guide – Weapons, Artifacts, and more Tips

Here is the Genshin Impact Rosaria guide with some of the best tips and tricks that will help you understand the character even more.

In Mondstadt’s Church of Favonius, Rosaria is a cold-hearted sister with very sharp words. She is Unpredictable as she leaves anytime from the church without notifying anyone about it. It seems that she has some kind of purpose, but no one has learned anything about it till now.

Rosaria is a 24-year-old adult and 176.5cm tall with pale skin. Rosaria wears a nun’s habit, which consists of a white sleeveless turtleneck top, a long white and black coif with a red lining, long white gloves, and a long black and red slit skirt. Her eyes are pale magenta with light pink irises that resemble those of a cat. She wears a serious expression on her face almost all of the time. To know more about Rosaria, read our Genshin Impact Rosaria guide. Get all the details about her best weapon, artifacts, constellations, and more from the guide below.

Related Genshin Impact Thoma Guide – 10 Tips and Tricks

Genshin Impact Rosaria Guide: Spear of Worship

Rosaria’s normal attack is the spear of worship. She attacks up to five enemies in normal attack with her polearm. If you use a charge attack, she will dash forward and deal damage to any enemy who comes in her way. However, this will cost you some stamina. While using her plunge attack, she dives to the ground, dealing an AoE damage to all the surrounded enemies.

Genshin Impact Rosaria Guide: Elemental Skill

Ravaging Confession is Rosaria’s elemental skill. Rosaria very smoothly shifts herself behind the enemy. After this, with her polearm, she pierces and slashes the enemy that will deal Cryo DMG. However, keep in mind that she cannot go behind larger enemies. 

Genshin Impact Rosaria
Rosaria (YouTube)

Genshin Impact Rosaria Guide: Elemental Burst

Rites of Termination is her elemental burst. Rosaria swings her polearm to slash nearby enemies before summoning a cold Ice Lance that lands on the ground, delivering Cryo DMG in both actions. While active, the Ice Lance shoots a burst of cold air, dealing Cryo DMG to all enemies in its path.

Rosaria’s Constellations

  • Unholy Revelation (C1): Her normal attack damage increases by 10% for seconds and attack speed increases by 10% when she deals a CRIT hit.
  • Land Without Promises (C2): The duration of the Ice Lance that is created by the elemental burst is increased by 4 seconds.
  • The Wages Of Sin (C3): The level of Ravaging Confession is increased by 3 and the maximum upgrade level for it is 15.
  • Painful Grace (C4): Rosaria’s five energy is regenerated by Ravaging confession’s CRIT hits. This can only be triggered when the ravaging confession is used.
  • Last Rites (C5): Elemental burst’s level increases by 3. It can be upgraded up to level 15
  • Divine Retribution(C6): The enemy’s physical RES decreases by 20% for 10 seconds when attacked with the elemental burst. 
Rosaria gameplay
GAmeplay (YouTube)

Best Weapon for Rosaria

Dragonspine Spear is one of the best weapon you can choose for Rosaria. This weapon gives high base attack and a physical damage bonus too. There is a 60% chance of dropping an everfrost icicle on top of the enemies because of the Frost Burial perk. This happens whenever Rosaria uses a normal or charged attack. In general, this usually make Rosaria’s attack 80%. In some case, the enemies can take damage around 200% from Rosaria when they are affected by the cryo element. However, this occurs only for ten seconds. By dishing out the cyro based attacks before triggering the effect, you can maximize the damage output.

If you think that Dragonspine Spear is not good for you, you can go for Skyward Spine. This weapon will help Rosaria to use her elemental skill more because it will help her energy to recharge  quickly up to 20%.

Best Artifact for Rosaria

As we know by now that Rosaria’s skill depends on critical hits, therefore, the four piece Berserker is one of the best option for her. Normally, it buffs her critical hit by 12%. However, it additionally increases to 24% when her health is below 70%. If you want to increase the damage, then you can use the Gladiator’s Destiny set. This will increase her attack by 18%. Her normal damage will also be increased by 35%. Combining the Gladiator’s Destiny et with the Martial Artist will increase the normal and charged attack power. 

Passive Talents

Night Walk: This passive talent helps Rosaria by increasing movement speed of party members by 10%. However, this only works at night. It also does not woek in Trounce Domains, or Spiral Abyss.

Extracted Confession: Her critical hit rate is increased by 12% for five seconds when she attacks an enemy from behind with her elemental skill.

Shadow Samaritan: All nearby party members will be buffed with additional critical hit rate when Rosaria uses her elemental burst. The maximu buff it can give to the critical rate is 15%.

Genshin Impact Rosaria gameplay
Rosaria Attacking with her polearm (YouTube)

Best characters to pair with Rosaria

  • Chongyun
  • Barbara
  • Sucrose
  • Kaeya
  • Fischl
  • Diona
  • Albedo

For more Guides, Tips, and Tricks

You can also check our dedicated Video Games Guides section.

Pokemon Unite Speedster Guide – Tips and Tricks

We have brought you the Pokemon Unite Speedster guide with some tips and tricks. Use this Pokemon if you like to be quick in battles.

In Pokemon Unite there are different Pokemon of different roles. The speedster is among the different battle types. If you like playing the game a bit fast and defeating the enemies very quickly, then this role is just for you. But how to play Speedster? We have all your answers in our Pokemon Unite Speedster guide with some of the best tips and tricks. Read below to know more.

Read Pokemon Unite Supporter Guide – Tips and Tricks

Pokemon Unite Speedster Guide: Jungle Role

Speedsters are best for the Jungler role. Many players depend on the speedster Pokemon due to their ability to run around the map very quickly and clear out the wild Pokemon. This will provide them with lots of EXP. With this, they can upgrade very fast resulting in more benefits.

Pokemon Unite Speedster Guide: Score points

Speedsters have the best opportunity to score points for their team. They have the ability to move around in the entire area. With this, they should always look for scoring opportunities. If you are going with a speedster Pokemon, make sure you go for solo opponents and the wild Pokemon first. They will provide you with lots of points. 

Read Pokemon Unite Attacker Guide – Tips and Tricks

Pokemon Unite Speedster Guide: Play aggressively 

Yes, don’t look anywhere, you are using a speedster Pokemon and this is your job. Play as fast as possible, don’t give the time for the enemy to think anything, or don’t allow them to make strategies against you. Just go out there, run fast and attack everyone aggressively. You can even hide in the tall grass to attack your enemy quickly when they come near you. 

Pokemon Unite gameplay
Gameplay (YouTube)

Think about the team 

You should think about the team too. Having speed does not mean that you can just leave and do whatever you want to. Always look for your team, although they will have the supporters with them, you can assist them too with your speed and attacking powers. Know what is your group’s plan and play according to that. Being reckless can sometimes cause problems too. 

Speedster helps other lanes too

Due to their high speed, speedster Pokemon can go around other lanes when the team needs more attacks and are ambushing the enemies. Speedster Pokemon can come for your assistance for the offense. 

Read Pokemon Unite Tier List – Best Pokemon for each role

Know about the map

When you are roaming around, you must have good knowledge about the entire map. This is because you can plan and get ready for the enemy in a particular area before it even arrives there. With both, the knowledge of the map and your speed, you can have an upper hand in the battle.

Pokemon Unite gaemplay
Gameplay (YouTube)

Best Speedster Pokemon 

Talonflame

Tanoflame is one of the best Speedster Pokemon in the game. He has maxed out mobility stats and is one of the easiest speedsters you can play with. With Talonflame, you can put your opponents under pressure. Brave bird or Fly will give you great mobility with high damage. In addition to that, the Flame charge will help you to escape from a close distance while damaging the opponent on the way.

Read Pokemon Unite Tsareena Guide – How to win games easily

Absol

Absol has a high critical rate which results in massive damage. Its Feint will ignore the defense and the shields of the opponent and take out the deadliest opponents on the field. If you want bonus damage, then use Pursuit which will help you with a quick ambush, and the enemies that get hit from behind will receive more damage.

For more Guides, Tips, and Tricks

You can also check our dedicated Video Games Guides section.