You might be facing difficulties on how to defeat The Banshee in Tiny Tina’s Wonderlands. Do not worry as we have a guide that will help you out.
Tiny Tina’s Wonderlands stays true to the previous Borderlands games’ gun-heavy madness. On their way to defeating the Dragon Lord, gamers will face a slew of bosses. The Banshee is a boss in the game’s Weepwild Dankness section who may be troublesome for low-level players and as well as those playing on higher levels.
Tiny Tina’s Wonderlands has everything to explore and uncover once you’ve entered the Weepwild Dankness. The Banshee is one of the most difficult opponents you’ll face. Our guide will tell you how to defeat the Banshee in Tiny Tina’s Wonderlands.
It can be difficult because there is no dodge button in Tina’s Wonderlands. The first bit of advice for each boss encounter is to keep moving. Players are a more challenging target for many bosses’ sluggish strikes due to their continual mobility. This is especially true for the Banshee, who will employ a range of trackable attacks, such as meteor-based lasers.
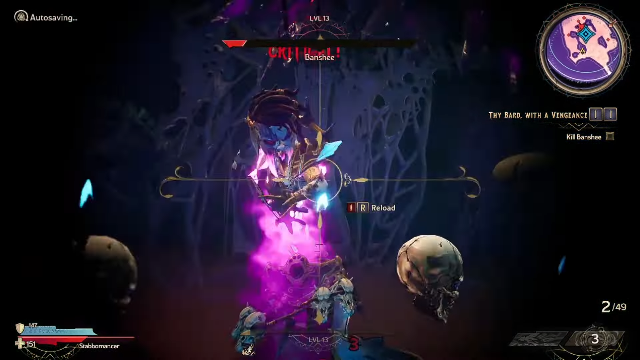
When fighting the Banshee for the first time, you’ll notice that they approach at the far end of the arena. They’ll finally call in a slew of huge skulls to fight with them. Although these do not immediately affect you, they will hover around the arena and only damage you if they collide with your character. Therefore, keep an eye on where they are.
The Banshee will launch waves of energy blasts at you from the back of the arena. These explosions sweep across the chest and legs. To prevent damage from blasts at chest level, you must crouch, and to avoid damage from blasts at leg level, you must jump.
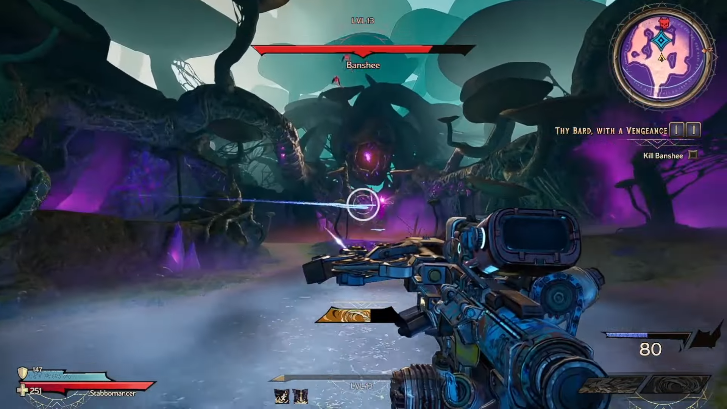
The Banshee will eventually descend down the middle, carrying with her a purple fog. Considering contacting the fog will cause you to incur damage, you’ll need to remain outside the arena to shoot the Banshee after it has traveled down to the center to your starting location. The Banshee will also shoot multiple blasts, which you must dodge by hiding behind the trees.
The Banshee will return to the arena’s back area and unleash the chest and leg level blasts at you once again. If you are not in the center of the arena when this happens, the purple fog will diffuse from the center to the outer, damaging you if you are not there. To avoid more damage, make sure you’re positioned far enough away from the fog that’s blocking the blasts.
The Banshee maintains its cycle throughout the battle, with the massive skulls flowing in and out of the battle, posing a threat if they are touched. If you ever need a Death Save, aim for them to help you get back on your feet.
We have brought you the Pokemon Go Catch Cup guide that will tell you everything from its date and rules to the best team you can use.
Each season, several new cups arrive in Pokemon Go’s PvP mode. Some of these PvP cups are only available during specified seasons or times of the year. The Catch Cup, for example, is a little more well-known. If you wish to compete in the Catch Cup, you’ll have to adhere to a set of severe restrictions. We’ll go over how the Catch Cup works in Pokemon Go, as well as all of the regulations you’ll need to know.
The Catch Cup started on Tuesday, March 29, 2022, at 1 p.m. PST and will end on Tuesday, April 5, 2022, at 1 p.m. PST. Therefore, only Pokemon captured during that time period will be eligible to play. To know more, read our Pokemon Go Catch Cup guide.
The Catch Cup is one of the most interesting cups in the Go Battle League since you may only utilize the Pokemon that you captured during the cup’s duration, drastically restricting your team’s possibilities. Pokemon must have less than 1,500 CP and cannot be Mythical to participate. Focus on Raid Battles, Egg hatching, and Field Research assignments in this cup to broaden your horizons, since they can award powerful Pokemon that don’t presently spawn in the wild.
Once you’ve caught your selected Pokemon, make sure they don’t exceed 1,500 CP. All of your Pokemon must have a CP of less than 1,500. If you have more than 1,500 CP on a newly obtained Pokemon, it will be unavailable.
The most effective strategy to compete in the Catch Cup is to use incense to attract Pokemon to your location. If you’re near a Poké Stop, you may also set a lure on one to attract Pokemon to that spot. Rather than walking around your area looking for Pokemon, here are some of the greatest ways to bring Pokemon to you.
Pokemon Go Catch Cup Guide: Best Team
Lurantis, Azumarill, and Galarian Stunfisk are three of the finest Pokemon you can pick to team up for the Catch Cup. These are some of the most powerful Pokemon currently available, making them eligible for the Catch Cup.
Our suggestions are based on the Pokemon that appeared during the Lush Jungle event but bear in mind that the top performers may change after the event finishes and a new set of Pokemon becomes available to meet and catch.
Fomantis debuted during the Lush Jungle event, and it can be found in the wild until the event concludes. If you evolve it into Lurantis, you’ll have one of the finest contenders for the Catch Cup. Fury Cutter as a Fast Move provides the quickest access to Lurantis’ strong Charged Moves: Leaf Blade, which has STAB and can be easily repeated, and the Fighting-type Super Power for added coverage.
Azumarill
Pokemon Azzumarill (YouTube)
Azumarill has long been regarded as one of the best Great League performances, and its success carries over to the Catch Cup, where it can be eligible if you hatch an Azurill from a 5km Egg and evolve it. The bubble is the best Fast Move. In terms of Charged Moves, Hydro Pump is the most powerful, while Ice Beam helps to compensate for its weakness against Grass. Azumarill might be expensive to power up, but it’s well worth it.
Galarian Stunfisk
Galarian Stunfisk is another difficult Pokemon to obtain during the Catch Cup – but possibly the greatest. You must hatch this regional version from a 7km Egg collected when the Catch Cup is active. Its Ground/Steel typing means it is resistant to a wide range of opponents and is especially effective against Fairy-types. You’ll have a winner with Mud Shot as a Fast Move and Rock Slide and Earthquake as Charged Moves.
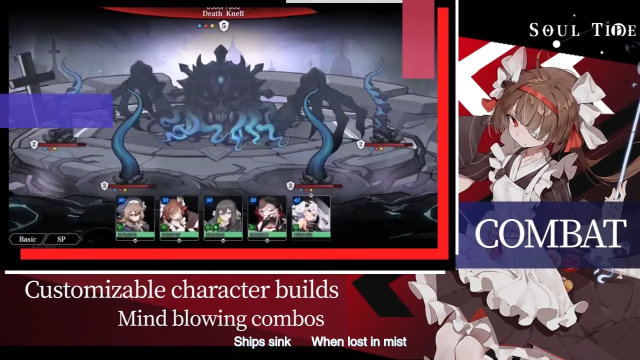
We have brought you the Soul Tide guide with some of the best tips and tricks that will help you have smooth gameplay.
Soul Tide is a Japanese role-playing game that was previously only in the Japanese language. There’s action, intrigue, a compelling plot, and everything that a great role-playing game should have. In this two-dimensional RPG, you’ll meet new characters, fight new monsters, defend your community, and travel throughout the world.
The game’s size varies depending on the device you’re using, but according to the information provided, it will begin downloading 1.5GB after installation. It is suggested that you have adequate space on your smartphone before downloading it; otherwise, it can cause your device to slow down. So, to start the game you will need some help, and we are here with our Soul Tide guide to assist you with some of the best tips and tricks.
Bleeding stun: Each layer’s effect is that you will be damaged by 2% of the attacker’s strike power at the end of each round. The maximum number of bleeding layers is unknown, although it currently exceeds 200. It is primarily utilized to augment the damage of the character Ye Yinliu’s ultimate move. Hidden Liuli’s ultimate damage rises by 5%, the top limit is 30 layers, or the current best long-axis play with Nicolette and Kelu Xueer as the core, overlaying hundreds of layers of bleeding for output.
Soul Tide Guide: Thunder Attribute will be beneficial for you
Shock: When the stack reaches four layers, it will absorb all of the shock layers and deal 120 percent of the attack power in electric shock damage.
Electric shock: This can gain Lily Elliott’s arcane resonance’s distinctive electric shock damage bonus, whether it can obtain the general lightning system damage bonus, the creator is unknown, and must be checked.
Game characters (LemcnSun Entertainment)
Soul Tide Guide: Boundary Point
The witches’ realm requires the puppet master to explore, solve riddles, and battle his way to the “boundary point” of each level in each chapter. The realm of witches and new worlds is the “boundary point” discussed above. The Moon Continent’s connecting and communication point is also the endpoint of each area. The level may be formally concluded after the puppet master reaches the boundary point, and a great number of puppet development supplies, gold coins, presents, and other items can be collected.
As the complexity of the level map grows, various options such as roads, portals, and hidden passageways will be introduced to the exploring path. Keeping a cool mind, not being scared of the darkness and fog, defining the objective, and working hard to go ahead are all things that the puppet master must accomplish on a regular basis.
There is a lot to know about Exploration
Explore the island (LemcnSun Entertainment)
When the puppet master discovers a new node, event, or battle marked by a compass while exploring, the exploration degree displayed in the top left corner steadily increases. When the exploration degree reaches 100 percent, the level is considered accomplished.
You can finish the settlement when the exploration is done; if it still does not reach 100%, please ask the puppet master to carefully check whether there are any hidden organs or crucial props around you, or if you overlooked something in the fork option.
Throughout the exploration phase, a number of complicated layout strategies assist you in overcoming obstacles. Additionally, the strategic layout in front of the station puts your tactical strategic layout to the test. A good match is a key to victory.
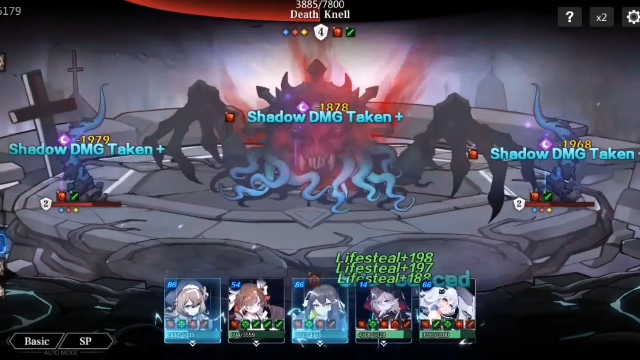
Combat strategies against monsters (LemcnSun Entertainment)
Sort by their qualities
When a rookie contemplates teaming up, a combination of characters with the debuffs should be given top attention. A combination of one attribute should contain at least three characters from the same attribute.
Weaknesses in monsters
Gameplay (LemcnSun Entertainment)
When the number is 0, the weak place is revealed, and the monster suffers +100% damage (including burning damage), which lasts until the conclusion of the following round. Breaking the weak spot at the same moment will restore the team’s rage.
Your level will pass even if exploration is incomplete
The level will be recorded as passed if the exploration degree is not completed, but the “border point” for settlement is successfully achieved. The puppet masters do not need to be concerned because becoming stranded in a level will have no effect on following exploring expeditions.
Burn your enemies with the burning attribute
Game Cutscene (LemcnSun Entertainment)
Each layer damages 0.5 percent of the carrier’s maximum HP at the completion of each round, up to a maximum of 10 layers. It damages, with a maximum damage per layer of 15% of our average attack power.
Want to know how to defeat Sir Gideon Ofnir, The All-Knowing in Elden Ring? We have the right guide for you to defeat this boss easily.
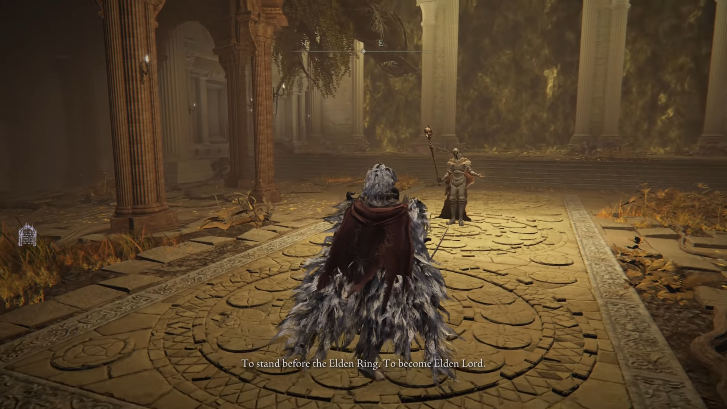
In Elden Ring, Sir Gideon Ofnir, The All-Knowing, is a boss that you will face. Sir Gideon Ofnir is a strong sorcerer that employs complex sorceries and incantations as a boss. He may be located in Leyndell, Capital of Ash, a branch of the Royal Capital that you can reach only once you’ve progressed far enough in the game. This is not an optional boss; in order to progress in Elden Ring, players must fight it. Read our guide to learn more about how to defeat Sir Gideon Ofnir, The All-Knowing.
Sir Gideon may be found in Leyndell, Ash’s capitol. You’ll be able to battle Maliketh after defeating him in the Crumbling Farum Azula. After beating him, you will be brought to the capital city, but it will be covered in ash. Proceed to the spot where Godfrey was defeated. Gideon will be waiting in the same room.
Sir Gideon Ofnir’s Attacks
Sir Gideon has a wide range of spells under his belt. It’s not for nothing that he’s known as the All-Knowing. This is a list of all the attacks you should be aware of when fighting with this boss.
Switft Glintstone Shard – Gideon will hurl a glintstone shard at you. This is a straightforward approach that can be readily avoided.
Comet Azure – If you are caught in Gideon’s huge beam of electricity, your HP will be shredded.
Black Flame Ritual – Gideon sends out a swarm of flame pillars.
Bloodboon – If Gideon makes a slash with a bloody flame, it will cause bleed damage.
Glintblade – Gideon will envelop himself in glintblades, which will fire at you after a brief period of time.
Discus of Light – Gideon fires three light discs in a fan motion that returns after a brief time.
Rykard’s Rancor – After striking you or an object, Gideon fires a crimson skull that delivers damage in an AOE.
Scarlet Aeonia – Gideon leaps into the air and smacks his fist into the ground, forcing a flower to bleed and spreading Scarlet Rot to anyone nearby.
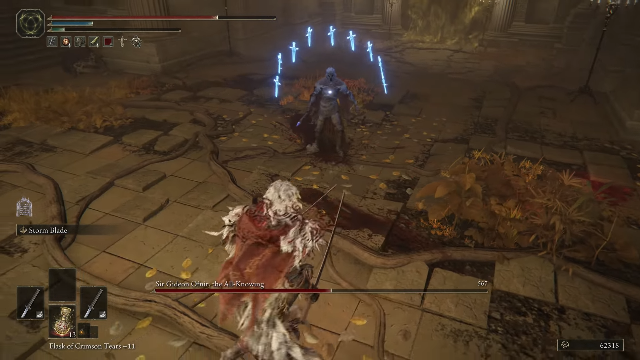
Sir Gideon Ofnir, The All-Knowing’s attack (YouTube)
If you give Sir Gideon Ofnir enough extra space, he can be a powerful magic-user. For starters, we recommend employing the Mimic Tear Ash Summon for this boss fight because it may constantly push the opponent and leave him with very little room to maneuver. Although the Mimic Tear has been nerfed after the release of the Elden Ring, it is still a viable choice for tanking damage and attracting Gideon’s attention.
We’d also suggest employing a Blood or Frost special attack, and infusing your weapon with one of the Ash of War’s abilities. The Hoarfrost Stomp Ash of the War has been nerfed in the same way as the Mimic Tear has been, prolonging the casting time and somewhat reducing the damage. However, it’s still useful at dealing significant damage to Ofnir while he’s distracted by the Mimic Tear.
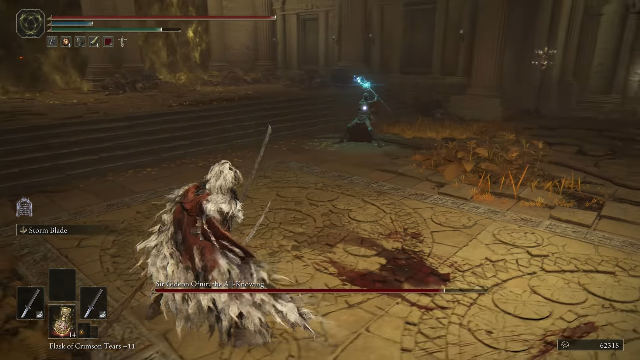
Throughout the battle, Sir Gideon Ofnir might shower you with spells. His array of spectral swords, which he conjures up above him, may be one of his most effective spells. If you get within whacking distance of this, it will spurt towards you. You can use the Bleed or Frost-based ability to hit Gideon without coming too near.
Sir Gideon Ofnir will also fire rotating Holy damage discs or a single, large Glintstone projectile at you. Both of them can be avoided by ducking through them, but with the spinning discs, in particular, you’ll want to avoid dodging too quickly or the projectiles will be able to follow you.
He can pull it off if you go too far away from him, so when you see him plant both feet and prepare for the assault, try to sprint past him as soon as you can. You can utilize this to cause some major damage while he’s executing the spell.
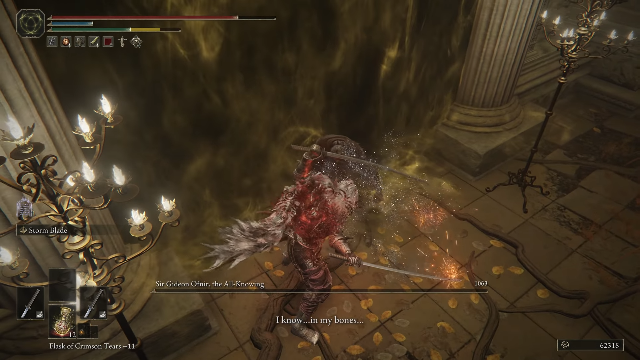
Sir Gideon Ofnir has two special attacks, both of which are based on someone you’ve already defeated. If you defeat Mohg, Lord of Blood, and then tell Gideon about it before fighting him, he’ll unleash a wave of bloody flames that may cause Bleed damage. This can be avoided by fleeing the area or inflicting enough damage on Gideon before he casts the spell.
Defeating Sir Gideon Ofnir, The All-Knowing (YouTube)
Alternative strategy
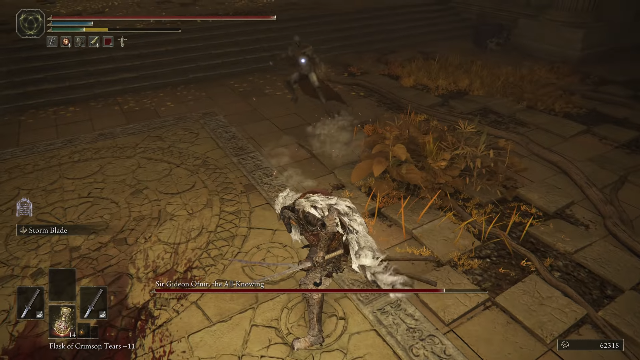
Upon knowing that you defeated Malenia, Blade of Miquella before the fight, he’ll turn into a lotus and fall into the earth, unleashing a massive area strike that builds up Scarlet Rot. Because Sir Gideon Ofnir can’t change the route of the attack once he’s beyond a certain point in the casting phase, you can either sprint out of range or roll beneath him.
We have brought you the Genshin Impact Serenitea Pot guide. Learn everything about the trust rank, furniture, and much more with the help of our guide.
The Serenitea Pot mechanism appears to be one of the more intriguing Genshin Impact improvements in a long time. There are various significant characteristics of the Serenitea Pot system in Genshin Impact to discuss. While it has been included since the 1.5 update, there are still some details that gamers should be aware of. There is still the issue of players not knowing what the Trust Rank, Furniture, and Realm Currency are.
We’ve got you covered, whether you haven’t yet unlocked your Serenitea Pot or just need an explanation, as well as plenty of other tips and tricks to get you started. If you’ve already dipped your toes into the Serenitea, you may be wondering where you can get all of these Genshin Impact wood components needed to craft furniture and other items. Read our Genshin Impact Serenitea Pot Guide for all the information.
Genshin Impact Serenitea Pot Guide: How to get the pot
Travelers must have completed all of the levels up to this point and be level 35. The quest ‘A Teapot to Call Home’ will then appear in the list. Travel to Liyue and talk with Madam Ping to begin this quest.
A Teapot to Call Home is a straightforward quest that primarily entails following waypoints and conversing with NPCs. It introduces players to Yanfei, a playable character who is assisting in the collection of resources needed to craft this teapot universe. After completing the game, players can return to Madam Ping for their own Serenitea Pot.
The player’s inventory contains the Serenitea Pot, which can be found in the gadgets section. To use the teapot, go to the menu and select “place.” After exiting the menu, the teapot, like other gadgets, will appear in front of the player. You can interact with the teapot to enter it, and you can leave it by interacting with the map and teleporting as usual. This transports the player to a different area of the game, akin to a realm.
Before you can begin, you must first select one of the three realm styles available. Don’t be too concerned about this decision. So far, the worlds differ simply in appearance, which is a little less than expected. They all supply a similar amount of land, but the region surrounding it will be different. It’s more like picking a backdrop in its current state and knowing that you’ll be able to modify it later – but not for a long time.
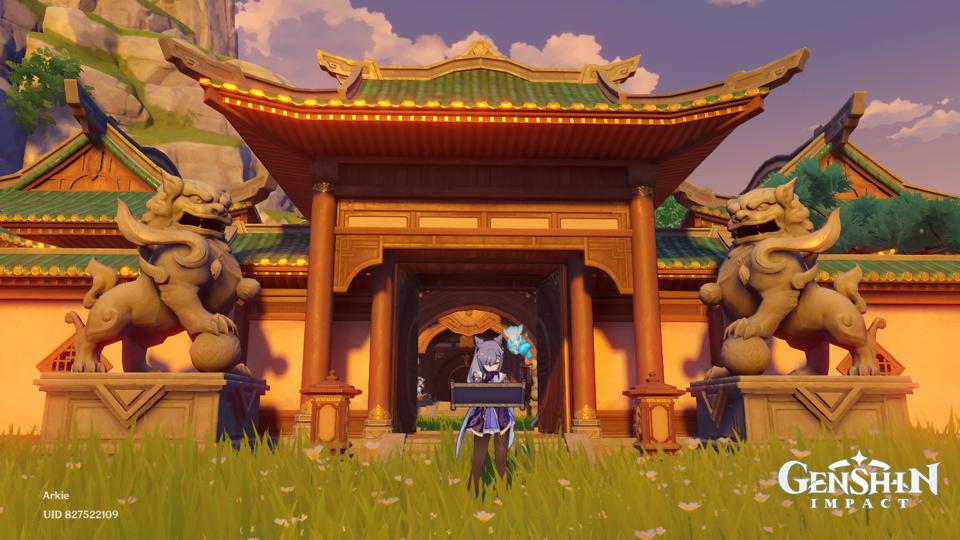
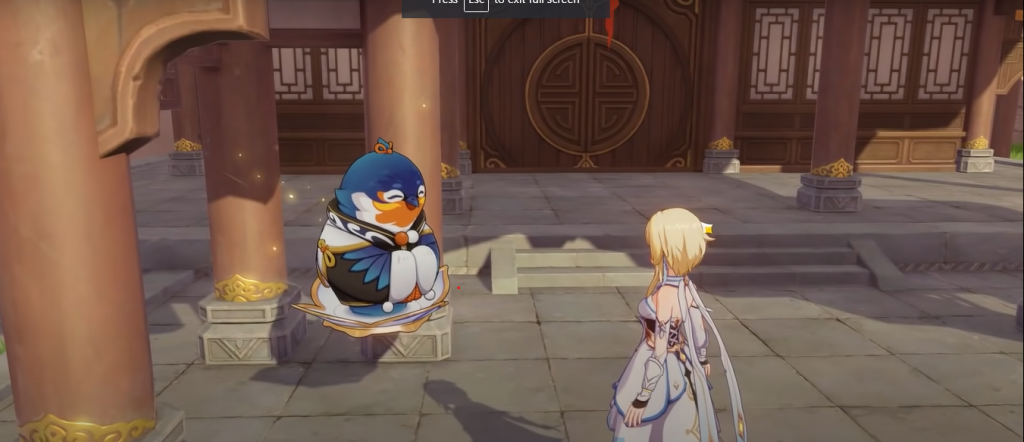
Players can begin exploring their new teapot house after they have arrived. Apart from the mansion and meadows, there won’t be anything there yet. The teapot ghost Tubby stands in front of the mansion, looking after the care of your new home.
Genshin Impact Serenitea Pot Guide: Trust Rank
Trust Rank (YouTube)
Trust Rank functions similarly to a player’s Adventure Rank. The UI and level-up rewards are comparable in function, but not in the way that the player levels it up. Players will be able to earn various furniture prizes based on their Trust Rank. The player must create and furnish their house in order to increase their Trust Rank.
The Trust Rank system may be used to gain various furnishings, but that doesn’t imply players are confined to them. Some new merchants, such as the Realm Depot and Teapot Traveling Salesman, are also available to Genshin Impact players.
In Genshin Impact, crafting is a breeze. When players invest some resources, they will receive new furnishings to utilize in their homes. As a result, their Trust Rank will increase. The second reason is essential, since some players may be concerned about how they will obtain the resources needed to construct their dream home in Genshin Impact.
These items may be discovered everywhere in the open world of Genshin Impact, so players aren’t confined to their houses all day. The different ores present in the Genshin Impact universe will most likely play an important role in this new crafting system. Trees can also be cut down, and their timber is utilized as a resource.
Genshin Impact Serenitea Pot Guide: Realm Currency
Realm Currency’s official in-game description is “The currency of the realm. To barter for a variety of things in the Serenitea Pot.” One way to get new money is to empty the Jar of Riches in Genshin Impact.
The player must empty the Jar of Riches, which contains a limited amount of cash (300, as mentioned in one of the miHoYo blog entries). It’s as easy as that. It should be noted, however, that the Jar of Riches only holds a limited amount of currency at any given time, so players can expect to empty it frequently.
Otherwise, the user will receive no new Realm Currency. Realm Currency can also be obtained in various ways related to realms in Genshin Impact. Adeptal Energy, for example, is required to make additional Realm Currency. Players must decorate their homes more in order to obtain more Adeptal Energy. More furnishings imply more energy, which the player can utilize to their advantage in order to furnish even more new items.
Furnishing is the backbone of Genshin Impact’s new home system. Players utilize the new Realm Currency to purchase new furniture, the Trust Rank to unlock new furniture, and the new crafting system to gain even more furniture. If players wish to decorate their house, everything is dependent on the furniture they have.
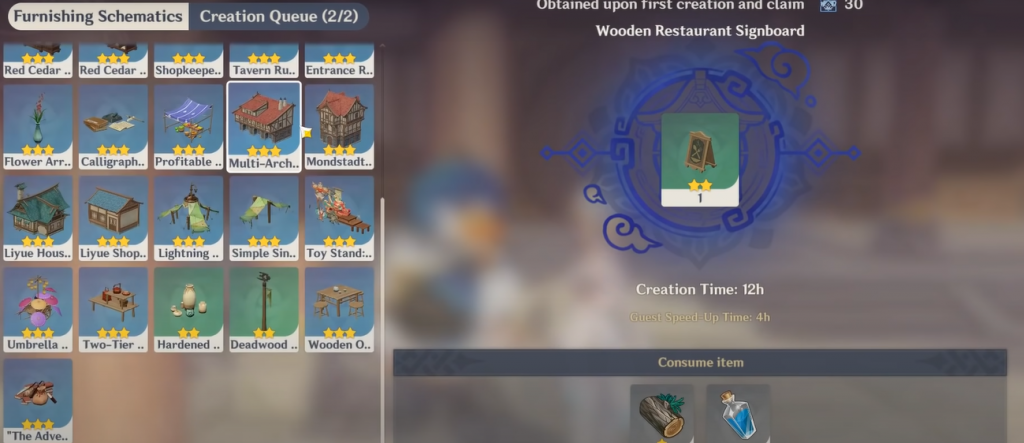
Furnishings come in a variety of star ratings, which reflect how uncommon a given piece is. Furnishing blueprints, gained through Trust Ranks, are comparable to culinary recipes in that players now know how to construct a new item.
Alternatively, players can get new blueprints via completing the new Adeptal Mirror task, visiting the previously stated new vendors, or engaging in new events. While there isn’t a specific tutorial on how to unlock everything just yet, users will quickly figure out how to achieve their dream furniture.
Furnishing (YouTube)
Things to keep in mind
A few Teyvat residents have been renovated to stores where you can buy furniture for your new homes. Goth, for example, can be located in the park south of the Knights of Favonious headquarters in Mondstadt. The other is Master Lu, who may be found at the home on Quince Village’s bottom ledge. Because they appear to be classified as conventional establishments, they are only open during the day.
Talking to Tubby allows you to construct furniture, but it takes a long time. If you aren’t utilizing those potions to immediately acquire your furniture, make sure the slots are constantly full. Empty slots serve no use, and with 14-hour turnaround times, it all adds up.
Make sure you have some extra cash on hand before the weekend arrives. Chubby, the traveling salesperson, visits the Serenitea Pot planets during this time. Chubby sells items that are not available elsewhere, so keep a few on hand.
It isn’t often visible, but after items are put, they can be picked up, moved about, and even returned to your inventory. To do so, collapse the furnishing choices when in situ mode and then hover over objects.
It’s worth mentioning that you can currently harvest wood from trees in other people’s games. The wood spawns for whoever strikes the tree, and it appears to work for both sides. This means that you can both harvest wood from the same tree, but you must both hit it.
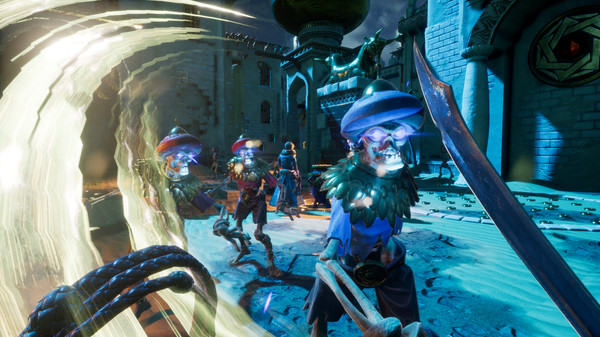
Are you confused about how to complete A Knight’s Toil in Tiny Tina’s Wonderlands? Do not worry. Our guide will help you complete this quest.
Tiny Tina’s Wonderlands builds on the precedents established by the Borderlands series while striking the new ground in critical areas. Instead of playing as a certain vault hunter with their own personality and voice lines, players may construct their own characters using the game’s character creation function. For the first time in the series, players may mix and match their skills across six distinct character classes.
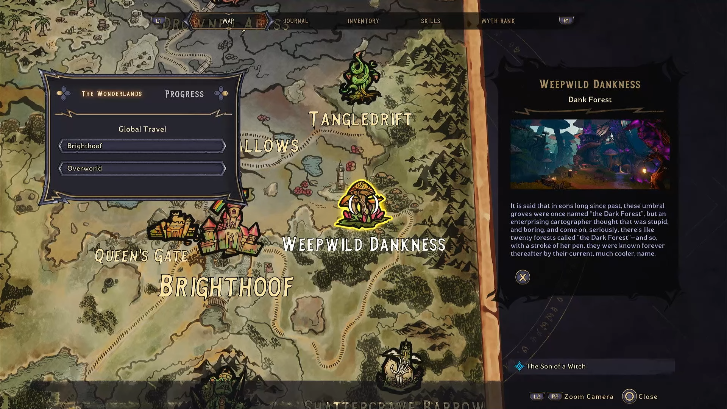
A bold hero needs bravery, honor, and a formidable weapon! Help Claptrap satisfy at least one of these requirements. A Knight’s Toil is a side goal in Tiny Tina’s Wonderlands. A Knight’s Toil may be unlocked during Main Quest 4: Thy Bard. It’s in the Weepwild Dankness region of the Dank Encroachment area. You will get this quest by the Quest Board. You must be at least level 13 to begin this quest.
This side mission will require players to face multiple tough enemies, including Mervin the Wizard, so they should be prepared. To have more fun, players may accomplish this quest on their own. However, Tiny Tina’s Wonderlands’ Crossplay makes it easier to join up with other players. Read our guide below to know how to complete A Knight’s Toil quest.
How to start
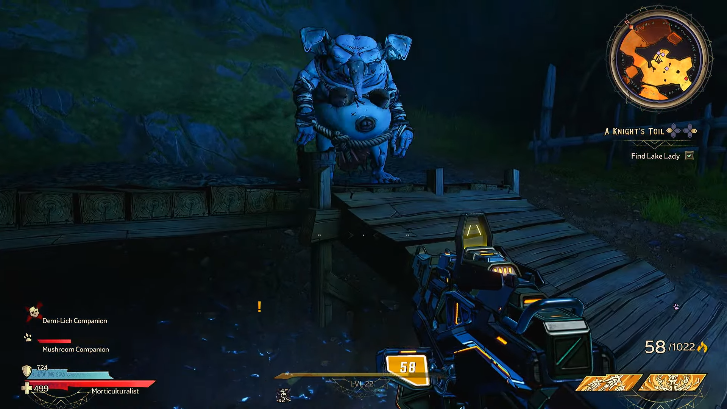
Players must fast travel to the Dank Encroachment fast travel point in Weepwlind Dankness to begin A Knight’s Toil. When players arrive in Dank Encroachment, they should see an “!” near the Vending Machines, where they will begin the quest. Claptrap will then approach the player and invite them to accompany him to Lake Lady.
How to Complete A Knight’s Toil: Lady Lake
Talking with Lady Lake (YouTube)
Claptrap directs the player to Lady Lake, where they can seek her assistance in finding a magical weapon. Lady Lake, on the other hand, demands a favor in the form of “taking care” of her obnoxious Goblin neighbors. Players should now follow the quest marker to a location with multiple small houses and a big drum being played by several Goblins.
The player will be attacked by the drumming Goblins, who will be joined by other Goblin Gunslingers who will emerge from neighboring cottages. Players can return to Lady Lake once they’ve dealt with their problems.
How to Complete A Knight’s Toil: Fight with Llance and Squires
Talking with Llance (YouTube)
Claptrap and the player proceed to the site of the mythical sword Extra-Caliber, but the sword is guarded by Llance and his frog-like Squires. Llance then informs the player that they will only be able to pass if they become King of the Cap.
The player and Claptrap are then taunted by Llance, who teleports to a nearby mushroom on a huge tree. Players must now use a melee smash strike on the Mushroom to knock him off. Llance’s Squires will assault the player after knocking him off, and Llance will join in the fight shortly after.
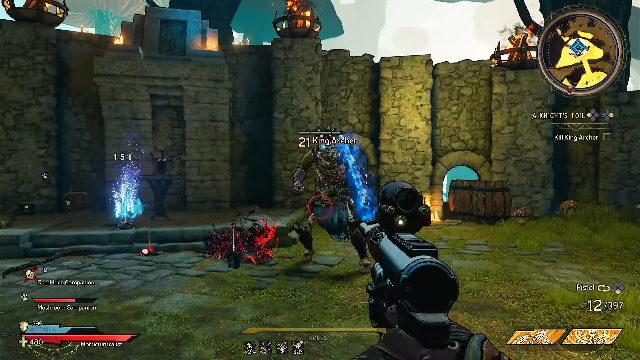
How to Complete A Knight’s Toil: Defeat King Archer
Defeat King Archer (YouTube)
After managing to draw Extra-Caliber, Claptrap instructs the player to fight King Archer and reclaim his hand, which can only be removed by a noble hand. Unfortunately, King Archer is a formidable opponent, as he will summon a swarm of Round Table Knights that will teleport about the region on a regular basis. Because King Archer and his minions have armor, the best approach to deal with him is to utilize Poison Elemental Damage on them.
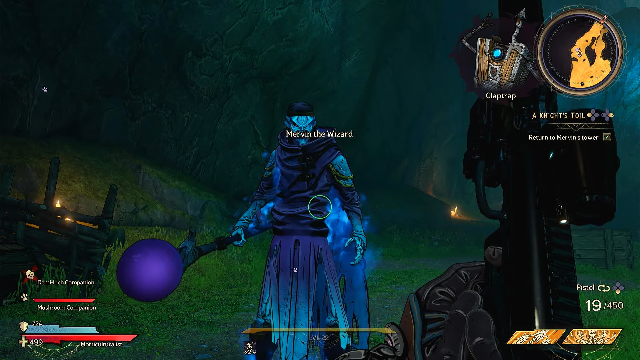
Claptrap discovers Mervin’s hidden tower in a nearby cave after receiving the sword Extra-Caliber. Mervin is annoyed that Claptrap has Extra-Caliber, therefore he wants to put him through a series of tests, but Claptrap instructs the player to finish the tasks.
Mervin confines the player in a horrible jail after passing various challenges. Claptrap, on the other hand, helps the player by inadvertently teleporting them into an Unreal Engine room using the Transform tool and a few blank game items. Players must confront Mervin and numerous of his clones after returning to Mervin’s Tower.
Return to Mervin’s tower (YouTube)
Claptrap will give the player 4436 XP, $7730, and a rare Spell called “Holey Spell-Nade of Omens,” which does huge AOE damage when vanquished.
Are you up for a thrilling action-adventure? Our City of Brass guide will provide you with all of the necessary tips and techniques for a seamless gameplay experience.
City of Brass is a single-player dungeon crawler with a first-person perspective. It takes place in a city inspired by the Arabian Nights, with hallways, courtyards, and chambers produced at random. Players assume the character of a burglar on the hunt for a treasure buried deep under a legendary city filled with traps and monsters.
Players must complete each level within a set time restriction while avoiding traps and opponents and collecting wealth along the way to improve their scores. Items discovered in the environment, such as bricks or vases, can be utilized as weapons. Death is permanent in this game, as it is in other dungeon crawlers, and players must restart the game after each playtime. So, to help you out, we have the City of Brass Guide with some tips and tricks.
People aren’t habituated to leaning down in most first-person games. Uppercut Games took an early build of the City of Brass to a dev meeting when it was still in the planning phases. They’d set a spike pit trap on one side of the first door, one of the first traps you’ll encounter in the game.
During that test session, every single individual who played the game died. Traps have been iterated and enhanced since then to make them simpler to notice, but only if you look. If you’re not sure there’s nothing on the other side of a door, don’t go through it. Exploring further gives you a better chance of spotting the hidden locations above.
City of Brass Guide: Wishes
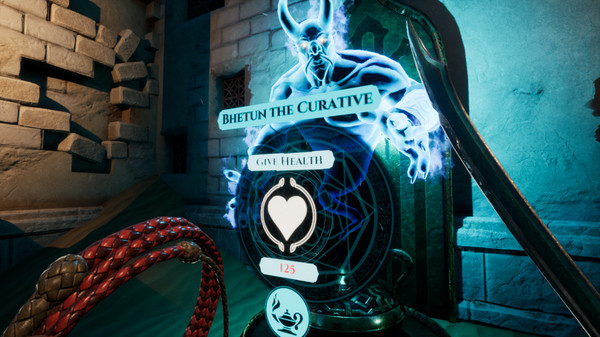
In the City of Brass, you are granted three wishes at the start of each run. Wishing on a store genie unlocks more powerful products to buy while wishing on an enemy genie turns them to your side. In a single run, wish effects remain at overall levels, but there is a cost. Spending a wish to enhance a genie who can bestow health, for example, can dramatically raise the genie’s future cost, making it a huge loot drain if you need it later in the game.
Any genies you’ve wished for will arrive in the final confrontation if you make it all the way to the heart of The City of Brass. They will have one more opportunity to modify your gear or assist you in the final battle. And if you can make it to the last fight without wasting any wishes, you’ll be in a really strong position.
City of Brass Guide: Pads of Silence and Talisman of Confusion
The Pads of Silence allow you to approach enemies before they spot you. On the other hand, the Talisman of Confusion does what its name says. It confuses the enemies for two seconds when they would usually pursue after you. If you have these things, you can sneak up on your enemies and surprise them.
As hard as you can, hit the legs and heads
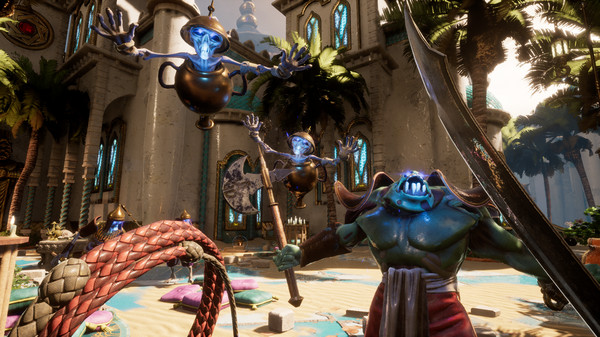
Attacking the enemy’s head (Uppercut Games)
While firing at an enemy’s head or legs, press L2 to briefly stun them. If you strike them in the head, they’ll clutch their heads in anguish, and if you hit them in the legs, they’ll fall off their feet. It is frequently advised to go for the legs because they are bigger and easier to attack.
Avoid enemies from two areas
Do not go out into the open. In other words, avoid going anywhere where opponents may attack from both sides. If at all feasible, approach new locations such that all enemies are in front of you.
Remember that pushing the circle button while racing ahead allows you to slide, which is quicker than walking. In addition, instead of waiting for bothersome traps, you may glide past them. By the way, once you’ve disarmed all of the traps in the city, speedrunning stages become a lot simpler. If you’re only aiming to go through all of the levels, a speedrunning technique isn’t recommended. However, if you’re only performing three stages, it’s a good plan.
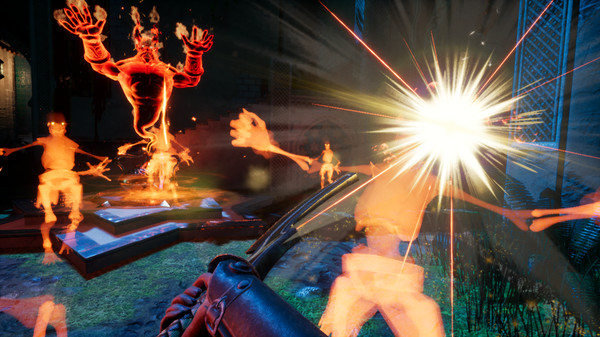
Explosions (Uppercut Games)
City of Brass Guide: You can restore your health
In return for some gold, Bhetun, the curative, grants you only one heart. You may not realize it, but you might instead wish for him to restore your full health pool. This request like other wishes lasts for the duration of the game, thus every time you encounter Bhetun, he’ll offer to restore your complete health. For any serious complete playthrough, this request is almost a must.
Like a tonne of lead, inflation has blasted into our city. It’s reasonable, given the wealth littered about. The genie merchants can sell you practically anything, from health restoration to magical trinkets, for a high price. Save your money till you reach the third level if you don’t have an urgent need for better health.
Even if you pick up every sparkling object that comes into your peripheral view, if you start spending recklessly, it will all be gone in a flash. This is especially true in the later stages since the genies’ fees will begin to rise as you progress, and this is amplified if you make a wish.
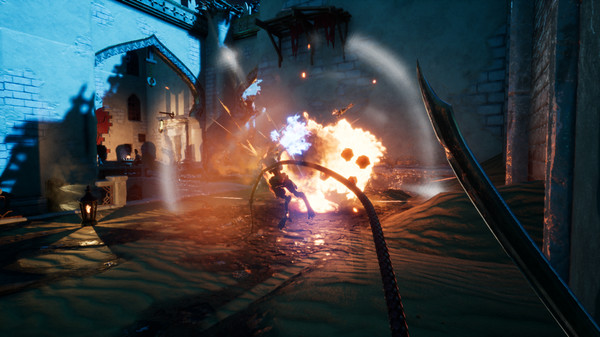
Enemies attacking (Uppercut Games)
Chickens are your allies
Have you noticed the flashing chickens on the ground? They’re your allies. When you throw one towards a bunch of enemies, they will begin following after it, allowing you to get the initial hit. You may just simply sprint past them all.
In big groupings, even early-run enemies may easily overpower you. Furthermore, if an enemy is alerted to your existence, they will instantly sprint towards you, regardless of your position in relation to them. When challenged by big numbers, strive to avoid conflict as much as possible.
Capture grappling points with the whip for swift, quiet movement, hurl ghost chickens to distract sentries, and take the low road if they’re on the high road. The bosses are mainly uninterested in you until you approach their tiny circle of enemies. So, if you have a few enemies, take care of them before beginning the boss fight.
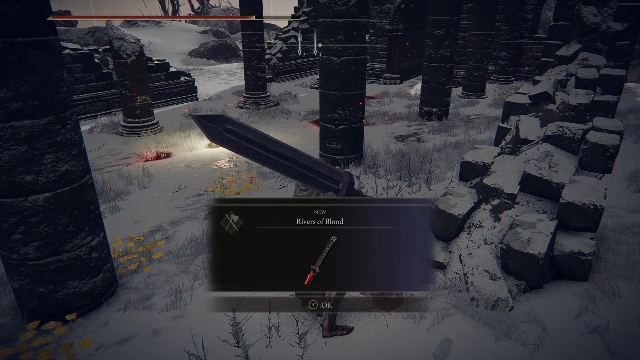
Here is a guide that will tell you how to beat Bloody Finger Okina and grab one of the best swords in the game as a reward.
The Bloody Finger Okina is a Phantom Invasion NPC in Elden Ring. He wields a unique katana called Rivers of Blood. At Mountaintops of the Giants, the Bloody Finger Okina spawns near the Church of Repose. As far as swords go, Elden Ring’s Rivers of Blood Katana is one of the best. The player must beat Bloody Finger Okina in order to collect it. You do not have to worry about it as we have brought you a guide that will tell you how to beat Bloody Finger Okina in Elden Ring.
Bloody Finger Okina using the rivers of blood katana (YouTube)
The player will need to go to the Mountaintops of the Giants in order to find the Rivers of Blood Katana in Elden Ring. You can find the Church of Repose in the southeast part of this area after arriving. Make sure you spend all remaining Runes before arriving at this location.
Players will be prohibited from leaving until a winner is declared in the upcoming invasion battle. You will see Bloody Finger Okina when you are close enough to the Church of Repose. The Rivers of Blood Katana will be awarded to players if they defeat him.
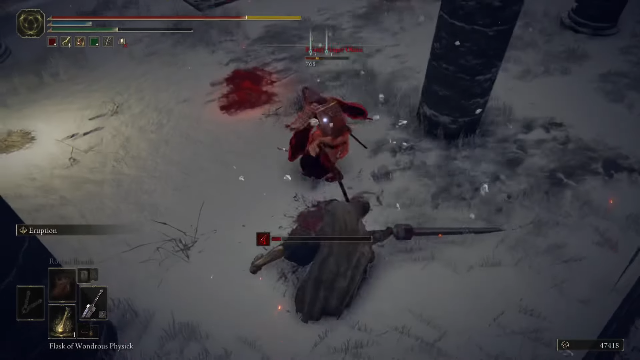
Players will need to worry about the same issues because Bloody Finger Okina wields the same weapon they came to collect. Players who are hit with the Rivers of Blood Katana will experience blood loss. He is extremely aggressive and runs toward the player often, but his attack will leave him wide open to be punished. Bloody Finger Okina can be defeated by baiting him out, and hitting him when he’s wide open.
It’s best to play wisely to prevent having to trek all the way back to this area. Bloody Finger Okina will drop the Katana for the player to retrieve as soon as the combat is complete. At this stage, players should spend their money on this weapon because it is powerful enough to carry them all the way to Elden Ring’s last monster. Make certain that you have mastered Weapon Skills in order to vanquish all of your adversaries.
Defeat the boss to get the katana (YouTube)
The Rivers of Blood Katana
Elden Ring’s Rivers of Blood Katana is one of the late-game weapons available. As you explore the places, strengthen their characters, and learn the battle techniques, you will find a variety of weaponry. Because of its one-of-a-kind ability, this sword is one of the best swords in the game. The blood loss status ailment, causes opponents to lose more HP than normal over a short period of time.
Elden Ring’s bosses can be incredibly challenging, but this weapon can be extremely helpful. As a result of the weapon’s skill, Corpse Piler, the player will be able to rapidly swing the blade across the ground, hitting everything in its path. To use it, the player must have 12 Strength, 20 Arcane, and 18 Dexterity. In Elden Ring, there are plenty of ways to farm for Runes, making late-game grinding easier.
It is one of several dungeons in Limgrave that has a Black Knife Assassin. To know more about it, read our Deathtouched Catacombs Dungeon guide.
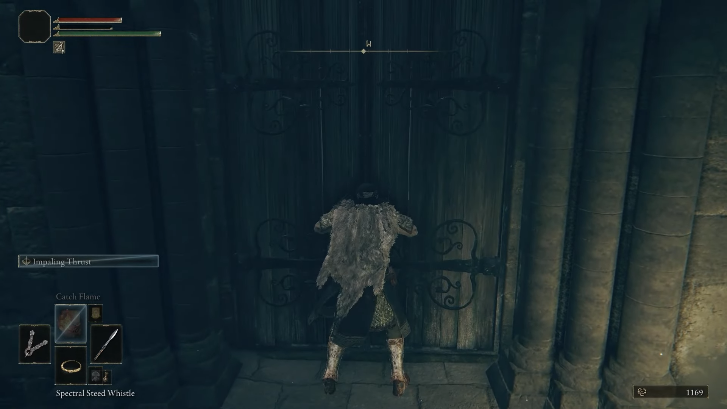
It’s yet another catacomb full of undead creatures in Elden Ring that want to slice you up, as you can see by its name. The area isn’t particularly difficult, but you might miss it since it’s located in West Limgrave’s northern part. Once you cross over a small encampment of enemy soldiers and dogs, you will find it on the northeast side of the Warmaster’s Shack site of grace.
When you find it, you will see a ghostly NPC standing beside it along with a door. Simply walk through that door and activate the site of grace. The crypt is now open for exploration. To know more, read our Deathtouched Catacombs Dungeon guide.
In Limgrave, just east of Stormveil Castle, there is a place called the Deathtouched Catacombs. In order to reach it, head north into the forest after fast traveling to the Warmaster’s Shack. Continue along the castle wall to the east in order to reach it. You must then safely descend the valley below once you have reached the two cliff edges. Find the entrance on the side you’re currently on. There is a Ghost seated next to a set of double doors.
How to start
From the site of grace, you’ll need to open a large locked door, which is located at the bottom of the stairs. The Root Resin should be on the right side of that door, and there will be stairs leading down to the left. You’ll encounter the first of many skeletons who will reassemble themselves and attack you as you descend those stairs.
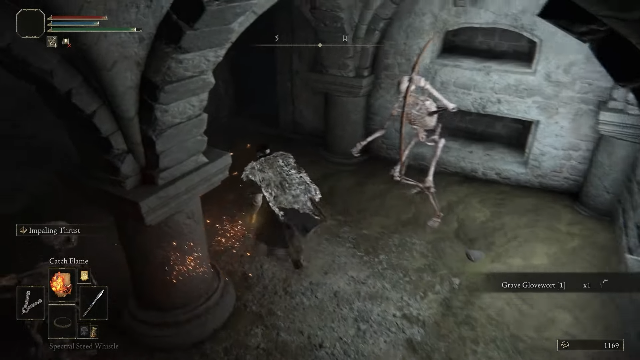
When you reach the bottom of these steps, look to your right for another skeleton. After you beat those up and continue descending, you’ll come upon Grave Glovewort. More skeletons will appear, and you must deal with them as well. There are now two options for you. A tiny hall may be found on the right. Stairs await you on the left.
There are two more skeletons to your right, one of which will shoot arrows at you. You are also going to find a Grave Glovewort under the stairs. As you continue down the hallway, you’ll find two more Grave Gloveworts and a Grave Violet at the end. When you go to grab the weapons, you’ll be attacked by two more skeletons. Simply kill them, then make your way through the left entrance.
This is indicated by the high platform seen as you depart the entryway. You’ll come across a body wielding the Uchigatana sword, which you may know if you’ve played any of FromSoftware’s prior titles. When you take it up, a skeleton with a bow will appear, so you should beat it up. At the other end of the platform, a sprig of Grave Glovewort grows. After obtaining these two things, you will find yourself in a chamber full of skeletons.
Kill the skeletons permanently
You will have to deal with skeletons as your main enemies in this. You will encounter some of them with swords, while others will fire arrows at you with bows. When you knock the skeleton down and deplete its health bar, the skeleton will start to get back up again. You must smash the glowing parts of them on the ground to prevent them from regenerating.
Deathtouched Catacombs Dungeon guide: Boss Preparation
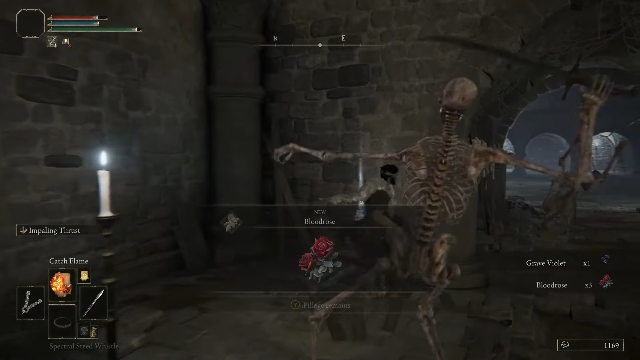
Pull the lever at the western end of this crypt to open the heavy door once the room full of skeletons has been cleared. Bloodrose will be found on a body, as well as another grave violet that can be collected. Back at your hotel room, you will notice that a whole group of skeletons has appeared.
Collect Bloodrose (YouTUbe)
Return to where you entered the catacombs and either kill or run past them until you reach the eastern door. Because the old door is now open, you may finally confront the boss. Fill your flasks in the place of grace if you’re low on fluids, then brace yourself for a long boss battle.
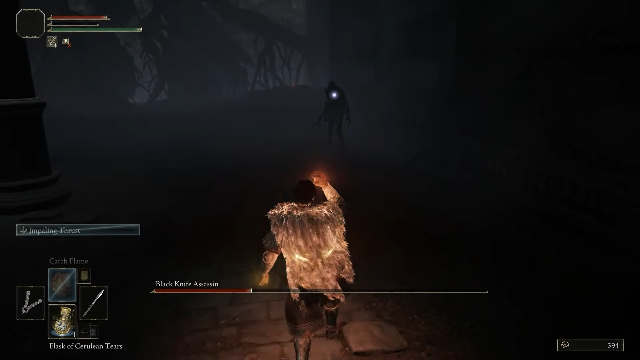
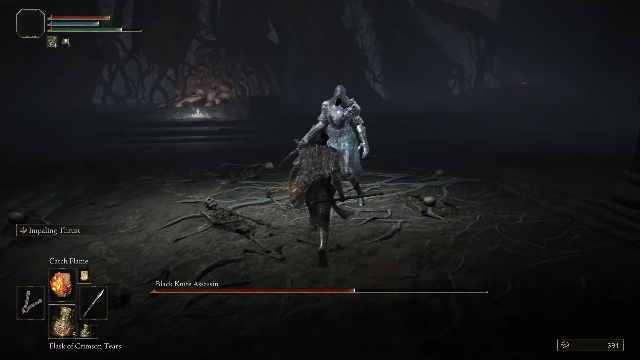
Now that you’re beyond the yellow fog gate, you must face the Black Knife Assassin. Elden Ring contains this particular boss a few times, although this is the easiest version. The health bar on this boss will be missing a large chunk when this fight begins for some reason. Daggers will be used to hit you fast with some stabs and slashes.
To deal with this boss, you need to immediately overwhelm it with damage. Because it lacks poise, if you whack it strongly enough, it will stagger. It might help to summon a spirit such as the Lone Wolf Ashes, as that should give you the help you need to defeat it. The Black Knife Assassin can easily be defeated by keeping your distance from it and not losing any health.
Fight with Black Knife Assasin
Deathtouched Catacombs Dungeon guide: Rewards
In addition to 1600 runes, you will also receive the Assassin’s Crimson Dagger talisman, which heals the target when it suffers a critical hit. You will find a chest at the end of this room that contains some Deathroot, which can be traded with Gurranq, the Beast Clergyman who can be found at the Bestial Sanctum in Caelid. Now that you’ve seen everything in the Deathtouched Catacombs, it’s time to head back to the entrance.
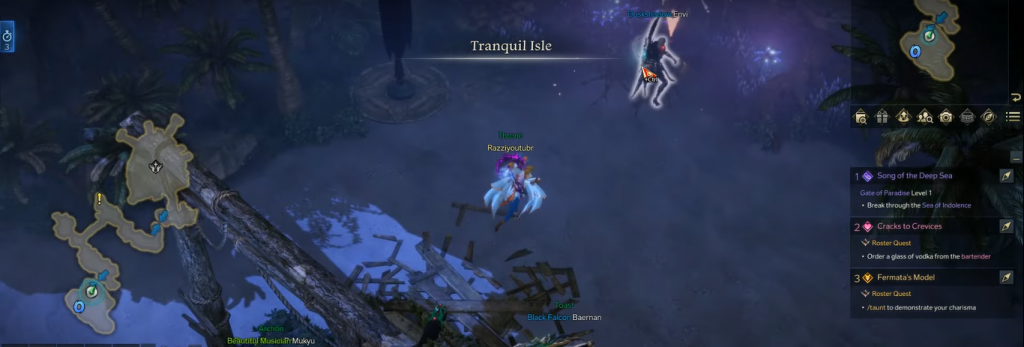
Do you want to know everything about Tranquil Island? We have brought you the Lost Ark Tranquil Island guide that will tell you everything you need to know.
The world of Arkesia, as seen in Lost Ark, is made up of multiple continents, city-states, and islands that your character is tasked with exploring throughout the game’s endgame. In the course of battling Ghost Ships and gathering Pirate Coins on the high seas, you may be thinking of exploring the Tranquil Isle, a mysterious location among the waves. In the Lost Ark, Tranquil Isle is a hidden area where players can get different Quests, Mokoko seeds, and Island Tokens. Read our Lost Ark Tranquil Island guide to learn everything about it.
If you’re arriving from the mainland, you’ll have to go all the way to Black Cave Marina before arriving on Tranquil Isle. Once you’ve arrived at Black Cave Marina, you may continue sailing northwest. After passing through Cradle of the Sea, look for Tranquil Isle on the right side of the road. Sea Ripple Support Ship is the closest marina to Tranquil Isle.
Lost Ark Tranquil Isle Island Token
After finishing the Island of Eternal Rest quest, you will face a boss known as Specter Lord. When you beat the boss, the Tranquil Island Token will be dropped. However, you will not always get this Token for beating the boss. Since this boss drops completely randomly, you may have to try several times before you obtain the Tranquil Island Token.
Before all that, however, you’ll need to get the Requiem of Twilight by completing quests. In the specter Lord fight, you will need to play it multiple times near the twisted tree in the arena once you have it.
Tranquil Isle has two main quests, one of which will grant you the Requiem of Twilight, and another which is a secret quest.
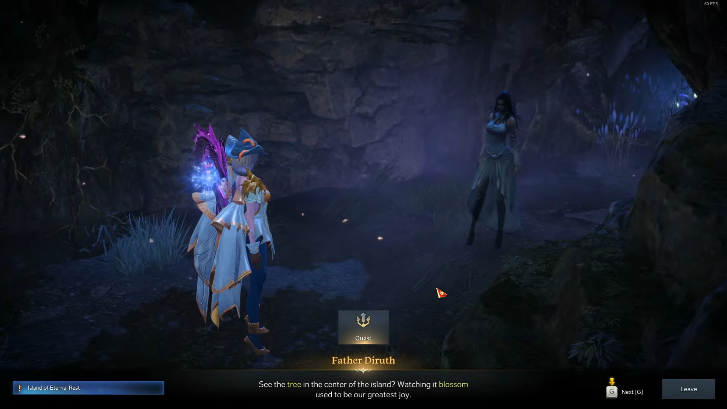
Once you enter Eternal Rest Island, the first quest you’ll get is Island of Eternal Rest. The quest will be given to you by the father Diruth, and you’ll receive the Requiem of Twilight song as well as 5,000 Silver as a reward. The Specter Lord can only be summoned by playing that song.
A Message from the Dead is the secret quest you will find on Tranquil Island. As a reward, you will get 10,000 silver and a Vitality Increase Potion after talking to the Tombstone on the eastern side of the island.
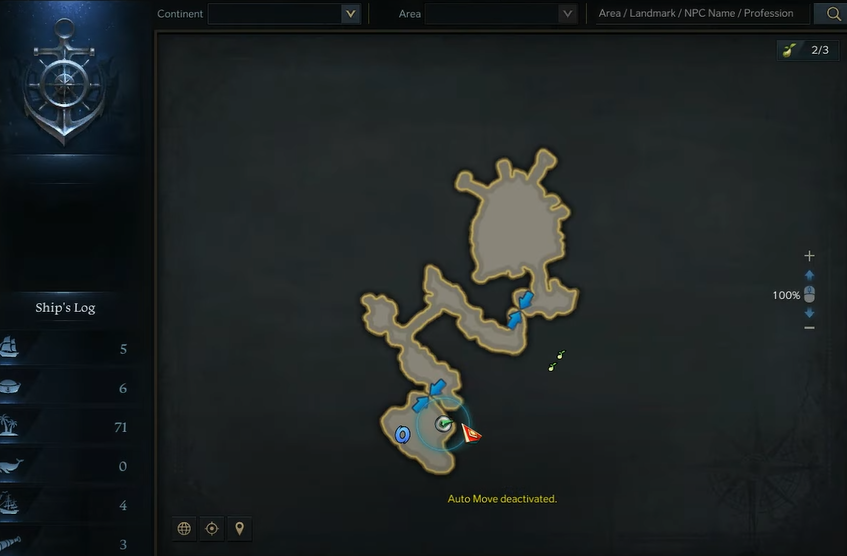
Mokoko seeds location
In total, you are going to find three Mokoko Seeds in Tranquil Isle. Players can get awesome rewards from the Mokoko Seed vendor. The location of all of them can be seen below.