WWE 2K22 Beginner’s Guide – Tips and Tricks

Are you a WWE fan? Then this is just for you. Read our WWE 2K22 beginner’s guide for some best tips and tricks to make your gameplay better.

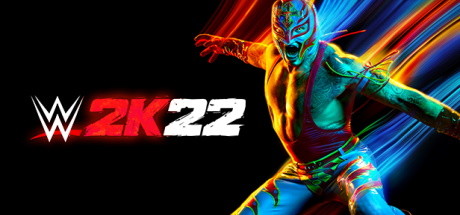
Visual Concepts and 2K Sports have just released WWE 2K22, a new professional wrestling video game. In total, it is the twenty-second installment of the video game series based on WWE. It is the ninth title in the WWE 2K series. The game will be available for Microsoft Windows, Xbox One, Xbox Series X/S, PlayStation 4, and PlayStation 5 on March 11, 2022.

The MyCareer mode in WWE 2K will be renamed “MyRISE” and will have different storylines for male and female superstars. Players may establish alliances, make enemies, and branch into subplots based on their decisions using manufactured superstars. The 2K Showcase will return, with Rey Mysterio as the cover hero, allowing gamers to relive the highlights of his WWE career. New features and improvements will be added to the 2K Showcase mode. Below is our WWE 2K22 Beginner’s guide with some tips and tricks.

Read How to beat Kronika in Mortal Kombat 11

WWE 2K22 Beginner’s Guide: Controls

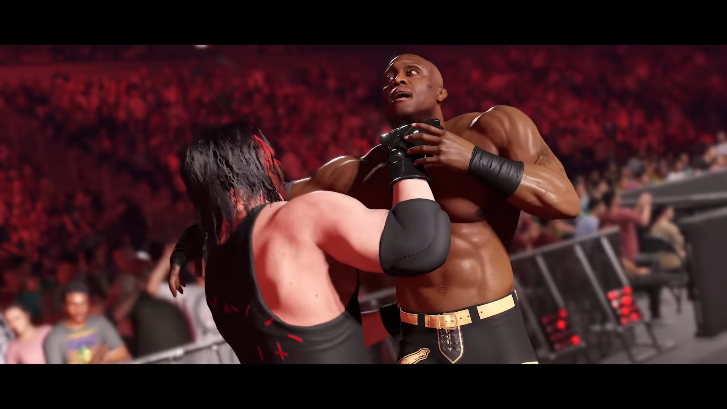
WWE 2K22 is highly combo-based, with the square being used to start contact with a mild attack before branching into Heavy Attacks with X or Grabs with O. The fourth and last strike is referred to as a Combo Ender, and it does additional damage. Opponents can break your combination by mirroring your button press, therefore it’s crucial to vary your technique during every battle rather than simply tapping square, square, square, square until your thumb blisters.

WWE 2K22 Beginner’s Guide: Grapples

Kevin Owens in WWE 2K22
Kevin Owens (2K)

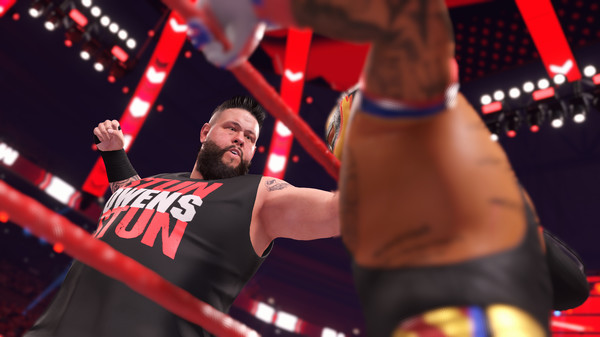
Your other important in-ring strategy is grappling. To conduct a grapple assault on your opponent, hit circle, then a square or X. Holding the left stick in a specified direction and hitting a button, as in previous installments of the series, performs a specific move. After locking up, you may Irish whip your opponent by pressing the circle.

Read Horizon Forbidden West Guide – 10 Things Everyone Should Know

The unique power of MyGM Manager

When you progress, you may need to use the power card corresponding to your onscreen avatar. They are as follows:

  • Shane McMahon: Coast To Coast (A general manager interference is worth +2 Show bonuses and is free for a week)
  • Stephanie McMahon: The McMahon Presence (double your income from arena attendance in a week)
  • Adam Pearce: Instigator (increases the level of all active rivalries by a level)
  • Sonya Deville: A Superstar’s GM (raise morale by 15 for the entire team)
  • William Regal: Legend Whisperer (After you play this card, you get to sign your first legend for free)
  • Custom Superstar: Beginner’s Luck (Gives your least popular superstar a 20+ percent popularity boost)

Use taunts to get Signature and Finisher moves

Signature and finisher moves
WWE 2K22 moves (YouTube)
Read Best Signature Moves and How to Perform them – WWE 2K22

WWE 2K22 offers more focused ways to boost Special Meters and Finisher Meters than simply doing moves in the ring. Utilize your character’s taunts, as they are able to increase your meter gains beyond simply antagonizing others and gaining a reaction.

Your Special Meter gain will be accelerated if you perform a Crowd Taunt, but your Finisher Meter will not gain by this. Your Finisher Meter gains will be boosted if you perform an Opponent Taunt, but your Special Meter will not gain by this. It is important not to try one too early in a match, as that could leave you vulnerable to attacks from your opponent.

WWE 2K22 Beginner’s Guide: Evolution cards

Sheamus in WWE 2K22
Sheamus (2K)

WWE 2K22’s new MyFaction mode, modeled after FIFA 22’s Ultimate Team mode, feels familiar to anyone who has played WWE SuperCard, a card-based mobile game. By winning matches and completing objectives, you build up to two sets of four cards – one male, one female.

Read FIFA 22 Guide – 10 Things you should Know

Every time you earn in-game currency, you are tempted to purchase new packs, hoping to find the most powerful cards. You can approach your climb to the top in a more effective manner. To do this, focus on Evolution cards. When you find any in your arsenal, you should deploy them right away since they automatically upgrade with sustained play. 

For more Guides, Tips, and Tricks

You can also check out our dedicated Video Games Guides section.

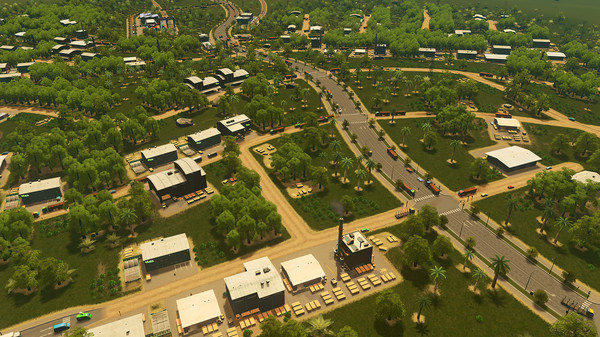
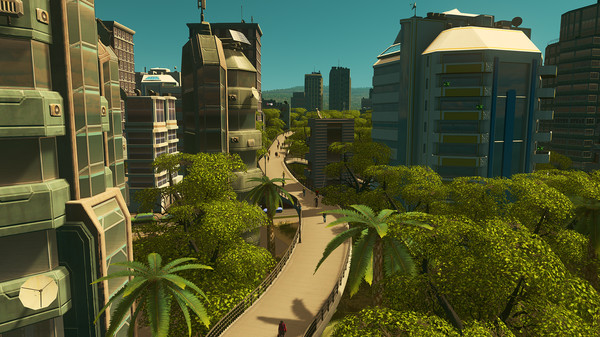
Cities Skylines Guide – 10 Tips and Tricks Everyone Should Know

Want to build an awesome city of your own? Read our Cities Skylines guide for some tips and tricks that you should know.

A city-building simulation game, Cities: Skylines was released by Paradox Interactive in 2015. It is a single-player simulation of city-building with an open-ended strategy. Controlling the zoning, road placement, taxation, public services, and public transportation of an area is a way in which players engage in urban planning. 

A player’s role in the game is to maintain the city’s budget, health, employment, and pollution levels, among other things. In addition, players have the ability to build a city in a sandbox mode, which allows them to express their creativity more freely. Here is a Cities Skylines guide with some of the best tips and tricks.

Read Hitman Sniper: The Shadows Beginner’s Guide – Tips and Tricks

Cities Skylines Guide: Trash

You have only two options for getting rid of the trash in your city: landfills, which fill up fast, and incinerators, which produce pollution. Ensure there are enough trucks for this purpose. However, there is another thing to watch out for – unused trucks follow traffic. You must ensure that traffic is flowing smoothly. 

Don’t build 4-way intersections

Make sure your crossings aren’t too close together; they shouldn’t be more than 10 squares apart. When joining roadways, the circular ‘hook points’ are employed for this purpose. Instead of four-way intersections, alternate three-way junctions. If you absolutely must have an interchange, keep it modest, efficient, and infrequent.

Set it and forget it

Cities Skylines development
Developed city (Paradox Interactive)

You may “set it and forget it” if you generate a net profit if you have enough police, fire, and health coverage, as well as landfills and other services. You may easily leave the game running in windowed mode while planning your future development. Popups will cause the game to pause, which is a good thing since as your city grows, so will the requirements of its citizens. 

When your city “levels up,” the game will pause to ensure that your cims do not leave with their new expectations. This is wonderful at lower levels when all you want to do is get a few items unlocked and some money so you can start growing properly.

Cities Skylines Guide: Traffic

The amount of traffic in your city determines how successful your city will be because once traffic hits the city, you’re screwed and you’ll probably never be able to earn enough money to recover. While there are too many traffic tips to mention, remember that most of your traffic jams begin at the intersections that were laid out for you at the beginning. 

You can move people around on larger roads and keep costs low by using smaller roads. A one-way road is the best way to avoid the small roundabout, as it tends to clog up too quickly. Red lights cause traffic to slow down at intersections, so you should avoid them at all costs. 

Read All Lost Ark Pets and How to Obtain Them

Cities Skylines Guide: Tax

Maintain tax of your city
Maintain Tax (Paradox Interactive)

In general, the more valuable the land, the more tax it generates. In addition, there is a loss component to this – the additional taxes may not be able to cover the upkeep on any improvement. All improvements should be placed in zones that touch the most zones. 

Build big roundabouts

In low-traffic areas, roundabouts are useful at the beginning, but they are less effective with more traffic, in which case you should incorporate bridges, tunnels, and additional lanes to improve flow. Make room for future development by laying large roundabouts.

Cities Skylines Guide: Buses

In general, buses are the easiest type of transport to turn a profit due to their low cost, easy setup, and ease of use. There are practically no restrictions on the number of buses that can be created by a depot, so you need only one. A depot costs less per bus when there are more lines.

Read Best Signature Moves and How to Perform them – WWE 2K22

Building an elementary school and a medical clinic should be your priority

Build the important areas
Building the areas (Paradox Interactive)

To build your city, you’ll need a medical facility and an elementary school. If you want to grow your city in the near future, these structures should be strategically located between where you are and where you want to go. A well-educated and healthy populace is the foundation of a flourishing city. As your city grows to fulfill the requirements of its inhabitants, continue to create these amenities in newer neighborhoods.

Do not build unnecessary things

If you want to build successfully in Cities: Skylines, you should build slowly. You should always check the demand meter in the bottom right corner of your screen to make sure everything is in order. By checking it, you can determine which city areas need further development. 

Keep an eye on how you will expand each area in the future in order to remain successful. Do not overdevelop. If your city continues to grow, make sure it has enough amenities to support the growing population.

Plant trees and small forests

Plant trees in Cities Skylines
Plant trees (Paradox Interactive)

Residents living nearby can benefit from trees and small forests by reducing noise pollution. See where there are noise problems by pulling up the overlay. Creating tree lines and mini-forests is a great way to limit the spread of noise, which allows you to put loud buildings like transportation hubs closer to residential areas.

For more Guides, Tips, and Tricks

You can also check out our dedicated Video Games Guides section.

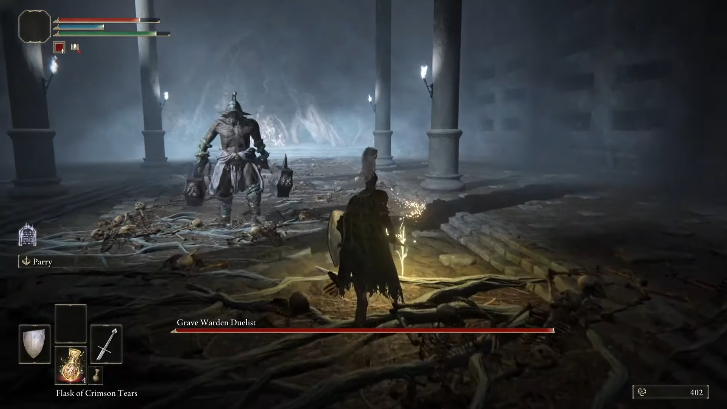
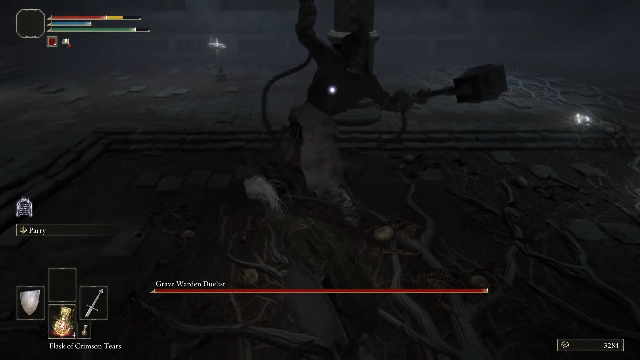
How to beat Grave Warden Duelist – Elden Ring

Facing difficulties on how to beat Grave Warden Duelist in Elden Ring? Do not worry, we are here to help you with our guide.

Elden Ring has an optional boss called the Grave Warden Duelist. Players can defeat him to obtain the Battle Hammer. There are also three Grave Gloveworts in the Dungeon where the boss resides. It is an upgrade material that may prove valuable in the future. In Elden Ring, players continue their struggle until they reach the next main challenge with optional boss fights scattered around The Lands Between. 

The Souls games are well known for their engaging boss fights. In this guide, we will teach you how to beat Grave Warden Duelist in Elden Ring with some best tips. Follow the guide thoroughly to beat this boss.

Fight with Grave Warden Duelist
Boss fight gameplay (YouTube)
Read All Boss Fights in Elden Ring – Ranked

Where to find Grave Warden Duelist?

Players can find the Grave Warden by jumping into Agheel Lake in the northeastern side of Limgrave. The dungeon can be found deep in the Murkwater Catacombs in Elden Ring. Once the tarnished have fought off a large group of skeletons, they will face a slug invasion. They can use fire to defeat these slugs or use the path to find a door through which they can enter Murkwater Catacombs.

Boss location
Location to find the boss (YouTube)

The Site of Lost Grace is accessible immediately upon entering Catacombs (like most dungeons in Elden Ring). Therefore, players need not worry about traveling long distances if they die during their stay in the Catacombs. Once you have entered the Catacombs, players should continue forward into a small corridor, where three Goblins guard the Lever. Once the tarnished has defeated the Goblins, interact with the Lever to open the boss room of the Grave Warden Duelist.

How to beat Grave Warden Duelist: Phase one

In the midst of countless pillars on either side of the chamber, the Grave Warden Duelist wields two huge hammers. You may take advantage of these pillars by aggroing the monster through them, causing him to waste his strikes on you. We propose that you apply Ashes like Lone Wolf Ashes to aid you to win. They don’t cause much damage, but they keep the boss distracted and allow you an additional opportunity to attack. This will increase your chances of success significantly.

Read Best Weapons in Elden Ring – Weapons You Should Be Using
Apply the lone wolf ash
Put ashes around you (YouTube)

How to beat Grave Warden Duelist: Phase two

After charging up, the boss will begin glowing red around three-quarters of the way through. It’s significantly more aggressive now, and it’ll do more harm. Hopefully, your Ashes are still standing, so it won’t be too big of a problem. 

This second phase, on the other hand, will not trigger you. It all relies on whether or not the employer has the opportunity to do so. It is possible to fully stagger the boss if you connect enough hits. This will lead it to stoop down, making it more vulnerable to harm.

Aside from that, you should follow the standard procedure. Its regular assault pattern consists of four to five strokes, which you won’t be able to parry due to a lack of stamina. As a result, use dodges to get out of the way as much as possible. You’ll rapidly overwhelm Grave Warden Duelist with the Lone Wolf Ashes and finish the fight.

Read Best Armor in Elden Ring – Ranked

Things to keep in mind

Back stab to beat Grave Warden Duelist
Backstab the boss (YouTube)
  • Swinging his Hammers up to five times, the Grave Warden begins his onslaught. He stops swinging and marches toward the tarnished as soon as players roll away from the boss’ strikes.
  • The Warden’s combo will be stopped once he gets far enough away from the tarnished.
  • Roll around him in an attempt to reach his back. He will not stop striking throughout this period, but will always finish with a powerful plunge attack that prevents him from moving. Make the most of the chance to deliver a backstab.

For more Guides, Tips, and Tricks

You can also check out our dedicated Video Games Guides section.

How to beat Arlo in Pokemon Go – Best Counters

Facing difficulty to beat Arlo in Pokemon Go? Read our Pokemon Go Arlo guide that will give you some of the best counters to win the battle.

Arlo and his Team GO Rocket mates have come to Alola to celebrate the Pokemon GO Season of Alola. Each season brings a fresh chance to combat Team GO Rocket members and liberate their Shadow Pokemon. Arlo appears to be bugging PokeStops from Team GO Rocket’s hot air balloon. 

Arlo’s Pokemon squad hasn’t changed with the new Season of Alola, but that doesn’t mean you couldn’t benefit from a refresher on how to defeat him. If you win the fight, you’ll be able to catch one of their Shadow Pokemon, which you may either ‘purify’ for a CP increase or leave as a Shadow with better attack stats if you’re competitive or want to master Raid battles. Read our Pokemon Go Arlo guide that will help you to beat Arlo with some best counters.

Arlo in Pokemon Go
Arlo (YouTube)
Read Tapu Koko Pokemon Go – How to beat, Raid Guide, Counters, and more

Pokemon Go Arlo

Bagon will be Arlo’s first Pokemon to deploy. He might employ Blastoise, Charizard, or Steelix in the second phase. He’ll bring Dragonite, Salamence, and Scizor in the last phase. We’ll show you how to counter each pokemon’s attacks so you can easily win this battle.

Pokemon Go Arlo guide: Best counters for Bagon

Shadow Bagon will always be Arlo’s first Pokémon. Fortunately, Bagon is a rather easy opponent to defeat. Ice, dragon, and fairy-type Pokemon are all vulnerable to it. You can use:

  • Palkia – dragon tail and draco meteor
  • Garchomp – dragon tail and outrage
  • Dragonite – dragon breath and dragon claw
  • Dialga – dragon breath and draco meteor

Pokemon Go Arlo guide: Best counters for Blastoise

Arlos' blastoise
Blastoise (YouTube)

Blastoise is a Pokemon of the Water-type. It is therefore vulnerable to Electric and Grass-type attacks. Here are some Pokemon that are the best counters for Blastoise:

  • Zekrom – Charge Beam and Wild Charge 
  • Tangrowth – Vine Whip and Power Whip 

Pokemon Go Arlo guide: Best counters for Charizard

Charizard is a Fire and Flying-type Pokemon, making it vulnerable to Electric, Rock, and Water-type Pokemon. Consider the following counter Pokemon and moves:

  • Zekrom – charge beam and wild charge
  • Omastar – rock throw and rock slide
  • Kyogre – waterfall and hydro pump
Read How to beat Cliff in Pokemon Go?

Pokemon Go Arlo guide: Best counters for Steelix

Steelix will be Arlo’s last Phase 2’s last Pokemon to employ. Steelix is a Pokemon of the Ground and Steel types, which means it is vulnerable to moves of the Fighting, Fire, Ground, and Water types. Here are some counter-pokemon to think about:

  • Heatran – fire spin and fire blast
  • Entei – fire fang and overheat
  • Excadrill – mud shot and rock slide
  • Swampert – Water Gun and Hydro Cannon

Phase 3: Best counters for Dragonite

Arlo will begin the last phase by employing Dragonite. Dragonite is a Dragon and Flying-type Pokemon, therefore Ice-type attacks are its main weakness, though it is also vulnerable to Dragon, Fairy, and Rock-type attacks. Here are the Dragonite counters:

  • Weavile – ice shard and avalanche
  • Palkia –  dragon breath and draco meteor
  • Sylveon – charm and psyshock
  • Dialga – dragon breath and draco meteor

Phase 3: Best counters for Scizor

Arlo's Scizor
Scizor (YouTube)

Scizor will be used by Arlo. Scizor is a Bug and Steel-type Pokemon, hence its primary vulnerability is against Fire-type attacks. The following are best counters for Scizor:

  • Standard Darmanitan – Fire fang and overheat
  • Reshiram – Fire fang and overheat
  • Moltres – Fire spin and overheat or fire blast
  • Charizard – Fire Spin and Blast Burn 
Read Swinub, Mamoswine, Piloswine in Pokemon Go — A Complete Guide

Phase 3: Best counters for Salamence

Salamence is a Pokémon of the dragon and flying types. It suffers from the same flaws as Dragonite. 

  • Dialga – dragon breath and draco meteor
  • Weavile – ice shard and avalanche
  • Palkia –  dragon breath and draco meteor
  • Sylveon – charm and psyshock

Rewards

You’ll get some fantastic goodies if you defeat Arlo or any other Team Go Rocket Leader. You will always receive 1,000 Stardust as well as a random pair of the following items:

  • A 12km egg
  • Unova Stone – 1
  • Max Potion – 1
  • Sinnoh Stone – 1
  • Revive – 1
  • Max Revive – 1

For more Guides, Tips, and Tricks

You can also check out our dedicated Video Games Guides section.

Animal Crossing New Horizons – A Complete Fishing Guide

Want to do some fishing? Here is our Animal Crossing New Horizons fishing guide that will help you to learn about every fish in the game.

To become a fishing master, you must catch one of each type of fish. Because there are so many various sites to catch fish, each of which spawns in a different area and at a different time, this might be difficult. Some may only be observed swimming in rivers on cliffs, while others can only be spotted swimming in rivers where rivers meet the ocean. 

The majority of fish are accessible throughout the day or during a certain time period, which varies from 4 a.m. to 9 a.m., 4 p.m. to 9 p.m. Because you can’t see the fish before catching them as you can with bugs, you’ll have to guess which one it is by the size of the fish’s shadow. Read our Animal Crossing New Horizons Fishing guide to learn more.

Using proper technique for fishing
Fishing (YouTube)
Read What is Nookazon in Animal Crossing New Horizons?

Animal Crossing New Horizons Fishing guide

Players will be able to unlock these fish in the new phone app after capturing them. Every insect and fish you’ve seen and captured will be featured in this huge library, along with a thorough description of their active hours, most popular places, and the seasons/months in which they’ll occur.

Once your island’s Museum is operational, you’ll be able to contribute your catches. While there are no incentives for doing so, your Museum will start to look very nice once it starts to fill up with fresh discoveries. Fish may also be sold for Bells if collecting isn’t your thing and you need some additional cash. While certain fish will be worth more than others, these Bells may be used to buy furnishings and other essential stuff like tools.

How to catch a fish

A very big fish
Fishing (YouTube)

Fishing in Animal Crossing: New Horizons is similar to other games in the series, in that you must first equip a Fishing Rod. To get the fishing rod, the player may either DIY create one or just purchase one from the shop in Resident Services.

Make your way to the water and check for little black shadows of fish swimming in the area once you’ve set up your new fishing gear. Cast your rod into the shadow once you’ve spotted the fish and wait for it to hook on!

Read Animal Crossing New Horizons Terraforming Guide

Animal Crossing New Horizons Fishing Guide

NameShadow sizeLocationTimeMonth & HemisphereValue
BitterlingSmallestRiverAll-dayNovember-March (Northern) / May-September (Southern)900
Pale ChubSmallestRiver9 a.m. – 4 p.m.Year-round (Northern and Southern)160
Crucian CarpSmallRiverAll-dayYear-round (Northern and Southern)160
DaceMediumRiver4 p.m. – 9 a.m.Year-round (Northern and Southern)240
CarpLargePondAll-dayYear-round (Northern and Southern)300
KoiLargePond4 p.m. – 9 a.m.Year-round (Northern and Southern)4,000

Goldfish
SmallestPondAll-dayYear-round (Northern and Southern)1,300

Pop-eyed Goldfish
SmallestPond9 a.m. – 4 p.m.Year-round (Northern and Southern)1,300
Ranchu GoldfishSmallPond9 a.m. – 4 p.m.Year-round (Northern and Southern)4,500
KillifishSmallestPondAll-dayApril-August (Northern) / October-February (Southern)300
CrawfishSmallPondAll-dayApril-September (Northern) / October-March (Southern)200
Soft-shelled TurtleLargeRiver4 p.m. – 9 a.m.August-September (Northern) / February-March (Southern)3,750
Snapping TurtleX LargeRiver9 p.m. – 4 a.m.April-October (Northern) / October-April (Southern)5,000
TadpoleSmallest
PondAll-dayMarch-July (Northern) / September-January (Southern)100
FrogSmallPondAll-dayMay-August (Northern) / November-Feburary (Southern)120
Freshwater GobySmallRiver4 p.m. – 9 a.m.Year-round (Northern and Southern)400
LoachSmallRiverAll-dayMarch-May (Northern) / September-November (Southern)400
CatfishLargePond4 p.m. – 9 a.m.May-October (Northern) / November-April (Southern)800
Giant SnakeheadX LargePond9 a.m. – 4 p.m.June-August (Northern) / December-February (Southern)5,500
BluegillSmallRiver9 a.m. – 4 p.mYear-round (Northern and Southern)180
Yellow PerchMediumRiverAll-dayOctober-March (Northern) / April-September (Southern)180
Black BassLargeRiverAll-dayYear-round (Northern and Southern)400
TilapiaMediumRiverAll-dayJune-October (Northern) / December-April (Southern)800
PikeX LargeRiverAll-daySeptember-December (Northern) / March-June (Southern)1,800
Pond SmeltSmallRiverAll-dayDecember-February (Northern) / June-August (Southern)500
SweetfishMediumRiverAll-dayJuly-September (Northern) / January-March (Southern)900
Cherry SalmonMediumRiver (mouth)4 p.m. – 9 a.m.March-June, September-November (Northern) / March-May, September-December (Southern)1,000
CharMediumRiver (mouth)4 p.m. – 9 a.m.March-June, September-November (Northern) / March-May, September-December (Southern)3,800
Golden TroutMediumRiver (mouth)4 p.m. – 9 a.m.March-May, September-November (Northern) / March-May, September-November (Southern)15,000
StringfishX LargeRiver (mouth)4 p.m. – 9 a.m.December-March (Northern) / June-September (Southern)15,000
SalmonLargeRiver (mouth)All-daySeptember (Northern) / March (Southern)700
King SalmonLargestRiver (mouth)All-daySeptember (Northern) / March (Southern)1,800
Mitten CrabSmallRiver4 p.m. – 9 a.m.September-November (Northern) / March-May (Southern)2,000
GuppySmallestRiver9 a.m. – 4 p.m.April-November (Northern) / October-May (Southern)1,300
Nibble FishSmallestRiver9 a.m. – 4 p.m.May-September (Northern) / November-March (Southern)1,500
AngelfishSmallRiver4 p.m. – 9 a.m.May-October (Northern) / November-April (Southern)3,000
BettaSmallRiver9 a.m. – 4 p.m.May-October (Northern) / November-April (Southern)2,500
Neon TetraSmallestRiver9 a.m. – 4 p.m.April-November (Northern) / October-May (Southern)500
RainbowfishSmallestRiver9 a.m. – 4 p.m.May-October (Northern) / November-April (Southern)800
PiranhaSmallRiver9 a.m. – 4 p.m.June-September (Northern) / December-March (Southern)2,500
ArowanaLarge
River4 p.m. – 9 a.m.June-September (Northern) / December-March (Southern)10,000
DoradoX Large
River4 a.m. – 9 p.m.June-September (Northern) / December-March (Southern)15,000
GarLargestPond4 p.m. – 9 a.m.June-September (Northern) / December-March (Southern)6,000
ArapaimaLargestRiver4 p.m. – 9 a.m.June-September (Northern) / December-March (Southern)10,000
Saddled BichirLargeRiver9 p.m. – 4 a.m.June-September (Northern) / December-March (Southern)4,000
SturgeonLargestRiver (mouth)All-daySeptember-March (Northern) / March-September (Southern)10,000
Sea ButterflySmallestSeaAll-dayDecember-March (Northern) / June-September (Southern)1,000
Sea HorseSmallestSeaAll-dayApril-November (Northern) / October-May (Southern)1,100
Clown FishSmallestSeaAll-dayApril-November (Northern) / October-May (Southern)650
SurgeonfishSmallSeaAll-dayApril-November (Northern) / October-May (Southern)1,000
Butterfly FishSmallSeaAll-dayApril-November (Northern) / October-May (Southern)1,000
NapoleonfishLargestSea4 a.m. – 9 p.m.July-August (Northern) / January-February (Southern)10,000
Zebra TurkeyfishMediumSeaAll-dayApril-November (Northern) / October-May (Southern)500
BlowfishMediumSea9 p.m. – 4 a.m.November-February (Northern) / May-August (Southern)5,000
Puffer FishMediumSeaAll-dayJuly-September (Northern) / January-March (Southern)250
AnchovySmallSea4 a.m. – 9 p.m.Year-round (Northern and Southern)200
Horse MackerelSmallSeaAll-dayYear-round (Northern and Southern)150
Barred KnifejawMediumSeaAll-dayMarch-November (Northern) / September-May (Southern)5,000
Sea BassX LargeSeaAll-dayYear-round (Northern and Southern)400
Red SnapperLargeSeaAll-dayYear-round (Northern and Southern)3,000
DabMediumSeaAll-dayOctober-April (Northern) / April-October (Southern)300
Olive FlounderLargeSeaAll-dayYear-round (Northern and Southern)800
SquidMediumSeaAll-dayDecember-August (Northern) / June-February (Southern)500
Moray EelNarrowSeaAll-dayAugust-October (Northern) / February-April (Southern)2,000
Ribbon EelNarrowSeaAll-dayJune-October (Northern) / December-April (Southern)600
TunaLargestPierAll-dayNovember-April (Northern) / May-October (Southern)7,000
Blue MarlinLargestPierAll-dayJuly-September, November-April (Northern) / January-March, May-November (Southern)10,000
Giant TrevallyX LargePierAll-dayMay-October (Northern) / November-April (Southern)4,500
Mahi-mahiX LargePierAll-dayMay-October (Northern) / November-April (Southern)6,000
Ocean SunfishLargest (Fin)Sea4 a.m. – 9 p.m.July-September (Northern) / January-March (Southern)4,000
RayX LargeSea4 a.m. – 9 p.m.August-November (Northern) / February-May (Southern)3,000
Saw SharkLargest (Fin)Sea4 p.m. – 9 a.m.June-September (Northern) / December-March (Southern)12,000
Hammerhead SharkLargest (Fin)Sea4 p.m. – 9 a.m.June-September (Northern) / December-March (Southern)8,000
Great White SharkLargest (Fin)Sea4 p.m. – 9 a.m.June-September (Northern) / December-March (Southern)15,000
Whale SharkLargest (Fin)SeaAll-dayJune-September (Northern) / December-March (Southern)13,000
SuckerfishLargest (Fin)SeaAll-dayJune-September (Northern) / December-March (Southern)1,500
Football FishLargeSea4 p.m. – 9 a.m.November-March (Northern) / May-September (Southern)2,500
OarfishLargestSeaAll-dayDecember-May (Northern) / June-November (Southern)9,000
BarreleyeSmallSea9 p.m. – 4 a.m.Year-round (Northern and Southern)15,000
CoelacanthLargestSea (rainy days)All-dayYear-round (Northern and Southern)15,000

Some Extra Tips for fishing

Animal Crossing New Horizons Fishing scene
Catching a fish (YouTube)
  • Fish appear like shadows beneath the water’s surface. The size corresponds to the sort of fish, but just like in real life, you won’t know what you’ve snagged until you bring it out of the water.
  • To prevent frightening away your fish, approach the riverbank or coast slowly. Cast your line such that the bait lands inside the visual range of the fish.
  • Once you’ve got the fish’s attention, it’ll start looking at the bait. It will sometimes consume it right away, and other times it may probe and poke at it numerous times before consuming it.
  • Wait until you hear a ‘plop’ and watch the lure vanish beneath the surface of the water. You just have a short time to hit ‘A’ and capture the fish immediately. Both the visual and audible clues will assist you, so make sure the volume is cranked up if you’re having problems.
  • Before you hoist your capture out of the water, the fish will begin swimming fast in a circle if you do this in time. You may unwind once this starts. It won’t make a difference if you pound ‘A’; you’ve already won. The fish will swim away if you click the button too late.

For more Guides, Tips, and Tricks

You can also check out our dedicated Video Games Guides section.

Phantomwing Island Guide – Tips and Tricks

There are a lot of things in Lost Ark’s Phantomwing Island. Do not worry if you are not aware of it. Read our Phantomwing Island Guide.

Phantomwing Island is a magical place filled with gorgeous Phantom Butterflies. Only when Adrinne appears does the island’s entrance open. For many gamers, the Lost Ark Phantom Wing Island is difficult to find, which is generating problems when attempting to find it. It’s part of the adventure islands, which are scheduled events in Raiders of the Lost Ark when an island rises from the sea, offering players a limited amount of time to complete missions and goals.

Read Lost Ark Drumbeat Island Guide – Everything you should know

How to get the Phantomwing Island

Phantomwing Island location
Phantomwing Island location (YouTube)

To begin, you’ll need Lost Ark ships to locate this location. Before facing the trials of this adventure island, you must have attained combat level 50 and equipped item level 250, implying that you should be in the end-game. Phantomwing Island is located slightly north of Papunika, a tiny continent, and southeast of Rohendel. If you go from Papunika to get there, once you reach the Eye of Hypnos, continue a short distance and the island will be seen.

It’s worth mentioning that, being an adventure island, you won’t be able to access it at all times, and it’ll only spawn during specific times of the week. So, you won’t be able to earn the Island Token every day. To find out when the island will spawn, look at your Procyon’s Compass, which is placed immediately under the minimap in the top right corner. You may also monitor the area chat, as other players will most likely report it if it appears.

Read Lost Ark Ghost Ship Guide – Location, Rewards, and more

Phantomwing Island Guide: Quests and Rewards

Phantomwing Island  rewards
Island rewards (YouTube)

There are around five quests on this island. 

  • “The Island Where Illusions Grow” quest given by Adras. You will get Legendary – Uncommon Card Pack x3, Pirate Coin x500, Silver x3,000 as rewards.
  • “The Guide Amongst the Illusions” quest given by Melissa. You will get Rare Battle Engraving Recipe Selection Pouch x3, Pirate Coin x1,500, Silver x5,000 as rewards.
  • “The Duty of the Last Knight” quest given by Adrinne. You will get, Rare Battle Engraving Recipe Selection Pouch x3, Pirate Coin x3,000, Silver x9,000 as rewards.
  • “For Adrinne” quest given by Guard Captain Saiki. You will get a Rare Engraving Recipe Selection Chest (Class-Exclusive) x2, Silver x13,000, Gold x200 as rewards.
  • “Adrinne of Light and Darkness” quest given by Guard Captain Saiki. You will get Silver x372 as a reward.
Read Asura Island in Lost Ark – Everything you need to know

Phantomwing Island Guide: Island Token

To begin the process of acquiring the Island Token, you must first arrive at the Lost Ark Phantomwing Island and accomplish certain objectives throughout the island. To begin, talk with Melissa, who will assign you the duty of tracking down butterfly trails across the island. You can easily follow the map and discover all three locations, which will then trigger a cutscene.

Phantomwing Island token
Phantomwing Island Token (YouTube)

Following this scenario, chat with Adrinne, who requests that you harvest phantom plants from a nearby cave. Return to her to complete the quest and begin a new one, in which she requests that you locate her weapon. When you try to pick it up, it’s near one of the cave openings, and you’ll have to chat with a man named Creon. He will lead you to the island’s Guard Captain, who will ask you about seeing Adrinne on the island. Return to Adrinne after drawing the sword once again.

After that, return to the Guard Captain and gather twenty Phantomwings in the island’s indicated region. This will start a boss fight with Adrinne, which may be done in a group. You must hit her through three phases until she summons a tornado. If you enter this vortex, you will be sent to her new position, where you may continue the fight. Repeat this method three times more until you’ve defeated her and finished the quest A Thousand Fluttering Nights and Days.

When Adrinne is defeated, she may drop the Island Token, but it is based on RNG, thus you may have to retry the quest a few times before receiving it. Aside from that, the fight is worth repeating since you can get a secret map, a rune of protection, and an Adrinne card.

How to get Mokoko Seeds on Phantomwing Island?

mokoko seeds location
Mokoko seeds location (Papunikia)

Mokoko Seeds are a delightful item in Lost Ark, and there are presently around 1200 of them accessible. Phantomwing Island has two Mokoko Seeds to locate. See the above map for the locations.

For more Guides, Tips, and Tricks

You can also check out our dedicated Video Games Guides section.

Hitman Sniper: The Shadows Beginner’s Guide – Tips and Tricks

Are you a sniper lover who fantasizes about being a hitman? Read our Hitman Sniper The Shadows Beginner’s guide to start the game.

Hitman Sniper: The Shadows is the sequel to Hitman Sniper, and it will put your killing precision to the test. Following Agent 47’s disappearance in the first game, the International Contract Agency, or ICA for short, is tasked with deploying the shadows, an elite sniper unit, to assassinate the target. 

Hitman Sniper: The Shadows builds on the exciting and innovative improvements of the previous sequel by expanding the surroundings and atmosphere, giving you an advantage in eliminating the target by whatever means required. Here is our Hitman Sniper The Shadows Beginner’s guide with some best tips and tricks.

Before you start, read Hitman Sniper: The Shadows Guide – Things You Should Know

Hitman Sniper The Shadows Beginner’s guide: Focus on the surroundings

Bullets aren’t the only method to assassinate people. You may also fire things in the surroundings to cause explosions and other effects that will take out opponents just as effectively. You may also create distractions, which earn you points and lead guards to more remote spots where you can perform a death shot without being seen. It’s helpful!

Hitman Sniper The Shadows Beginner’s guide: Special kills 

Accidental Kills
Accidental kills (Square Enix)

Publicly shooting people, as you might think, draws attention, which draws bullets. You can get around this by making shootings look like accidents or making bodies vanish. Include examples of killings committed in the context of the environment.

Shooting a bucket dangling over a well, for example, will attract an interested guard’s attention. When you shoot the guard while he’s checking the bucket, he’ll tumble down the well and disappear. You can shoot near windows since the opponent will be drawn to the sound and will approach it. If you shoot the opponent, he will fall through the window.

Hitman Sniper The Shadows Beginner’s guide: Score

In Hitman Sniper: The Shadows, your goal is to score as many points as possible in addition to completing the contract tasks. Your incentives increase as your score rises. Kills, moving kills, lured kills, headshots, and other types of kills can all score you points. Multi-kills may also be earned, either by deft shooting or by using a sniper’s special ability. 

Bonus points are also awarded for accidental killings. You’ll collect awards, unlock new agents, and level up your gear as you progress through the campaign, allowing you to earn more points and access later tasks.

Don’t make any witnesses

Witnesses can be a big problem
Be aware of the witnesses (Square Enix)

When no one else is around, try to kill guards and the like. Strangely, if someone suddenly dies in front of them, citizens and other guards will raise the alert. You don’t want your target to flee for their lives. That’s one of the best ways to fail a mission. Dead bodies, on the other hand, have a comparable effect on potential witnesses. Attempt to kill individuals while simultaneously disposing of them. 

Read How to beat Waterblight Ganon in Zelda: Breath of the Wild

Do not forget to reload

It’s simple to reload, but in the heat of combat, you could forget. Then, just as you’re about to take a superb shot, you realize you’re out of bullets and have to watch your target drift out of position. To avoid this disaster, get into the habit of swiping the screen every now and again. When participating in PvP, you should be mindful of this as well. You must keep track of your bullets since this is a timed competition.

Be aware of your objectives

Objectives in the game
Objectives (Square Enix)

Because not every mission has the same aim, review your objectives each time and play in a way that allows you to achieve them. Remember that you should usually shoot at your target last after you’ve taken care of everything else because the mission finishes only a few seconds after that individual dies. If you don’t take the time to stop and smell the flowers, you can lose out on some important details.

Read Brothers A Tale of Two Sons Guide – Best Tips and Tricks

Choose your character wisely 

Agent Kiya in Hitman Sniper the shadows
Agent Kiya (Square Enix)

In Hitman Sniper: The Shadows, six sniper assassins are featured, each with their gameplay approach, personality, and powers. You’ll need to know what each agent’s talents and weaponry are so you can plan your approach to finishing each contract.

  • Espelho’s Incendiary rounds are well-known.
  • With her Raifuru K62, Soji has an acid round.
  • Kiya possesses a lightning round with unequaled speed that flashily removes the target.
  • Stone possesses a temporal proximity mine that has the potential to blow up your target.
  • Kolzak specializes in contagion rounds.
  • Knight is your go-to choice for headshots.

Upgrade weapons

After completing the contract in the PvP mode, you can earn a material upgrade for your weapon in a rewards suitcase. You may upgrade your weapon to enhance damage, or your sight to expand your viewing range. You can also update your recoil to improve your sniper’s steadiness.

Read Best Armor in Elden Ring – Ranked

The Guards are not the same every time

Guards in Hitman Sniper the shadows
Guards are different (Square Enix)

Because not all the guards have been notified, they do not all pose the same threat. You should know how to distinguish between interested guards, suspicious guards, and alarmed guards. The first ones are simply investigating a strange circumstance, and you may be able to lead them around a facility in this fashion so that you may execute them where they won’t be noticed. Suspicious guards may have discovered a dead corpse or other signs that things isn’t quite right.

A guard who has been alerted is aware that there is a problem. Perhaps he witnessed someone being downed by a stunning sniper shot, or perhaps you shot at him and wounded him. In any case, he’ll most likely go for his radio to call in reinforcements. Your new priority is to take him out.

For more Guides, Tips, and Tricks

You can also check out our dedicated Video Games Guides section.

All Lost Ark Pets and How to Obtain Them

Who wouldn’t want a pet as a companion in Lost Ark? In our Lost Ark Pets guide, you’ll find all you need to know about pets. You’ll also discover how to get them.

Pets are one of the most significant qualities of life enhancements available in Lost Ark. They follow you around everywhere you go, catching any loo that falls to the ground. They can also remotely access your storage, send letters from anywhere, and even provide minor battle bonuses. Lost Ark, like most other MMORPGs, has a range of pets, some of which are entirely free to players. 

Since Lost Ark attracted over 5 million new players in its first few days, players will want to know about the extra friends they may obtain to aid them on their trip across Arkesia. Pets, aside from being a unique-looking cosmetic, also provide additional benefits. Below is the Lost Ark pets guide that will tell you everything about the pets and also how you can obtain them in the game.

Lost Ark Pet
Lost ARk Pet (YouTube)
Related: Lost Ark Free Mounts and How to Get Them

List of Lost Ark Pets

Lost Ark white bunny pet
Lost Ark’s White Bunny (lostarkcodex)
  • Acorn Cloak Shupi
  • Arong
  • Barbarrosa
  • Bilbrin
  • Blue Bunny
  • Blue Yoholing
  • Bonbon
  • Bori
  • Bouncy
  • Brave Achatemeow
  • Brulee
  • Bubbly Totoiki
  • Cacao
  • Cackling Totoiki
  • Carrot Cloak Shuri
  • Cheerful Totoiki
  • Cherry Cloak Shuki
  • Chipper Totoiki
  • Confident Chocolatti
  • Cookie
  • Cool Pongpong
  • Custard
  • Dorong
  • Drake
  • Enhance Aid Chuchu
  • Enrico
  • Excited Chromarong
  • Exuberant Totoiki
  • Festive Pepe
  • Floppy Frazio
  • Franco
  • Freddie
  • Fresh Chromarong
  • Fuzzy Frazio
  • Gold Yoholing
  • Gorong
  • Grape Cloak Shuna
  • Green Bunny
  • Grinning Totoiki
  • Happy Chromarong
  • Happy Totoiki
  • Heavy Walker-M1
  • Heavy Walker-M4
  • Helgachu
  • Helganew
  • Helgapim
  • Heavy Walker-M2
  • Heavy Walker-M3
  • Helgaron
  • Hwarong
  • Icicle Cloak Shushu
  • Ivory Heart Toto
  • Jamis
  • Jolmi
  • Jose
  • Josephine
  • Kidd
  • Lavian
  • Lisette
  • Lizabet
  • Mario
  • Mean Frazio
  • Mean Toto
  • Mocha
  • Nero
  • Nerran
  • Nervous Macchiato
  • O’Malley
  • Pink Bunny
  • Poiai
  • Poikoi
  • Poimui
  • Poipoi
  • Poirai
  • Porong
  • Proud Achatemeow
  • Pure Lulu
  • Puzzled Macchiato
  • Red Yoholing
  • Reliable Chromarong
  • Shushire Leopard
  • Shy Achatemeow
  • Shy Macchiato
  • Simon
  • Snickering Toto
  • Soft Chromarong
  • Splendid Achatemeow
  • Squawkie
  • Starfish Archie
  • Starfish Dugo
  • Starfish Hook
  • Starfish Pinkie
  • Starfish Sway
  • Stuffy Chocolatti
  • Timid Chromarong
  • icon
  • Tofu
  • Totoange
  • Totoanmeow
  • Totoanri
  • Totoenfant
  • Vertora
  • Vertorang
  • Vertori
  • Vertoto
  • Voldis Leopard
  • Wet Chromarong
  • White Bunny
  • White Yoholing
  • Yangeng
  • Yellow Bunny
Read Asura Island in Lost Ark – Everything you need to know

Lost Ark Pets Guide: How to obtain

Buying Helgachu
Buying Pet (YouTube)

By completing the “Learning About Pets” quest, all players can obtain a free Epic-quality pet. To begin the task, go to the Working Achatemeow NPC in the heart of Prideholme. It’s a quick instruction on how pet auto-looting works. If you missed this quest, a Guide quest that unlocks at level 50 and provides a walking egg companion when finished is also available.

Once you’ve got a pet, press “Alt + P” to access the pet menu. You can call any pets you possess from this menu, allowing them to auto-loot adjacent objects and offer extra benefits if you have Crystalline Aura-enabled.

If you don’t like the pet rabbit from the initial quest, you may get more by completing limited-time events or buying a pet in the cash store. Pets acquired in this manner cost Royal Crystal, the premium currency of Lost Ark. All Lost Ark Founder’s Packs include a pet.

Read Best Lost Ark Summoner Build – PvP and PvE

Power Pass Token

The Power Pass Token will assist gamers in leveling their freshly created secondary character up to level 50. While it is a free feature, players will only be able to use it after finishing “Ealyn’s Gift,” the final task in the North Bern narrative. Players will earn a Vern Power Pass Token after finishing the base content up to that time, which will contain another Power Pass when they cash in their first token.

This extra token may be used to take part in a number of optional lessons and guidance for the alternate character. One such instruction is named “The Adventurer’s Path,” and following completion, gamers will be given a range of Sebastian pets to choose from.

Founder’s Packs

Every Founder’s Pack includes a Founder’s Exclusive Pet. This means you may begin playing the game with a companion of your choice right away, rather than waiting for the first mission. When you open the Founder’s Exclusive Pet item, you can select one of three cats in black, brown, or white. The black one’s name is Nero, the white one’s name is Lizabet, and the brown one’s name is James.

Read Lost Ark Proxima Guide – Tips and Tricks

Either of them will accompany you on your quest and provide you with some little but vital assistance throughout the game! You will be able to purchase all of your Founder’s Pack products from the Store after finishing the Prologue.

Lost Ark Pets Guide: Pets Basic Stats and Effects

Pet effects
Pet Effect (YouTube)

Give your pets the ability to detect objects in their environment automatically. By clicking boxes such as currency, gear and products, resources, and so on, you may personalize and filter what your Pet picks up. Your pet will pick up on everything by default. One of the most major advantages of having a pet at your side is this.

Read How to get Jewel Coral in Lost Ark

Pet Effects are the player’s passive boosts that Pets provide. To activate Pet Effects, you must spend 120 Crystals. These effects will persist for 30 days once you’ve done it. Pet Effects will continue to operate even if you change Pets throughout that term if you have previously paid the activation charge.

When you initially register your pet, you will receive Pet Effects at random. Pet Effects can be changed through pet management. NPCs Only when Pet Effects are active can they be used. The Pet effect is not applied if you dismiss a Pet.

For more Guides, Tips, and Tricks

You can also check out our dedicated Video Games Guides section.

Best Armor in Elden Ring – Ranked

Are you confused about which one is the best Elden Ring armor? Do not worry, as we have ranked them in our guide for you.

Combat in Elden Ring is significantly influenced by character-building features from prior Souls games and associated intellectual properties, such as strategic and close-ranged melee combat with the use of skills, magic powers, and blocking and evading techniques.

Elden Ring is brimming with armor and armor sets for you to outfit your tarnished avatar with, but they’re not just for show. Each one has its unique set of stat enhancements and resistances that can defend you from otherwise lethal attacks or status illnesses. Most of the following armor may also be upgraded to make them even better. Below we have the guide which ranks the best Elden Ring armor. Read till the end, as we have stated the best armor in the end.

Snow Witch Set
Snow Witch Set (YouTube)
Read All Boss Fights in Elden Ring – Ranked

Raya Lucarian Soldier Set

While it isn’t visually stunning, the Raya Lucarian Soldier Armor Set is one of the more approachable early-game sets in Elden Ring and deserves to be mentioned. This lightweight armor set provides adequate Elemental protection as well as Physical and Magical Defense. The Raya Lucaria Soldier Set, which can be discovered in Liurnia of Lakes, will be dropped by Raya Lucaria Knights. 

Farming and getting their armor is straightforward because these are low-level opponents. Though you’ll probably have to replace it before the end of your quest, the Raya Lucarian Soldier Set does its job well and will provide you with hours of protection when you need it.

Malformed Dragon Set

The Malformed Dragon armor may be earned in the same region as the Beast Champion set but from a different boss. You must kill another Draconic Tree Sentinel in the Mountaintops of the Giants, who may be found in the Crumbling Farum Azula, rather than the one in the Capital Outskirts. This one is tougher to beat, but you may use poison damage on him because he’s weak to it. In addition to the Malformed Dragon set, he will drop 28,000 Runes.

Scaled Set

Scaled armor in Elden Ring
Scaled Set (YouTube)

This sort of armor is ideal for players who wish to boost their resistance to non-physical damage while maintaining a high level of composure. The Scaled Set is also less difficult to obtain than many of the other sets on our list. During the Volcano Manor questline, all you have to do is fight Old Knight Istvan, the first of the three invaders.

Raging Wolf Set

The medium-weighted Raging Wolf Armor Set offers several nice bonuses for Dexterity builds, dialing things down from the hefty Crucible Tree Set. For a lightweight armor set, the Raging Wolf Set performs a good job at defending its wearer from all sorts of damage and diseases. It also looks great.

Like the Crucible Tree Set, the Raging Wolf Set will not be accessible until much later in the game. After completing the Volcano Manor questline and assisting Knight Bernahl with an invasion, you will be able to get this gear. Here is the “Bloody Wolf” set that was included in the Elden Ring Network Test last year if you were lucky enough to play it.

Read Best Weapons in Elden Ring – Weapons You Should Be Using

Lionel’s Set

Lionel's Set armor in Elden Ring
Lionel’s Set (EldenRingWiki)

The Lionel’s Armor Set is one of the game’s heaviest armor sets. With outstanding Poise, fantastic defensive numbers, and fantastic illness resistance, Lionel’s Set is one of the best sets in the game. It also appears to be completely ludicrous but in all the right ways.

Prepare yourself before attempting this section, since it is recommended that you be at least Level 90. Until you reach Leyndell’s late-game region, you won’t be able to get your hands on this iron panoply. Lionel’s Set may be seen on a bed in the Lower Capital Church.

Beast Champion Set

As with other FromSoftware games, some armor sets may be obtained by killing the NPC who is wearing them, as is the case with one of the game’s greatest heavy sets: Beast Champion Armor Set. You will have good protection from Physical, Magical, and Elemental damage types as well as high Poise with the Beast Champion Set.

Unfortunately, in order to obtain this outfit, you must first kill Knight Bernahl (AKA Resucant Bernahl). However, before you murder him in cold blood for his amazing armor, we recommend completing his questline first, since murdering him too soon would stop several questlines you may be following.

Best Elden Ring Armor: Bull-Goat Set

Bull-Goat Set in Elden Ring
Bull-Goat Set (EldenRingWiki)

The finest armor in the game for physical resistance is without a doubt the Bull-Goat armor, which has just one disadvantage in the form of tremendous weight. However, if you play as a solely strength-based character, you should have no trouble equipping this gear without fear of fat rolling. It has the most poise of any armor set in the game, but it isn’t the most visually appealing, with gigantic horns jutting from its chest plate.

Find Patches on Scenic Isle in Liurnia of The Lakes and chat with him. Begin the Volcano Manor quest, but do not slay Rykard, Lord of Blasphemy yet. If you kill Patches or Rykard before finishing Patches’ quest, you will be unable to get this armor set.

Read Elden Ring – Which Keepsake Should You Pick

Best Elden Ring Armor: Veteran’s Set

Elden Ring Veteran's Set
Veteran’s Set (EldenRingWiki)

This armor set has one of Elden Ring’s best weight-to-posture ratios. As a result, it might easily have been an S-Tier armor, but it is exceedingly vulnerable to poisons and blights, which can be fatal in some battles. To obtain this set, you must defeat Commander Niall, who can be found on the roof of Castle Sol in Mountaintops of the Giants, which is located in The Lands Between’s northeastern region.

Best Elden Ring Armor: Crucible Axe Set

Crucible Axe Set in Elden Ring
Crucible Axe Set (EldenRingWiki)

If you don’t want really heavy armor that makes you fat roll, but still want adequate protection, Crucible Axe armor would be ideal. Many players see it as one of the most fashionable armor sets in Elden Ring. The full set may be gained by fighting Crucible Knight Ordovis, who can be found near Auriza Hero’s Grave in the Capital Outskirts’ eastern region.

It’s worth noting that this boss battle also features another Crucible Knight, so you’ll have to deal with two monsters at once. If you don’t want to battle two Crucible Knights, Deeproot Depths has a comparable Crucible Tree set. It is an underground location that may be reached by resting in a coffin after slaying Valiant Gargoyle in Nokron, Eternal City’s Siofra Aqueduct. You must defeat Crucible Knight Siluria there.

Best Elden Ring Armor: General Radahn Set

General Radahn Set
General Radahn Set (YouTube)

Starscourge After defeating Radahn, you will receive not only the best greatsword in the game but also one of the finest and most sturdy armor sets. Though another hefty armor set on the list, Radahn’s Armor Set is particularly badass-looking and provides great protection, making it well worth the effort to earn. Radahn’s Set provides strong Poise, Physical, and Magical Protection, and will aid you in resisting the majority of diseases.

To begin with, beat Starscourge Radahn, who resides in Caelid’s Redmane Castle. The Chamber Outside the Plaza Grace is the quickest way there. You’ll have a difficult time killing this monster if you don’t remember that he’s weak to Scarlet Rot and Bleed. When you’re done defeating him, go to Roundtable Hold’s Finger Reader Enia and pay 36,000 Runes for this amazing armor.

For more Guides, Tips, and Tricks

You can also check out our dedicated Video Games Guides section.

Snoop Dogg Joins Faze Clan – Everything you should know

Snoop Dogg joins Faze Clan. You heard it right. This is going to be some kind of entertainment pack. Here is everything you should know.

Snoop Dogg, a well-known hip-hop artist and fan of electric lettuce, has joined Faze Clan. Faze Clan, a “digitally native lifestyle and media platform anchored in gaming and young culture,” announced that Faze Snoop would join the board of directors once the firm goes public later this year. As a member of the roster, he will “co-create content, engage in important commercial activities, and launch items with the brand.”

According to Faze Clan’s chief strategy officer Kai Henry, the organic relationship between Faze and Snoop has been blossoming for years, and they are excited to officially welcome Faze Snoop to the family. As the first internet person and first-generation gamer, Snoop has always recognized the cultural relationship between music, lifestyle, and gaming. 

Read Valkyrae and YouTube Drama Explained

Snoop Dogg is now a well-known personality in the Web community. Faze Clan & Snoop have exciting plans to work in the metaverse, resulting in new ways for our fanbases to communicate. Except from the news that Snoop Dogg Joins Faze Clan, here is everything else you need to know.

Snoop Dogg’s Gaming life

Snoop’s gaming reputation is well-established. He made an impact on Terry Crews at EA’s Battlefield 1 live stream in 2016, started his own esports league, and streams games and vibes on Twitch. Despite this, Snoop joined Faze for the same reason that most aged pop culture celebrities join anything new: his child got him into it.

Read Who is ElXokas? — Net worth, Age, Height, and more

What is FaZe Clan?

FaZe Clan (formerly FaZe Sniping) is a Los Angeles-based esports and entertainment firm. Members from all around the world play games including Call of Duty, PUBG, Valorant, Fortnite Battle Royale, Counter-Strike: Global Offensive, Tom Clancy’s Rainbow Six Siege, FIFA, and Rocket League in the group, which was created on May 30, 2010.

FaZe Sniping made its YouTube debut on May 30, 2010. The organization was founded as a Call of Duty clan by Eric “CLipZ” Rivera, Jeff “House Cat” Emann (now known as “Timid”), and Ben “Resistance” Christensen. The three acquired a reputation for pioneering trickshotting in Call of Duty: Modern Warfare 2.

Snoop Dogg Joins Faze Clan

“My son Cordell realized that the kids identify with their brand, which is why he brought us together,” Snoop stated.

Cordell Broadus, Snoop Dogg’s son and a creative consultant at Channel 21, said he’s been keeping an eye on FaZe Clan’s progress in the gaming world. He sensed a natural link between what his father was doing and what Faze Clan was doing. 

“I was fascinated by the potential synergy between the two companies, so I brought them together in this collaboration. I’m excited for the rest of the world to witness what we’re going to do,” he added.

Snoop Dogg with FaZe Clan
Snoop Dogg with FaZe Clan (FaZe Clan)

He also mentioned that Faze employs a handful of people who aren’t professional gamers. Kyler “FaZe K1” Murray of the NFL, LeBron “FaZe Bronny” James Jr., Lil Yachty aka “FaZe Boat,” and Offset aka “FaZe Offset” are among the group.

“They won’t win The International, but they do represent FaZe Clan in the gaming community and across the converging media and entertainment sectors, which I believe is a fairly lucrative company in and of itself,” says the author.

For more stories

Check out the Entertainment section for more stories.