Best Classes in XCOM 2 – April 2022

Don’t know which class to use in XCOM 2? Read our best XCOM 2 classes list that will guide you to pick the best class.

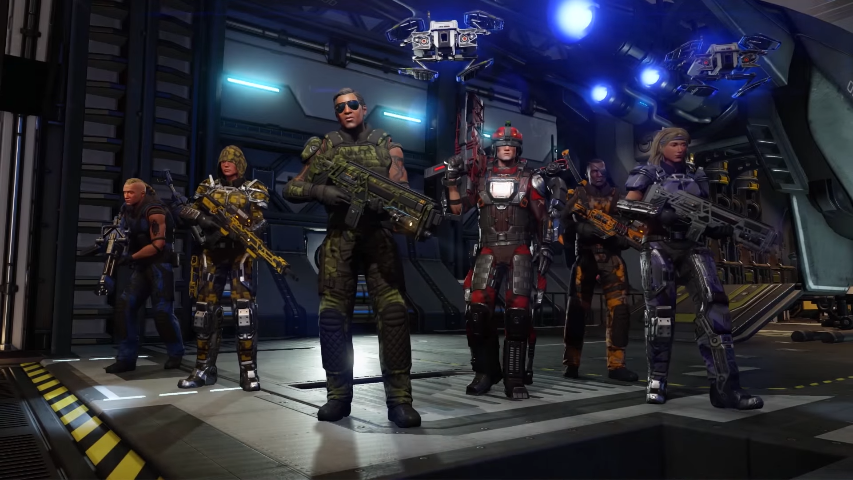
In the ongoing alien occupation of Earth, you are the commander of the XCOM military. This turn-based game is from a top-down perspective. Command a squad of soldiers to kill the aliens. Ranger, Grenadier, Specialist, Sharpshooter, and Psi operative are the five character classes in the game with their distinct soldier abilities. There are some other classes in the game as well that were added through the DLCs. Below is the list of the best XCOM 2 classes.

Read Pokemon Unite Tier List – Best Pokemon for each role

Best XCOM 2 Classes

Templar

Templars usually attack with their shard gauntlets. They are melee-based soldiers who wield an auto pistol. However, it is not that powerful. The reason they are among the best XCOM 2 classes is because of their ability to retreat. This is very beneficial for your team. They can easily eliminate the weak enemies to gain their focus meter. 
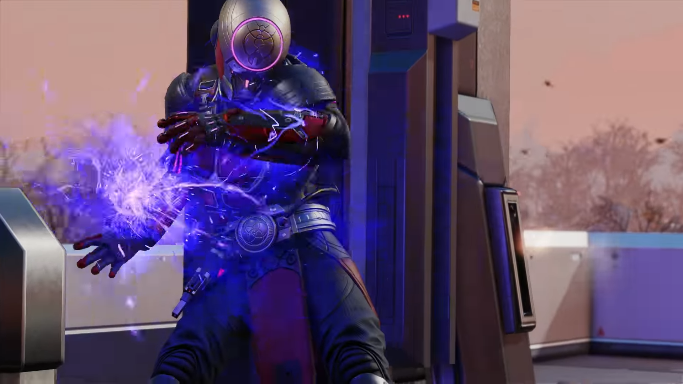
Templar class
Templar (YouTube)

Psi Operative

The major problem with this class is that they are not available at the beginning of the game. In addition to that, you will need to have Dr. Richard Tygan to build a Psi lab that will train the Psi Operatives. This is very time-consuming, and many players will try to avoid it. However, it is really worth your time. Training this class will definitely not be a waste of time. They can control the enemies’ minds and protect their teammates. Additionally, Psi Operative can remotely detonate grenades and grant a bonus action to the team.
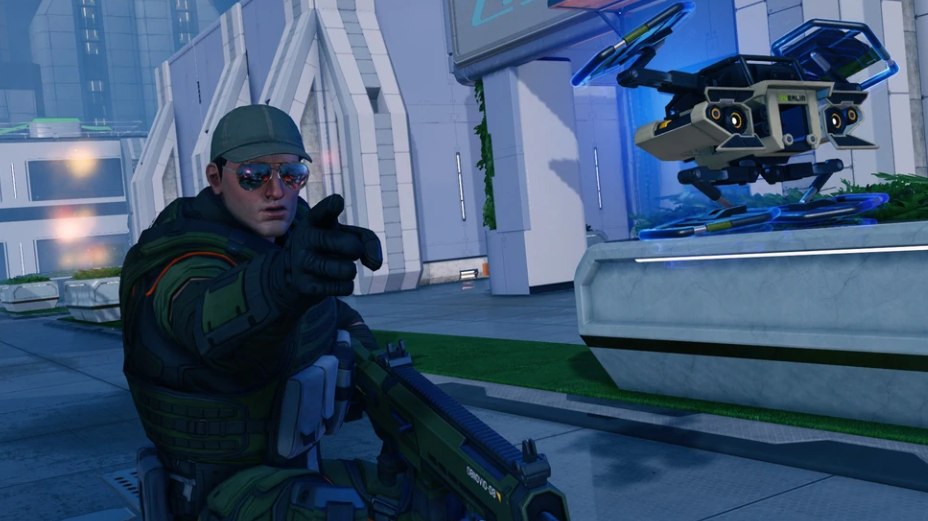
Read Shindo Life Element Tier List

Sharpshooter

Sharpshooter comes with two builds: Sniper and Gunslinger. If you love sniping then this is the best option. Go to rooftops, stay far away and snipe at aliens. If you choose gunslinger, you will have a pistol that will help you to shoot multiple times in a round. 

Grenadier

Grenadier class in XCOM 2
Grenadier (YouTube)

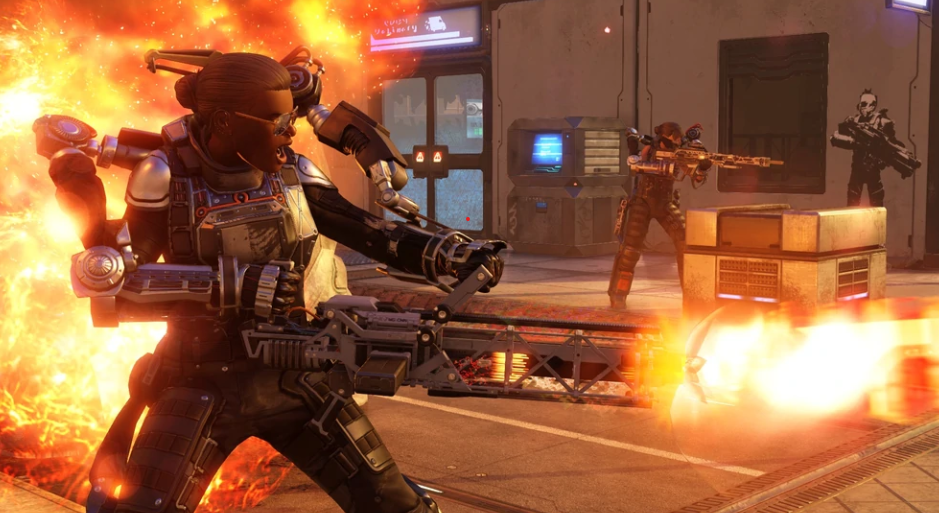
The name itself says everything. This class believes in explosions. They are the most dangerous of the classes since they carry a minigun cannon as well as a grenade launcher. They are a crucial element of the team. However, the only problem is their ammo is limited in the early game. 

You can ignore this because the Grenadier can do lots of things for you, like, destroying the enemy armor, and their covers, doing AoE damage and dealing major damage to a single target. This is the go-to class if your enemy has high HP, or they have armor. Grenadiers have a large variety of grenades to use.

Read Rainbow Six Siege Operators Tier List

Ranger

If you want to rush forward and attack the enemies, the Rangers is for you. They are one of the best classes on the frontline. They have great offensive attacks with their shotgun and other melee combos. If you like to play offensively, this class is for you.

Specialist

Specialists can help you get into restricted locations and do more damage to robotic enemies. Not only that, but they can also heal their injured teammates. You can heal them multiple times in a single mission. Specialists can also reveal hidden enemies. This class has lots of abilities that you can benefit from.

So these were the best XCOM 2 classes according to us. You can always try to experiment with each class to know which suits you the best. 

Specialist is the Best Classes in XCOM 2
Specialists (YouTube)

For more Guides, Tips, and Tricks

Check out our Video Games Guide Section for a more dedicated guide

Free Fire Max Guide – Tips for New Players

We have brought you the Free Fire Max guide with some tips. Also, know the difference between Free Fire and Free Fire Max in the end. 

Free Fire Max is nothing but a better version of the Free Fire. The Free Fire Max has great graphics and visuals, realistic animations, more difficulty, and much more compared to the normal Free Fire. If you are a new player, you might get confused and face a few difficulties while playing the game. Keeping all these things in mind, we have made a Free Fire Max guide for you. This guide has some of the best tips and tricks that you need to know. 

Read PUBG PC Guide 2022 – Now Free to Play!

Free Fire Max Guide: Explore and Learn 

If you are new to the game, it is recommended that you start playing and learn more. You don’t have to win all the matches at the beginning. It is fine to lose too. In Garena Free Fire MAX, maps are not randomized like in most battle royale games. 

Therefore, the more you explore and immerse yourself in it, the more familiar you will become with its layout and terrain. Even if trying to memorize this enormous map is tough, identifying key areas bit by bit will lead to greater success in searching for resources or strategizing around engagements.

Free Fire Max Guide: Characters

As a starting character, you have access to two default characters in Garena Free Fire MAX. You can unlock other characters to use their skills in combination with the passive traits of your character. The process of racking up shards and unlocking or upgrading characters will take some time, but they are all better options than the default characters.

You’ll be able to determine the one who is most suited to you if you have a good grasp of each of your characters’ distinct characteristics. Knowing how to use each character does not entail only knowing their strengths and weaknesses. Both for cooperative and competitive reasons, it would be advantageous for you to have a solid idea of the special traits of each character.

New characters
Free Fire Max Characters
Read PUBG New State Guide for Beginners – Tips and Tricks

Sounds will help you in the fight

This is a very basic thing that you must do in every battle royale game. There are many different sounds that you will have to focus on in the game. If an enemy shoots you with a sniper, the sound will be different from a normal gun. You will have to quickly spot the sniper or just hide somewhere for the time being. The other sound you have to keep in mind is footsteps. When an enemy is running close to you, you can hear the footsteps. This can be very beneficial to be prepared to attack first. 

Danger Zone

A bit of a change was made to the Danger Zone compared to the original Free Fire, where it appeared to be easier to identify. When playing Free Fire MAX, the giant blue portal leading to the DZ can be difficult to spot at first. This version of the game has a bit more clarity, so you’ll need to be more alert when it is closing in. Since you can see lightning, you can recognize it more easily.

Read Shindo Life Element Tier List

Go for the guns that suit your gameplay

It is always recommended that pick the guns that are best suited for you. Don’t try to use guns just because everyone is using them unless you are perfect with them. You might play great with some other gun that all players are not using. This is completely okay. So try out all the guns at first and then decide which one is the best for you.

Free Fire Max Gameplay
gameplay (YouTube)

Free Fire vs Free Fire Max

There is not a big difference in both the games. Read the below to know the difference between Free Fire and Free Fire Max.

New features, characters, and customization

A number of features are included in Free Fire Max, such as new characters, abilities, and more. Garena Free Fire Max also allows players to customize maps that they play on. The feature is called Craftland.

Free Fire Max craftland Gameplay
Craftland gameplay (YouTube)
Read Best Free To Play Team in Genshin Impact

Graphics

One of the most important reasons Free Fire Max was made is to improve the graphics. It includes ultra HD texture and better visual graphics compared to the normal Free Fire.

Draw Distance

In Free Fire Max, higher draw distances are achieved by using high-end devices. It is the best news for you if you are a sniper. This is because snipers can have a great chance to snipe out the enemies from long distances because of the draw distance. With this, it becomes more real and easy for you to spot the enemies.

For more Guides, Tips, and Tricks

Check out our Video Games Guide Section for a more dedicated guide

 How to Unlock the Unicorn Mount in Lost Ark

We have brought you a guide that will tell you how to unlock the unicorn mount in Lost Ark. Read the steps carefully to get the mount.

Lost Ark offers you lots of things: You can travel to different islands, play PvP and PvE, and customize your characters; You can also get different skins for your characters, ships, and mounts. There are several mounts available in Lost Ark that may be acquired and utilized if you choose to use them. 

You can ride mounts in Lost Ark due to their unique talents and abilities. Some mounts can be used in activities because of their powers and capabilities. Among them, there is a new mount. In this guide, we will tell you how to unlock the unicorn mount in Lost Ark.

unicorn mount
Unicorn mount (YouTube)
Read Lost Ark Free Mounts and How to Get Them

How to Unlock the Unicorn Mount

You will have to watch the G4TV Lost Ark invitational tournament. You can watch it on the official twitch stream or on any other streamers’ Twitch channels. It started on April 12th. This Twitch Drop award is accessible to tournament participants and some co-streamers until April 13, 2022, when it will be made available to the Lost Ark Creator Program. Follow the steps below to know how to unlock the unicorn mount.

  • First, link your Lost Ark and Twitch accounts. Click here to link accounts.
  • By logging in to Steam and Twitch, you can complete your processes.
  • Enable the Twitch Drops.
  • Follow the streams that have “Drops Enabled” in their channel tags to see if they qualify.
  • To get the rewards, which include a unicorn mount and 1000 amethyst fragments, you will have to watch the stream for 2 hours.
Read Lost Ark Drumbeat Island Guide – Everything you should know

Check your Twitch notification

After you watch it for 2 hours, you will get a Twitch notification that you have unlocked the New Lost Ark Twitch Drop. You will have to wait for a while as it can take a few hours to add all the rewards to your in-game inventory. The event began at 11 p.m. on Tuesday, April 12, and will close on Monday, May 9, 2022. As a result, you’ll only have a month to reclaim your original mount.

rewards after watching the stream on twitch
Rewards in the inventory (YouTube)

For more Guides, Tips, and Tricks

You can also check our dedicated Video Games Guides section.

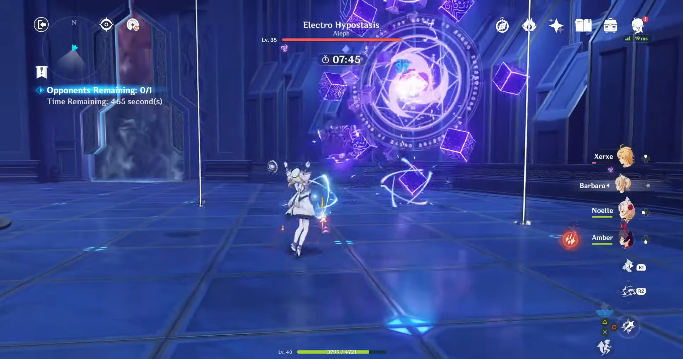
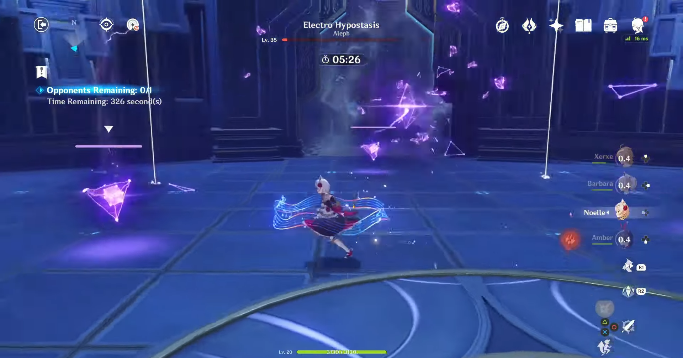
How to Beat the Electro Hypostasis in Genshin Impact – Attack Patterns, Strategy, Rewards, and more

We have brought you the Genshin Impact guide that will tell you how to beat the Electro Hypostasis easily.

Hypostasis are one of the most interesting bosses of the game. Each Hypostasis boss is based on an element. Therefore, for each boss of this type, you will have to make a separate strategy to win and a different team. One of them is the Electro Hypostasis. This boss has the electro advantage and can attack you very aggressively. But how to beat the Electro Hypostasis in Genshin Impact? To know the answer, read our guide that will show you the best strategy, attack patterns, and much more.

Electro Hypostasis appearing
Read Genshin Impact The Chasm – 10 Things You Should Know

Where to find Electro Hypostasis?

You can find the Electro Hypostasis in Cape Oath which is near the Eagle’s Gate domain. The location is not that hard to find. You can access it from the traveler guide book too.

Best Team to beat Electro Hypostasis

Bringing out the Electro-based users will be of no use. The boss is immune to those attacks. You can use long-range characters or pyro characters. The below free characters are recommended for this boss fight. 

  • Kaeya
  • Xiangling
  • Barbara
  • Traveler (Geo)
  • Noelle
  • Amber
Read Best Free To Play Team in Genshin Impact

Electro Hypostasis Attack Patterns

Rock, Scissors, Paper – In this attack, the boss uses a combo to attack the player. First, it will punch, then sweep left to right on the ground, and at the last, he will form into a flat surface to slam on the ground with great power. This attack has great power and it can give good damage to the player. Moving and dodging rapidly is the only way to escape this. Run away as far as possible from the boss.

Clap – The boss will run towards the player and attack you in a pattern of a clap. If this attack hits you, it will cost lots of damage and can also knock you down. It is recommended to run backward when the Electro Hypostasis is using this attack, after this, quickly go for an attack.

Electrostorm – Do not get confused when the boss falls down without you even attacking. He is preparing for another attack. A circle will appear under the boss and if you are inside that circle, you will get hit badly when the boss throws its armor and attack with an electro beam. Stay out of the circle to be safe.

Drill – The boss will create a drill and then attack the player with a barrage of slow missiles. All you have to do now is evade and attack, as the boss’s core will be exposed.

Electro Hypostasis attacks
Read Genshin Impact Lost Valley Domain – Location, How to Unlock, Best Characters, and more

How to Beat the Electro Hypostasis

Electro Hypostasis, like all other Hypostasis opponents, is weak when attacked at its core. There is nothing to worry about in this fight. All you need to do is just keep avoiding all the attacks that the boss uses and then wait for the right chance to attack its core. The boss will surely make many openings where you can attack its core. So, just wait for the right moment.

When the Electro Hypostasis is going to die, it will drop the armor. This does not mean you can now attack very easily. The boss becomes more invulnerable.  Electro Hypostasis will summon three crystals around itself. You will have to destroy all of them in order to beat the Electro Hypostasis. 

Now, the difficult part is when you fail to destroy these crystals, each of them will restore 15% HP of the boss. Attacking these crystals with normal attacks won’t be any help. You will have to use the elemental attacks to eliminate them. The trick here is to save your elemental attacks in the fight just to use them later on against these three crystals. 

boss fight gameplay
Three crystals summoned by the boss (YouTube)

The most irritating part is if the boss regains its health, you will have to again bring it to the end and the crystals will appear again. The crystals, on the other hand, will have the same level of health as previously. As a result, the second time should be sufficient to complete the boss fight.

Read How to beat Perpetual Mechanical Array in Genshin Impact

Rewards

You will need 40 original Resin to obtain the rewards. You will get the following Material and artifacts drops:

Material drops

  • Vajrada Amethyst Gemstone (Lv. 75+)
  • Vajrada Amethyst Chunk (Lv. 60+)
  • Lightning Prism (Lv. 30+)
  • Vajrada Amethyst Fragment (Lv. 40+)
  • Vajrada Amethyst Sliver (Any Lv.)

Artifacts

  • Traveling Doctor
  • Instructor
  • Lucky Dog
  • Gladiator’s Finale
  • Wanderer’s Troupe
  • Prayers for Wisdom

For more Guides, Tips, and Tricks

You can also check our dedicated Video Games Guides section.

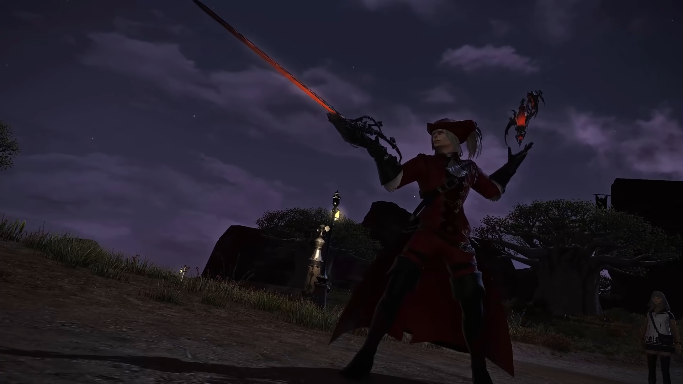
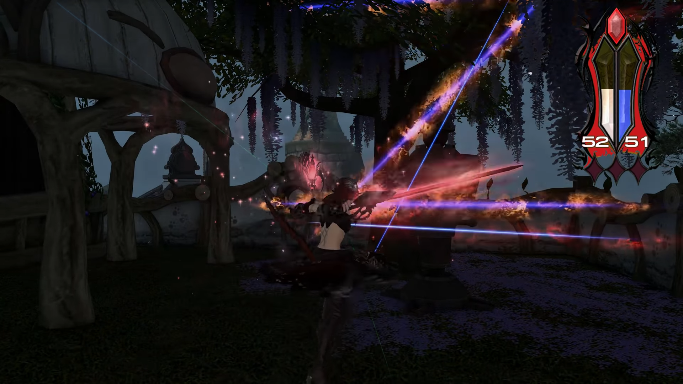
Final Fantasy 14 Red Mage Guide – Tips and Tricks

We have brought you the Final Fantasy 14 Red Mage guide with some tips and tricks. Learn more about the Red Mage.

People took shelter in Gyr Abania which is on the eastern edge of Abalathia’s Spine. They were guided from the Sixth Umbral Calamity’s treacherous floodwaters. Many people who took shelter here were refugees from Mhach and Amdapor. Slowly as time passed, new disciplines were made. This is when the red mages came forward to fight against the enemies.

A typical mage and a swordfighter together make the Red Mage. With the chain spell ability, Red Mage can attack very rapidly with a barrage of magic attacks. To know more about the Red Mage, read our Final Fantasy 14 Red Mage guide, which has some of the best tips and tricks.

Read Stranger of Paradise Final Fantasy Origin Guide – Tips and Tricks

Final Fantasy 14 Red Mage Guide: Lucid Dreaming

Lucid Dreaming is one of the most important things about the Red Mage because without it, regenerating MP will not be possible. Mana less than 70% is the recommended condition to use this ability. Keep in mind not to use it on cooldown. This is because, while using Lucid Dreaming, Red Mage will not be able to spend MP faster than it is restoring. 

Final Fantasy 14 Red Mage Guide: Balance Gauge

Balance Gauge is one of the factors that makes Red Mage unique because this gauge shows their accumulated White and Black Mana. Certain spells are required to obtain these two types of Mana. With the help of the balance gauge, you will be able to see the amount of Black and White Mana of the Red Mage. To collect the Black Mana, you will need to cast Verfire, Verthunder, and Verflare. On the other hand, casting Verstone, Veraero, and Verholy will give you the White Mana. 

Balance gauge at the top right corner (YouTube)
Read Final Fantasy VII: The First Soldier Beginner’s Guide

Keep the Mana close to each other

The crystal that is at the top of the balance gauge changes color if the gap between Black and White Mana increases. This will get more challenging to accumulate the lesser of the two. How will you know about it? This will happen once the gap between both Black and White Mana is at 31 and more. This is the reason you should keep the Mana close to each other every time. 

Get more MP

As we mentioned above, Red Mage depends on MP reserves to activate the Chain spell. If you use combos at the enemy at the last moment, which is when the enemy is going to die, you can activate the effects of Ambitious edge or Will of the Blade. This will guarantee you a soul burst, resulting in more MP.

Gameplay (YouTube)

Pair with the right class

Pairing your characters with the right class is very important in Final Fantasy. A good combo will always be beneficial for you. For Red Mage, you can pair it with a class that has great ability in MP recovery. This will make Read Mage even more powerful.

Read FFXIV Reaper Guide – How to play Reaper in Final Fantasy XIV

Use Diversion

The diversion will be very useful if you are not using potions. In addition, you can utilize it for jumping on adds quickly without pulling the aggro. This is more beneficial, especially in PUG situations.  

Do not use oGCDs between Hardcast and Dualcast

The oGCDs are “Off Global Cooldown” that have their own cooldown timer. You can use the oGCDs in-between global cooldown (GCD) abilities, spells, or weapon skills. However, using oGCDs between your Hardcast and Dualcast spells is not recommended. The reason is that Hardcasted spells have a 2.0s cast while the GCD is 2.5s, and this is why you can not use the oGCDs between the Hardcast and Dualcast spells. 

Final Fantasy 14 Red Mage Guide: Acceleration

Acceleration works on finishers. However, do not use it in these two cases: If you have less than 12 seconds on Impactful and both procs are still active. If you have both Vestone and Verfire proc and your Mana is between 60-60 or 80-80. 

Gameplay (YouTube)

For more Guides, Tips, and Tricks

You can also check our dedicated Video Games Guides section.

Pokemon Unite Supporter Guide – Tips and Tricks

Want to play as a supporter? Read our Pokemon Unite Supporter Guide which has some of the best tips and tricks for you.

There are several types of Pokemon in the Pokemon Unite, each with its own set of powers, perks, and other abilities. Many players prefer to have an attacker Pokemon so that they can just go forward attack and win the battles. These Pokemon do not think much about the defense. 

However, the hidden gems are the supporter Pokemon. These Pokemon don’t go away straight in the battle for an attack. They stay behind and support the other Pokemon to do their job. Honestly, the supporter is as important as any other role. So, today we have a Pokemon Unite Supporter guide with some tips and tricks for you. 

Read Pokemon Unite Attacker Guide – Tips and Tricks

Pokemon Unite Supporter Guide: Position

When it comes to the position of the supporter Pokemon, you can place them at the top or at the bottom lane. This is because they stay with the attackers to support them, and attackers stay around these positions. Your primary job is to provide as much support as possible to the attacker Pokemon so that they don’t go down quickly. Therefore, the position plays an important role for the supporter Pokemon. 

Don’t Play Solo

It will be a very bad choice if you are thinking to play solo with a supporter Pokemon. They are not meant for this role. The attacker can go solo and attack the enemies. However, it’s a problem for the attacker too since it has low HP. 

Similarly, supporter Pokemon do not have low HP like the attacker, but they do not have the high attacking power either. This is the reason that it is not recommended to play solo. Staying close to a teammate and supporting them is the best option to win with support Pokemon.

Read Pokemon Unite Tier List – Best Pokemon for each role
Pokemon unite gameplay
Gameplay (YouTube)

Watch your teammates

Your teammates might get very aggressive in between the battle. By doing this, they will need lots of support. And the job of a supporter here is to look at who requires the most help and when they need it. Adjust your support abilities, be aware of the enemies, watch your teammates and support them whenever they need it. 

Farm EXP for your team

Generally, everyone levels up quickly to get the upgrades. However, in a supporter’s case, they have to let their teammates level up first. Farm EXP for the attacker or an all-rounder so that they can upgrade and get powerful quickly to win the battle. If you upgrade yourself, the attackers might die quickly and you will lose the battle.

Read Pokemon Unite Tsareena Guide – How to win games easily

Pokemon Unite Supporter Guide: Exp. Share

Exp. Share is the best supporter item that can assist to distribute the EXP to the teammates equally. Additionally, the supporter will get a movement speed bonus. With this, you can change your positions quickly to support your teammates.

Pokemon unite gameplay
Gameplay (YouTube)

Pokemon Unite Supporter Guide: Best Supporter Pokemon

Eldegoss

In addition to healing all the teammates, this Pokemon will provide the shields as well. As a result, your team will survive for a long time during a fight. Eldegoss provides a movement speed bonus that will support the teammates to either chase the enemies quickly or escape during the battle. One of its best moves for healing is Synthesis and Pollen Puff. 

Mr. Mime

Mr. Mime can create barriers to block the path of an opponent. This will be very beneficial if you use it at the start because your teammates have a great chance of attacking. However, its main move is the Guard Swap as it can manipulate the defense system of the enemies. Mr. Mime has a good endurance making him stay in the fight for a long time.

Mr. Mime using his barier
Mr. Mime’s barrier (YouTube)
Read Pokemon Legends Arceus Guide – Best Tips and Tricks

Wigglytuff

This Pokemon can stun the enemy or make them sleep, making it a great chance for your team to attack. With its Starlight Radical passive ability, Wigglytuff can provide protection to the teammates. This Pokemon can slow down enemies, and call them closer to attack them easily. Wigglytuff is a great supporter to win the battles. 

For more Guides, Tips, and Tricks

You can also check our dedicated Video Games Guides section.

How to Beat Thunder Manifestation in Genshin Impact

Facing difficulties in defeating Thunder Manifestation? Don’t worry, our guide will tell you how to beat Thunder Manifestation in Genshin Impact. 

In Genshin Impact, the Thunder Manifestation is a normal boss with whom you will fight. You will face the boss in Seirai Island’s Amakumo Peak. The boss is a little different from other bosses in the game. It does not have specific phases but its vast variety of attacks is what you have to look for. Thunder Manifestation can attack you from long and short ranges. But how to beat Thunder Manifestation? To know the answer, read our guide below that has all the details in it. 

Thunder Manifestation fight gameplay
Fight gameplay (YouTube)
Read Genshin Impact The Chasm – 10 Things You Should Know

Thunder Manifestation attacks while not enraged

  • Strike Probes: The boss will fly into the air and strike with electro probes that will deal with 30% ATK as AoE DMG. Additionally, the boss will gain rage when the player is in range of this attack.
  • Random Strikes: Thunder Manifestation will attack with several lightning strikes. Each strike will deal 78% ATK.
  • Full area strike: If the boss is not enraged, it will unleash a powerful electro shockwave in the entire area that will deal with 50% ATK. 

Thunder Manifestation attacks while enraged

  • Blink: The boss will teleport anywhere in the arena in a flash.
  • Slicing storm: In this attack, Thunder Manifestation rotates its wings and spins forward to hit you. If it hits you, it can deal up to 50% ATK.
  • Wing smack: Thunder Manifestation will smack you with its wings that can deal almost 100% ATK as electro DMG.
  • Lightning walls: Two lightning walls will be summoned by the boss at the sides of the player that will close in very fast. This attack deals up to 180% ATK.
  • Electric feathers: The boss will attack you with five sets of electric feathers, dealing a maximum of 52% ATK.
  • Dive attack: Thunder Manifestation flies in the air and lands near the border of the arena. After this, it quickly dives forward, dealing 150% ATK.
  • Lightning bolts rain: The boss will start raining lightning bolts on the player in a circular area. Each strike will deal78% ATK.
  • Electrical prison: Attacks the player with a thunder circle after charging up. When the circle stops, it will activate an electrical prison to attack the player. This will deal with 50% ATK.
Thunder Manifestation attacking
Boss Attacking (YouTube)
Read Genshin Impact Lost Valley Domain – Location, How to Unlock, Best Characters, and more

How to Beat Thunder Manifestation

Now that you know all the attacks of the boss, it’s time to beat it. Thunder Manifestation says everything by its name. The boss uses electro attacks and is immune to electro attacks. You can use melee range characters to attack but the boss sometimes flies in the air. Therefore, use characters that can attack at long ranges as well. 

In addition to its massive HP, the boss can dodge many attacks as well. It is recommended not to rush or get too close to the boss every time. Take your time and attack according to the plan. The boss will start a fight in a normal state where he will use lots of electro attacks on you. You just need to be careful and dodge those attacks. Only attack when you find an opening. If you get hit by the attacks, Thunder Manifestations’s Rage bar will fill up. 

Once the boss is Enraged, powerful attacks will be launched that will deal very high damage. You can use geo characters to minify the attacks. Try to go behind the boss and attack. This will be very helpful because the boss will be very quick and will be teleporting. So wait for his attack, dodge it, then quickly use your attack. By following this, you can easily beat Thunder Manifestation in Genshin Impact. 

beat Thunder Manifestation with long range
Attack with long-range characters (YouTube)
Read Best Free To Play Team in Genshin Impact

Recommended Characters to beat the boss

  • Aloy
  • Amber
  • Ganyu
  • Ayaka
  • Diona 
  • Bennett 
  • Zhongli
  • Xingqiu

Rewards

You will get the following rewards once you beat Thunder Manifestation:

Material Drops

  • Vajrada Amethyst Silver (Any Lv.)
  • Vajrada Amethyst Fragment (Lv. 40+)
  • Storm Beads (Lv. 30+)
  • Vajrada Amethyst Chunk (Lv. 60+)
  • Vajrada Amethyst Gemstone (Lv. 75+)

Artifacts

  • Traveling Doctor
  • Instructor
  • The Exile
  • Gladiator’s Finale
  • Wanderer’s Troupe
  • Prayers for Wisdom

For more Guides, Tips, and Tricks

You can also check our dedicated Video Games Guides section.

Monte Island in Lost Ark – A Complete Guide

We have brought you the Lost Ark Monte Island guide. Learn everything about the island and get exciting rewards.

Lost Ark has lots of Islands in the game that players can visit and play different quests to get multiple rewards. Monte Island is an adventure island that has different activities and rewards. However, players can participate in Monte Island only when it is available. What are the quest, rewards, Mokoko seeds location, and island location? All the answers lie in our Lost Ark Monte Island guide below.

Lost Ark Monte Island location
Monte Island location (YouTube)
Read Tranquil Island in Lost Ark – Guide

Lost Ark Monte Island Location

Across the sea from Faten and northeast of Bern, you will find Monte Island. Before sailing to the island, you must reach combat level 50 and item level 250. As we said that Monte Island is an adventure island, so it will not be available to you all time. With the help of the Procyon’s compass, you can check the availability of the island. You can also find it if you see a giant whirlpool. The island will show up after a few moments. 

Lost Ark Monte Island Quest

You can play a competitive co-op quest on Monte Island. The competitive co-op quest will start after three minutes when players set foot on the island. In this quest, all the players will be searching for chests. Many chests are marked on the island map. However, it is not as simple as it appears. Some of the chests are hidden away inside the trunks of trees. So, search everything carefully. 

Players will earn points when they open the chests. When the total points reach 5000 among all the participated players, the competition will come to an end. If you open the small chests, you will get around 10 points for each chest. On the other hand, large chests will give you more than 10 points. 

Monte island chest location
Chest locations (Papunika)
Read Snowpang Island Lost Ark – A Complete Guide

Rewards

After completing the Monte Island quest, players will be granted different rewards according to their ranks. However, if you dont rank at the top, you will be still rewarded for your participation in the competitive co-op quest. You can use the rewards in various places of Lost Ark. Below are the rewards that players will get.

  • Participation: Participation Reward x 22 and 1,500 Silver
  • 1st Place: Participation Reward x 30 and 20,000 Silver
  • 2nd Place: Participation Reward x 28 and 15,000 Silver
  • 3rd Place: Participation Reward x 26 and 10,000 Silver
  • 4th Place: Participation Reward x 24 and 1,500 Silver
Read Lost Ark Drumbeat Island Guide – Everything you should know

Monte Island Token

The island token is a token that proves you are accepted by the island. You can exchange the island token with Opher on the Lonely island for great rewards. You can earn the Monte Island token as a reward for completing the island quest. However, there is no guarantee of players getting the token as a reward. Therefore keep visiting the island when it is available and play the quest until you earn the island token as a reward.

Merchants in Monte Island

Lost Ark Monte Island has two merchants. One merchant sells life tools and the other trades useful items in exchange for the island participation rewards. Below are the offers made by the merchants.

Darudo (Life Tools Merchant)

  • Foraging Tool: Silver x1500
  • Logging Tool: Silver x1500
  • Mining Tool: Silver x1500
  • Hunting Tool: Silver x1500
  • Fishing Tool: Silver x1500
  • Excavating Tool: Silver x1500

Traveler Herodot (Exchange)

  • Uncommon Class Engraving Chest: Participation Reward x 15 (Weekly Limit 5/5)
  • Rare Class Engraving Chest: Participation Reward x 50 (Weekly Limit 2/2)
  • Crew Application Form: Participation Reward x 900 (1)
  • Crew Application Form: Participation Reward x 900 (1)
Read Phantomwing Island Guide – Tips and Tricks

Lost Ark Monte Island Mokoko seeds location

There are a total of four Mokoko seeds available on Monte Island. Players can use these seeds to get rewards from the vendor. The location for the mokoko seeds is below.

Mokoko seeds location
Mokoko seeds location (Maxroll)

For more Guides, Tips, and Tricks

You can also check our dedicated Video Games Guides section.

Genshin Impact Orb of the Blue Depths – A Complete Guide

Here is a complete guide about the Genshin Impact Orb of the Blue Depths. Learn where to find and how to use these orbs.

As Genshin Impact introduced the Chasm to the players, there are many new things the players are finding. One of the side quests players will find is “Locked Gate in the Nameless Ruins.” To unlock this, players will need the Orb of the Blue Depths. This is an item that the players will need to unlock a gate leading to a secret room. However, it can only be obtained by defeating several enemies. Here is our Genshin Impact Orb of the Blue Depths guide that will help you find it and tell you how to use it. 

Orb of the blue depths
Orb of the Blue Depths (YouTube)
Read Genshin Impact The Chasm – 10 Things You Should Know

Where to find Genshin Impact Orb of the Blue Depths?

Around the Chasm, you will have to collect a total of nine Orbs of the Blue Depths. Players will need to defeat different enemies in order to find all the Orb of the blue depths. Some are very easy to find, while some will test you. Below are the nine locations to find the Orb of the blue depths. You can go to any location randomly.

Buliwyf: Guardian Of The Desolation

Follow the elevated ridge on the east from the teleport waypoint south of stony halls. You will find a room. Break it with a Geo attack. Buliwyf will be inside waiting for you. Take him out and grab the orb. 

Haltaf: The Young

You will find Haltaf in the Serpent’s cave. Go inside the cave and defeat Haltaf to get the Orb.

Skeld: Augur Of The Mirrors

In the west of the Ad-Hoc Main Tunnel, there will be a locked room. Get the Miner’s Key from debris in the long tunnel that is north of the serpent’s cave. The key will help you to open the locked door. Fight with Skeld to get the orb.

Skeld's location
Location for Skeld (YouTube)
Read Genshin Impact Lost Valley Domain – Location, How to Unlock, Best Characters, and more

Edgetho: Breaker Of The Oath Of Silence

The waypoint at the south end of the Chasm: Main Mining Area will take you to the right location. Stay high and keep going forward. You will end up finding Edgetho. Defeat him and grab the orb.

Hyglacg: Rebuked Servant

To find Hyglacg, go to the waypoint in the Underground Waterway. You won’t find him easily. Check out the map below for an exact location. Beat him and get the orb. 

Hyglacg's location for Orb of the Blue Depths
Location for Hyglacg (YouTube)

Serkir: Scribe Of Swords

At the corner of the Nameless Ruins in the southwest, you will find Serkir. Keep moving forward and you will find Serkir waiting for you. Beat him and get the orb.

Roneth: Banished Knight

This one can be found easily. Go to the waypoint of The Glowing Narrows. Keep moving down and you will find him. Beat him and get the orb.

Herger: Jester Of Bloody Tears

Herger can be found at the waypoint in the middle of The Glowing Narrows. On the east side, find a wall with a crack and a plant that can be destroyed. Blast the plant and enter inside to beat Herger and get the orb.

Read Genshin Impact Venti Guide – 10 Tips and Tricks

Rethel: Slain Of The Split Bow

Rethel will be waiting for you at the end of The Glowing Narrows’ long tunnel. Get your orb by defeating him.

Rethel's location for Orb of the Blue Depths
Rethel’s location (YouTube)

How to use Orb of the Blue Depths

After collecting all the orbs, you will need to take them to the Nameless Ruins in order to use them. Go inside the Nameless Ruins and move towards the east side of the room. Just keep moving inside the ruins until you reach the other area. You will soon find a square mechanism. Interact with it to put the orbs of the blue depths inside. Now the secret room will be open for you.

place orbs inside this mechanism
Place orbs inside this mechanism (YouTube)

Three Chests: an Exquisite Chest, a Precious Chest, and a Luxurious Chest will be given to the players as a reward. In addition, the players will get the “Crede Tenebrae” Achievement, and a mysterious letter too. Only 12 lines will be revealed to the players from the mysterious letter. These lines will be encrypted too.

For more Guides, Tips, and Tricks

You can also check our dedicated Video Games Guides section.

Insurmountable Beginner’s Guide – 10 Things Every Player Should Know

Do you love climbing mountains? Then this game is for you. Read our Insurmountable Beginner’s Guide to get a good start.

Insurmountable is an adventure game in which you have to overcome huge mountains. This is a very thrilling game as you are required to climb the mountains while keeping all the other things in mind. You have to be aware of your health and stamina so that you don’t lose them while climbing up the mountain. You can say that this is a game that depends highly on your decision. One wrong decision can result in a loss.

Your job as a mountaineer is to confront various terrains alone and face all the dangers on the way. The risky environment will put you in many tough situations that you have to overcome. With all this, overcome the insurmountable heights by making your way up and down the mountains. But how will you do it all alone? Do not worry, we are here with you to help you with our Insurmountable Beginner’s guide. 

Read Mobile Legends Adventure Beginners Guide – Tips and Tricks

Insurmountable Beginner’s guide: How to begin

The first things you have to do is choose one of the three characters in the game. Each character has different skills and background stories. After selecting the character, you have to search for crates, caves, and other parts of the area for equipment that the previous adventurers left. They are very important because the mountains will demand every bit from you, 

Insurmountable characters
Choose from the three characters (ByteRockers’ Games)

Insurmountable Beginner’s guide: Harsh environment

In the game, your task is to climb the three mountains. However, the task is difficult because of the harsh environment. The weather sometimes is very dangerous. You will have to face different weathers day and night. There are many events that you will not know when and how they will end. In situations like these, everything depends on your decisions. So decide wisely. 

Gather all the resources from the first mountain

Among all the three mountains, the first one is the easiest. You can take this as a great advantage by gathering as many resources as possible. Why gather so much? Because the other two mountains are challenging and these resources and equipment will help you to survive the remaining two. 

Read LEGO Star Wars: The Skywalker Saga Guide – 10 Things You Should Know

Careful with your steps

All you need to do is figure out your next move. The terrains that are rough consume more energy. Not only that, but some steps can result in dangerous events that will cause you harm. It will seem easy for you to just take the most straight and direct path to the mountain. However, this will result in a big mistake.

Insurmountable Beginner’s guide: Plan your route

Beginners will have a tough time memorizing the routes of the three mountains. As we said above, the weather makes it very difficult and therefore it will be hard for you to plan which route is safe. You will have to learn to read the environment and then predict and plan your route that will be the safest. This is a game of decisions, so deciding the right route will be beneficial for you.

Choosing the right path
Plan and choose your path (ByteRockers’ Games)

Limited inventory space

The game gets more difficult when you will get to know that you have a limited amount of storage in your inventory. Choose the most crucial items and bring them with you on the journey based on your playstyle and what you are going to do next. There are lots of things that you will need, a tent, oxygen tanks, boots, and other stuff. Decide carefully and then fill up your inventory.

Read Cookie Run Kingdom Guide – 10 Tips For Beginners

Spend the resources

You will have to spend the resources that you gathered to make progress. You can use it to move forwards in the game or use it to upgrade your character. This is why it is a very important factor in the game. Make sure that whatever your decisions are, you are making some benefits from them. Gathering too many unnecessary resources can also be a problem. So be conscious of what you require and then gather and spend in accordance with your requirements.

Do not take anything for granted

This game will punish you later for taking things for granted. For example, if you use lots of health and still have plenty remaining for the first mountain, then do not take it for granted and believe that it will be the same for the remaining two. The other two mountains are difficult compared to the first one. A similar thing goes with the resources. Just do not use it randomly and expect that you will get more and more in the future. 

Insurmountable cutscene
Game cutscene (ByteRockers’ Games)
Read The Bard’s Tale Guide -10 Tips and Tricks for Beginners

Energy, Temperature, and Oxygen

As you go up, the oxygen level drops down and the weather makes it difficult too. You will need the energy to climb the mountains. The temperature is what decides whether you will die from freezing or not, so you have to keep your eye on it. When you go above 6000 meters, it will be hard for you to breathe. From here, you will have to decide everything wisely to go further. This is because all your energy, temperature, and oxygen will play an important role as everything will be on its edge. 

Abilities

An active ability that reduces your energy cost on tall climbs can be a game-changer at the right moment, but active skills have long cooldowns. If a skill lasts four hours, you will really want to squeeze everything you can out of it.

An active ability can reduce your energy cost to climb up those mountains. This can be very beneficial when needed. All of this is amazing, but there is a problem. The active ability has very long cooldowns. So, you have to decide when and how you use it.

Insurmountable beginner's gameplay
Gameplay (ByteRockers’ Games)

For more Guides, Tips, and Tricks

You can also check our dedicated Video Games Guides section.