Rainbow Six Siege Azami Guide – Tips and Tricks

If you are a defender in Rainbow Six, then this operator is just for you. Here is our Rainbow Six Siege Azami guide with some tips and tricks.

New operators are frequently launched in Rainbow Six Siege to coincide with the start of a new competitive season. There have been a lot of new characters added to the roster since Rainbow Six Siege’s first release in 2015. It was one of the last console generation’s most popular first-person shooters. Each operator in the game has a unique specialty, whether it be defending or attacking. Over fifty operators are available for gamers to choose from. 

As part of ‘Operation Demon Veil,’ Ubisoft has unveiled a new operator as part of the game’s seventh anniversary. Introducing Azami, Rainbow Six’s newest defender in Demon Veil. The Japanese private security agent has a new weapon in her arsenal. She has a loadout to run with her Kiba Barriers, as well as the ability to change the way the game is played. Here is our Rainbow Six Siege Azami guide for you with some of the best tips and tricks.

Read Rainbow Six Siege Operators Tier List – March 2022

Rainbow Six Siege Azami Guide: Average SMG in her loadout

The 9x19VSN is not the most powerful loadout, but its 34 damage per bullet at 750 RPM is far from the worst in the game. This means that you won’t run out of bullets too quickly into your spray because of the 31 bullet magazine. Her sidearm is the D-50 Deagle by default, while she can choose either a barbed wire or an impact grenade for her secondary gadget. While the latter is just useful to rotate with, it synergizes with her primary gadget, the Kiba Barrier. Fill the gap on your team.

Rainbow Six Siege Azami Guide: Weapons
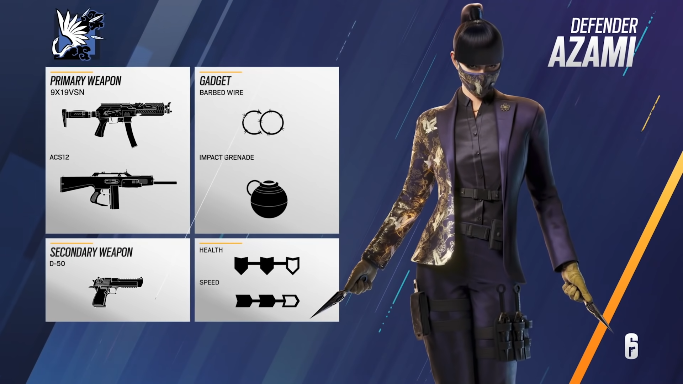
Rainbow Six Siege Azami weapons
  • 9x19VSN (Primary weapon)
  • ACS12 (Primary weapon)
  • D-50 (Secondary weapon)
  • Impact Grenades (Secondary gadget)
  • Barbed Wire (Secondary gadget)

Rainbow Six Siege Azami Guide: Kiba Barrier

Azami’s unique gadget, Kiba Barriers, makes her loadout in Rainbow Six the most interesting. Their use as little kunais is to hide blemishes in walls, floors, and ceilings. Bulletproof and cover a lot of space, but they can only be deployed when they are attached to a surface, and they will only deploy in circles. 

They deal five damage to an enemy if thrown at them. Allies are not damaged by the kunai. If Sledge’s hammer or explosives are used on it, the Kiba Barrier can be destroyed, but otherwise, it’s as good as reinforcement. Because of that, Azami is good at reclaiming control of the site and putting up defenses against attacks from all directions.

Read Top 10 Tips for Rainbow Siege Six Extraction – Guide

Rainbow Six Siege Azami Guide: Counters

With the exception of Sledge, there is no genuine catch-22 response to Azami in Siege. You’ve done your duty when an attacker wastes a lot of utility on Kiba Barriers (such as an Ash charge). Because Ash only has two of them, while you may have up to four Kiba Barriers, it damages the attackers more than your side. Having said that, Azami is not infallible. You can just ignore her Kiba Barriers or blast them up. Anyone who can surprise her with rapid vertical play.

You can patch holes
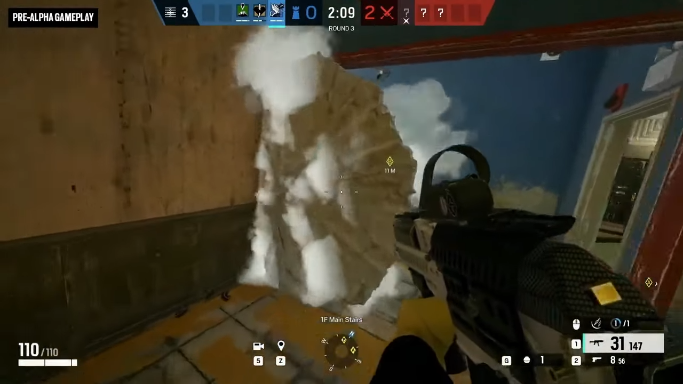
Rainbow Six Siege Azami's kiba barrier
Using Kiba barriers (YouTube)

You might think that Kiba Barriers are a good way to guard against attacker breaches since you can throw them from a safe place on site. You would be right in thinking this. There is another, even better use for Kiba Barriers: Azami’s Kiba Barriers are the first vertical denial defense available in Siege. 

If any operator blows some holes in the roof with Breaching Charges, Azami is able to close them up and secure the defender spots. Even after that, they can be difficult to deal with: Buck is incapable of this, and Sledge must swing his hammer at the right angle. There can only be something like an Ash or Zofia charge that can handle it easily. Using Kiba Barriers in this way makes more sense. Keep in mind that this won’t be the same in all maps of the game.

Read Best Operators in Rainbow Six Siege – Complete Guide

Combining the Kiba barriers

In addition to patching holes in ceilings, Kiba Barriers can also be used to create deadly choke points. A doorway can be made to resemble a crouching zone by placing one on top. Adding barbed wire makes the effect even more effective. There are other options as well. Ela’s Grzmot Mine and Thorn’s Razorbloom Shell can further complicate the situation for attackers. Defensive units can benefit from these small death traps.

For more Guides, Tips, and Tricks

You can also check our dedicated Video Games Guides section.

How to beat the Elden Beast in Elden Ring – Weakness, Strategy, and more

So here we are, standing against the final boss of Elden Ring. Read our guide that will guide you on how to beat the Elden Beast in the Elden Ring.

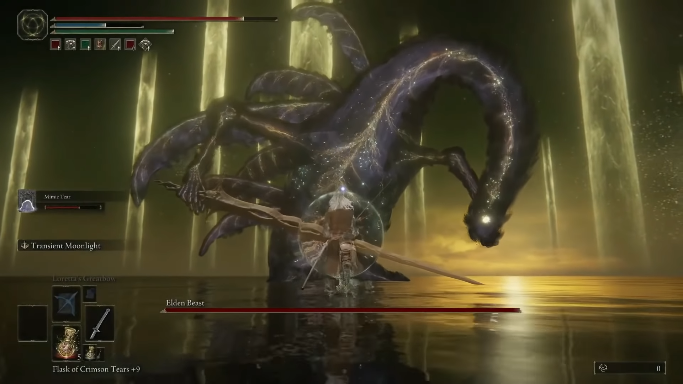
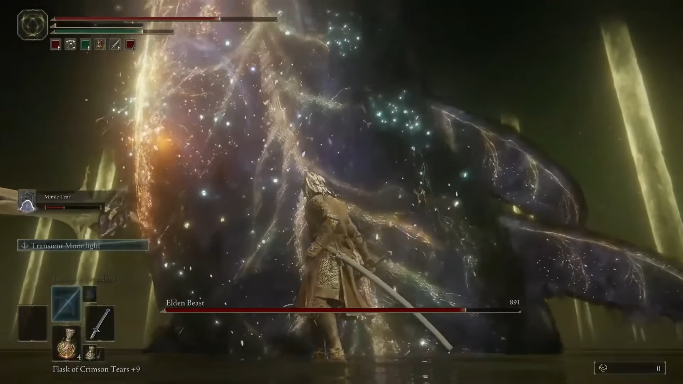
In Elden Ring, Elden Beast is the final boss. The Elden Beast serves as the vassal of the Greater Will, residing inside the Elden Throne. Since this is the final boss of the game, it is not optional like other boss fights. Elden Beast appears immediately after defeating Radagon of the Golden Order. 

You will be facing bosses one after another during the final stretch of the game, which features very few mobs. If you are able to defeat both forms of Godfrey and go on to the next one, you will reach the final boss, the most challenging in the game. In this guide, we will not only tell you how to beat the Elden Beast in the Elden Ring, but also how to beat Radagon. Both the bosses are very difficult, so read carefully so that you can beat these two beasts together easily.

Elden Beast Fight (YouTube)
Read All Boss Fights in Elden Ring – Ranked

How to Beat Radagon

Fight with Radagon (YouTube)

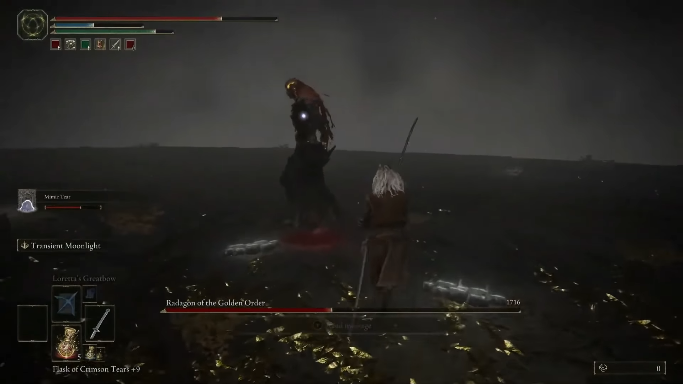
Radagon of the Golden Order is a humanoid enemy with many melee attacks that deal Holy damage in the first stage of Elden Ring’s final boss battle. Do not panic in this fight; Radagon uses his hammer to make many delayed swings that will punish you for rolling spam. Wait for Radagon to commit his attacks, then dodge. Only attack Radagon a few times in between his own attacks because he has very high Poise. Be cautious or you may get hit.

You must dodge as late as possible to avoid the hit and explosion whenever Radagon’s feet or hammer glow gold. Be prepared to avoid Radagon’s grasp when his arm glows gold. Radagon will repeatedly smack you with his hammer if you get grabbed by him. Make sure you avoid any lightning spears Radagon might throw at you if you’re far away. Radagon will fall once his health bar is empty. Then comes the Elden Beast. He will emerge from Radagon’s body with a sword, ready to fight you.

Read Best Weapons in Elden Ring – Weapons You Should Be Using

How to Beat the Elden Beast 

A large beast with high mobility, many magical projectiles, and sweeping physical attacks, the Elden Beast is strong and powerful. To avoid the Elden Beast, sprint left or right if it breathes dark yellow flames at you. Avoid the flames by rolling away from them. If you are sprayed with purple mist by the Elden Beast, flee as soon as possible. Streams will explode shortly thereafter, so stay away from them when they happen.

Run as fast as you can if the Elden Beast starts to swirl, creating a large haze of purple mist. It will explode shortly afterward, just as the previous mist did. Try to sprint after the Elden Beast when it flies away from you so that you can dodge the large sweeps its sword makes with its large blade. This is the best chance at avoiding these attacks.

During its sword swipes, the Elden Beast is most vulnerable to damage. You can score a lot of hits before it attacks again between these swipes. At least land three or four sorcery spells or a full melee attack combo during this time. Run away if the Elden Beast stabs its blade into the ground. That spot will explode shortly afterward.

How to beat the Beast
Fight with Elden Beast (YouTube)
Read Best Armor in Elden Ring – Ranked

Be aware of the golden rings and orbs

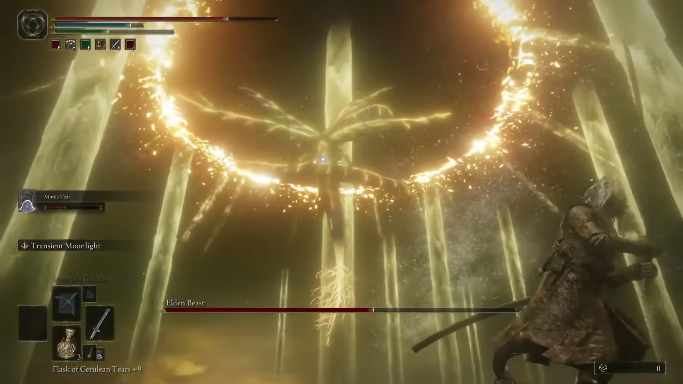
Fly away from the Elden Beast if it flies towards you and leaves golden rings around you. Dodge through the ring that moves towards you and sprint outside the outer ring. You are damaged by the inner ring if it hits you, and you are unable to escape the radius of the outer ring, which explodes after a few seconds.

If the Elden Beast generates a golden orb that follows you, you should flee to the left or right. The orb will begin to fire miniature magical missiles that may be evaded by sprinting left and right. If you’re getting hit by projectiles and aren’t running rapidly to the side, you should start practicing dodge rolls. It will vanish in a short amount of time.

You’ll eventually emerge victorious if you manage to avoid the Elden Beast’s many physical and magical attacks. In addition, you should take advantage of the large damage options you get when he swings at you with his sword. With all this, you have defeated Elden Ring’s final boss and finished the game. So this is all about how to beat the Elden Beast and grab the victory.

Things to keep in mind

Equip all the important things (YouTube)
Read Elden Ring – Which Keepsake Should You Pick
  • In this fight, Mimic Tear Spirit Ash Summon is powerful. You can hit the bosses more easily with this weapon because it has a lot of health, deals good damage when fully upgraded, and is able to distract them.
  • This battle can also be won using Black Knife Tithe Spirit Ash Summon. Tithe’s speed and frequent dodges make him a very effective distraction, even though he doesn’t cause a lot of damage and isn’t very tanky.
  • Radagon and the Elden Beast are both resistant to Holy damage, so be cautious when dealing with them. If you have a powerful Faith build, holy weapons and spells still do solid damage to bosses.
  • On the other hand, both bosses are susceptible to Scarlet Rot, so use weapons, items, or spells that cause it if possible. Over time, Scarlet Rot will deal a significant amount of poison damage, making combat much easier.
  • Additionally, the bosses deal with Holy damage, so boost your resistance to Holy damage if you can. Several spells, including Divine Fortification and Haligdrake Talismans, can help achieve this effect. The Elden Beast can be healed by Faith spells, so avoid using them against it. Buffering spells can be used, but don’t use damage-dealing ones.

For more Guides, Tips, and Tricks

You can also check our dedicated Video Games Guides section.
Stranger of Paradise Final Fantasy Origin Guide – Tips and Tricks

For all the Final Fantasy fans, we have brought you the Stranger of Paradise Final Fantasy Origin guide with some of the best tips and tricks.

In celebration of the series’ 35th anniversary, Koei Tecmo’s Team Ninja has developed Stranger of Paradise: Final Fantasy Origin. The game will be published by Square Enix. As in the original Final Fantasy game, Stranger of Paradise: Final Fantasy Origin takes place in a dark fantasy world, populated by people drawn from a different world. 

Jack Garland, a man consumed with a desire to destroy Chaos, is the main character. In this case, Chaos refers to the horned Chaos from the first Final Fantasy game, which was both the main antagonist and the final boss. Ash and Jed have recently joined Jack as companions. Here is our Stranger of Paradise Final Fantasy Origin guide with all the tips and tricks for you.

Read Elden Ring Thop’s Quest – A Complete Guide

Get used to things

Before pushing too far, players should familiarize themselves with the game’s parrying techniques, blocks, Soul Shield, and Break Gauge. There will be a fighting lesson in a gorgeous wheat field early on in the game that will cover these basic ideas in depth. Those gamers can hone their skills further by returning to the task labeled ‘???’ on the global map.

Improve Defense

Fighters should know when to block and when to escape, and Jack must also possess this skill. You can’t evade every situation, nor is evasion a limitless tactic, so you may sometimes find yourself exposed to a follow-up attack, or surrounded if you try to roll out of the way.

As a result, you must remain vigilant and be ready to block. Patience is the virtue of the day; rather than brute-force your way through every encounter, just know when to soak up attacks and when to choose your moments. Take some damage now rather than a lot later because you missed your attack or because you failed to dodge Jack’s attack.

Read Rainbow Six Siege Operators Tier List – March 2022

Stranger of Paradise Final Fantasy Origin guide: Soul Shield

Stranger of Paradise Final Fantasy Origin combat scene
Combat (Square Enix)

The soul shield can temporarily absorb enemy abilities, allowing you to strike back with a vengeance when used on selected enemy attacks. If your explosive foes spew flames at you, those who learned the adage of fighting fire with fire will know that throwing fire back at them can be deadly and control their detonation.

Throughout the Trial Version, you’ll encounter a variety of enemies, but not all fall in the same way. When unleashed, they can inflict damage on Jack and his team within minutes. You can defend yourself against some of these moves, but you can also turn your defense into offense with the soul shield, and kill your enemies with their own attacks.

Read Horizon Forbidden West Guide – 10 Things Everyone Should Know

Stranger of Paradise Final Fantasy Origin guide: Jobs

Those unfamiliar with Final Fantasy lingo should know that Jobs are the equivalent of classes. A player can switch between two Jobs in this game by clicking on them at the same time. As long as a player has the required weapon and is unlocked for that Job, he or she can also change Jobs during combat or between missions.

Jack can utilize his three different job roles throughout the trial – swordsman, mage, and lancer, easily switching between spells, greatswords, and lances. Once enough levels have been earned on each of these jobs, they can become warriors, black mage, and dragoons respectively. With these, you can choose to fight at a distance, at close range, or with immense power.

Read Sifu Guide – Things you should know before you start the game

Equip different clothes

Different clothes in Stranger of Paradise Final Fantasy Origin
Different clothes (Square Enix)

Explore the Chaos Shrine and you’ll find a wide range of equipment and clothing to dress Jack up in. There will also be properties that change stats or set bonuses that may be included. The result is that there are plenty of excuses for taking a break and trying on your latest spoils.

There are, however, different clothes Jack can wear for each job role, something you may not know. In your role as a mage, you can customize your outfit to be more resistant to magic. On the other hand, if you are a lancer, you can dress to maximize your strength, and as a swordsman, your wardrobe will prioritize defense, so you can use your greatsword confidently.

Learn spells as soon as possible

As Jack learns more about the role of the mage, you will soon learn that spells can also be used against the Shrine. Whenever you break the pillars that lie in your path, you can do substantial damage to the break gauges of your enemies and even kill several enemies at once if they are caught up in it. Water spells are also effective at putting out fire, allowing you to make your way through dangerous flames unscarred and even cause some critical damage if there is a Bomb in the way.

Read Top 10 Apex Legends Characters for March 2022

Guard and Evade the enemy attacks

Stranger of Paradise Final Fantasy Origin fighting scene
Combat scene (Square Enix)

While there are a few ways to avoid taking damage during a fight, guarding and evading are the two most common. While guarding, Jack stands still while using his weapon or shield to block. Most attacks are blocked when Guarding is active and Break damage is reduced when it is active. Keep in mind that magic attacks will still take damage, but it will be reduced. Parrying will reduce your Break damage further when you guard just before an attack lands, allowing you to attack faster.

So this was all about Stranger of Paradise: Final Fantasy Origin. Follow the tips and make your gameplay even better.

For more Guides, Tips, and Tricks

You can also check out our dedicated Video Games Guides section.
Elden Ring Thop’s Quest – A Complete Guide

We have brought you a complete guide on Elden Ring Thop’s quest. We have detailed everything step by step, so read carefully.

There are a lot of side quests in Elden Ring, and some of them result in great loot. In the world of Elden Ring you will encounter many different NPCs, some of which are going to have a significant impact on the future of the Lands. You can unlock entirely different endings by completing their quests. 

Thops’ quest is not one of those side quests. However, if you are more interested in using magic than sword and shield, then thop’s quest can give you a good staff and spell. As for the quest, it takes place primarily inside the Academy of Raya Lucaria, and isn’t very long or complicated.  Here is our complete guide on Elden Ring Thop’s Quest.

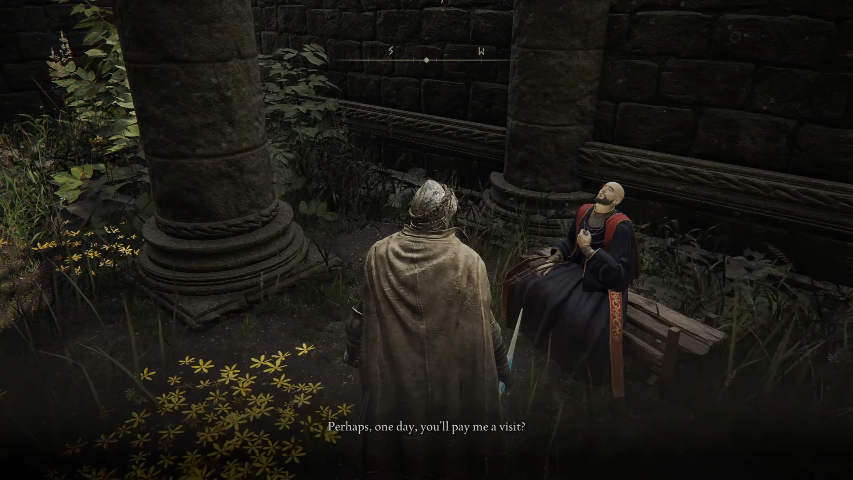
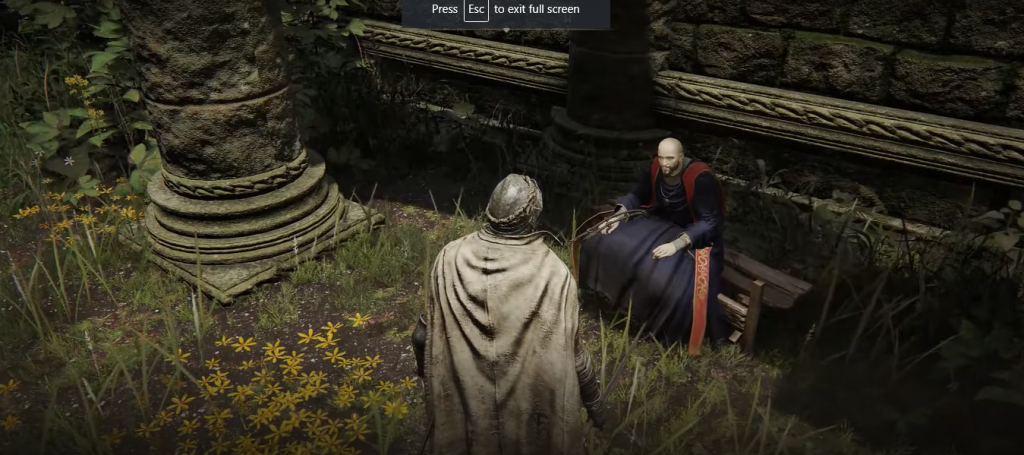
Talking to thop
Talk to Thop (YouTube)
Read Best Armor in Elden Ring – Ranked

Elden Ring Thop’s Quest: Location

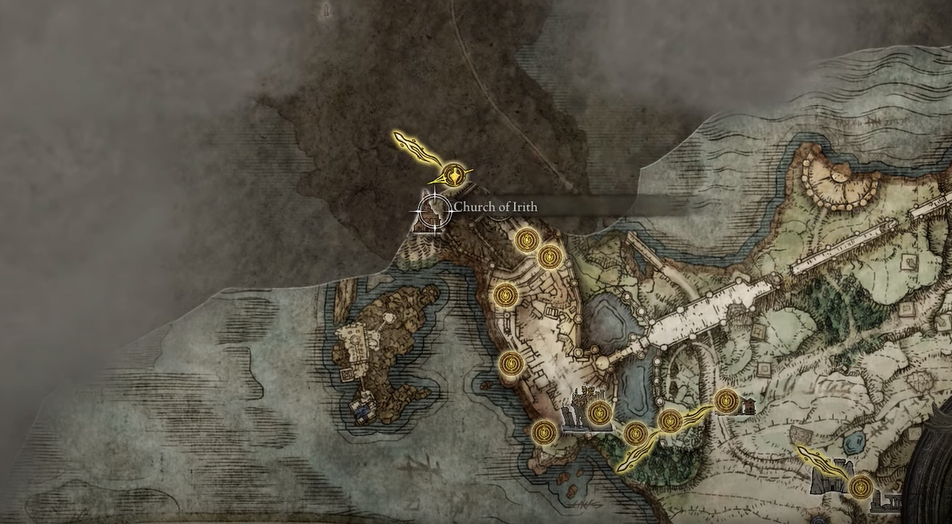
Elden Ring Thop's Quest location
Church location (YouTube)

Tarnished can locate Sorcerer Thops, an NPC merchant and task giver, near the Church of Irith in the Liurnia of the Lakes region. This location may be reached by fighting Godrick in the Stormveil Legacy Dungeon or going along the cliffside route beyond the eastern castle walls. A church may be located on the left side of the main road, near to the Elden Ring Site of Grace at the Lake-Facing Cliffs of Liurnia.

Tarnished will ask for the donation of 10 Runes from the protagonist when they meet for the first time to impart his knowledge of Sorceries. Upon doing so, his shop will be unlocked and he will be able to sell Glintstone Pebbles, Glintstone Arcs, and Starlight Sorceries. It is not possible to increase the number of spells available in Thops’s store, as it is with Sorceress Sellen. 

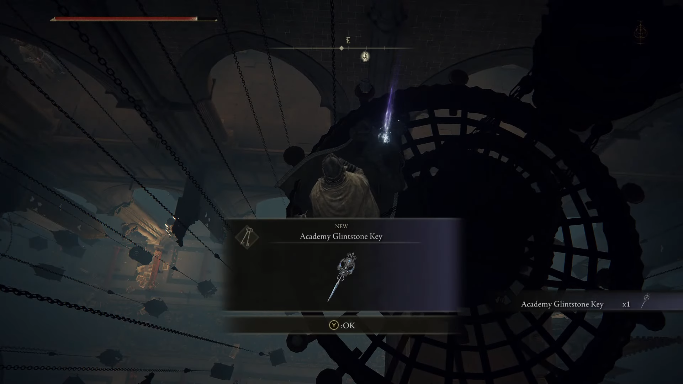
A Glinstone Key must be obtained for the player to enter the Raya Lucaria Academy if the player continues talking with the Sorcerer. In addition, he will request a key from the Tarnished if given the opportunity. You are then tasked with finding the Academy Glintstone Key so he can resume his studies, thereby starting his quest. 

So, before accepting Thops’ quest, one should learn any sorceries he may have at his disposal. In exchange for Runes, Thop provides the following sorceries:

  • Starlight: 2,500 Runes
  • Glintstone Arc: 1,500 Runes
  • Glintstone Pebble: 1,000 Runes

Elden Ring Thop’s Quest: How to find the key

In order to finish Thops’ quest in Elden Ring, the adventurer must get an Academy Glinstone Key for the Sorcerer NPC. A Glinstone Key, which the player will utilize, can be located west of the school on Dragon Smarag’s island lair. Another hidden key, however, may be found within Raya Lucaria but requires a secret method to obtain it.

Read Best Weapons in Elden Ring – Weapons You Should Be Using

You can begin searching for the remaining Glintstone Key after you unlock the doors to the Raya Lucaria Academy and obtain any sorceries Thops has in stock. You can fast travel to the South Raya Lucaria Gate Site if you have yet to explore all the Sites of Grace inside the Academy. 

Turn left at the entrance to the Academy grounds upon entering the South Raya Lucaria Gate Site of Grace to reach the Schoolhouse Classroom and Debate Parlor Sites of Grace. Travel to the Debate Parlor Site of Grace after you have explored before accepting Thops’ quest.

You will be unable to progress further inside the Academy unless you defeat Red Wolf of Ragadon, one of the Great Enemy Bosses. By defeating the boss, you will gain access to the courtyard adjacent to the Debate Parlor and 14,000 Runes.

Go to the staircase

The Debate Parlor Site of Grace is situated north of the Debate Parlor, upstairs leading to a courtyard. There are a few enemies located nearby a broken staircase left of the courtyard. Turn left to drop down into the area below in the stairwell across from the broken staircase. Here you’ll find even more enemies, but you’ll have to climb the stairs and follow the left corner to discover a corpse hanging on the balcony.

Climb the ladder to go further
Climbing the ladders (YouTube)

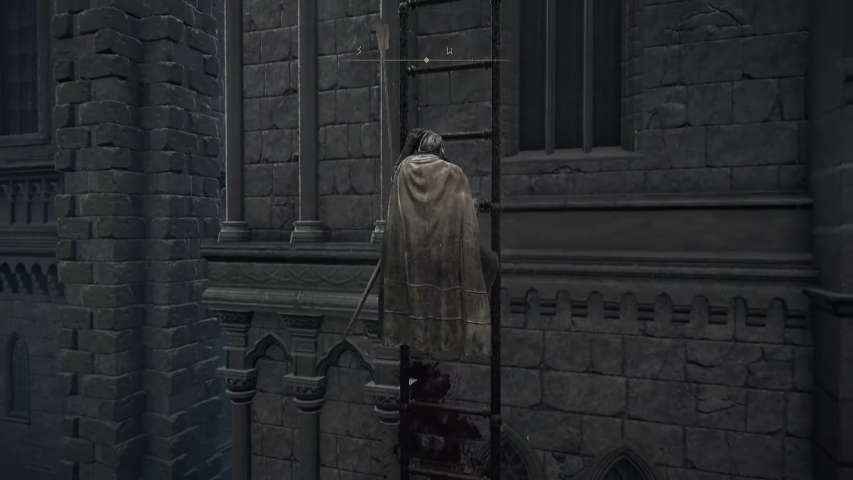
Once inside the Debate Parlor, climb up the stairs that lead to a courtyard from the Debate Parlor Site of Grace. They have a few enemies in the surrounding area of the broken staircase on the left side of the courtyard. Turn left to descend into the area below once you reach the stairwell across from the broken staircase. Further enemies can be found here, but it will take a lot of work to wrap around the left corner and find the corpse hanging on the balcony.

Continue climbing the roofs until you reach the edge, where you’ll locate a ladder on the right side of a building. The road to the right will bring you to additional opponents, which you may dodge by choosing the path to the left and jumping down into the roofs below.

Three more drops are necessary until you notice a balcony on your right. By traveling this road, you will reach the Imbued Sword Key and then return along the same path where there is a staircase heading down.

Find a chandelier

Getting the key
Getting the key upon a chandelier (YouTube)

You can take care of a few enemies patrolling the rooftops ahead of you on a circular rooftop. The open window you’ll find on the circular rooftop is on the right side of the rooftop. You can find a chandelier hanging beneath one of the wooden beams if you enter the room through the window. You can loot the corpse of the Academy Glintstone Key by dropping down onto the chandelier.

The key to the Chruch of Irith can be handed to Thops at the Lake Facing Cliffs Site of Grace to receive the Erudition Gesture. Once Thops leaves the church and the area is reset, a teardrop Scarab with the Ash of War: Thops’ Barrier drops upon defeat. Thops can be found once more at the Academy, where you can continue the main questline. 

Elden Ring Thop’s Quest: Rewards

Rewards (YouTube)

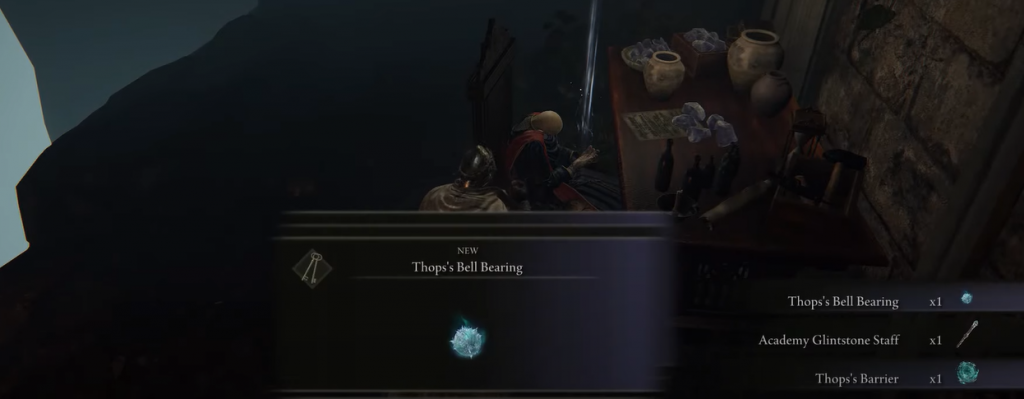
When you find Thops’ body in the Academy, you’ll be able to loot his body for various items. You will receive the following items:

  • Thops’ Bell Bearing
  • An Academy Glintstone Staff
  • Thops’ Barrier sorcery

After completing Thops’ side quest, you can explore the Academy and complete the main questline where you’ll face off against Rennala, Queen of the Full Moon.

Read All Boss Fights in Elden Ring – Ranked

For more Guides, Tips, and Tricks

You can also check out our dedicated Video Games Guides section.
How to beat Kuroki The Artist in Sifu – Guide

Are you facing difficulties on how to beat Kuroki the Artist in Sifu?  Do not worry. We are here with a guide to help you out.

Kuroki is a well-known artist as his name indicates. In the detective board of the player character, Kuroki is Japanese but was exiled for unknown reasons, and now lives in China. It is generally easier to complete Sifu’s third level, The Museum, than The Club. 

However, up until this point, you haven’t faced anything as challenging as the boss, Kuroki the Artist. The trick to avoiding her moves is to parry and dodge her moves at the same time. Additionally, she moves differently from the first phase to the second phase. Here is our guide that will tell you how to beat Kuroki The Artist in detail.

How to beat Kuroki The Artist
Gameplay (YouTube)
Read Sifu Guide – Things you should know before you start the game

How to beat Kuroki The Artist: First Phase Attack Patterns

The first is the most basic: Kuroki swings her bladed staff left then right, then two downward strokes, then she leaps forward or retreats. Her movements are among the slowest, so it is easy to avoid. It is recommended for players to avoid all the swings within this pattern. Finally, players can dodge Kuroki’s leap one last time and retaliate with their own attacks.

Kuroki’s second attack pattern entails her swinging her staff rapidly whilst approaching the player. The player cannot do anything until the attack has finished if they are caught by this attack. Due to Kuroki’s movement towards the players, dodging to the side or doing a backflip is unlikely to work. The best thing to do is dodge first, then punish.

The third attack pattern for Kuroki alternates between low and high attacks. After swinging low and high, she will swing a few more times afterward. By keeping a distance and then running in after the last attack, the player can easily avoid and punish this attack. Dodging the highs and lows and then punishing will be a bit more challenging, but it will lead to a better punishment. 

As with the previous patterns, the player must dodge high attacks in order to avoid them. The player will get hit if they use the wrong dodge. The player can punish Kuroki after the fourth dodge before he or she continues attacking. 

The Fourth attack pattern ends the phase one

Fighting Kuroki The Artist
Gameplay (YouTube)

The fourth Kuroki pattern is the most difficult. Attacks vary between high and low, but they are more challenging this time. Kuroki in Sifu will perform a stunning performance of martial arts choreography, beginning with a high-level strike and swinging low, high, low, and high. Furthermore, determining whether she is employing the high-low-low-high-low rhythm or the low-high-low-high pattern might be difficult. Injuries might occur if one is mistaken for the other.

Read Genshin Impact Signora Guide – Best characters, rewards, and more

Keeping a distance and noticing whether the first attack is high or low are the best ways for the player to avoid this mistake. The low-high-low-high pattern will be used if the attack is low. High-low-low-high-low is the pattern of an attack if the attack is high. The player will have enough time to react if they keep their distance. As well, the player doesn’t have to dodge the whole string of attacks to punish Kuroki. Just making it past the last attack will give them an opening.

How to beat Kuroki The Artist: Phase two

Kuroki attacking with kunai
Gameplay (YouTube)

Sifu’s exciting brawling will continue in Kuroki’s second phase after she has received enough punishment. It will be necessary for the player to learn a completely new set of moves in phase two. There will be three moves in phase two. First up is the flurry attack of Kuroki. A string of five attacks is delivered by her kunai, ending in a double slash. After the fifth attack, the player is able to dodge all these attacks with the L1/left stick down. 

Kuroki will attempt to kick the player in the air if he fails to punish. In addition to knocking the player back, this will damage the player’s health. The player can dodge this by pressing the L1/left stick down, or they can dodge to the side by pressing R2. Once the kick has been delivered, the player can punish.

In the second pattern, Kuroki throws kunai. There are two ways Kuroki throws kunai at a player: he can jump and throw a wave of kunai, or he can stand in place and throw two or three kunai one after another. Despite being able to dodge all kunai attacks with the left stick down, there is another strategy the player can utilize. 

Read Top 10 Apex Legends Characters for March 2022

You can catch the Kunai

Catching kunai
Catching knife (YouTube)

A player can catch a kunai if they have the weapon catch skill unlocked, whether it is one of Sifu’s permanent upgrades or a temporary one. Afterward, the player can throw the kunai at Kuroki. Staggering her can be useful in order to continue to press for damage, but it can also be used to leave her vulnerable to attacks.

Kuroki’s rush attack is the last attack pattern. When the player is far away from her, she will dash forward to slice at them with her kunai. She uses two variations of this attack: in the first, she stands still then charges forward; in the second, she moves left and right before charging forward. Whenever she charges forward, the player will see the shine. It is possible to dodge the rush with L1/left stick down and then punish it as before.

Read Horizon Forbidden West Guide – 10 Things Everyone Should Know

Sparing Kuroki’s life

Kuroki
Kuroki (YouTube)

She can be taken down fairly easily by punishing. Nevertheless, the player must play a little more dangerous if they wish to spare Kuroki’s life before her health is depleted. During the second phase of the game, if a boss’ health is depleted, the player will automatically kill it. Sparing a boss requires breaking the boss’ structure twice and then selecting the ‘Spare’ dialogue option. Parries are the best method to ensure this. 

Read Best Signature Moves and How to Perform them – WWE 2K22

They break the structure of the enemy without impacting their health. Further, if the player has collected the Parry Impact reward from shrines around Sifu, their impact is even greater. Flurry and rush attacks by Kuroki are the best attacks to parry. The player can parry all five of her attacks consistently due to her flurry’s slow speed. Players who parry should be especially careful with their ensuing kick, since it will more likely break their structure. Parrying the rush attack is easier because it is well telegraphed. Whichever ending the player wants, with maneuvers like dodging, punishing, catching, and parrying, it will not be hard for them to defeat Kuroki.

For more Guides, Tips, and Tricks

You can also check out our dedicated Video Games Guides section.
Genshin Impact Signora Guide – Best characters, rewards, and more

For all the Genshin Impact fans, we have brought you the Genshin Impact Signora guide that will help you with everything you need to know.

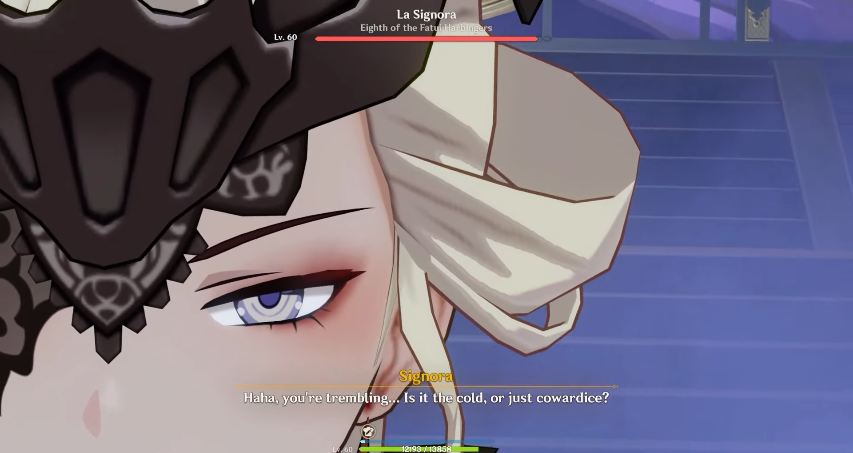
La Signora’s true name is Rosalyne-Kruzchka Lohefalter, and she is also known as The Fair Lady. She is Fatui’s eighth Harbinger of the Eleven. She first employs the Cryo element, but her true element is Pyro. The Fatui gave her the Cryo Delusion to help her innate propensity for the art of liquid flame.

Signora is determined to rid the world of disease, even if it means losing her own life in the process. La Signora has led a turbulent existence, but for those who seek her desired prizes, her narrative concludes in a conflict in which our Travelers are forced to participate: the Signora Boss Fight.

Signora
Signora (YouTube)
Read Genshin Impact Bennett Guide – Tips, Tricks, Weapons, Artifacts, and more

When players finish Inazuma’s Archon questline, which debuted in Genshin Impact 2.1, they will be able to access the Signora Boss Fight. The weekly domain, like Dvalin and Childe’s boss domains, may be obtained by completing the Archon questline. In addition to the usual Trounce Domain prizes, Signora drops special materials for rising Raiden Shogun and Kujou Sara. Here is our Genshin Impact Signora guide that will help you to beat her.

Genshin Impact Signora Guide: Preparation

Even the most seasoned players should take caution when facing Signora, as the fight is not particularly difficult. Defeating her two distinct phases requires different strategies, but with the right composition, Signora’s fires can easily be put out. There is certainly an interesting boss fight, but it comes at the expense of her riveting story.

When you have enough mitigation or healing, most compositions should work on Signora. Using food consumables or playing Co-op mode is a good solution if you find yourself undergeared or underleveled. Several things are worth noting about Signora, including the Cryo phase and the Pyro phase. 

Read Genshin Impact Noelle Guide – Weapons, Artifacts, and more

The more shielders you have in your team, the easier the fight will be because shields nullify most of the incoming damage. When Signora’s Cryo phase is active, Diona’s Cryo shield will be very effective, while Xinyan’s Pyro shield will be very effective when his Pyro phase is active. Due to its insane durability and fortifying abilities, Zhongli’s shield is also excellent in both phases.

Genshin Impact Signora fight
Gameplay (YouTube)

A “Cocoon Phase” follows the Cryo phase in Signora, where Elemental Reactions affecting Cryo are needed to progress. The cocoon shield will be depleted by picking up and using Crimson moths which will spawn. Bringing in Pyro characters, however, will make this phase easier since you will be able to deplete the shield faster. You can choose from Ayaka, Hu Tao, Zhongli, Qiqi, Diluc, Eula too in your team.

Read Genshin Impact Tatara Tales Quest Guide – Complete Walkthrough

Genshin Impact Signora Guide: First Phase

As part of the first phase, Signora only targets the player with Cryo attacks. It will accelerate when Sheer Cold accumulates, and Signora will deal Cryo DoT with her attacks. As a countermeasure, Pyro sigils are placed at each corner of the arena, and getting close to them drains the Sheer Cold. These sigils can also be broken by players, which will immediately remove all Sheer Cold and any Frosted Floor in that quadrant. Cryo attacks can be performed by Signora in several different ways, including:

Signora
Signora (YouTube)
  • Raining Icicles: Ice begins to fall on the player’s position in a small area.
  • Ice Shards: Calls forth ice shards in a straight line toward the player.
  • Ice Flower Bombs: Summons three ice flowers that explode after a short while.
  • Cryo Wheel: Produces an ice wheel that rolls towards the player.
  • Cryo Spears: Signora fires five spears that follow the player and collide when they reach him.
  • Massive Ice Spear: Players will see a spearhead above them, which will hit them after a few moments and deal massive damage.

It is easy to telegraph and dodge most of these moves, but to mitigate them with Diona’s shield, this phase of the fight is very straightforward. After Signora’s HP is depleted, she will turn into an Icy Cocoon, which has a Cryo shield that needs to be depleted. Pyro attacks are extremely powerful, but if you don’t have one, you can pick up Crimson Moths, which give you Pyro power.

Read How to beat the Golden Wolflord in Genshin Impact – Guide

Genshin Impact Signora Guide: Second Phase

second phase of the fight
Phase two fight (YouTube)

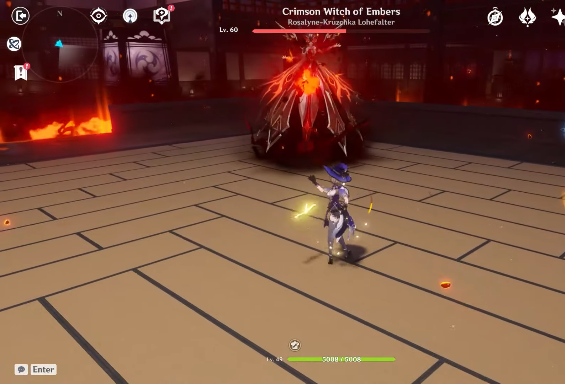
In phase two of the fight, Signora will become the Crimson Witch after she has depleted her Cocoon shield. The player will be affected by Blazing Heat during this phase, and Signora’s attacks will increase the Blazing Heat gauge. A cryo sigil will appear at each corner of the arena, where players can reduce the Blazing Heat by getting close to it. In addition to being broken, the Cryo sigils will also reset the Blazing Heat gauge and cleanse the Embered Ground on that quadrant of the arena.

Read Genshin Impact Qiqi Guide – Tips and Tricks You Should Know

A flaming tornado will turn into Signora once her HP reaches a critical level, sweeping the arena and summoning micro-tornadoes that wander around at random. It is just a matter of being patient and dodging the tornadoes or mitigating damage. Once a move is completed, players can begin to finish Signora, and end the fight.

Genshin Impact Signora' tornado
Tornado attack (YouTube)

Rewards

Once you defeat/survive La Signora, you will obtain materials that can be used to upgrade your character’s abilities. They are Molten Moments, Hellfire Butterflies, and Ashen Hearts. The Molten Moments materials are used by Aloy and Raiden Shogun, and the Ashen Hearts materials are used by Kujou Sara.

For more Guides, Tips, and Tricks

You can also check out our dedicated Video Games Guides section.
Top 10 Apex Legends Characters for March 2022

Want some of the best characters in your Apex team? Take a look at our top 10 Apex Legends characters list and take the win in your pocket.

Apex Legends is a multiplayer online battle royale game in which squads of three players control predefined characters with unique skills known as “Legends”. Since the game’s debut, new modes have been added that allow players to play either alone or in groups of two. 

To commercialize the free-to-play game, microtransactions and loot boxes are employed. This allows the user to purchase cosmetics like new Legends armor and weapon colors with both real money and in-game cash. However, the most interesting part of the game is its characters. So here are the Top 10 Apex Legends characters.

Read Top 5 Characters in Apex Legends Season 12 Defiance

Top 10 Apex Legends Characters

1. Bloodhound

Apex Legends Character Bloodhound
Bloodhound (Electronic Arts)

Bloodhound is at the top of our list of the top 10 Apex Legends characters. In Apex Legends, Bloodhound is still the greatest legend. Although their skills don’t deal any damage, their tracking talents are unrivaled, and you’ll be at a disadvantage if you don’t have a Bloodhound in your squad. Despite being at the top of the heap, Bloodhound hasn’t seen any substantial adjustments in a few seasons and remains well balanced. When it comes to squad composition and scoping out adversaries, they’re still as good as they’ve always been.

The Ultimate ability, Beast of the Hunt, transforms Bloodhound into a killing machine for a short period of time, displaying foes in red as if they were a digital danger and allowing Bloodhound to observe enemy movements on the ground. 

The scan is the heart of the Bloodhound’s arsenal, allowing you and your friends to see adversaries in the vicinity through barriers. The sole disadvantage of the scan is that foes will be aware that they’ve been scanned and, as a result, will be aware that you’re around – but the advantage is still in your favor.

2. Gibraltar

Apex Legends Character Gibraltar
Gibraltar (Electronic Arts)

Characters like Gibraltar are referred to as the backbone of a team. In games rated at a high level, Gibby has become a must-have but isn’t used as frequently in games rated lower. It’s possible that he could zone your opponent with his Ultimate ability, and the Dome Shield could save not just you, but the whole team as well. As there is nothing stopping them from entering, you must keep a close eye out for potential opponents who may use it.

3. Valkyrie

Apex Legends Character valkyrie
Valkyrie (Electronic Arts)

From the sky, Valkyrie has the ability to reign fire down on her enemies. She is a high-flying Legend. Your teammates and you are able to launch into the air together with Skyward Dive, which is her Ultimate Ability. Additionally, teammates within your line of sight will be highlighted as you fly.

The jetpacks, her main passive, let Valkyrie get to almost any point on the map. This allows her to gain an instant advantage, but they are very noisy, and this is one of the biggest downsides. The jetpack is also not capable of firing weapons. Using the tactical, enemies are bombarded with an avalanche of mini rockets, which do little damage but stun enemies, allowing them to be easily eliminated.

Related: Best 5 Agents in Valorant Right Now

4. Wraith

Apex Legends Character wraith
Wraith (Electronic Arts)

With each passing season, Wraith has become one of the most popular Legends in Apex Legends. With her abilities, she is able to cause chaos on the battlefield in large part. At all skill levels, she remains one of the most frequently picked Legends. She uses her passive to let her know when she is being watched, which is helpful, but not particularly fascinating. 

Nevertheless, her tactical and ultimate skills provide her with considerable mobility and utility. As one of the game’s best abilities, the latter grants her invulnerability and a 30% speed boost to aid her in resetting failed fights. When she and her allies are caught in a challenging situation, this portal allows them to reorient themselves.

5. Ash

Ash
Ash (Electronic Arts)

The first pilot to participate in the Apex games is Ash from Season 11. Ash’s kit is sure to be a popular pick at launch, based on immediate results. Unlike Wraith, she has a single-direction Ultimate with a shorter range than Wraith. In contrast, the cooldown period is much shorter, and it’s much faster to use. 

Ash’s passive is perhaps her greatest strength. Finding death boxes and then using her data knife to locate enemy squads instantly. The arc snare, her tactical weapon, is probably the weakest part of her kit, but that doesn’t make it bad. The tool can still be useful both in close-range gunfights and for softening up an opponent for an easier push. 

6. Octane

octane
Octane (Electronic Arts)

Octane is one of the most exciting characters to play since he is one of the fastest tricksters in the game. He’s a blast to play since he uses his stim to sprint incredibly fast, soars over adversaries with his jump pad, and heals on the go. 

The jump pad is one of Apex’s strongest moving abilities, and it may be utilized by both teammates and adversaries. Octane’s talents won’t help you win many gunfights compared to the S-tier heroes, but if speed is all you care about, Octane is your legend.

7. Caustic

caustic
Caustic (Electronic Arts)

As Caustic becomes more dangerous with his Gas, an experienced Caustic player on your team can make the difference between winning and losing in organized team composition. If he can set up a smattering of his gas traps in a building or other constrained environment, It can be fantastic for area denial. In addition, he can also use his ultimate to push teams out of cover while also providing cover to healers and rezzers.

Read How to select a good Crosshair for Valorant?

8. Lifeline

lifeline
Lifeline (Electronic Arts)

Lifeline can literally save your life with her supportive abilities, making her a great addition to your squad. Despite being able to revive two players at the same time, Lifeline continues to fight. Her drone has also been upgraded to heal faster, at 8HP per second. 

A huge improvement to Lifeline’s Ultimate also came in Season 9 as it now ensures that your gear will be upgraded. In a lot of Apex matches, capturing a Legendary or Epic piece of equipment can mean the difference between victory and defeat. Lifeline remains one of the best characters to have on your team.

9. Pathfinder

pathfinder
Pathfinder (Electronic Arts)

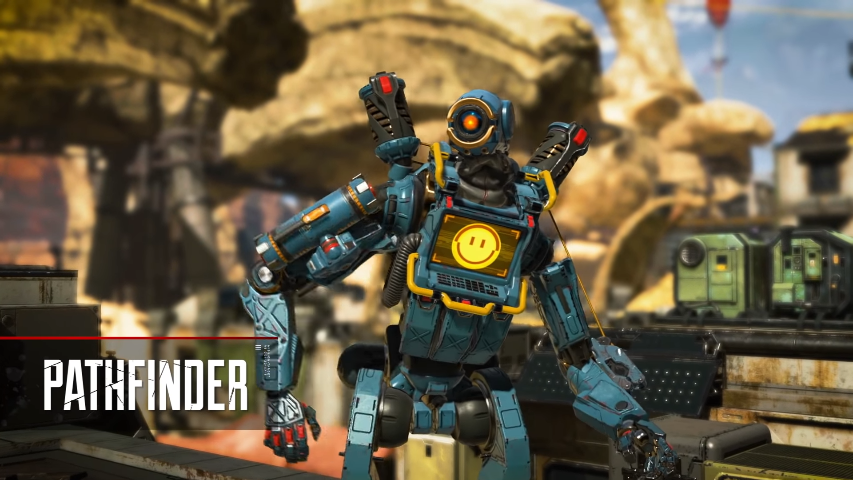
It used to be that Pathfinder was among the best Legends to play, but successive nerfs have reduced him to the ‘B’ tier. However, he is one of the most enjoyable characters to play, and if you can master his grapple, you can move like none other.

You can still use the Grapple to escape quickly or push up on your weak opponent while they are still vulnerable. He still has unrivaled movement, and his Zipline Ultimate works similarly to the Wraith’s portal, allowing your team to get out of tight spots and to reach hard-to-reach locations.

10. Horizon

horizon
Horizon (Electronic Arts)

Horizon has established herself as one of the most well-known Legends since her introduction in Season 7. As a result, her tactical ability resembles a faster variation of Pathfinder’s and Wraith’s ultimate abilities. It will only take her and her team a few seconds to reach high ground. Horizon no longer belongs in the ‘S’ tier, despite the fact that she is still a popular pick despite the current changes.

For more Guides, Tips, and Tricks

You can also check out our dedicated Video Games Guides section.

In Sound Mind Guide – Everything You Should Know

Are you ready for a psychological horror game? Read our In Sound Mind guide that will tell you everything that you should know before you start playing.

The Living Tombstone provides original music and unique boss fights to the game, ‘In Sound Mind‘, an imaginative first-person psychological horror. The one place you can’t seem to escape is your own mind, a journey deep within the workings of your mind.

The environment takes on a life of its own as you awake in the corridors of an inexplicable building and you discover a series of victims. They have all been exposed to the same experimental chemical. As you search for answers, bizarre visions emerge and reveal an array of frightening horrors…and a cat named Tonia. We have covered everything that you should know in our In Sound Mind guide.

Read Horizon Forbidden West Guide – 10 Things Everyone Should Know

In Sound Mind Guide: Get lights on

To progress through a dark area, players will need a flashlight as they begin the game. Players can use the flashlight to traverse the darkness and turn on the lights by activating the switch.

In Sound Mind Guide: Collect the pistol pieces 

Grab the key next to the switch after you have turned on the lights. The key will allow you entry into the laundry room. Insert the fuse from the laundry machine that is running into the other washing machine to make it move and reveal the pistol grip hidden in the hole behind it.

On Desmond’s desk, a cat will knock a button to the ground after listening to some tapes. Once players grab the button, they can move on to the next area, which is a long hallway with two paths. The maintenance room is on the left, near the end of the hall. Below the table is a pistol barrel.

In Sound Mind house
House (Sony)

There is a vending machine on the second floor with boxes you can use to reach the top. A gun can be crafted at a table next to the switch that turns on the lights at the beginning of the game if you have all three pieces.

Read Best Signature Moves and How to Perform them – WWE 2K22

The Second Tape

The gameplay shows what happens after Desmond encounters the second tape. A strange lighthouse, isolated highways, thick forests, and a deserted coastal area are featured in the second tape. With the second tape, players are thrust into an open-world playground, offering a completely different approach to combat and exploration than the homo mart.

Get the Shotgun as soon as possible

If you play In Sound Mind for a while, you might no longer be interested in the pistol. A shotgun is a logical step if you are looking to expand your arsenal. In Sound Mind’s shotgun can be acquired by completing an optional puzzle, unlike its pistol, which required different parts to be assembled.

Read FIFA 22 Guide – 10 Things you should Know

A gas mask will be difficult to achieve

Gas mask
Gas Mask (Sony)

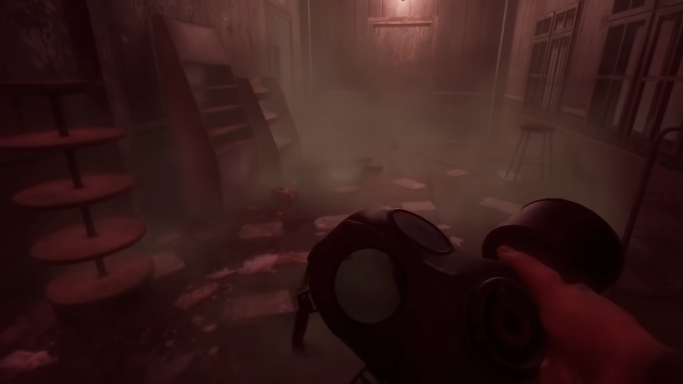
You will come across several puddles of toxic sludge during your journey through In Sound Mind. As soon as you begin a new file, a gas mask will appear through a window, but the door next to it will be locked. This room doesn’t require a key to access. It will take a few hours to get the mask. The first thing you’ll have to do is finish Virginia’s tape, which is the first of the major playable chapters exploring Desmond’s past patients. 

For more Guides, Tips, and Tricks

You can also check out our dedicated Video Games Guides section.

Assassin’s Creed Valhalla: Dawn of Ragnarok – Things You Should Know

Are you excited about the release of Assassin’s Creed Valhalla Dawn of Ragnarok? Read our guide that will tell you everything about it so that you can start with a bang.

Assassin’s Creed Valhalla: Dawn of Ragnarok’s gameplay digs further into the mythology than prior games in the franchise. Since Altair’s trek through the Holy Land, Ubisoft has been mixing real-world history with fictitious narrative strands.

The expansion will continue the Odin part of Valhalla’s tale, set in the mythological dwarven Norse kingdom of Svartalfheim. Players will be charged with discovering and recovering Odin’s stolen son, Baldr, from the dwarven realm while Eivor assumes the role of Odin once more. Valhalla’s base game made substantial contributions to the greater Assassin’s Creed plot, and the Odin storyline was a big part of it, so we’re forward to see what happens in Dawn of Ragnarok. Here is everything you should know about Assassin’s Creed Valhalla Dawn of Ragnarok.

Read Assassin’s Creed Valhalla Guide – Best Tips and Tricks

Assassin’s Creed Valhalla Dawn of Ragnarok: Price

With a fresh new plot and tonnes of content, Assassin’s Creed Valhalla Dawn of Ragnarok is now available. If you wish to begin your trip into the stunning land of the Norse myth, you may get this expansion for $39.9 from the shops. 

New mythical bracer

Dawn of Ragnarok will not only include new places and a new plot, but it will also introduce new gameplay features, as you’d expect from such a large expansion. The Hugr-Rip, a new mythological bracer worn by Odin that players will be able to utilize to gain abilities from fallen adversaries, is one of these. 

Players may only have two of these powers on them at a time, so if you obtain a third, one of your existing two will be replaced. In the meanwhile, unlike the skills in Valhalla’s basic game, which relied on adrenaline, these new abilities in Dawn of Ragnarok will be active as long as your Hugr meter is full.

Read How to Beat the Lost Wolf in Assassin’s Creed Valhalla – Guide

You will get new gear

Meanwhile, players will be able to purchase new gear to go along with their new weapons and skills, but we don’t have a lot of details on this yet. We do know that new mythological armor will be available in the expansion, each with its own set of benefits and abilities. While Odin’s new abilities are specific to Dawn of Ragnarok, Ubisoft claims that this new gear may be utilized with Eivor in Valhalla’s basic game as well.

Get ready for new enemies

Assassin's Creed Valhalla Dawn of Ragnarok cutscene
Cutscene (Ubisoft)

The fact that Odin travels to new realms and has new abilities to use in combat means that you will also face off against new types of enemies. There are a lot of new enemies in this expansion, most notably the Muspels, which are lava and fire-infused enemies we mentioned earlier. 

Muspel enemies, called Firekeepers, will be able to resurrect low-level enemies during combat and this is a very interesting feature. The Power of Rebirth reminds me of Odin’s power of rebirth, so fighting them should be quite interesting.

Read Assassin’s Creed Valhalla – Tips for How to Beat Odin

Assassin’s Creed Valhalla Dawn of Ragnarok: Valkyrie Trials 

Dawn of Ragnarok’s Valkyrie Trials seems like an intriguing new addition to the game. These are just battle areas where players can take on waves of enemies, but Odin’s past victories are woven into the story, so you could encounter enemies you’ve already fought in the past. 

As part of this retelling theme, you’ll be able to choose up to 14 Boastings before each trial, which are basically combat modifiers that make the trial more challenging or more intriguing. Boasting will make your trials harder, but as you’d expect, you will also be rewarded better for your efforts.

Odin’s two new abilities

Assassin's Creed Valhalla Dawn of Ragnarok cutscene
Cutscene (Ubisoft)

Raven’s Power and Muspelheim’s Power, in addition to Odin’s new abilities, change you into ravens and magma, respectively. The Raven’s Power allows you to morph into a raven, while Muspelheim’s Power turns you into magma, allowing you to fight Muspel opponent kinds. 

Read Assassin’s Creed Valhalla – How to Beat the Walloper

When you play as a raven, your stealth is greatly boosted, and with the Power of Muspelheim, you may use your resemblance to Muspels to sneak into enemy camps without being discovered. Since social stealth made a major comeback in Valhalla’s previous expansion, we’re curious to see how it’ll be utilized in Dawn of Ragnarok.

New weapons like Viking atgeir

One of the new weapons is the Viking atgeir, which is a polearm with a long blade. There has not been a lot of information released by Ubisoft about this new weapon type or what you can expect from it. According to the developer, players can use a mix of light and heavy attacks to deal some serious damage with these polearms.

For more Guides, Tips, and Tricks

You can also check out our dedicated Video Games Guides section.

Genshin Impact Xinyan Guide – 10 Tips and Tricks

Want to know about Xinyan? We have the Genshin Impact Xinyan guide that covers everything about her with some best tips and tricks.

As a musician, Xinyan enjoys playing Rock and Roll, which isn’t a popular genre of music in Liyue. As a result of her eagerness to stand out, she often scares people away with her over-enthusiasm or people simply find it really weird. However, she remains undeterred and is still trying to spread the genre across Liyue.

As a pyro, Xinyan plays a defensive role in Genshin Impact. The Chinese stringed instrument, ruan, is one of the instruments she uses to stir the people’s passions and criticize prejudice. Shielding her allies and dealing with physical and pyro damage are the main objectives of her kit. Here is our Genshin Impact Xinyan guide with some of the best tips and tricks.

Xinyan in Genshin impact
Xinyan’s attack (YouTube)
Read Genshin Impact Bennett Guide – Tips, Tricks, Weapons, Artifacts, and more

Genshin Impact Xinyan Guide: Skyward Pride

Primogems must be spent on the weapons banner in order to get this 5-star weapon. There is an 8% increase in all damage from this weapon. It has an energy recharge bonus stat. Normal and charged attacks combine to create a vacuum blade that deals 80% of your attack to enemies nearby when you use your elemental burst attack. You can make up to eight vacuum blades in a minute. 

Genshin Impact Xinyan Guide: Snow-Tombed Starsilver

Snow-Tombed Starsilver is another excellent weapon to utilize. Physical damage is the additional stat, therefore it’s ideal for physical DPS setups. When assaulting an adversary with a normal or modified attack, the probability of generating and dropping an Icicle on them rises by 60%. This strike has an AoE damage of 80%. Cryo gives 200 percent attack damage to enemies when it impacts them. The assault happens just once every ten seconds.

Xinyan’s Constellations

Xinyan's constellation 2
Constellation 2 (YouTube)

Xinyan is a fantastic DPS character, but with her pyro shield, she can provide some helpful support — being able to use at least two of these shields is expected for most four-stars.

  • C1 – If you are focused on critical hit damage, this is an excellent constellation. Xinyan’s charge and normal attack speed are boosted by 5% for five seconds when she lands a crit, which happens once every five seconds.

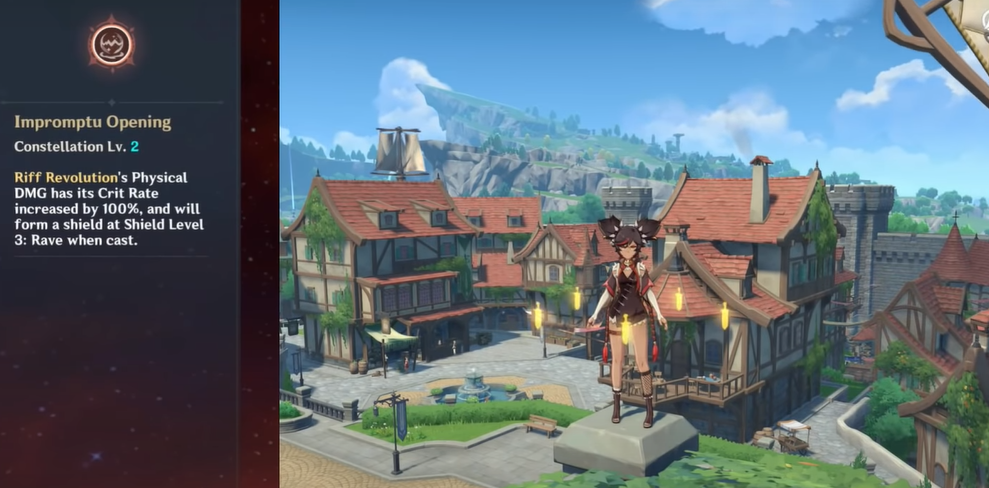
  • C2 – Xinyan’s Riff Revelation now produces a shield on level 3 and has a critical damage percentage of 100%.
  • C3 – It is possible to increase Sweeping Fervor to level 15.
  • C4 – The amount of pyro resistance an opponent has is reduced by 15% for 12 seconds when Sweeping Fervor is activated.
  • C5 – Level 15 can be reached in Rift Revolution.

  • C6 – Attacks now gain a bonus equivalent to 50% of Xinyan’s defense stat, and charged attacks no longer consume 30% more stamina.
Read Genshin Impact Noelle Guide – Weapons, Artifacts, and more

The 4-star craftable prototype Archaic is a great weapon

With the Prototype Archaic, you can get free refinements thanks to its 4-star craftability. If normal and charged attacks are used in a small area of effect, you have a 50% chance of doing 240% attack damage to an enemy. However, it can only happen once every 15 seconds.

If you are using support build then go for Emblem of Severed Fate

Xinyan's gameplay
Xinyan’s gameplay (YouTube)

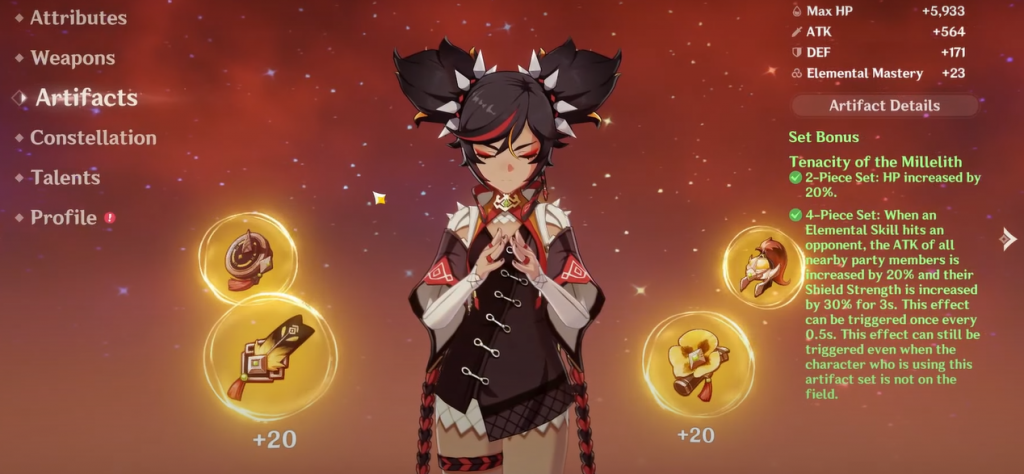
In order to maximize the shield ability in a support build, we recommend the Emblem of Severed Fate set. By wearing four pieces of this set, you receive an energy recharge buff of 20%, which in turn increases your elemental burst damage by 25% of your energy recharge. Using this method, you gain a maximum damage buff of 75%. As for the sands, the cup should have a physical damage bonus, and the hat should have a crit rate or damage bonus.

Read Genshin Impact Three Realms Gateway offering guide – All Mirror Puzzles and How to Solve Them

Genshin Impact Xinyan Guide: The Bell

You can also use the Bell as a powerful weapon. You get a shield in response to taking damage that absorbs up to 20% of your max health when you take damage. It lasts for up to 10 seconds before breaking. You can trigger it every 45 seconds. Attacks are increased by 12 percent while the shield is active.


The Unforged will help you a lot in shield ability

The Unforged is a fantastic pick for a support build that makes advantage of the shield ability. It increases shield strength by 20% and provides a bonus stat of attack percentage. When an attack is applied to a target, it increases by 4% for 8 seconds and can stack up to 5 times. While you are shielded, your attack boost bonus is increased by 100%.

With the battle pass, you can get the Serpent Spine

Crit rate is the bonus stat of Serpent Spine and it increases the damage dealt by 6% every 4 seconds the character is on the field as well as the damage taken by 3%. You can stack this bonus stat up to five times.

What is the best Artifacts?

Xinyan's artifacts in Genshin Impact
Artifacts (YouTube)

You should go for the Noblesse Oblige set and the Bloodstained Chivalry set if you are going for a physical burst DPS build. There will be a 20% increase in physical damage and a 25% increase in elemental burst damage. For the sand, you should have attack%, physical damage bonus for the cup, and crit damage or crit rate for the hat.

Read How to beat the Golden Wolflord in Genshin Impact – Guide

Gather these talent materials for an upgrade

Xinyan’s talents can be upgraded with the following materials:

  • 114x Philosophies of Gold
  • 93x Lieutenant’s Insignia
  • 66x Sergeant’s Insignia
  • 63x Guide to Gold
  • 18x Recruit’s Insignia
  • 18x Tusk of Monoceros Caeli
  • 9x Teachings of Gold
  • 3x Crown of Insight

For more Guides, Tips, and Tricks

You can also check out our dedicated Video Games Guides section.