If you are a defender in Rainbow Six, then this operator is just for you. Here is our Rainbow Six Siege Azami guide with some tips and tricks.
New operators are frequently launched in Rainbow Six Siege to coincide with the start of a new competitive season. There have been a lot of new characters added to the roster since Rainbow Six Siege’s first release in 2015. It was one of the last console generation’s most popular first-person shooters. Each operator in the game has a unique specialty, whether it be defending or attacking. Over fifty operators are available for gamers to choose from.
As part of ‘Operation Demon Veil,’ Ubisoft has unveiled a new operator as part of the game’s seventh anniversary. Introducing Azami, Rainbow Six’s newest defender in Demon Veil. The Japanese private security agent has a new weapon in her arsenal. She has a loadout to run with her Kiba Barriers, as well as the ability to change the way the game is played. Here is our Rainbow Six Siege Azami guide for you with some of the best tips and tricks.
Rainbow Six Siege Azami Guide: Average SMG in her loadout
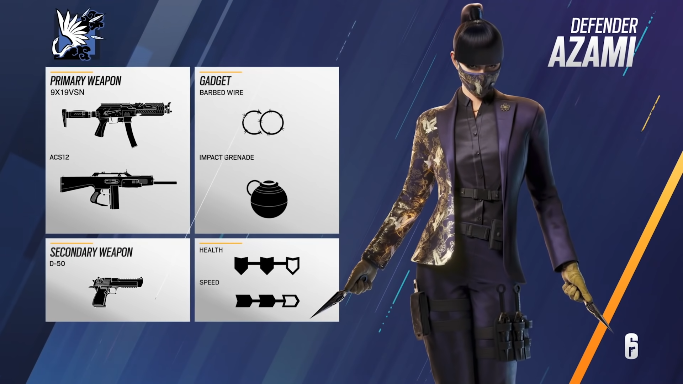
The 9x19VSN is not the most powerful loadout, but its 34 damage per bullet at 750 RPM is far from the worst in the game. This means that you won’t run out of bullets too quickly into your spray because of the 31 bullet magazine. Her sidearm is the D-50 Deagle by default, while she can choose either a barbed wire or an impact grenade for her secondary gadget. While the latter is just useful to rotate with, it synergizes with her primary gadget, the Kiba Barrier. Fill the gap on your team.
Rainbow Six Siege Azami Guide: Weapons

- 9x19VSN (Primary weapon)
- ACS12 (Primary weapon)
- D-50 (Secondary weapon)
- Impact Grenades (Secondary gadget)
- Barbed Wire (Secondary gadget)
Rainbow Six Siege Azami Guide: Kiba Barrier
Azami’s unique gadget, Kiba Barriers, makes her loadout in Rainbow Six the most interesting. Their use as little kunais is to hide blemishes in walls, floors, and ceilings. Bulletproof and cover a lot of space, but they can only be deployed when they are attached to a surface, and they will only deploy in circles.
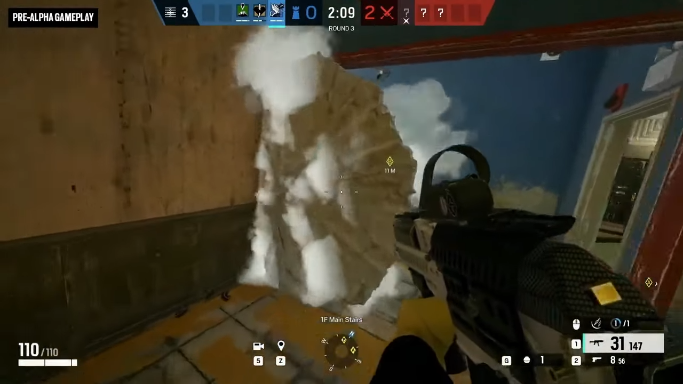
They deal five damage to an enemy if thrown at them. Allies are not damaged by the kunai. If Sledge’s hammer or explosives are used on it, the Kiba Barrier can be destroyed, but otherwise, it’s as good as reinforcement. Because of that, Azami is good at reclaiming control of the site and putting up defenses against attacks from all directions.
Rainbow Six Siege Azami Guide: Counters
With the exception of Sledge, there is no genuine catch-22 response to Azami in Siege. You’ve done your duty when an attacker wastes a lot of utility on Kiba Barriers (such as an Ash charge). Because Ash only has two of them, while you may have up to four Kiba Barriers, it damages the attackers more than your side. Having said that, Azami is not infallible. You can just ignore her Kiba Barriers or blast them up. Anyone who can surprise her with rapid vertical play.
You can patch holes

You might think that Kiba Barriers are a good way to guard against attacker breaches since you can throw them from a safe place on site. You would be right in thinking this. There is another, even better use for Kiba Barriers: Azami’s Kiba Barriers are the first vertical denial defense available in Siege.
If any operator blows some holes in the roof with Breaching Charges, Azami is able to close them up and secure the defender spots. Even after that, they can be difficult to deal with: Buck is incapable of this, and Sledge must swing his hammer at the right angle. There can only be something like an Ash or Zofia charge that can handle it easily. Using Kiba Barriers in this way makes more sense. Keep in mind that this won’t be the same in all maps of the game.
Combining the Kiba barriers
In addition to patching holes in ceilings, Kiba Barriers can also be used to create deadly choke points. A doorway can be made to resemble a crouching zone by placing one on top. Adding barbed wire makes the effect even more effective. There are other options as well. Ela’s Grzmot Mine and Thorn’s Razorbloom Shell can further complicate the situation for attackers. Defensive units can benefit from these small death traps.
For more Guides, Tips, and Tricks
- Stranger of Paradise Final Fantasy Origin Guide – Tips and Tricks
- Elden Ring Thop’s Quest – A Complete Guide
- How to beat Kuroki The Artist in Sifu – Guide
You can also check our dedicated Video Games Guides section.
