FIFA 22 Guide – 10 Things you should Know

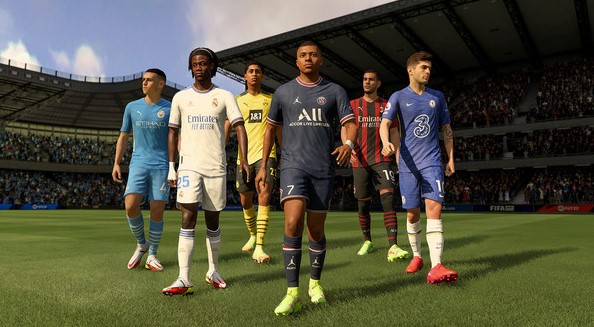
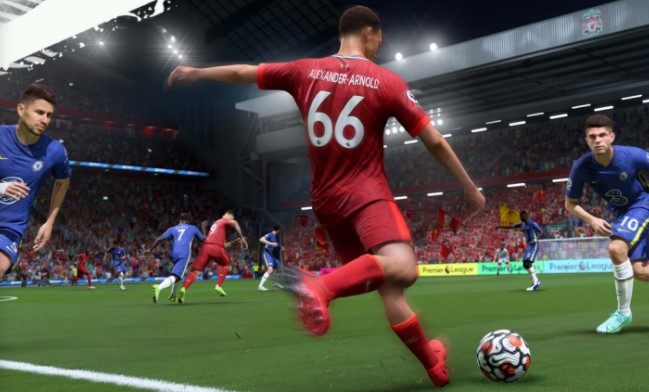
Here is the FIFA 22 Guide that will help you to understand the game even better. We have also given the link if you want to play FIFA 22.

Electronic Arts have released FIFA 22, a football simulation video game. There are two editions of FIFA 22, a Standard Edition and an Ultimate Edition. In FIFA 22, you may play as both a manager and a player.

 As you guide your club to triumph, create the newest club in FIFA, design your uniforms, style your stadium, and decide whether to compete with the elite or climb from the lower levels. Alternatively, you may put your abilities to the test in the more immersive Player Career mode, which allows you more opportunities to advance, accomplish, and immerse yourself in your Pro’s journey through the game.

You can play FIFA 22 for free on Steam which ends in 3 days. You can buy FIFA 22 for 67% off and the ultimate edition for 30% off. If you are thinking of buying or playing the game, below are the 10 things that you should know about FIFA 22.

FIFA 22 Guide: Create your club

In career mode, you may now establish your own club and add it to any league in the game, effectively replacing an existing squad. And it’s fantastic! You get to pick your team’s name, rival, crests, and home and away uniforms. With 80 different styles to choose from, including Nike, Adidas, Umbro, Puma, Hummel, and New Balance, the latter is a great way to pass the time.

You need to get the ‘Your Squad’ tab right during the initial setup. Make sure the line-up of regen players on the right is suitable by experimenting with the top two sliders (‘overall rating’ and ‘squad age’). A list of player ages can be viewed by flicking the right stick.

Read FIFA 22 Future Stars – Team 2 Released, Stats and Everything You Need to Know

FIFA 22 Guide: Career mode

Career Mode is FIFA 22’s holy grail for single player gamers. In the new version of the game, you are able to manage both a real-world club as well as make your own. You can also work your way up the ladder in Player Career, including breaking into your favorite team or beginning in the lower leagues and moving up to international glory.

The authenticity that cannot be matched

FIFA 22 Stadium
FIFA 22 Stadium (EA Sports)

Play in the world’s most prestigious competitions with the best players on the planet. This includes the UEFA Champions League, UEFA Europa League, and the newly new UEFA Europa Conference League, as well as the CONMEBOL Libertadores, CONMEBOL Sudamericana, Premier League, Bundesliga, LaLiga Santander, and many others.

Volta Football

VOLTA FOOTBALL is bringing football back to the streets. Create a player, choose your gear, and show off your flair at football playgrounds all around the world, whether alone or with your squad. Play unique events in distinct locales each season as you acquire new gear through a new seasonal progression system that allows you to earn XP toward all of the rewards available in VOLTA FOOTBALL, regardless of which mode you play.

FIFA Ultimate Team

FIFA 22 players
FIFA 22 (EA Sports)

Become a part of FIFA Ultimate Team, the game’s most popular mode. Create your ideal team from hundreds of players from across the world, personalise your club on and off the field with unique shirts, badges, and an entire FUT Stadium to define your territory, and compete against the AI or other FUT Community players. Also, as some of football’s most iconic players return to the pitch as new FUT Heroes, say hello to some of the game’s most memorable players.

BPM (Bronze Pack Method)

EA’s contentious decision to eliminate normal 400-coin bronze packs from Ultimate Team has impacted the Bronze Pack Method, often known as ‘BPM.’ Instead, only 750-coin premium packets are available. It’s bad, and it makes working the market more difficult, but it may still be profitable if you’re patient.

Check the ‘Compare Price’ option after purchasing a pack to see how much each player costs individually. For the time being, any cards that are presently selling for the ‘discard’ price of 200 coins should be kept in your club. Those with a value of more than 200, on the other hand, can be sold on the open market at a comparable price to other cards of the same type. Set a goal of selling 1000 coins per pack, and you’ll be well on your way to making a lot of money.

Finesse shots

FIFA 22 Ultimate Team
FIFA 22 Gameplay (EA Sports)

FIFA 22’s improved keepers are a very pleasing feature. They score fewer rebound goals, play better one-on-one, and behave more realistically generally, tipping balls over or claiming crosses. The community hasn’t stopped searching for new goalscoring exploits just because the old ones have been nerfed. Despite patches that have reduced its effectiveness, the most effective way to shoot in FIFA 22 is to sidefoot a curler around the keeper, and into the top corner.

Read How to complete Arthur Cabral SBC in FIFA 22 Ultimate Team

Player Cards

When you initially start playing FUT, it seems like any other trading card game. There are players in bronze, silver, and gold – everything is still fairly evident at the start. New card kinds will be released to the game on a regular basis during the season, including Team of the Week, Ones to Watch, and Team of the Year. Special events abound in Ultimate Team. 

The majority of these events are based on true occurrences. For example, if Raheem Sterling gets a hat trick this weekend, the chances of his being in the TOTW are strong. The market’s demand, as well as their price, is influenced by the genuine players’ performances. So keep an eye on what’s going on in the world of football!

SBC (Squad Building Challenges)

FIFA SBC
Gameplay (EA Sports)
Read How to complete FIFA 22 Flashback Neymar Jr SBC

SBCs arise on a regular basis and provide you with one-of-a-kind incentives. You must submit one squad (or more) with players that match specific criteria to accomplish a Squad Building Challenge. You can submit your team if you meet all of the requirements. The players, on the other hand, will be lost forever. So think about who you’re going to sacrifice! After completing the task, you will be given either packs or individual players. So keep a lookout for the most recent SBCs!

FIFA 22 Guide: Loyalty

Take a look at the loyalty stats if you want to perfect your chemistry stats. If someone has already played for your team 10 times, he gets an extra chemistry point. It’s much easier when players are chosen from a pack: pack players start with a loyalty boost! The bonus is indicated on the card with a green symbol.

For more Guides, Tips, and Tricks

You can also check our dedicated Video Games Guides section.

Cris Tales Guide – Tips and Tricks

We have brought you the Cris Tales Guide with some tips and tricks. Follow the guide so that you can have a better gaming experience.

Time jumping is an important aspect of the gameplay in Cris Tales, an action-packed turn-based RPG. A unique ability is available to each of the playable characters. As the game’s primary mechanic, manipulating time is important. As you can see on the screen, there are three sections: the present in the center, the past to the left, and the future to the right. 

With the help of Matias, Crisbell must accomplish a series of missions in the story. Using her time powers, she must utilize insights from the past in order to change the present. But walk carefully; your decisions will have an impact on the individuals you meet and contact with, perhaps altering their lives and destinies.

Cris Tales Guide: Moving Time the Right Way

Surprisingly, time in Cris Tales is a double-edged blade. By either advancing or regressing to their prime form, certain foes are genuinely improved. This may sometimes make a bad position worse since you’ve spent around while also strengthening the adversary. Unfortunately, there is no definite method to determine when to make the proper decision; in general, terrifying things become less scary and vice versa, with some exceptions.

Keep an eye on the turn counter

Keep an eye on the turn counter
Gameplay (Modus Games)

Combat turns are quite crucial. Both allies and foes have forthcoming turns that you can observe. You may also examine the results of any healing seeds you’ve sown. Always keep an eye on the following few turns to both forecast what your opponent will do and assess what you need to do. For instance, if no healing seed appears, you must heal any weak teammates.

Based on the enemy’s turns, you should decide whether or not to assault. If a group of two or three is approaching, make sure you and the other parties are prepared to withstand the onslaught. This will come easily as you play, but keeping an eye out early on can help you avoid problems in late-game confrontations.

Put an end to hard fights

Do not fight if not required
Gameplay (Modus Games)

Certain randomly generated combat will be more difficult than others, like in any RPGs. It might be due to a large number of adversaries, a single formidable foe, or something else. Because levels, save points, and towns do not heal your team, only inns, potions, and tents can, it’s nearly always best to avoid encounters that will severely harm your squad. This will make it easy for you to learn and improve, especially because the difference in experience is rarely worth it.

Cris Tales Guide: No Autosave

no autosave in cris tales
Gameplay (Modus Games)

The only feature that’s missing from Cris Tales is automatic saving, instead of giving you the choice to save manually. Especially since you never know what may happen during battles and in-game sequences, it’s always a good idea to save before entering them. Also, it’s advisable to back up your saves. If your save file gets corrupted, you could lose a lot of progress, so make sure you’ve updated your save file.

Bosses are puzzles

bosses are puzzles
Gameplay (Modus Games)

The bosses in Cris Tales are all different riddles that you must solve in order to progress. In this game, there’s no such thing as striking a boss hard enough till it dies; you’ll need to plot carefully if you want to make it through the bouts. You’ll lose if you don’t, and you’ll have to revert to the last save. Given the length of some boss fights, this can be severe punishment.

Take the time to study each boss’s attack patterns and pay attention to the important places that must be attacked. Work on injuring limbs if there’s a weak area that’s only noticeable after a limb has been harmed. Alternatively, if you need to utilize time to harm a monster in any way, figure out how to weaken it in order to do so.

Time travel mechanic

Cris tales time travel
Gameplay (Modus Games)

The most fascinating use of Cris Tales’ time-travel mechanism is in battle. Enemies alter according to the time period in which you’re facing them. Moving ahead and backward in time might weaken or strengthen foes, but that’s something you’ll have to figure out for yourself. It has the potential to create some fascinating scenarios. 

Moving ahead in time after using a water strike on a mechanical enemy in the past might result in the adversary rusting up and being easier to defeat. Examining foes will give you a better sense of how to use the time-traveling mechanism to your advantage.

For more Guides, Tips, and Tricks

You can also check our dedicated Video Games Guides section.

Children of Morta Guide – Top 10 Tips and Tricks

Here is a complete Children of Morta guide with some top tips and tricks for you. Read the guide and make your gaming experience good.

In September 2019, the game Children of Morta was launched. It’s an action role-playing game with a roguelike twist. Players will unlock additional members of the Bergson family as the game proceeds. There will be a total of seven playable characters in the game. Members’ playstyles and gameplay mechanics differ, and as the game goes, players level up, obtaining rewards for themselves and other family members. In order to clear Mount Morta’s tunnels of countless foes and bosses, players must cross a succession of randomly produced dungeons.

Individual dungeon runs are interspersed by visits to the Bergson family home, which occasionally advance the story or allow players to hear the extra conversation. Some of the tales take place after the game’s events have occurred. Below is the Children of Morta guide with some best tips and tricks.

Read Genshin Impact Yae Miko – Things We Know So Far

Children of Morta Guide: Explore

Each time you enter a dungeon, make sure you investigate every inch of the terrain. You’re probably missing out on a lot of great stuff if you rush into the boss chamber as soon as you find it. Not only will you most likely uncover relics, runes, and graces that will give you an advantage when you do decide to face the boss, but you may also miss out on key unlockables like research tablets, which can be used to purchase permanent improvements.

Ranged characters will be a great help

Children of Morta gameplay
Gameplay (Dead Mage)

Try switching to one of the two ranged characters if you have difficulty using swords, daggers, fists, or hammers. Even if you can pick off enemies while keeping a safe distance from them with Linda’s arrows and Lucy’s fireballs, you can change the game. There are a few skills that Lucy has that greatly increase her chances of survival. Unless you’ve been hit in the last five seconds, her decoy ability and protective ward allow her to absorb any damage from an enemy attack.

Children of Morta Guide: Local Co-op

Children of Morta’s co-op mode is one of the game’s most distinguishing features. Players may choose from a variety of heroes, which will grow in number as the game progresses, and go it alone or with a companion. It can be simpler in other aspects, such as the ability to be revived on the spot. The game, on the other hand, scales the difficulty, or at the very least the number of creatures it summons. It’s also worth noting that this is exclusively for local multiplayer.

Children of Morta Guide: Gems

Combat
Gameplay (Dead Mage)

Aside from gold, jewels may also be found. These can be discovered in chests, stolen from defeated foes, or earned as a prize for completing in-dungeon activities. They can only be used to open specific chests initially. 

If the occurrence is discovered early in the game, players can rescue a merchant. He’ll take diamonds in exchange for his stuff. While it may be tempting to spend every gem on a chest, if one’s health is in good shape, we recommend reserving those valuable resources for the store. He generally has some nice stuff with him.

Family buff

Contrary to popular belief, we believe it is necessary to play with everyone at some time. There are two major causes for this. One, as characters progress in their talents, they will advance to new tier levels, which will offer permanent bonuses to the whole family.

As a result, raising everyone’s skill level will benefit the family. Another reason to experiment is that later in life, family members will fall unwell, lowering HP. They need to rest, thus they aren’t being played. As a result, it’s critical to try everyone out as a backup.

Be sure to explore the entire floor before you leave

Children of Morta gameplay
Exploring Children of Morta (Dead Mage)

Aside from monsters, many other things might happen at random when you enter a dungeon. That is to say, a wide range of occurrences can occur. They can sometimes lead to dungeon prizes, like a boost for saving a caravan of merchants. On the other side, some circumstances may result in permanent assignments at the Bergson mansion. One of the first was rescuing a wolf cub, which eventually became the family dog. Basically, we’re attempting to emphasize that no stone should be left unturned.

Play solo

If you’ve been playing only in co-op mode with a friend and are having trouble even reaching the boss in each level, we’d recommend going it alone. You’d think that having a second player would make the game easier, but the game becomes significantly more difficult in two-player mode, with far more adversaries and far fewer healing potions dropping.

Read How to Beat the Guardian Ape in Sekiro: Shadows Die Twice

Children of Morta Guide: Glowing gate

This one seems a lot more like a dirty trick than the others, but it’s a valid strategy in a game as difficult as Children of Morta. As you go through the levels, you’ll come across chambers with glowing barriers across the doors; these rooms generally contain amazing stuff, so they’re always a pleasant surprise. 

Another reason to be happy if you come upon one of these doors is that opponents cannot travel through it. Your projectiles, on the other hand, have the ability to do so. If you find yourself in a tight place, you can lead your adversaries to a glowing gate and hide behind it while you take them out with your bow or spells.

Switch characters

Different Characters
Characters in the game (Dead Mage)

If you’re stuck on a level and can’t seem to progress with your favorite character, you might want to try switching to a new one. Each of the Bergsons may acquire special bonuses that extend to the entire family as you level them up, so it’s certainly worth it to continually swap up whose character you’re playing as. 

Furthermore, if you make several failed efforts with the same character, they may get ‘corruption fatigue.’ This depletes a percentage of that Bergson’s maximum health, which worsens as you use them more, but improves if you rest them and switch to another character.

Three key strategies

Children of Morta gameplay
Gameplay (Dead Mage)

There are three key strategies for surviving in the dungeons. First and foremost, practice reading the skill cooldown meters. When an ability is complete, press the button! Second, master the art of dodging.

John can deflect damage with his shield and dodge, but his evasion is poor. The majority of the other characters are nimbler, and players may duck through opponents. The final component of this trifecta is understanding when to flee. Because not all monsters hunt all the time, reducing the herd can sometimes assist.

For more Guides, Tips, and Tricks

You can also check our dedicated Video Games Guides section.

Genshin Impact Thoma Guide – 10 Tips and Tricks

Here is the Genshin Impact Thoma guide with some of the best tips and tricks that will help you understand the character even more.

Thoma will be a familiar face to those who have traveled to Inazuma in Genshin Impact because he is one of the first individuals you will see when you arrive at Ritou Harbor. Thoma is recognized for being someone you can count on at any time since his contacts with the Yashiro Commission can come in helpful if you need to avoid conflict with the Shogun’s forces.

His role in the Kamisato Clan is that of a ‘housekeeper,’ despite his seeming tremendous power surrounding Inazuma. Thoma will always find plenty to do on the Kamisato Estate because he is in charge of things like cleaning and cooking.

From February 16, 2022, through March 8, 2022, Thoma appears on Yae Miko’s banner as a rate-up character. In Wanderlust Invocation and Epitome Invocation, he is also accessible at a regular charge! Yae Miko’s banner also includes Thoma, Fischl, and Diona as rate-ups! The below Genshin Impact Thoma guide will give you all the information about him.

Read Genshin Impact Yae Miko – Things We Know So Far

Genshin Impact Thoma Guide: Staff of Homa

The Staff of Homa is the finest weapon Thoma can have. It’s now on the weapons banner, so if you don’t already get it, you still have a chance to grab it. Because this is a 5-star weapon, you’ll need a lot of Primogems to obtain the weapon banner. 

Crit Damage is a bonus stat on the Staff of Homa, making it perfect for dealing huge amounts of damage. It raises your maximum HP by 20% and enhances your attack based on your maximum HP. When the wielder’s HP is less than 50%, the bonus is increased even more.

Genshin Impact Thoma Guide: Skyward Spine

Thoma showing his skills
Thoma fight scene (YouTube)

Skyward Spine is another 5-star weapon with energy recharge as a bonus stat that we can suggest. It boosts the crit rate by 8% and the standard attack speed by 12%. When standard and charged strikes hit an adversary, a vacuum blade is created with a 50% chance of dealing 40% of the attack as damage in a short area of impact. Only once every two seconds is this possible.

Blazing Blessing and Crimson Ooyoroi boost Attack and Defense!

Blazing Blessing is Thoma’s elemental skill. A deadly kick from Thoma does AoE Pyro damage as he thrusts his spear into the ground. Thoma can also absorb a certain amount of damage with Blazing Blessing’s Blazing Barrier.

On the other hand, Crimson Ooyoroi is the elemental burst. Thoma spins his spear causing pyro damage to all nearby foes as he slices through them with scorching flames. If Thoma (active characters) remains in this state, he will utilize Fiery Collapses that deal Pyro damage to everyone nearby and summon Blazing Barriers.

Read Genshin Impact Fischl Guide – 10 Tips and Tricks

What Artifacts should you choose for Thoma?

The 2-piece Emblem of Severed Fate and 2-piece Tenacity of the Millelith sets are the best recommendations. 20% more energy is going to be recharged and your HP will increase. In addition to energy recharge on the Sands, HP% should be the main stat on the Goblet and HP% for the Circlet.

If you prefer, you can also use 2-piece Tenacity of the Millelith and 2-piece Crimson Witch of Flames. A 20% increase in HP will be accompanied by a 15% increase in pyro damage bonus. We recommend Pyro Damage bonus on the Goblet, energy recharge on the Sands, and Crit Rate or Crit Damage on the Circlet.

Genshin Impact Thoma Guide: Passive skills

Thoma fighting the enemy
Thoma fight scene (YouTube)

One of Thoma’s passive skills is Imbricated Armor. Your shield strength will rise by 5% for six seconds if you get or renew a Blazing Barrier. This can be triggered every 0.35 seconds.

The other two are Flaming Assault and Snap and Swing. In Flaming Assault, Crimson Ooyoroi’s Fiery Collapse increases damage dealt by 2.2% of Thoma’s max health. Snap and Swing is useful when you are 20% more likely to score a double catch if you successfully fish in Inazuma with Thoma’s help.

Use Constellation 4 if you need Energy

Since Thoma’s Elemental Burst has 80 energy cost, he needs to recharge his energy. Constellation 4 will provide him with Extra energy which will ease this problem. His shields will also be more consistent with the first two constellations.

Read How to beat Stormterror Dvalin in Genshin Impact – Guide

What do you get from Thoma’s Elemental Skill?

Thoma using his elemental skills
Thoma fight scene (YouTube)

When Thoma’s Elemental talent is used, 4 Energy particles are released. This will be an excellent way for Thoma to acquire energy, given he has a very high Energy Cost. Thoma may provide Pyro shields to the squad as a protector. Thoma’s Max HP determines the strength of the shield. If you layer the shield, it will be much more powerful.

Thoma needs a Battery

The Burst can only be used by Thoma when he has 80 Energy. Even though his skill gives four particles, this amount is still quite high. In order to have his skills more consistent, it is recommended that he has a battery or a weapon that recharges energy.

Fire Collapses Can Disrupt Reactions

While the Elemental Burst of Thoma is effective at doing harm, it may also steal reactions from other members. This is especially problematic if you’re employing Thoma as a Shield Bot, since his damage will be significantly increased.

Having Thoma with Bennett will be a great advantage

Genshin Impact Thoma Guide
Thoma watching the enemies (YouTube)

Bennett and Thoma provide an excellent support core. Thoma can shield and snapshot to deliver extra damage, while Bennet offers a healing and attack benefit. Bennet’s C6 is genuinely effective when helping a pyro carry, and while supporting a non-pyro carry, they assure that everything you face will be affected by pyro and keep up responses. 

Thoma’s shield adds an extra layer of defense, making the carry invulnerable-even while hanging at 75% HP, it’ll be much tougher to burst. They can also repair one another’s energy problems with good particle regeneration.

For more Guides, Tips, and Tricks

You can also check our dedicated Video Games Guides section.

Best Lost Ark Summoner Build – PvP and PvE

Here is everything you need to know about the Lost Ark’s Summoner. Also, we have the best Lost Ark Summoner Build for PvP and PvE. 

Summoner is a long-range DPS mage class in the Lost Ark MMORPG. In addition, when the game was initially announced, it was one of the first characters to be revealed. It’s also the first female magical class, with the ability to use a magic staff as a weapon to perform spells that assume the shape of spirits and deliver elemental damage to opponents.

Not only that, but some of these spirits with broad abilities may move and do tasks. As a result, they may now fight alongside the summoner class in combat. In Lost Ark PVP and PVE combat, the spirits can also operate as supplementary damage dealers, tanks, and crowd control (CC), allowing summoners to keep a safe distance and survive.

Read Best Lost Ark Bard Build – PvP and PvE

About Summoner

Despite her poor defense, Summoner’s many magical powers and spirits are well-balanced, making it a class that is difficult to kill. Furthermore, the Summoner class’s identity or unique power entails summoning a big ancient form of spirit that may cause immense harm to foes.

For example, after gathering a certain quantity of energy in the form of ancient orbs, a specific spirit marble will glow. In addition, based on the number of orbs gained through battles or talents, you can pick what to summon. Furthermore, when employed correctly, these ancient spirits have their own distinct strength and ability, allowing them to dominate battles.

Summoner Skills

Summoner skills
Summoner Skills (YouTube)

Ancient Spear 

For 2.5 seconds, Ancient Spear concentrates your energy and summons a massive great ancient spear to the designated spot. Anyone inside the radius takes damage and becomes paralyzed. Enemies who are at the center of the collision take more damage. As your tripods, use Swift Cast, Explosive Spear, and Ancient Strength.

Sticky Moss Swamp

After 0.5 seconds, the user summons a sticky moss swamp at the specified area. Every second, opponent caught in the swamp take damage and have their movement speed slowed. It takes 5 seconds for the Sticky Moss Swamp to appear. To gain Ready Attack as your tripod, you’ll need to spend 4 skill points.

Winged Spirit

At the designated area, you summon a Wind Elemental in the shape of a hawk. You can hold it for up to 4 seconds to deal 8 hits of damage. Swift Cast, Thunder Spirit, and Whirlpool are the suggested tripods for this construction.

Fleeting Gale Bird

You can obtain the talent Fleeting Gale Bird as early as level 10. When you use it, you summon a flock of Gale Birds in the direction you’re facing. They cause damage to an adversary with each strike and may last up to 3 seconds. For this talent, I propose Accumulated Energy, Flame Bird, and Mother Gale Bird as tripods.

Earth Collapse

An earthquake at the chosen site is all that is required for Earth Collapse to occur. It inflicts Earth Damage to adversaries inside the radius by causing damage and launching them into the air. Flame Collapse, Shake, and Great Earthquake are all good choices.

Pauru

Pauru hurls a massive ball of fire towards the designated target spot when activated. This also summons the Fire Elemental Pauru, who goes on a 15-second assault spree against adjacent adversaries. It’s a fantastic AOE talent that can help you quickly dispatch trash creatures. You unlock Small Talk, be sure to invest 4 points in this talent.

Shurdi

Shurdi, a tiny Light Elemental, is summoned. This then follows you about for up to 20 seconds, doing damage to any surrounding enemies. It’s a fantastic passive talent to employ because it grants you free damage. Ignore Collision is the only skill you should select; the rest of your skill points should be used for other skills.

Steed Charge

Then there’s Steed Charge. Steed Charge is a magical energy summoner that takes the shape of a galloping horse. All foes caught in it will receive magical damage and be thrown into the air. Stormlike Gallop, Weak Point Detection, and Destruction Charger are recommended as tripods.

Elcid

Lily Elementals, 2 Elcids, are summoned. With their basic attack, Elcids inflicts 62 Damage to nearby enemies for 10 seconds.

Electricity Release

Cast a concentrated ball of electrical current to deal 106 [Lightning] damage, then create an electrical current zone to deal 245 [Lightning] damage over 1 second.

Maririn

Maririn, the Coral Stone Elemental, must be summoned. Maririn’s basic strike does 262 damage over 20 seconds to surrounding opponents.

Water Elemental

Inflict up to 793 [Water] Damage over 2s by summoning a Water Elemental.

Read Lost Ark Gunslinger Guide – Best Build for PvP and PvE

Reine’s Protection

Reine has blessed you. For 5 seconds, cast a barrier that absorbs damage up to 21% of max HP.

Flash Explosion

Activate a concentrated energy burst at the target place. Resulting in 312 damage.

Best Lost Ark Summoner Build for PvP

Summoner build for PvP
Summoner Gameplay (YouTube)
  • Steed Charge
  • Shurdi
  • Fleeting Gale Bird
  • Sticky Moss Swamp
  • Ancient Spear 
  • Elcid
  • Flash Explosion
  • Water Elemental

Best Lost Ark Summoner Build for PvE

Summoner build for PvE
Summoner Gameplay (YouTube)
  • Reine’s Protection
  • Flash Explosion
  • Steed Charge
  • Earth Collapse
  • Pauru
  • Sticky Moss Swamp
  • Electricity Release
  • Maririn

For more Guides, Tips, and Tricks

You can also check our dedicated Video Games Guides section.

Oblivion Isle in Lost Ark – Everything You need to Know

Here is the complete guide to the Oblivion Isle, mokoko seeds, and much more that you need to know about the Lost Ark.

If you kill the field boss Sea God Aporas, you will obtain the Oblivion’s Isle Token by RNG. According to the Sea God Aporas’ Eye Compass schedule, it spawns when necessary. A tree of aporas spawns on the map at the start of the game, and the boss is invincible at first. Before the invincibility buff wears off, you must destroy all Trees of Aporas.

Below is everything you need to know about Oblivion Isle, island tokens, and mokoko seeds in Lost Ark.

Oblivion Isle Mokoko Seeds
Sea God Aporas Map (YouTube)
Read How to Increase Item Level in Lost Ark

Oblivion Isle

You will need to kill the Boss in the center of Oblivion’s Valley in order to receive the Island Token. As the Boss is invulnerable at the beginning of the fight, you must destroy three bushes around him to kill him.

Oblivion Valley

Oblivion’s Valley is located amid treacherous seas; do not attempt to swim to the island before it appears. You can earn 2 mokokos outside the map by finding 5 mokoko seeds on the island. Kill the monster, then walk to the location shown on the map and smash the circular stone preventing the mokoko seeds’ entry. 

Read Lost Ark Boss Rush – A Complete Guide

Moroko Seeds

Collect Mokoko seeds
Collecting Mokoko Seeds (YouTube)

The initial mokoko seeds from the Lost Ark are simple to come by. You most likely found one in Prideholme, either behind the view tree or near Neria’s Tavern. You picked it up, cheerful music played, and you earned some experience points.

Even though they resemble a green fruit, perhaps a pear, there’s a reason you can’t eat them and why the head of Mokoko Village is so keen to have them back. When the enormous Tortoyk sneezed, the seeds, which are baby mokokos, were strewn all over the planet. That’s what the mokokos believe, at least.

Read Best Way to get Gold in Lost Ark

What are the rewards?

Every mokoko seed you collect earns you 180 roster XP in addition to emitting a pleasant perfume. By hitting O, you may see your current roster level and receive any benefits you’ve earned for upgrading it. Consider the roster level as an investment in the future for every character you have on a server. Because you’ve picked up mokoko seeds, your alts will be beefier, and seeds won’t be grabbed by your secondary characters again.

Lost Ark Gameplay
Collecting Mokoko Seeds (YouTube)

You’ll encounter Totoma shortly after leaving Lost Ark’s initial continent, at the quite quaint Mokoko Village on the island of Tortoyk. He’s the mokoko seed reward seller, and he’ll offer you items like virtue and stat-boosting potions, blueprints for the Eurus, and more crew for your ships. 

You’ll obtain cosmetics that convert you into a walking egg or allow you to find your final form as a mokoko seed along with everything else. When you acquire these prizes, you don’t lose any mokoko seeds; instead of paying seeds to buy them, you unlock them as you progress through each tier.

For more Guides, Tips, and Tricks

You can also check our dedicated Video Games Guides section.

How to Beat the Guardian Ape in Sekiro: Shadows Die Twice

We have brought you a guide on how to beat the Guardian Ape in Sekiro. Follow our guide carefully and defeat this boss.

The Lotus of the Palace is guarded by the Guardian Ape, an immortal creature in Sekiro: Shadows Die Twice. It has white fur with a vertical crimson scar from the top of its head to the left cheek, passing through its left eye. The Ape’s hands and feet have enormous, sharp claws. Ape’s buttocks are not covered in fur. A massive nodachi-style weapon runs through the beast’s neck, which is noticeable.

Bosses, such as the Guardian Ape, are unique and hazardous Enemies that, when destroyed, display a particular message on-screen, such as “Shinobi Execution.” To beat them, you’ll need to land many Deathblows on them, and filling their Posture Gauge, as well as reducing their health, is one way to do it. As their health deteriorates, their Posture Gauge will refill more slowly, supporting you in completing your task. Our guide will teach you how to beat the Guardian Ape.

The guardian Ape gameplay
The Guardian Ape
Read Sekiro Shadows Die Twice – How to Beat Juzou the Drunkard

Two Phases

The Guardian Ape can’t stop any of your assaults and has two stages. This isn’t to say he’s a pushover; he spends a lot of time swinging his lengthy arms or rolling about in an attempt to crush you, so you’ll have to be fast to parry or evade his assaults. Firecrackers can be beneficial in the early part of the fight to shock him, but the second phase will demand a lot of patience as he learns a whole new set of moves.

How to Beat the Guardian Ape: Phase 1

Phase one of the Guardian Ape in Sekiro
First phase of the guardian ape (YouTube)

Staying close to the Guardian Ape and baiting it into attacking is the key to this phase. Because the great majority of its strikes are blockable, you should defend and wait for its combinations to finish before striking. While not difficult, deciphering the combinations might be challenging at first.

Be aware of its body slam assault, which involves it jumping on its back and thrashing the ground. When it does this, try to avoid colliding with its arms and hitting its skull. Its unblockable hand swipe grab and body slam grab are the most threatening strikes in this phase. Simply hop to escape the hand swipe grab; duck as it jumps to avoid the body slam grab.

A toxic poo is another violent attack that, when thrown, inflicts huge damage as well as immediate poison status. However, because it hops high before throwing the excrement, this move is fairly obvious; simply rush underneath as it jumps and retaliates, as its recovery time from this strike is rather long. It also possesses a fart attack that is frequently employed when Sekiro is around; while this does not inflict instant poison, it does significantly fill the poison status bar.

It is possible that the Guardian Ape will sometimes jump back and roar. As a result, Sekiro is prompted to use the Grappling Hook, closing the gap and causing a short stagger. Furthermore, the Shinobi Firecracker is able to temporarily stun a Guardian Ape, since it is a beast-type. Flame Vents also have an excellent effect, inflicting flame status and potentially knocking the flame down.

How to Beat the Guardian Ape: Phase 2

Headless Ape
Second phase of the guardian ape (YouTube)

The attacks of this phase will be much easier to deflect, and they will cause significantly more posture damage than the previous phase. You should concentrate on deflecting attacks during this phase. As its attacks are longer-ranged, it is advised to stay away from the Guardian Ape. If you are trying to deflect an attack, move in only when its health is low so that posture can be built up.

Read How to beat Great Shinobi Owl in Sekiro – Guide

Keep an eye out for its broad sword swipes. Continue to attack it for only a short time. Attack it multiple times after it has completed a few combinations, then retreat. This ape’s attack is well-planned, as it rushes forward and swipes the ground while dropping flat on its stomach, leaving it defenseless. Take advantage of this by jumping over it and attacking it while in the air, then finishing with a complete combination.

Another strike that may be used is the Guardian Ape’s enormous overhead attack, which can be deflected; if deflected, it inflicts a massive stagger, allowing for a short flurry of blows before the Guardian Ape recovers. Also, when it’s down, striking its neck with the Loaded Spear will enable you to take out a centipede and deal tremendous posture damage.

The most dangerous attack

How to beat the Guardian Ape
Get up on the Ape and strike it (YouTube)

An attack that fills up the terror meter is a battle roar, which causes shockwaves to erupt. It can therefore instantly kill Sekiro by inflicting Terror status. In spite of the Lilac Umbrella’s focus on terror build-up, any Loaded Umbrella will negate the scream. As Phoenix’s Lilac Umbrella contains Divine Confetti, the slash is temporarily buffed with a buff when used with Projected Force. Any other buff you have on your sword, such as actual Divine Confetti or Living Force, will be canceled out by this buff.

The Shinobi Firecracker has no effect on the Guardian Ape during this phase since it transforms from a beast to an apparition. The Flame Vent is still efficient in inducing flame status, but it does not extinguish it. Holding down the run button and kiting the ape around the arena is a lengthy but safe tactic. Leap over the ape and swing three times as it descends. 

Start racing away from the ape as soon as you touch the ground. By remaining patient, keeping your distance, and attacking only when there’s an opening, you will soon defeat this boss.

For more Guides, Tips, and Tricks

You can also check our dedicated Video Games Guides section.

How to Beat Riddle School 3 – A Complete Guide

Here is a complete guide on how to beat Riddle School 3. Follow every step guided by us to complete the chapter.

Using your browser, you can play Riddle School 3 as a short graphic adventure. In the story, one student faces the consequences of his daring attempt to escape from school so he can experience the freedom that awaits beyond those brick walls. From start to finish, this walkthrough will make sure that you don’t miss anything important.

Below is a complete guide on how to beat Riddle School 3. Follow the steps and complete the chapter easily.

How to beat Riddle School 3
Riddle School intro (YouTube)
Read Hello Neighbor Act 2 Guide – Tips and Tricks

How to Beat Riddle School 3: Leave the Classroom

As the game begins, your first priority is to exit the classroom you’re in. You’re sitting in the left-hand corner of the room, with a ruler on your desk. Mr. Soggy, your instructor, is on the right side of the room, and there are a few other pupils who are trying to concentrate. To add the ruler to your inventory, click on it, and then look at the teacher’s desk. 

There is a globe positioned to its side. The globe will spin until a pink wad of gum appears. Click twice on it. You can then add the chewing gum to your inventory by clicking on it. Put it together with the ruler. You can find the air vent behind your teacher on the wall. 

You will trigger a brief cutscene when you drag the ruler over to the vent with gum on its tip. You can pick it up from your inventory and drag it to your teacher, who gets a cutscene in which his glasses fall to the ground. Pick them up to use later. After completing your active play area, exit the hallway by clicking the arrow in the lower right corner.

How to get the bookmark

Mr Read gives bookmark
Mr. Read wearing glasses (YouTube)

The hallway has several points of exit, so you are in the hallway now. You should grab the penny on the floor to your left. You must then enter the library by following the arrow pointing down from the playground’s base. Following this is a short cutscene. 

Upon entering, you will see Mr. Read standing beside a desk. Put the librarian’s glasses over his head to improve his vision by dragging them from your inventory. You’ll be rewarded with a bookmark for your efforts. Attach a ruler to the tip of your gum with that item. Leave the room after that.

Enter the supply closet

supply closet
Supply Closet (YouTube)

You’ve returned to the corridor you left after leaving Mr. Soggy’s lesson. Turn to the left. Another penny may be found to the left of the green lockers’ base. To enter the supply closet, grab it and then click the right of the two arrows going down at the bottom of the play area. 

A penny rests on the highest shelf of the bookshelf in this room, almost brushing the ceiling. It’s little and difficult to spot. To gather the valuable coin, take out your extended ruler from your inventory and use it on the dime. Your inventory should now contain 12 cents.

Play a little mischief

After you’ve stuffed your pockets with more cash than you need, it’s time to cause a little mischief. Return to the hallway from the supply closet. To the left of the water fountain, click the arrow that points into the bathroom. To open the stall, click on it once inside. After clicking on the toilet paper, it will be collected. 

You may now use the toilet paper from your inventory in the stall. Afterward, flush the toilet by clicking on the flusher, which is on the left top side of the toilet. Upon this, a new cutscene depicts the arrival of the janitor. Then leave the bathroom.

Richy’s introduction

Help Richy
Richy asking for help (YouTube)

On one screen left of the hall, you will find another penny sitting on the floor near the base of the stairway to the next level. Pick it up. Click on the arrow pointing up to reach the next level. One of the benches in the hallway has a portly individual sitting on it. Walk to the right for now and ignore him. 

A locker will be indicated in a word bubble there. You need to click on the locker, specifically the one that looks like it has a ruler on the front. When you press the button, a scene will start, and Richy will tell you he can be unlocked by the combination in Mrs. Oddverb’s room.

Read Hello Neighbor Act 1 Guide – Tips and Tricks

Where to find Mrs. Oddverb

Once you become wealthy, you need to worry about Richy. Leave this screen and locate the lad who has “feed me” written on his shirt. You will now be standing in front of the bathrooms after heading downstairs. There are two teachers relaxing in the teacher’s lounge, when you click on the left arrow pointing down. Mrs. Oddverb is one of the two. She has some questions to ask you. Select the first speech bubble to speak with the woman in the green dress. 

After selecting “Mrs. Oddverb, about Richy…?”, select “He’s locked in his locker. If you think Mrs. Oddverb should search for the combination in her classroom, select “Yes.” Both teachers will leave. You should also check the drawers near the right side of the room before leaving. Nickel can be found in the drawer directly below the coffee mugs. By clicking on it, you will now have 43 cents in your stash. You can leave now for the hallway.

Head left and then up the stairs again once you are back in the hallway. Next, proceed right past Richy’s locker, where a sign proclaims “Carrots are people too.” You can enter Mrs. Oddverb’s classroom through the door to the left of that sign. Pick up the penny on the floor first. Step into the classroom. Click on the slip of paper near the back right corner of the room to gain access to the combination on the desk inside.

How to free Richy

Locker code to help richy in riddle school 3
Locker code to free Richy (YouTube)

View the lockers on the back wall of the hallway as you exit the classroom. Open the leftmost yellow locker by clicking on it. You can grab a nickel from the shelf below the books and above the traffic cone by clicking. 48 cents are now yours. The next screen found Richy still locked up in the locker. To reveal the combination, click on the locker to clear the dialogue bubble.

You may modify each of the 8 digits by clicking up and down on the arrows above and below each number. The combination is 5-3-7-8-8-0-7-8, and then you may rescue your friend by clicking the symbol of the unlocked lock. He’ll give you a quarter automatically, boosting your total riches to 74 cents. He also reveals a liking for collecting buttons while you’re chatting.

Get a button for Richy

Miss Count’s classroom entrance should be identified. This classroom is chaos, with monkey dolls strewn around the floor and particularly in front of the desk. Hovering your cursor over the silver shell reveals that it is a keyboard key. Take it and get out of here.

To go to Miss Count’s classroom, go one screen right, climb the stairs, and then go one screen left to access her classroom. A machine is positioned across from the teacher’s desk, where she leans against it. The machine will start up if you click and drag the button you grasped before. A cutscene and a button will emerge on the machine’s left side. Take it and leave the classroom once you have it.

The next step is to find Richy. Continue straight along the hallway until you reach the end. Richy is standing on the left side of the desk in Mrs. Oddverb’s classroom. By giving the button to your friend, you’ll earn an additional quarter, bringing the total to 100 cents.

How to Beat Riddle School 3: Get the key for exit

This is How to Beat Riddle School 3
Chubby asking for pudding (YouTube)

Remember that student you saw earlier and ignored? Go back to him. His name is Chubb. Give him the pudding that you will get from Mrs. Munch from the lunchroom. A cutscene will play when you drag the pudding from your inventory onto his belly. Upon its completion, you are in an auditorium with an unconscious Chubb. Go back to the hallway by clicking on the arrow pointing out of the hole Chubb made in the wall. 

Head upstairs. Once there, click on the office door. The first thing Mrs. Mooses will do when you arrive is asking you how she can help you. You might be asked why you are here. Say, “I was sent here to see Mr. Potato.” She will want to know why you are supposed to see him. You automatically receive the key when you reply, “I’m awesome.” A cutscene follows.

It is now only a matter of leaving the building. Leave the school office by clicking the downward pointing arrow. Proceed downstairs. Take the left exit. A final cutscene and closing credits follow after you pass through them. 

This completes our complete guide on how to beat Riddle School 3.

For more Guides, Tips, and Tricks

You can also check our dedicated Video Games Guides section.

How to Increase Item Level in Lost Ark

Don’t know how to increase item level in Lost Ark? Do not worry, as we are here with a guide to help you increase the item level.

Finding and equipping your character with the greatest gear available is one of the most enjoyable aspects of any RPG. Lost Ark is no exception, although it does have several unique elements that beginning players may find difficult to grasp.

When you achieve level 50 in Lost Ark, you’ll have access to a massive endgame experience. Chaos Dungeons, Guardian Raids, island tasks, and much more are all waiting to be discovered. However, before you start any of these tasks, make sure your item level matches the topic you’re dealing with. So, below is a guide on how to increase item level in Lost Ark.

Lost Ark's Market
Lost Ark Market (YouTube)
Read Lost Ark Boss Rush – A Complete Guide

What is Item Level

The objects you uncover in Lost Ark have a level attached to them, referred to as “item level” or “ilvl,” much like your character. In the endgame grind, increasing your item level is a basic yet vital part. All weapons and equipment you gain in Raiders of the Lost Ark have an item level. 

This number determines how powerful your character is and what kind of endgame stuff they can access. The more activities your character can undertake and the higher content levels you can clear, the greater their total item level is. To access the majority of Lost Ark’s endgame content, you must boost this number once you reach level 50.

Items have a very low item level when they first appear. When you approach the endgame in Lost Ark, you’ll earn things with greater item levels, which will provide your character with more powerful stats and even ability-centric enhancements. The first breakpoint for conquering Chaos Dungeons and Guardian Raids is about 250 item level in the endgame. You’ll be able to boost your item level above 1,000 and unlock T3 content, which is presently Lost Ark’s most difficult offering, thanks to the honing system and endgame prizes.

Read Best Way to get Gold in Lost Ark

How to Increase Item Level

Gear Honing process to increase item level
Gear Honing (YouTube)

Honing your gear will be your primary source of item leveling. To obtain your first set of gear, you’ll need to finish a couple of Chaos Dungeon runs when you reach level 50. With that equipment, you’ll want to talk with a honing dealer in your town’s crafting area. It may be found near the southern end of the castle center in Vern. When it comes to honing an item, you’ll need three resources to get started.

  • Stone Fragments
  • Harmony Leapstones
  • Harmony Shards

The sort of Stone Fragments you’ll require will be determined by the object you’re trying to improve. Destruction Stones are used by weapons, whereas Guardian Stones are used by armor. All weapons and armor are made of Harmony Leapstones and Shards. The material kinds will alter as you get to T2 and T3 content. Stone Fragments will revert to Stones, Harmony Shards to Life Shards, and so forth. When you clear content at your character’s maximum item level, you’ll get the right upgrade materials for honing your gear.

You’ll notice an “upgrade” button under a percentage orb when you first access the honing UI. This orb indicates the likelihood that your update will be successful. Yes, improving your equipment has a probability of failing and consuming all of your resources. Only the resources you used will be destroyed if you fail to honing the object you want to enhance. Failing also increases your chances of a successful honing system, as shown by the Artisan’s Energy of that item.

Invest in Harmony Shards

You’ll need to invest Harmony Shards to improve your chances. For the first several layers of sharpening, investing the maximum amount will ensure a successful improvement. However, once you’ve completed a set amount of upgrades, you won’t be able to upgrade again—even if you put all of your Harmony Shards into it. 

Additional sharpening materials are used in this situation. Items like Star’s Breath can increase your honing success rate, even more, lessening your chances of failing your upgrade attempt. Items can reach +20 ranks before needing to be completely replaced, however, most people update their gear at +15. Keep your upgraded gear prepared for gear transferring even if this happens.

How to Increase Item Level: Acquire Honing Materials

Honing and special materials to increase item level
Honing and Special Materials (YouTube)

Guardian Raids and Chaos Dungeons are where you can find honing materials. By clearing both of these activities each day, you will be able to get a decent amount of honing materials. If you are still a beginner, we recommend completing island quests to acquire honing materials. These quests provide you with hundreds of Stone Fragments, so you definitely need to do them. 

You can view the rewards for each island from the Lost Ark community’s excellent resource here. You should start by clearing Glacier Island and as much of Shadow Island as you can. The materials given should be sufficient to get you to an ilvl of 400+. You will need to clear the Chaos Dungeon and Guardian Raid daily after completing these island quests.

Related: Lost Ark Chaos Dungeon – A Complete Guide

How to Increase Item Level: Gear Transfer System

the gear transfer system in lost ark
Gear Transfer (YouTube)

When you play Lost Ark, you will find better items. A better option might become available after you have invested thousands of dollars into upgrading an item. With the gear transfer system, you can use an item’s upgrades to upgrade another, allowing you to upgrade your gear without having to worry about your item level dropping.

How to use Gear Transfer System?

  • Pay a visit to the local sharpening shop in your town.
  • At the bottom of the dialogue menu, select the “gear transfer” tab.
  • Choose the item you’d want to upgrade.
  • Select an updated item that is compatible.
  • Transfer the levels to your superior item while destroying the upgraded item.

You can make much better gear from Abyssal Dungeons when you start doing them. Gear Transfer will be a very useful tool when you start using them. 

For more Guides, Tips, and Tricks

You can also check our dedicated Video Games Guides section.

Best Lost Ark Paladin Build – PvP and PvE

Here is everything you need to know about Lost Ark’s Paladin. Also, we have the best Lost Ark Paladin Build for PvP and PvE. 

Paladins, being one of Warrior’s advanced classes, have a distinct style that incorporates heavy armor, melee strikes, and holy magic. Paladin is a simple combat class that puts you in direct contact with your opponents.

Paladin is a fantastic class for leveling up rapidly in Lost Ark since it can take some damage as well as destroy large groups of monsters. It’s also ideal for single players looking for a class that can neutralize a lot of damage with shields while engaging opponents. This class employs sword combos, area skills that do massive quantities of damage to adversaries, and the ability to shield teammates.

Paladin fighting in lost ark
Paladin gameplay (YouTube)
Read Best Lost Ark Bard Build – PvP and PvE

Paladin Skills

Because Paladin skill cooldowns are very short, it’s easy to fall into a cycle of attacks, flitting between skills with a strong run of basic assaults. Flash Thrust and Flash Slash are excellent attacks that cost no mana, offer good upgrades that speed up the defeating of foes, and are handy in dealing with large numbers. Light of Judgment and Wrath of God are two of the first holy talents you have access to, and both do massive amounts of AoE damage.

  • Combo (Skill Lv. 4)
  • Holy Explosion (Skill Lv. 8)
  • Charge (Skill Lv. 10)
  • Heavenly Blessings (Skill Lv. 10)
  • Holy Sword (Skill Lv. 10)
  • Wrath of God (Skill Lv. 10)
  • Holy Area (Skill Lv. 10)
  • Holy Protection (Skill Lv. 10)
  • Execution of Justice (Skill Lv. 10)
  • Flash Thrust (Skill Lv. 10)
  • Alithanes’s Judgment (Awakening Skill)
Read Lost Ark Gunslinger Guide – Best Build for PvP and PvE

Best Lost Ark Paladin Build for PvP

 Paladin Build for PvP
Paladin using skills (YouTube)

Charge (Skill Lv. 10): Charge forward six meters and then stab enemies to inflict damage. The benefits of mobility, shining protection, and ambush attacks.

Heavenly Blessings (Skill Lv. 10): It summons an angel that does damage to surrounding enemies while also reducing the damage taken by all party members within its range for a short time. “Agile Cast,” “Perseverance,” and “Heavenly Requiem” are a few names.

Combo (Skill Lv. 4): Launches enemies into the air and can counterattack on the first use, and on second use, it becomes even more powerful. “Quick Pace”.

Wrath of God (Skill Lv. 10): Nearby enemies are knocked back when he hits them. “Wide Thunderstroke,” “Thunder,” and “Light’s Guardian” are some names.

Holy Area (Skill Lv. 10): An instantaneous ability that does damage to enemies within its range. While the “Godsent Law” skill is also a viable alternative, Holy Area offers the benefit of not requiring any casting. “Impaired Mobility,” “Grace,” and “Light’s Concentration” are some themes.

Holy Protection (Skill Lv. 10): This skill, when used, casts a six-second shield based on the percentage of Max HP for all party members within its range. “Quick Pace,” “Robust Protection,” and “Thunderous Protection” are the three phrases.

Alithanes’s Judgment (Awakening Skill): Causes tremendous damage to a target and adjacent opponents, as well as providing a shield to party members within its range dependent on your Max HP.

Execution of Justice (Skill Lv. 10): With a last punch, a powerful spin attack is launched. “Rune Prison,” “Strength Release,” and “Light Explosion” are some names.

Holy Sword (Skill Lv. 10): An effective thrust strike. “Propulsion,” “Vital Point Hit,” and “Condensed Energy” are three terms that come to mind.

Best Lost Ark Paladin Build for PvE

Paladin Build for PvE
Paladin gameplay (YouTube)

Execution of Justice (Skill Lv. 10): With a last punch, a powerful spin attack is launched. “Rune Prison,” “Strength Release,” and “Light Explosion” are some names.

Holy Sword (Skill Lv. 10): An effective thrust strike. “Propulsion,” “Vital Point Hit,” and “Condensed Energy” are three terms that come to mind.

Charge (Skill Lv. 10): Charge forward six meters and then stab enemies to inflict damage. The benefits of mobility, shining protection, and ambush attacks.

Heavenly Blessings (Skill Lv. 10): It summons an angel that does damage to surrounding enemies while also reducing the damage taken by all party members within its range for a short time. “Agile Cast,” “Perseverance,” and “Heavenly Requiem” are a few names.

Alithanes’s Judgment (Awakening Skill): Causes tremendous damage to a target and adjacent opponents, as well as providing a shield to party members within its range dependent on your Max HP.

Wrath of God (Skill Lv. 10): Nearby enemies are knocked back when he hits them. “Wide Thunderstroke,” “Thunder,” and “Light’s Guardian” are some names.

Flash Thrust (Skill Lv. 10): A stabbing strike with a powerful finishing blow. Call it “Flash Enhancement,” “Quick Prep,” and “Piercing Striker.”

Holy Explosion (Skill Lv. 8): A casting skill that explodes at the target place after two seconds. If alone, “Swift Fingers” and “Wide Explosion”, and “Light’s Vestige” if in a party.

For more Guides, Tips, and Tricks

You can also check our dedicated Video Games Guides section.