Cookie Run Kingdom: Dark Cacao Cookie Toppings build

We have brought you the Dark Cacao Cookie Toppings build in our cookie run kingdom guide. Learn everything about this cookie.

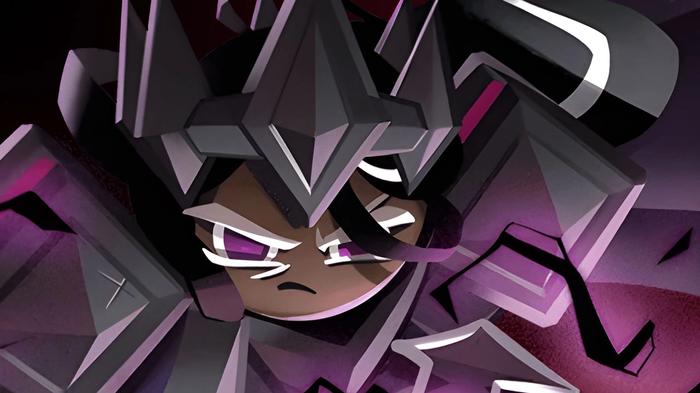
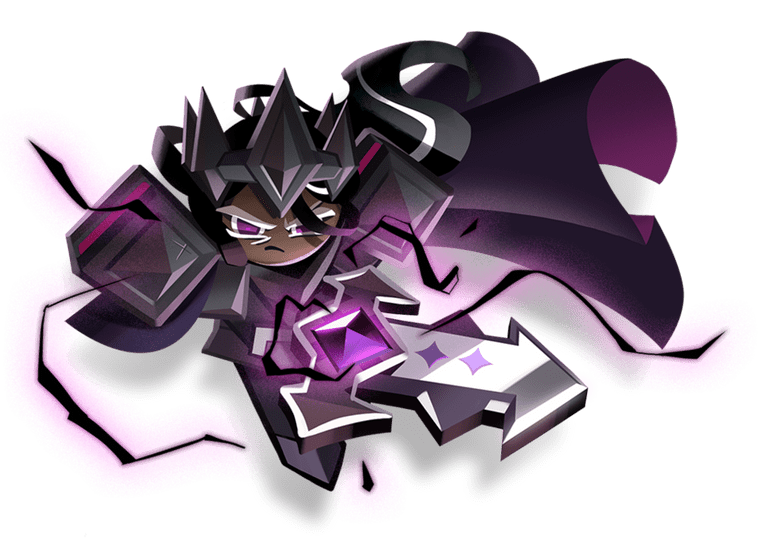
Among the five Ancient Heroes in Cookie Run: Kingdom is Dark Cacao Cookie. He is the third character to be released, appearing along with Affogato Cookie in the first Heroes of Dark Cacao update (version 2.7.102). The position he holds is prioritized to the Front, meaning he is of the Charge class.

Dark Cacao Cookie is the Dark Cacao Kingdom’s creator and ruler. He is also Dark Choco Cookie’s father, however, he disowned him after Dark Choco Cookie destroyed the Kingdom. Below is our guide. We will give you the best Dark Cacao cookie toppings build.

Read Pancake Cookie Guide – Toppings, Team, and more

The Story of Dark Cacao Cookie 

The last bean of a deserted cacao tree fell from a branch that had withered above a cliff edge without any taste. As it lay there in the frozen soil, enduring snow and wind, this bean had no idea it would become the main ingredient in a cold and solitary Dark Cacao Cookie. The Dark Cacao Cookie, wielding the Grapejam Chocoblade, was a warrior of unimaginable strength. 

It took three average Cookies to move this sword. Thunder and lightning erupted with each swing, and avalanches tumbled down mountains. A Cookie of few words but with great principle, Dark Cacao Cookie stood out from the rest. Following the sorrowful events of the Dark Flour War, the warrior isolated himself within the solitude of his castle. What could possibly melt the frozen soul of the warrior?

Dark Cacao Cookie is portrayed as a harsh and fierce protector of the Dark Cacao Kingdom. During his childhood, he is revealed to be a loving parent, telling Dark Choco Cookie that he will train him to be the strongest fighter. Dark Choco Cookie became increasingly disobedient to his father as he got older. The Dark Choco Cookie nearly killed his father while under the influence of the Strawberry Jam sword, prompting Dark Cacao Cookie to exile his son from the realm.

Dark Cacao Cookie Skill

Dark Cacao Cookie skills
Dark Cacao Cookie (cookierunkingdom fandom)

The Dark Cacao Cookie swings the Grapejam Chocoblade with immense vigor, inflicting damage on adversaries in range with thunder and lightning. This devastating strike lowers foes’ ATK and DEF while also inflicting Zap and Injury. Injury debuff ignores immunity and dispelling effects that don’t specify Injury directly, therefore injured opponents will have lower Max HP. When Dark Cacao Cookie uses his skill, he becomes temporarily immune to interrupting effects.

  • Cooldown of 16 seconds
  • DMG for first hit: 46.9% (+0.7-0.6% DMG per level)
  • DMG on second hit: 265.8% (+3.7-3.6% per level).
  • Passive Debuff Resist +20.0%
  • CRK-defdown -15.0% DEF for 9.0 seconds
  • CRK-atkdown -10.8% for 9.0 seconds
  • Injury: 12.5% maximum HP reduction for 30.0 sec (from the beginning of the battle), Injury limit of 25%
  • ZAP: 3.0% DMG every 1.0 second for 9.0 seconds. The HP shield is nullified.
Read Cookie Run Kingdom Team Guide – Tips and Tricks

Dark Cacao Cookie Toppings build

Dark Cacao Cookie Toppings
Dark Cacao Cookie (cookierunkingdom fandom)

A frontal Charge unit is a great choice for a Dark Cacao Cookie topping build, and the Solid Almond set is a great choice. Searing Raspberry’s ability to hit hard right away can make it tempting to go for a pure attack. In contrast, Dark Cacao Cookie might just be able to make one or two more attacks if he chooses endurance. There will be far more damage outgoing from this than from one boosted blow before he’s knocked out.

For more Guides, Tips, and Tricks

You can also check our dedicated Video Games Guides section.

Elden Ring – Which Keepsake Should You Pick

Which Keepsake Should You Pick? Do not worry, we have brought you the Elden Ring Keepsake guide to help you choose.

Despite being a new item, the Elden Ring Keepsake should be familiar to gamers who are experienced with From Software games. If you want to create the perfect visual representation of yourself or your preferred hero, you have a wide range of options at your disposal. However, that choice is purely visual. Before you arrive in The Lands Between, you will also have to decide which Keepsake you will use as your starting Keepsake.

The Keepsake item resembles a Gift in Dark Souls, giving you something (or a stack of things) to take with you on your journey. Although some of them will be extremely valuable, there are others that will not. It’s possible to skip the Keepsake altogether if you’re hardcore. For those who want the keepsake, we have the Elden Ring Keepsake guide that will help you with which keepsake you should pick.

Read Elden Ring Beginner’s Guide – 10 Things You Should Know

In the character creation process, there are ten Keepsake possibilities, although technically there are only nine because one of these options is to have no Keepsake at all. The most crucial thing for new players to grasp about Keepsakes is that they aren’t unique items: they’re rather common in-game resources, and you’ll wind up accumulating a lot of them during the game.

Keepsakes in Elden Ring

Golden Seed: From the Lands Between, a golden seed washed ashore “Sacred Flasks are thought to be strengthened by this. “This Keepsake improves your healing flasks, letting you utilize them for longer.

Cracked Pot: At first, you are given three cracked pots. These pots are actually crafting ingredients that are used to make projectiles.

Stonesword Key: To begin, you are given two sword-shaped stone keys. Each key is single-use and breaks when the seal is broken, so it cannot open an Imp Gargoyle Lock.

Crimson Amber Medallion: An amber medallion that increases your maximum health. While similar to Keepsakes, this is a Talisman, not a consumable, which gives a permanent buff when worn.

Fanged Imp Ashes: This Keepsake is made out of the ashes of little, miniature golems that are “supposed to carry spirits within,” allowing you to call a ghost to battle alongside you at specific spots in the game. The usage costs MP.

Lands Between Rune: “The people of the Lands Between are enlightened by the gold of grace.” This item can be consumed to gain Runes.

Shabriri’s Woe: “A crazed likeness of a noble with two eyes that have been crushed.” Increases enemies’ madness and aggression.

Bewitching Branch: You begin with five holy branches imbued with seductive power “Miquella, a demigod, is thought to be the source of this. “Consume this item to charge your melee weapon with a magical enchantment that charms the target of your strike. The usage of MP costs MP.

Boiled Prawn: Prepare five portions of meat from boiled crayfish. Their consumption increases resistance to physical damage.

None: No keepsake. The past has been well and truly forgotten. The game starts with your character without a Keepsake.

Which Keepsake Should You Pick among the 10
All Keepsake (YouTube)

Which Keepsake Should You Pick?

The Cracked Pot and the Golden Seed are the best keepsakes according to us. The Cracked Pot is a great Keepsake because it can be used to make thrown projectiles with a variety of devastating elemental and status effects on the target. This is definitely one to save for a later playthrough, as this type of crafting is a little more advanced than you’ll be prepared for in the first hour or two of your first run.

Read How to Two-Hand a Weapon in Elden Ring – Guide

The Golden Seed will grant you one additional Flask usage – either to restore your HP or FP. Survival is crucial at the start of the game. Many Golden Seed sites may be located in Elden Ring, but it will take some time to find them all. This is a wonderful idea for providing you with an advantage right at the start of the game.

For more Guides, Tips, and Tricks

You can also check our dedicated Video Games Guides section.

How to Two-Hand a Weapon in Elden Ring – Guide

Want to know how to two-hand a weapon in Elden Ring? Read our guide so that you can kill the enemies with both hands.

Who does not want a weapon in both hands to smash their enemies? The ability to two-hand a weapon can really boost your combat abilities, allowing you to get rid of Elden Ring bosses quicker than if you were holding your sword in one hand. Two-handed attacks are important when it comes to breaking the poise of beast enemies, especially when dealing with thrusts, swings, spins, and overhead attacks.

It is a basic feature of almost every FromSoftware RPG to be able to weaponize with both hands. Elden Ring allows you to use most melee weapons with one hand while freeing the other hand for items, shields, and abilities. It is typically better to use two-hand weapons when defense is not your primary concern, or when you want to utilize an Ash of War skill.

Elden Ring Two Hand Weapon
This is how you look with two-hand weapon (YouTube)
Read Oblivion Isle in Lost Ark – Everything You need to Know

Elden Ring Two Hand Weapon Importance?

Two-handed weapons have the ability to completely change the course of a battle. This is due to the fact that two-handing a melee weapon gives you more damage and various attacks. When it comes to shields, in Elden Ring, you can’t utilize your shield while two-handling a weapon. 

Because you deal greater damage with both hands on your weapon, this keeps things balanced. Because you won’t be carrying two hefty firearms at the same time, two-hand makes you somewhat more agile on your feet.

However, you should not constantly use two-handed weapons. Some fights need the use of a shield or a parry counter, while others contain challenging hits to roll past. Simply experiment to determine what works best against any specific enemy.

Read Lost Ark Key of Balance and Gate of Harmony – Guide

How to Two-Hand a Weapon in Elden Ring

How to Two-Hand a Weapon in Elden Ring
XBOX Controller (YouTube)

To hold their right-handed weapon in both hands in earlier FromSoftware titles, players merely needed to click the Y button on an Xbox controller or the Triangle button on a Playstation controller. Because Elden Ring jumps using the A button/X button, the input for interacting with the environment was switched to the Y button/Triangle, which was previously utilized for two-handing. 

Though the system for two-handing weapons in Elden Ring is more difficult than in previous games, it still enables players to two-hand either their right or left-handed weapon depending on which buttons they hit.

To two-hand a weapon, hold down the Y/Triangle button first. Press either the right or left shoulder buttons (R1 or L1) while holding down the Y/Triangle button, depending on which hand’s weapon you wish to two-hand. Hitting the right shoulder or R1 button two-hands the weapon on your right, while pressing the left shoulder or L1 button two-hands the weapon on your left.

When you are ready to use your hand for an item or a shield, just press the shoulder button (R1 or L1) on the device that corresponds with that weapon’s original hand and hold the Y/Triangle button again.

For more Guides, Tips, and Tricks

You can also check our dedicated Video Games Guides section.

Elden Ring Beginner’s Guide – 10 Things You Should Know

We have brought you the Elden Ring beginner’s guide. Read the guide carefully to learn everything about the game.

A third-person action role-playing game Elden Ring focuses primarily on combat and exploration. According to director Hidetaka Miyazaki, the game starts linearly, but players advance to a point where they can explore the Lands Between freely. There are six main zones in the open-world map, as well as castles, fortresses, and catacombs.

This story takes place in the Lands Between, sometime after the destruction of the titular Elden Ring, shards of which are scattered into the Lands Beyond. The realm is now ruled by the demigod offspring of Queen Marika the Eternal, which was graced by the Ring and the Earthtree that symbolize its presence. 

Read Total Warhammer 3 Guide – Best Tips and Tricks

As a result, they possess shards of the Ring that corrupt and taint them with power. After the Shattering, Tarnished, exiles from the Lands Between who lost the grace of the Ring, return to the Lands Between to find all the Great Runes. Become the Elden Lord by restoring the Elden Ring.

Elden Ring Beginner’s Guide: Choosing the class

At the start of Elden Ring, you’ll have to make the most important decision: choosing your starting class. Even if you can make your character into anything you want, all of the 10 starting classes offer stat boosts that are beneficial to specific play styles. Further, you’ll have the equipment and possibly spells that align with your play style from the get-go.

Elden Ring Beginner’s Guide: Summoning

Elden Ring cutscene
Game cutscene (BANDAI NAMCO)

An icon of the rebirth monument displayed on the far left of the screen can summon a spirit when ashes are used in conjunction with it. The summoned spirit will leave:

  • As soon as its HP reaches zero.
  • A boss has been defeated.
  • Spirits move a certain distance from monuments.
  • Reusing the same ashes.

Spirits cannot be summoned during multiplayer, and only one type of spirit can be summoned at a time.

Elden Ring Beginner’s Guide: Explore

Explore in Elden Ring
Exploring the area (BANDAI NAMCO)

Though Elden Ring’s open world might be scary to explore, venturing off the established path ensures uncovering a variety of really useful loot. Though Runes are required to level up, the game also requires other materials to upgrade your weapon, Flasks, and summons. Most of these materials can only be obtained by skipping heritage dungeons and traveling anywhere your heart desires, so don’t be scared to do so.

Look for glowing trees

You should keep an eye out for small, glowing trees in particular. Golden seeds are used for increasing your flask capacity, and they are found in these places. This is something you will come to rely on as you explore the Lands Between.

Crafting materials

You should come across a merchant early on in your journey who offers you equipment that permits you to craft. Crafting is an important part of Elden Ring, and some of the consumable things you may build can make a huge impact in battle and adventure. However, gathering resources throughout The Lands Between is required in order to manufacture such products.

Collecting these essential crafting materials, on the other hand, may be easier than you think at some strategic locations. That’s because you can just rest at a Site of Grace to respawn most adjacent resources, giving you an effectively infinite supply—as long as you’re willing to put in the effort to grind.

Find the enemy’s weakness

fight enemies
Combat cutscene (BANDAI NAMCO)

Don’t make your deaths in vain; if you must depart, make sure you know exactly what you did wrong and how you may change. This is especially critical during boss battles. Analyze your opponent’s moveset, animations, attack patterns, and openings.

Some enemies, for example, have powerful strikes but a long recovery period. Take advantage of this by striking them when they are pulling their large axe or mace off the ground. Every opponent will have flaws that you must exploit. You only need to find them by attentively analyzing the fight.

Guidance of grace

You can use Guidance of Grace, a new guide mechanic in From Software games, to guide you when you’re stuck. 

Read Raid Shadow Legends Guide – 10 Things Everyone should know 

Nighttime stealth

This is commonly ignored but crucial: stealth is far more valuable at night than during the day. While you may certainly utilize stealth behind and around foes’ backs during the day, you’ll discover that twilight provides an amazing benefit to this covert approach. If you stealth in front of an enemy during the day, they can see you from quite a distance, but once the sun sets, they won’t see you until you’re fairly close. 

Bring your horse back to life

Horse is the best partner
Your Horse in the game (BANDAI NAMCO)

Speaking of riding your horse, you’ll be relieved to hear that there are several ways to care for your loyal steed. Torrent has a distinct health bar from yours, so you’ll want to keep him topped off by feeding him raisins, which can be made from a variety of Rowa Fruits you gather along the way.

Meanwhile, even if Torrent dies, all hope is not lost. He’ll be restored automatically if you use a Site of Grace, or you can revive him by spending one charge of your Flask of Crimson Tears if you’re in severe need of his mobility before reaching a site of rest.

Spirit Ashes

fight enemies
Combat (BANDAI NAMCO)

As you go through Elden Ring, you will undoubtedly come across and gather Spirit Ashes, which will call upon the spirits of your enemies to help you in combat. These spirit summons are excellent at diverting attention away from you during battles, and they may be leveled up later in the game to become even more effective.

However, summoning spirits requires a significant amount of FP, and they may only be summoned in certain regions. To clarify, you must be near a rebirth monument to summon them, and if you leave the area, they will vanish. Furthermore, if they die in combat, you will not be able to bring them back in during that battle.

For more Guides, Tips, and Tricks

You can also check our dedicated Video Games Guides section.

 The Odd One Guide – Destiny 2 The Witch Queen

Here is the Odd One guide for all Destiny 2 players. Read the guide carefully and learn how to solve the puzzle.

Destiny 2’s long-awaited addition, The Witch Queen, was finally released on February 22. The new DLC is available for Google Stadia, Xbox One, Xbox One S, PlayStation 5, PlayStation 4, and PC. This was the first piece of DLC published before Destiny 2: Lightfall, in connection with Destiny 2’s Season 16: Season of the Chosen. Several new features and weapons are available in Destiny 2’s Witch Queen campaign. In addition, you may find some puzzles challenging to solve in the campaign. 

‘Puzzle: Rune Patterns’ is a mission objective in Destiny 2 Witch Queen that players must fulfill as part of the ‘Memories of Ruin’ quest. When you approach the big stone wall in the center of this region, a message labeled ‘The Odd One’ may show up on your screen. Find the ones that stand out among the others to figure out which set of runes stands out among the others. Below is the Odd One guide for you.

Read Destiny 2 DLC The Witch Queen — Everything You Should Know

The Odd One Guide: How to solve

The mission is fairly short and will not have you facing too many Hive. Instead, it focuses on storytelling. As soon as you discover the Memory chamber in your first mission, this mission will be unlocked. However, you must solve the Odd One Out puzzle challenge before you can move on to the storytelling section. Keep in mind that this puzzle will be unique to each person, therefore there is no one-size-fits-all solution.

Identifying the symbols that don’t belong in each column of Hive text is the key to solving this puzzle. A common pattern of symbols appears in five other columns as well. The pattern doesn’t appear in three columns. 

Puzzle gameplay (YouTube)

You should shoot at the incorrect columns after you have located the imposters. A hive symbol will appear three times over the slab to show that you are doing it correctly. The Hive texts and the slab seem to change every time you visit, so it may be hard to tell exactly what to look for.

You will be able to determine Savathun’s true intention once you have solved the puzzle. You will return to the Throne World when all Region Chests have been collected or after completing each Lost Sector has been completed. The Odd One Out puzzle challenge in Destiny 2: The Witch Queen is now complete.

The mirror puzzle

There are eight vertical columns displaying five symbols on the wall of runes when you approach it. The order of the symbols repeats in each of the columns with the exception of three. Each of the three of these columns will have a different rune order. According to the example above, the third rune in the circled column has a different meaning from the six that have the circular symbol. That means you need to blast any rune on that column since it is one of the three you need to shoot.

Upon choosing the runes correctly, you will see a symbol appear over the entire tablet. This process needs to be repeated two more times, identifying two more vertical columns of runes with a different order of runes. Once you have completed all three, you will be able to progress in the game.

After arriving at The Mirror quest for the second time, you’ll have to finish the tablet puzzle once again. Runes will emerge on the four circular platforms in each corner of the chamber as soon as you complete the process. 

On each circular platform, a line of runes will emerge. It’s crucial to locate the rune lines that are distinct from the rest. Shoot the rune lines that aren’t the same as the room’s most common repeating pattern. You won’t be returning to this area during the campaign. As soon as you complete the puzzles above, you’ll be done with the actual “encounters” in The Mirror.

For more Guides, Tips, and Tricks

You can also check our dedicated Video Games Guides section.

Lost Ark Ghost Ship Guide – Location, Rewards, and more

Want to know more about Ghost Ships? We are here with the Lost Ark Ghost Ship guide so that you can learn everything about these ships.

Traveling around another continent, exploring islands, and facing specific encounters are all possible with Lost Ark’s sailing mode. These include the Lost Ark Ghost Ships, which appear at specific times during the day and each has a specific difficulty level. 

In exchange for rare rewards, players take on difficult fights with their ghostly crews on these ships spawning randomly in the sea. Getting to and participating in these naval battles may prove to be challenging. A person who is brave enough to stand up to these nightmarish sights can reap some excellent rewards. So, here is the Lost Ark Ghost Ship guide to help you learn everything about it.

Lost Ark Ghost Ship battle
Ghost ship battle (YouTube)
Read Lost Ark Key of Balance and Gate of Harmony – Guide

How to unlock the Ghost Ships

You must first unlock the ability to sail on open waters before you can reach Lost Ark’s Ghost Ships. In order to board a ghost ship and begin the combat encounter, you must have your own ship. When you complete the main quest, sailing becomes available to you. Upon completing the Wavestrand Port questline, you will be able to get your own ship and embark. 

The pursuit of Ghost Ships will take you into rough waters, so you should customize your ship for durability to handle these encounters more effectively. In order to win the tough battles ahead, hire recruits with the Fighter: Ghost Ship trait, which increases their damage.

The Rohendel zone will be unlocked after you reach item level 460. Getting to item level 460 requires you to complete Chaos Dungeons and then increase the level of that gear by using Gear Honing. During your journey through the Lost Ark story, you will encounter quests that introduce both of these mechanics.

Lost Ark Ghost Ship Guide: Location

It isn’t possible to spawn Ghost Ships every day, but when they do spawn, they do so at the beginning of several hours throughout the day. The screen will display a notification once the activity is about to start. In any case, it’s a good idea to check out the schedule in advance through Procyon’s Compass. There are three ghost ships available in Lost Ark:

  • Nightmare Ghost Ship: It requires Item Level 460 and is found in the Northeast of the Sea of Procyon
Location for nightmare ghost ship
Nightmare ghost ship location (YouTube)
  • Shadow Ghost Ship: It requires Item Level 960 and is found in the East of Feiton
Location for shadow ghost ship
Shadow ghost ship location (YouTube)
  • Tempest Ghost Ship: It requires Item Level 1370 and is found in the Southeast of Punika
Tempest Ghost ship in lost ark
Tempest ghost ship location (YouTube)

Nightmare Ghost Ship, item level 460, will be of use to you. Search for “ghost ship” in your map’s search bar, or look for gray ship icons on your map to find the Nightmare Ghost Ship. There may not always be a Ghost Ship available to challenge, since they spawn randomly throughout the day. 

Read How to Increase Item Level in Lost Ark

The Nightmare Ghost Ship battle demands you to first slay the ship’s crew before confronting its master. Because regular resurrection is disabled, it’s a good idea to have Resurrection Feathers with you, which will revive you if you die in combat.

Lost Ark Ghost Ship Guide: Rewards

Although you can find varying rewards from defeating Ghost Ships, you can count on some powerful upgrade materials, such as engravings that enhance your skills. Additionally, you’ll earn Pirate Coins that can be used to upgrade your ship, which is important if you want to take on even more difficult Ghost Ships. Ghost Ship rewards are only available once per week, so farming them isn’t something to do daily.

When you’re able, accept the Bleak Night Fog daily quest from the “Una’s Tasks” option in your menu whenever it’s available to gain the most rewards from Ghost Ships. For you to make progress on this quest, you’ll need to defeat a Ghost Ship whenever you face one. 

When you finish this quest for the first few times, you will only receive silver as a reward. If you beat it 12 times, you will be rewarded with Eibern’s Wound, a powerful and popular Ghost Ship that you can sail for yourself.

Read Oblivion Isle in Lost Ark – Everything You need to Know

Things to keep in mind

Ghost ship events
Procyon’s Compass (YouTube)

The best way to get all the rewards from a Ghost Ship is to go in with a group, both so you can stay alive, and can make sure you’re doing enough damage. You will be paired with random players if you do not have a group.

Follow Procyon’s Compass for Ghost Ship appearances once you have met all requirements. It will put you and other nearby players against a boss at the top of the ship. In the event that you die during an encounter and don’t use a Phoenix Plume, or just quit, no rewards will be earned.

One of Una’s tasks directly involves Lost Ark Ghost Ships. It’s called Bleak Night Fog, and if you stick with it, you will earn some great rewards. However, defeating the Ghost Ship boss only happens once a week, which means it will take a while to increase the reputation of the quest.

For more Guides, Tips, and Tricks

You can also check our dedicated Video Games Guides section.

Lost Ark Key of Balance and Gate of Harmony – Guide

Some players are having trouble in Lost Ark. We have brought you a guide regarding the Key of Balance and Gate of Harmony problems. 

In Lost Ark, you can learn a lot. Throughout the seven vast and diverse continents, as well as the waters that connect them, you will uncover colorful civilizations, odd and wondrous wildlife, and all the wonders that have yet to be explored. Experience Arkesia’s mysteries, face off against other players in PvP and test your skills in battles and raids. There are also distant islands where you can find hidden treasures, giant monsters and enemy packs in the open world, and much more.

Among the most important items in the Lost Ark are the Key of Balance and the Gate of Harmony. To access the Gate of Harmony in the game, you need the Key of Balance. Taking into account the importance of these elements in the game, we have compiled a guide for you about the key of balance and the gate of harmony for you. 

Read Oblivion Isle in Lost Ark – Everything You need to Know

Gate of Harmony event

gate of harmony quest
Lost Ark events (YouTube)

Before you may utilize the Key of Balance and Gate of Harmony, you must first engage in the co-op event. You must engage in the event at specific moments throughout the day. At particular periods, you can take part in the event Gate of Harmony. The location of this particular event is somewhere in the Vast Sea. You must travel to the specified place after locating it on a map. You’ll need to enter the gateway during the event after you’ve arrived.

key of balance needed
Chest of harmony (YouTube)

When you accomplish this, you will be divided into two groups. You must now travel out into the water to take away the enemy. This is going to take some time. The event will eventually come to an end. It makes no difference what happens in the event because the chest will be found at the end. The Key of Balance is required to unlock this chest. You will be able to obtain Gienah’s Coins and gold as well as other incentives by doing so.

Read How to Increase Item Level in Lost Ark

Players facing issues regarding the Key of Balance

During the Harmony Gate Sea Events, players obtained the Key of Balance. However, according to the tooltip for the Key of Balance, the Key of Balance can only be consumed at the Gate of Harmony sea event. It appears, based on what other players are complaining about, that the “Key of Balance” has been mistranslated and should really display as “Key of Harmony”. Nothing from the officials has been released yet regarding this problem. Players will have to wait till then.

For more Guides, Tips, and Tricks

You can also check our dedicated Video Games Guides section.

Genshin Impact Noelle Guide – Weapons, Artifacts, and more

We have brought you the Genshin Impact Noelle guide. Learn all about her weapons, artifacts, and much more so that you can put her on your team. 

We have fallen in love with a wide range of characters in Genshin’s story. Everyone has their own back story, as well as their own unique talents and skills. The game’s lore has been enhanced since its launch through the addition of more characters and information about their backgrounds through in-game events.

Noelle is a playable Genshin Impact character. Her goal is to join the Knights of Favonius one day as a dutiful maid while she waits for the right moment. Supporting a team with both healing and shielding is one of her strong suits, but don’t dismiss her DPS capabilities, especially at higher Constellation Levels. Noelle’s birthday is on 21st March. Her age is expected to be 15 years, while her height is 158 cm. To know more about her, read our Genshin Impact Noelle guide below.

Noelle
Noelle (YouTube)
Read Genshin Impact Three Realms Gateway offering guide – All Mirror Puzzles and How to Solve Them

Genshin Impact Noelle Guide: Weapons

Genshin Impact Noelle gameplay
Noelle gameplay (YouTube)

Whiteblind

The fact that Noelle has this weapon at her disposal is arguably the most powerful weapon available to her. Noelle’s DEF% is a crucial sub-stat because her whole kit scales off of it, and her Infusion Blade ability enhances it further. 

Furthermore, Whiteblind can be forged, so it is relatively easy to both obtain and refine. Whenever you use Whiteblind, wait until you have fully stacked Infusion Blade before launching Noelle’s Elemental Burst. Before you activate it, it is recommended that you have all your damage amps active.

Sacrificial Greatsword

This is another good weapon you should look out for. Whiteblind’s innate DEF% scaling is not present in Sacrificial Greatsword, but the Energy Recharge can be used as a substitute. Breastplate’s cooldown can also be reduced by “Composed,” as “Nice and Clean” further decreases its cooldown. For a support or healer build, it is great, and not bad for a DPS build either.

The Unforged

The 20% shield strength boost from Golden Majesty boosts the Breastplate’s power and smooths out some of its flaws. The Unforged revolves around Noelle shielding herself, then staying shielded so that she can benefit from the enormous damage boost provided by the weapon while shielded.

As a DPS choice, consider running full Retracing Bolide as an artifact set to maximize her DPS uptime and focus on the shields as the best damage strategy. C6 again emphasizes the importance of this choice.

Read Genshin Impact Nine Pillars of Peace – A Complete Guide

Skyward Pride

Look no further than Skyward Pride if you want an aggressive DPS build. The Energy Recharge stat still has some utility, but Sky-ripping Dragon Spine makes Noelle’s Elemental Burst extremely powerful. Watch the vacuum blades at work after setting Breastplate and Sweeping Time. While she is in the middle of wailing on enemies, she can still provide good healing. With Noelle at Constellation Level 6, this build becomes a lot more important as her DEF to ATK conversion increases.

Genshin Impact Noelle Guide: Artifacts

Noelle combat style
Noelle gameplay (YouTube)

Full Maiden Beloved

When you need a supportive, shielding Noelle, Full Maiden Beloved is the way to go. With Noelle, you maximize healing output, which sometimes requires a little boost, and takes full advantage of the 50%+ chance to heal on hit with the breastplate in use. Using “I Got Your Back” makes use of Noelle’s 100% chance to heal on hit when both her Elemental Skill and Burst are active at once if you have Constellation Level 1 or higher.

 Defender’s Will 

Two pieces of Defender’s Will plus two pieces of Maiden Beloved are also good options. In exchange for higher defensive stats, it sacrifices some healing power, which results in stronger shields and higher DPS when Sweeping Time is activated.

Retracing Bolide

Retracing Bolide can be substituted for Defender’s Will for more reliable healing on the field. Stronger shields mean less chance of them getting broken, so more healing is possible. However, such effects only apply to the person who wears the artifact. When Noelle is not on the field, the utility of Breastplate is greatly diminished, and you don’t have the raw healing stats of straight Maiden Beloved.

The benefits of having Noelle on your team

importance of Noelle
Noelle gameplay (YouTube)

It’s not difficult to get the most out of Noelle. Her Elemental Skill and her Burst are most valuable when she is on the field. If you need healing for your team, activate Breastplate. If not, switch to another character so they can benefit from the shield while putting out damage. Furthermore, if you want to maximize the damage and healing output of Noelle, activate Sweeping Time as well.

Bear in mind that Noelle only heals when Breastplate’s shield is active. Once the shield breaks, you can no longer heal. So, if you want to ensure maximum healing, you have to be careful not to play Noelle too aggressively. While it’s less of an issue if you prioritize her for DPS, it’s still something you should keep in mind.

With her Constellation Level 6 ability, “Must Be Spotless,” Noelle’s DEF is converted into ATK by an additional 50% with Sweeping Time. With the appropriate setup, Noelle becomes a powerful DPS machine. You can watch heads roll with the appropriate setup. Team comps with Elemental Reactions already in place would benefit from her presence since she doesn’t add much value on that front as a Geo character. Noelle is a worthy candidate for healer and shielder roles.

For more Guides, Tips, and Tricks

You can also check our dedicated Video Games Guides section.

Genshin Impact Stone Slate Puzzle – Bunkoku Enigma Guide

Here is the Genshin Impact Stone Slate Puzzle guide for the Bunkoku Enigma quest. Read on to find out how to solve the puzzle.

The Genshin Impact Bunkoku Enigma is one of the most difficult puzzles in the Three Realms Gateway Offering event. It’s not just about collecting Stone Slates; you’ll confront opponents, solve puzzles, and solve a mirror puzzle along the way. 

Remember that the Genshin Impact Bunkoku Enigma World Quest is only open until March 30. Here is the Genshin Impact Stone Slate Puzzle guide along with all the Bunkoku Enigma information.

stone slate puzzle
Stone slate puzzle (YouTube)
Read Genshin Impact Three Realms Gateway offering guide – All Mirror Puzzles and How to Solve Them

How to start Bunkoku Enigma

Starting the Three Realms Gateway Offering itself is the first and foremost step. As you complete the first questline, Enkanomiya is yours to explore at your leisure. You’ll find an NPC called Yabe next to a grand stone staircase if you visit the Statue of the Vassals and then go one level higher. You can ask him all about Bunkoku’s Secret Treasure when you speak with him. The Bunkoku Enigma World Quest will appear in your Journal after the conversation ends.

Stone Slate Puzzle guide: Location

talking to yabe

To begin, you must follow the markers to find a secret room and then speak with Yabe again. There are a total of seven Stone Slates to find in Enkanomiya. The one in the south is the easiest to find. To find the Stone Slates, enter the old chamber through the square opening in the ground. 

Go to the northwest location where there is stone slate. There are two of them inside the library, south of the teleport waypoint. Activating the Electro mechanisms opens the entrance, but you need to complete the two Three Realms Gateway Offering challenges first.

Read Genshin Impact Nine Pillars of Peace – A Complete Guide

The two challenges are:

  • A parkour task is one of the event challenges: Collect Electro orbs within the allotted time. 
  • You have to hit the barrels before the timer expires on the second challenge. Equip a Bow beforehand to save some time. 

The library will open after lighting the mechanisms with Electro. Located in the same room, there are three Damaged Stone Slates.

Solve the mirror puzzle before going for other Stone Slates

mirror puzzle
Mirror Puzzle (YouTube)

You have to solve a mirror puzzle before you can reach Stone Slate. The steps are as follows:

  • There’s a mechanism that shoots a light beam. Using the Bukosu Box, you can trigger it.
  • Each Hydro mirror passes through the beam, but every Cryo mirror reflects it. 
  • Pyro or Cryo attacks can be used to either freeze or unfreeze the mirrors. Mirrors can also be rotated. In this way, the light beam can be planned.
  • When you manage to hit the floating stones, then you’ve solved the mirror puzzle.

After you align the mirror on the left with the square, change the mirrors in the middle to Hydro to complete the first mirror puzzle. The mirror in the second is still Hydro, but the rest must be Cryo. Turn all to cryo after you gain access to the underground area, and rotate the middle one so the beam of light will travel in the proper direction. 

Puzzles and such are not required for the final location. Simply fly toward the marked location until you reach underground ruins. You can grab 2 stone slates by entering the ruins at that location and checking the square floors. Continue with Bunkoku Enigma after collecting the two stone slates.

Stone Slate Puzzle guide: Arranging the stone slates

Stone Plates puzzle guide to arrange the stone plates
Arranging the Stone Plates (YouTube)

You’ll need to arrange the stone slates once you have them. Here’s how to do it:

  • Move up to the middle left slate
  • Move up from the left bottom slate
  • Move left on the middle bottom slate
  • Move left on the right bottom slate
  • Move down the middle right slate
  • Move right on the middle slate

An entirely new location will open after completing the picture. Locate the ghost there to obtain the final piece. Place it in the mechanism to unlock it. It opens up a hole where you can find enemies you need to defeat. Complete the quest by speaking with Koyanagi and Yabe.

For more Guides, Tips, and Tricks

You can also check our dedicated Video Games Guides section.

Destiny 2 DLC The Witch Queen — Everything You Should Know

Destiny 2’ DLC, The Witch Queen, has been released. Learn everything about this DLC in our guide, as there are a lot of changes in the game.

On February 22, Destiny 2’s much-anticipated expansion, The Witch Queen was released. The new DLC is available for Google Stadia, Xbox One, Xbox Series X, PlayStation 5, PlayStation 4, and on PC. It was released in conjunction with Destiny 2’s Season 16: Season of the Chosen, kicking off the next year of content before Destiny 2: Lightfall.

Since Destiny’s introduction in 2014, at least one significant expansion has been published every year, with the exception of 2021, when The Witch Queen was postponed. Everything you need to know about The Witch Queen DLC can be found in the following guide.

Witch Queen’s Guardians

Along with the new raid, Sunken Pyramid, the Throne World will include three zones and Savathûn’s throne. Witch Queen’s Hive Guardians can wield the Light, just as the Guardians can. They will be the key enemies in the new expansion. Additionally, the Hive Guardians are able to use Super moves and resurrect like players.

Read What are Elemental Wells in Destiny 2

New build, weapons, and difficulty

New weapons
New Weapon in the game (Bungie)

Added to the new update is the Void Subclass, allowing players to customize their builds and rework their subclasses. Glaive, a weapon type that has parts melee and ranged, with the ability to generate a shield, will be added as a new archetype.

Destiny 2’s new weapon crafting system offers players the ability to craft their own weapons using the new weapon archetypes. Additionally, The Witch Queen features a legendary difficulty campaign mode, which buffs enemies and restricts respawns for players seeking a bit more challenge. Make custom weapons using unique combinations of mods, shaders, and advanced stat pools by mastering the new crafting system. Leave nothing to chance when facing a god.

What are the Hive Gods in The Witch Queen

Within the Ascendant Realm, each hive god has his own ‘cyst universe,’ also known as a Throne World. Throne Worlds are the domain of those who have absolute power. It may be possible to gain additional closure towards the theme of Light and Darkness upon entering the domain of Savathûn’s light-wielding guardians.

Power Level

New power level in destiny 2
Destiny 2 new campaign (Bungie)

In conjunction with the Witch Queen expansion, Destiny 2’s Power floor has received a fresh update. Bungie intends to make content drops of this scale available immediately to all players. All Guardians will therefore be upgraded to 1350 Power when the new expansion launches. No matter your current Power level, you will start at 1350 Power.

Read Genshin Impact Three Realms Gateway offering guide – All Mirror Puzzles and How to Solve Them

Destiny 2 The Witch Queen: Void overhaul

Bungie will also revamp the Void-related content in Destiny 2 in addition to the Witch Queen expansion. In the upcoming release, a new coat of paint will be applied to Void, the first of a series of reworkings of all Light subclasses. Afterward, Solar and Arc abilities will be given some attention.

New abilities will be added, certain abilities will be discarded, and others will be altered. 

In Witch Queen, we won’t get any new subclasses as a result of this revamp. Bungie confirmed that Solar and Arc will undergo overhauls, focusing on burning/healing and chaining damage, respectively.

What more is added in Destiny 2’ DLC, The Witch Queen?

Legendary difficulty in the witch queen
The legendary difficulty (Bungie)

Wellspring: Matchmade activity for six players at the heart of the ongoing struggle for the Throne World. It is important to keep the balance.

A Journey of Power: You will find Exotic and Legendary rewards on the road ahead. Savathûn will learn that the strength of a Guardian goes beyond Light alone when the time comes.

Introduction to Free Story: Start your journey into a sprawling mystery, meet the Lucent Hive, and design your very own Glaive.

For more Guides, Tips, and Tricks

You can also check our dedicated Video Games Guides section.