Where to Find Mjolnir in Dave the Diver

Due to the game’s Random Number Generator (RNG) system, Dave the Diver Mjolnir appearance rate varies with each dive.

Due to the game’s Random Number Generator (RNG) system, Dave the Diver Mjolnir appearance rate varies with each dive. However, based on player experiences, the area above the Third Glacial Cave proves to be the most likely spot to find the legendary weapon.

The quest to locate the mighty Dave the Diver Mjolnir proves to be an arduous one, thanks to its remarkably low spawn rate. This elusive item poses a challenge to find and holds the key to a hidden achievement, preventing players from achieving a perfect 100 percent completion. Luckily, we have identified several designated locations that will bring you closer to uncovering Mjolnir’s whereabouts. Let’s look into each one to assist you on your journey.

Where to find the Yellow Shipwreck in Dave the Diver

Dave the Diver Mjolnir Locations

To set your sights on Mjolnir, you must venture to the Glacial Area and explore the following areas:

  1. The Rocky Platform above the Third Glacial Cave – The Prime Location: The platform above the Third Glacial Cave emerges as the most promising spot to find Mjolnir. Numerous players have reported encountering the item here. Its presence has been noted multiple times, making it an excellent starting point for your search.
  2. Inside the Third Glacial Cave – Subterranean Possibilities: Mjolnir might also be hidden within the depths of the Third Glacial Cave. Don’t overlook this location during your hunt, as it has yielded positive results for some explorers.
  3. The Initial Area of the Beluga – Coastal Secrets: Explore the initial area of the Beluga, as it might hold the key to Mjolnir’s location. Be thorough in your exploration, and keep a keen eye out for any signs of the mighty weapon.
  4. Inside the First Glacial Cave – Frozen Discoveries: Delve into the chilling depths of the First Glacial Cave. Dave the Diver Mjolnir could be lurking within, waiting to be found by the most determined divers.

While Mjolnir’s appearance is subject to the Random Number Generator (RNG) system utilized in Dave the Diver, the area above the Third Glacial Cave stands out as the most promising location. Many players have attested to its presence there. However, it’s worth noting that Mjolnir may also appear in the other suggested areas. 

Regardless, if you go on multiple dives above the Third Glacial Cave, chances are high that you’ll eventually encounter the coveted weapon. Be aware that some players have reported a camera glitch in one of the caves. The game’s developers have addressed this issue through a recent patch. Ensure you update the game to resolve any potential problems.

Acquiring Mjolnir: Overcoming the Frozen Barrier

Once fortune smiles upon you, and you discover Dave the Diver Mjolnir, the task of obtaining it is not as simple as reaching out and taking hold. You must employ your trusty knife or pickaxe to remove the icy barrier obstructing Mjolnir’s retrieval. Prepare yourself for a timed minigame, where you must skillfully remove the barrier and claim the legendary weapon.

How To Get Sunbracers Exotic Armor in Destiny 2

How to Unlock the God of Lightning Achievement

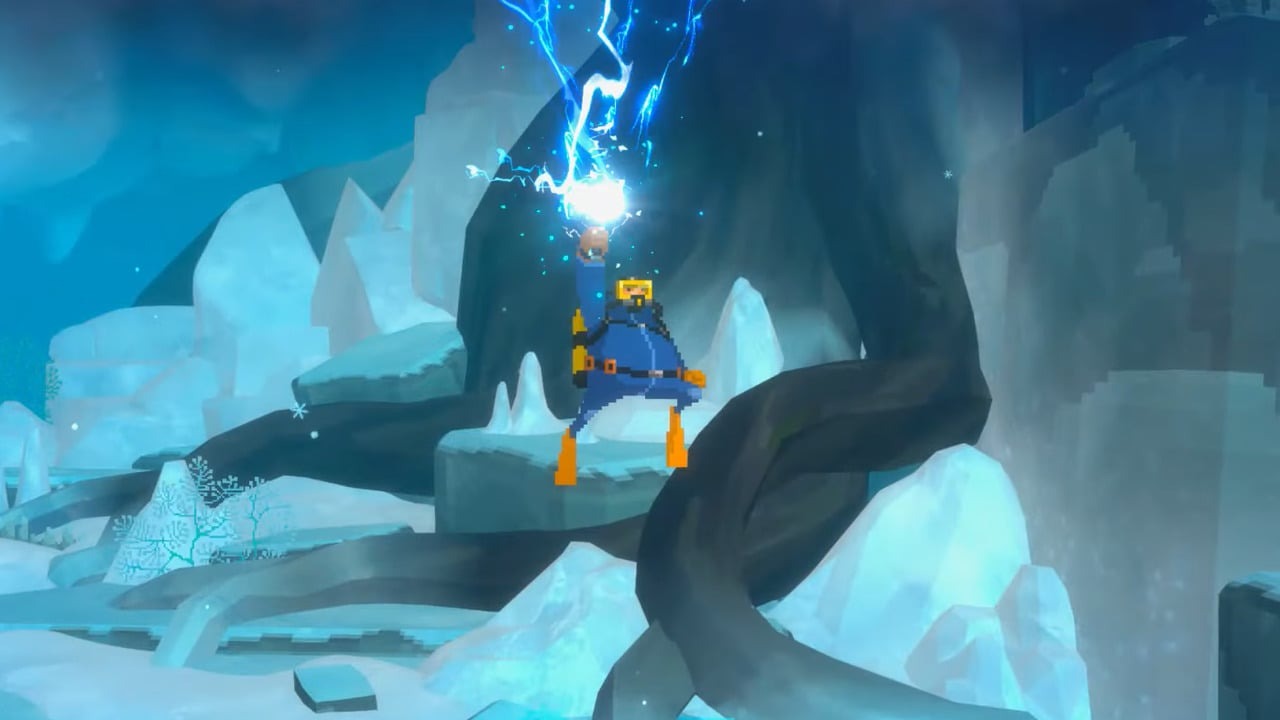
Now that you possess Mjolnir, you have the opportunity to earn the coveted hidden achievement, God of Lightning. You must wield the weapon and defeat a fish with its thunderous might to unlock this achievement. Similar to throwing a baseball, Mjolnir requires a throwing interaction to launch the object at your aquatic target.

For easy completion of the achievement, locate a smaller fish and hurl Mjolnir at it repeatedly until you are rewarded with the God of Lightning achievement. Alternatively, if you seek a greater challenge, take on the colossal creatures of the Glacial Area. Use the electrifying power of Mjolnir to overpower these powerful enemies while showcasing your mastery of the weapon.

With the mystery of Dave the Diver Mjolnir unveiled, your exploration doesn’t end there. Numerous other rare items await your discovery, including the sought-after Giant Trevally Fin. 

For more Guides, Tips, and Tricks

Check out our Video Games Guide Section for more dedicated guides.

How to Get Naraka Bladepoint Twitch Drops

Don’t miss out on Naraka Bladepoint Twitch Drops. Our guide explains how to connect your accounts, tune into designated streams, and receive exciting in-game loot.

Naraka Bladepoint, the popular game that recently went free-to-play, now offers Naraka Bladepoint Twitch Drops with exciting rewards. With an increased player base, the community has even more reason to celebrate. The developers are giving away a free character and various cosmetic upgrades to show appreciation. 

However, obtaining these rewards requires a bit of effort, as you’ll need to watch specific streams. Read on to discover the complete list of rewards and learn how to link your Twitch account to Naraka Bladepoint to claim them.

hot drops
Hot drops
How to Get the Centrifuse Catalyst in Destiny 2

How to get Naraka Bladepoint Twitch Drops

To Claim Naraka Bladepoint Twitch Drops, you must first link your accounts. Here’s how to do it:

  1. Visit the Twitch website and log in to your existing account. You can create a new account easily if you don’t have one.
  2. Open a new tab and navigate to Naraka Bladepoint’s official page.
  3. Click on the “Log In” button at the page’s top right corner.
  4. Choose to log in with either your Google, Facebook, or Twitter account. Alternatively, you can sign in using your platform accounts such as Steam or Epic Games for PC, Xbox, or PlayStation accounts.
  5. Once logged in, select the “Connections” option.
  6. Connect your Twitch account by following the instructions provided.
  7. Return to the Twitch website and authorize the login process.
  8. After successfully linking your accounts, you can proceed to watch streamers who have Twitch drops enabled for Naraka Bladepoint.
  9. Make sure to watch their streams for a sufficient duration to become eligible for the drops.
  10. To claim your rewards, check your Inventory Page on Twitch. Once claimed, the rewards will be added to your in-game inventory.
  11. Lastly, launch Naraka Bladepoint and locate your rewards in the in-game inventory.
connecting account
Connecting account
Destiny 2 New Avalon Mission – Everything You Need to Know

Naraka Bladepoint Twitch Drops Rewards

All Rewards Available from Naraka Bladepoint Twitch Drops The following rewards can be obtained by watching the corresponding amount of hours:

  • Day 1 – Kurumi Gesture: Sword Ready (watch at least 2 hours)
  • Day 2 – Headwear Sorry (watch at least 2 hours)
  • Day 3 – Female Twintail (watch at least 2 hours)
  • Day 4 – Avatar Prickly Pear (watch at least 2 hours)
  • Day 5 – Background Bloom Soul (watch at least 2 hours)
  • Day 6 – Base Summer Beach (watch at least 2 hours)
  • Day 7 – Matari Outfit Stone (watch at least 2 hours)
  • Final Prize – Matari Accessory Golden Tambourine (watch a total of 20 hours between 13th July 2023 to 20th July 2023)

In conclusion, by linking your Twitch account to Naraka Bladepoint and watching the designated streams, you can obtain exciting rewards, including character gestures, headwear, avatars, backgrounds, outfits, and a special accessory. Remember to claim your rewards through Twitch’s Inventory Page and access them in your in-game inventory. Join the celebration and enhance your Naraka Bladepoint experience with these exclusive items!

For more Guides, Tips, and Tricks

Check out our Video Games Guide Section for more dedicated guides.

Exoprimal Guide – 5 Tips and Tricks

Exoprimal allows players to swap between exosuits at any time during a match. This Exoprimal Murasame Guide will help you learn more.

Exoprimal is an exciting third-person shooter that combines multiplayer PvP (Player versus Player) action with facing massive waves of tough dinosaur enemies. Mastering the gameplay mechanics and forming strategies can be difficult, given the diverse exosuits for players to pilot. To triumph over the ruthless attack of Leviathan’s forces, teams must adapt on the fly and make quick decisions to secure victory. 

The primary gameplay of Exoprimal revolves around two main modes: PvE (Player versus Environment) and PvP (Player versus Player), with various combinations of the two depending on the specific match. Some matches pit teams against each other while contending with the deadly dinosaurs. In contrast, others focus solely on competitive combat between two groups. Since the game’s closed Beta, several modes have been introduced, expanding the variety of gameplay experiences available to players. Check out the Exoprimal Guide that has some of the best tips and tricks for you.

Exoprimal Guide: Data Key Security

One of the engaging game modes in Exoprimal is the Data Key Security mission. In this mode, teams escort a valuable asset called the “Data Key” to a designated location on the map. However, enemy exofighters are also vying for control of the Data Key. They will attempt to destroy it to hinder your progress. Should the Data Key sustain damage, its functionality will be temporarily halted until it is repaired. To succeed, teams must defend the Data Key from enemy attacks and ensure its safe arrival at the destination.

Tower of Fantasy Mirroria Fastlane Event Guide 

Exoprimal Guide: Vortexer Sabotage

In the Vortexer Sabotage mission, players face a relentless onslaught of dinosaurs. The objective is to destroy the Vortexer, which continuously spawns these ancient reptiles. To accomplish this, teams must withstand waves of dinosaur attacks, gradually weakening the Vortexer’s armor until it becomes vulnerable. Once vulnerable, the Vortexer can be manually shut down, preventing further dinosaur spawns. Cooperation, timing, and effective communication are crucial to overcoming this challenging mission.

Exoprimal Guide: Area Defense

Area Defense is another thrilling game mode in Exoprimal. Like the VTOL Defense mode, players must protect a specific device from waves of dinosaur attacks. However, in this mode, the device can be repaired if destroyed. Standing near the device for a designated amount of time initiates the repair process, allowing teams to maintain their defense against the relentless dinosaur waves. Balancing offense and defense while coordinating with teammates is key to success in this mode.

Exoprimal Guide: Exosuits

Exosuits, known as “exofighters,” are crucial in Exoprimal’s gameplay. These flexible characters can be swapped at any time during a match, enabling players to adapt to the evolving circumstances of each game. Exosuits are categorized into three roles: Assault, Tank, and Support.

  • Assault exosuits excel in dealing substantial damage to enemies. Equipped with powerful weapons, they can turn the tide of battle through sheer firepower.
  • Tank exosuits draw enemy attacks and absorb damage with their sturdy protective gear. Their presence on the battlefield helps shield teammates from harm, creating opportunities for strategic maneuvers.
  • Support exosuits possess unique abilities to repair damaged structures or apply beneficial effects to allies and enemies. Their versatility allows them to indirectly influence the outcome of battles, making them invaluable assets to any team.
Gameplay
Gameplay
How To Get Sunbracers Exotic Armor in Destiny 2

Exoprimal Guide: Mastering Exosuit Abilities

To conquer the dinosaur-infested world of Exoprimal, it is vital to understand and utilize each exosuit’s distinct abilities effectively. Each class of exosuit has a diverse set of skills that can turn the tide of battle in your favor. For example:

  • Assault exosuits wield powerful weapons capable of dealing huge damage. Use these weapons to eliminate powerful dinosaur enemies quickly.
  • Tank exosuits have defensive abilities that allow them to protect both themselves and their teammates. By drawing enemy attention, tanks can divert threats away from more vulnerable allies.
  • Support exosuits provide valuable support to the team by repairing structures damaged in the heat of battle or by applying beneficial effects to allies and hindering enemies. Mastering the support class can tip the scales in your team’s favor.

By understanding and using the unique abilities of each exosuit, players can maximize their impact on the battlefield and increase their chances of victory.

Conclusion

Exoprimal offers a thrilling blend of multiplayer PvP combat and intense dinosaur battles. With its diverse exosuits and challenging game modes, the game provides an engaging experience for players seeking strategic and action-packed gameplay. Whether you’re escorting a Data Key, sabotaging the Vortexer, defending a vital area, or utilizing the various exosuits’ abilities, Exoprimal is sure to keep you on the edge of your seat as you adapt, strategize, and overcome the odds.

For more Guides, Tips, and Tricks

Check out our Video Games Guide Section for more dedicated guides.

How to Beat Lych in BTD6

Failing to defeat BTD6 Lych within the allotted 20 rounds will result in defeat. It’s crucial to plan your strategies accordingly and prioritize efficiency.

Bloons Tower Defense 6 is an engaging game where you defend your base from bloons using an array of adorable monkeys. As you progress, you’ll find yourself faced with challenging bosses, and one such formidable adversary is Gravelord Lych. Defeating Lych requires strategic planning and careful execution. In this article, we will provide you with a detailed guide on how to beat Lych in BTD6, ensuring your victory against this demanding boss.

Gameplay
Gameplay

How to Beat BTD6 Lych

Gravelord Lych presents a significant challenge, possessing abilities that can make the battle arduous without the right tactics. Lych can restore his health at the expense of your monkeys, revive MOABs, and even spawn bloons with increased health and speed. To emerge victorious against this Tier 5 boss, you must focus on building a strong defense and efficiently managing your resources.

How to Beat Professor Evil in Bloons TD Battles – Guide

Focus on Farming

Managing your money wisely is crucial to overcome BTD6 Lych and other formidable bosses. At the start of the game, prioritize developing your economy by investing most of your funds in farming. As the rounds progress, you’ll face more bloons, necessitating the purchase of additional monkeys to deal with them. By Round 50, aim to establish Monkey Farms and utilize buffs for optimal farming.

To defeat Gravelord Lych, you’ll require monkeys with high DPS (damage per second). Thus, you need to allocate funds for units such as Paragon Towers, True Sun God, Dartling Gunner, Druid, Alchemist, and Bomb Shooter. It’s important to buff these units strategically before reaching Tier 5 and position them strategically for maximum effectiveness. Notable upgrades include the M.A.D. Dartling Gunner, capable of attacking multiple bloons simultaneously, and the Avatar of Wrath Druid with its remarkable attack speed.

Don’t Let Lych Heal

Regardless of your wealth and powerful monkeys, victory will only evade you if you understand Gravelord Lych’s capabilities and strengths. Lych possesses the ability to regenerate health when you sell units. To prevent the boss from healing, sell your farms before reaching Tier 5, allowing space for defensive structures. Utilize the proceeds from the sold farms to erect as many formidable towers as possible.

Additionally, BTD6 Lych can manipulate your buffs, recovering from their effects, while your monkeys within range lose their buffs. The buffs you employ during the battle and those acquired from abilities will be nullified. However, the Sun Temple will continue to function unaffected.

How to Deal With Ethereal Form

Another challenge when facing Gravelord Lych is his Ethereal form. When Lych’s health bar reaches the Skull, he becomes invulnerable. He will resurrect MOABs with increased speed and strength during this phase, though they won’t generate offspring. To revert BTD6 Lych to his vulnerable form and resume damaging him, you must eliminate all revived bloons. Additionally, you’ll need to defeat a smaller version of Lych, known as the soul Bloon, which can drain lives.

To emerge victorious against Gravelord Lych, you must progress through 5 Tiers and defeat each Lych within 20 rounds. Failing to do so will result in defeat.

Gameplay
Gameplay
How To Get Sunbracers Exotic Armor in Destiny 2

Key points

  • Upgrades such as Paragon Towers, True Sun God, M.A.D. Dartling Gunner, and Avatar of Wrath Druid are highly recommended for a successful encounter with Lych.
  • Unfortunately, Lych can neutralize your buffs during the battle, rendering them ineffective. However, the Sun Temple will continue to operate as expected.
  • Farming is crucial as it allows you to accumulate the necessary funds to purchase and upgrade powerful monkeys capable of defeating Lych.
  • Lych’s Ethereal form grants him invulnerability, during which he resurrects stronger MOABs. To overcome this phase, you must eliminate the revived bloons and defeat the soul Bloon.

Conclusion

Bloons Tower Defense 6 offers an enchanting gameplay experience with its captivating visuals, diverse characters, and intriguing structures. While challenging bosses like Gravelord Lych may pose a significant hurdle, with the help of our guide, you can conquer them. Focusing on farming, preventing Lych from healing, and effectively dealing with his Ethereal form enhance your chances of triumphing in this thrilling tower defense game.

For more Guides, Tips, and Tricks

Check out our Video Games Guide Section for more dedicated guides.

How To Unlock Storytelling Method in Genshin Impact

While unlocking the Genshin Impact Storytelling Method quest, you can increase your Reputation Level in Inazuma.

As a Genshin Impact player, you may have come across the Storytelling Method world quest. The Genshin Impact Storytelling Method offers a thrilling adventure and the opportunity to increase your Reputation Level in the game’s new region, Inazuma. In this complete guide, we will walk you through the process of unlocking and completing the Storytelling Method, ensuring you can fully enjoy this engaging quest. 

Unlocking the Genshin Impact Storytelling Method

To begin your journey with the Storytelling Method quest, you must first complete a series of daily commissions related to novel writing. By diligently finishing these commissions, you will unlock the world quest and gain access to the exciting story that awaits you. Here are the daily commissions you need to complete:

Genshin Impact Codes – Free Primogems, Mora, and more

Is This Novel Amazing?

Start by locating two NPCs named Shigeru and Junkichi in Inazuma City. Engage in a conversation with Junkichi, who will present you with two options. To unlock the Storytelling Method quest, choose the latter option: “Actually, Shigeru sounds more reasonable…”. This decision will lead you to the next commission.

This Novel Seems…Familiar?

Before this commission, you will have to complete a commission known as “This Novel Seems…Problematic?” After siding with Shigeru in the previous commission, complete the dialogue and follow the instructions provided by Junkichi. He will task you with retrieving three novels from Yae Publishing House. Once you have obtained the three books, return to the argument between Shigeru and Junkichi. To unlock the Storytelling Method quest, give Junkichi the Literature Club book instead of the other two options.

How to Complete the Storytelling Method

Now that you have successfully unlocked the Genshin Impact Storytelling Method quest, it’s time to complete it and unravel the story it holds. Follow these steps to finish the quest and earn valuable rewards:

Embrace Your Role

Junkichi will ask you to assume the role of the main character and experience the story firsthand. Accompany him to a fortress where you will play the part of a Ninja. Pay close attention to Junkichi’s instructions as he guides you to your destination. Along the way, you may encounter guards, so be prepared to use your stealth skills.

Overcome the Obstacles

As you progress through the fortress, you will encounter enemies that you must defeat to continue your mission. Engage in combat and showcase your prowess as a skilled warrior. Once all the enemies have been vanquished, proceed to the next step.

Genshin Impact Kaveh Hangout Event – How to Get All Endings

Uncover the Secret

Make your way to the top floor of the fortress using the elevator. Upon reaching the desired floor, direct your attention to the right side of the large area, where you’ll notice a bright light emanating from behind a tree. Approach the tree and collect the valuable intel hidden there. This information is crucial to the completion of the quest.

Return to Junkichi

With the intel in hand, make your way back to Junkichi and engage in a conversation with him. By sharing the acquired knowledge, you will bring the Storytelling Method quest to a satisfying conclusion. As a result of your accomplishment, you will unlock the ‘Well, At Least It Ended’ and ‘Editorial Opinion’ achievements, along with earning six Hero’s Wit.

For more Guides, Tips, and Tricks

Check out our Video Games Guide Section for more dedicated guides.

How To Tame a Fenrir in Ark Survival Evolved

You can secure your very own Ark Survival Evolved Fenrir companion by conquering a series of challenging boss battles and emerging victorious against Fenrisulfr.

Suppose you’re fascinated by the majestic Fenrir, the massive wolf reminiscent of Direwolves from Nordic mythology. In that case, you’re in the right place. In this complete guide, we’ll reveal the steps to successfully tame Ark Survival Evolved Fenrir, ensuring it becomes a valuable addition to your arsenal of epic animal companions. Let’s dive into the world of Ark Survival Evolved and discover how to tame a Fenrir.

Taming
Taming

Requirements

Before embarking on your journey to tame Fenrir, it’s crucial to understand the requirements and challenges involved. Unlike other creatures in Ark Survival Evolved, Fenrirs cannot be tamed traditionally. You must adopt a different, more time-consuming approach. In order to tame a Fenrir, you need to overcome a series of trials by defeating all the Ark Fjordur bosses, ultimately facing the formidable Fenrisulfr.

How To Find A Lost Dinosaur in Ark Survival Evolved

Conquering the Fjordur Bosses

To begin your quest, you must first locate and defeat the Alpha creatures and obtain their valuable Runestones. These Runestones will serve as your key to summoning the mini-bosses required to progress further. The bosses you need to defeat before reaching Fenrisulfr are as follows:

Mini-Bosses

  1. Beyla
  2. Hati & Skoll
  3. Steinbjorn

Island Bosses

  1. Broodmother
  2. Dragon
  3. Megapithicus

By triumphing over these powerful bosses, you will acquire their trophies, which are vital for unlocking the final showdown with Fenrisulfr.

How to Tame Ark Survival Evolved Fenrir

Fenrisulfr, an enhanced version of Ark Survival Evolved Fenrir, awaits you as the ultimate challenge. The battle against Fenrisulfr closely resembles the encounters with the preceding Ark bosses. You’ll confront Gamma, Beta, and Alpha variants, each demanding a higher level of strength and strategy. Here are the specific requirements for defeating each variant:

Gamma Variant

  • Health: 385,000
  • Player Level: 55
  • Requirements:
    • x1 Gamma Broodmother Trophy
    • x1 Gamma Dragon Trophy
    • x1 Gamma Megapithicus Trophy

Beta Variant

  • Health: 750,000
  • Player Level: 75
  • Requirements:
    • x1 Beta Broodmother Trophy
    • x1 Beta Dragon Trophy
    • x1 Beta Megapithicus Trophy

Alpha Variant

  • Health: 1,200,000
  • Player Level: 100
  • Requirements:
    • x1 Alpha Broodmother Trophy
    • x1 Alpha Dragon Trophy
    • x1 Alpha Megapithicus Trophy
How to Get the Centrifuse Catalyst in Destiny 2
Fenrir
Fenrir

Reward

Upon successfully defeating Fenrisulfr, your inventory will reveal a Cryopod containing your newly tamed Fenrir. This amazing creature will be your loyal companion, ready to assist you in your future endeavors. It’s important to note that Fenrirs cannot be bred, so if you desire additional Fenrirs, you’ll need to repeat the taming process.

Conclusion

In the ever-expanding world of Ark Survival Evolved, the Fjordur DLC introduces the enigmatic Fenrir. This challenging wolf attracts the imagination of players. You can secure your very own Ark Survival Evolved Fenrir companion by conquering a series of challenging boss battles and emerging victorious against Fenrisulfr. Remember, patience and perseverance are key as you undertake this demanding endeavor. 

For more Guides, Tips, and Tricks

Check out our Video Games Guide Section for more dedicated guides.

How to Get Aspect of the Umbral in Diablo 4

The Diablo 4 Aspect of the Umbral functions the same for all classes. It provides resource restoration when Crowd Control is applied to enemies.

Suppose you’ve been engaging yourself in the world of Diablo 4. In that case, you’ll soon find yourself venturing through dangerous dungeons and acquiring powerful artifacts known as Aspects. While some aspects are tailored to specific classes, a few are accessible to all. One such versatile Aspect is the Aspect of the Umbral, which can be attached to your Rings. If you’re curious about how to obtain the Diablo 4 Aspect of the Umbral, then read on.

dungeon and its rewards
Dungeon and its rewards

Diablo 4 Aspect of the Umbral Location

There are two primary methods to acquire the Diablo 4 Aspect of the Umbral: completing the Champion’s Demise Dungeon or extracting it from a Legendary Item. It’s important to note that any Aspect that finds its way into your Codex of Power can be obtained within Dungeons, for those seeking the Aspect of the Umbral, journey to the Untamed Scarps area in the Dry Steppes region of Sanctuary. There, you’ll discover the entrance to the Champion’s Demise Dungeon.

How to Beat Dianthus in Diablo 4

Within the depths of this Dungeon, you must embark on a dangerous quest and fulfill several tasks before the Aspect of the Umbral is bestowed upon you:

  1. Return the Stone Carving to the Pedestal.
  2. Travel to Eater of Stones.
  3. Defeat the Khazra Abomination.

By overcoming these challenges, you’ll successfully obtain the coveted Aspect of the Umbral.

location
Location

How to Extract Diablo 4 Aspect of the Umbral

The Champion’s Demise Dungeon is the easiest way to secure the Aspect of the Umbral. However, another option is available if you stumble upon a Ring that already possesses this Aspect. Seek out an Occultist who specializes in extracting Aspects. They possess the skill to carefully separate the Aspect of the Umbral from the Legendary Ring, allowing you to imprint it onto another suitable Ring of your choice.

It’s worth noting that extracting the Diablo 4 Aspect of the Umbral can only be done once from a Legendary item. Once extracted, it cannot be obtained again. Therefore, it’s crucial to consider your options carefully and ensure that you imprint the Aspect on the most suitable and powerful Ring.

How To Get the Reins of Ashava Horse Armor in Diablo 4

Understanding the Power of Aspect of the Umbral

Now that you know how to obtain the Diablo 4 Aspect of the Umbral, let’s delve into its capabilities. This Aspect bestows upon you the ability to restore a varying amount of resources for your Primary Resource when you successfully execute Crowd Control on an enemy. This is particularly advantageous for those who often struggle to maintain their Primary Resource during intense battles and combat situations. By utilizing the Aspect of the Umbral, you can replenish your resources and keep fighting with renewed vigor.

Conclusion

As you continue your journey through Diablo 4, unlocking and acquiring powerful artifacts is essential for your character’s progression. The Aspect of the Umbral stands as a versatile and valuable tool that can benefit all classes. Whether you choose to conquer the Champion’s Demise Dungeon or discover a Legendary Ring with the Aspect already imbued, the power it bestows upon you is undeniable. Remember to strategize and make wise decisions when imprinting the Aspect of the Umbral onto your Rings, as its effects can greatly enhance your combat prowess.

For more Guides, Tips, and Tricks

Check out our Video Games Guide Section for more dedicated guides.

Where To Find Green Rising Penstemon In Disney Dreamlight Valley

The Dreamlight Valley Green Rising Penstemon is a key ingredient in several recipes. You must find it to make those recipes.

Finding the Green Rising Penstemon in Disney Dreamlight Valley can be challenging due to its natural ability to blend in with its surroundings. Locating the Green Rising Penstemon in Disney Dreamlight Valley requires patience, careful observation, and a keen eye. The flower’s natural camouflage and limited spawn rate make it a challenging yet rewarding endeavor. The Dreamlight Valley Green Rising Penstemon holds a special place; we will help you find it.

Gameplay
Gameplay
How To Complete Forgotten Memories in Disney Dreamlight Valley

Dreamlight Valley Green Rising Penstemon

Disney Dreamlight Valley is a treasure trove of beautiful flowers. Still, the Green Rising Penstemon stands out as a particularly elusive specimen. This flower has a knack for blending in with similar plants and flowers, making it difficult to spot. Additionally, its spawn rate in the game is relatively low, adding to the challenge of finding it. However, the search is well worth the effort for crafters seeking to create items that require this unique flower.

The Importance of Flowers in Disney Dreamlight Valley

Flowers are significant in various recipes and crafting endeavors within Disney Dreamlight Valley. Flowers are essential ingredients, from decorative items like pots, boxes, and chests to charming birdhouses. The Green Rising Penstemon is no exception, as it features prominently in recipes for archways, balloon clusters, and chests.

Where to find the Green Rising Penstemon

The Green Rising Penstemon can be found relatively early in the game if players know where to look. In Disney Dreamlight Valley, it is classified as a “Rare” flower, with only three spawning at any given time. Once picked, it takes approximately 40 minutes for them to respawn. This particular flower is most commonly found in the starting area of the game, known as the Peaceful Meadow. Its vibrant green color allows it to blend seamlessly with the surrounding foliage, making it challenging to locate.

It’s important to note that the respawn timer operates on an internal clock rather than being triggered by player interaction. The game constantly runs in the background, checking if a respawn is possible. Once the 40-minute mark is reached, a new Green Rising Penstemon will appear. Until then, players must exercise patience.

While the Dreamlight Valley Green Rising Penstemon typically spawns in the lower section of the Peaceful Meadow, particularly around Merlin’s house, it can appear anywhere in this tranquil area. Players should watch for a small, green plant that can be interacted with. Compared to food-based plants, the Green Rising Penstemon is generally smaller in size. Once all three flowers have been collected, players must wait for the respawn time to gather more.

Crafting with the Dreamlight Valley Green Rising Penstemon

The Dreamlight Valley Green Rising Penstemon is a key ingredient in several enchanting recipes. Here are a few notable examples:

How to get the Green Potato in Disney Dreamlight Valley
Green Rising Penstemon

Green, Yellow, and White Balloon Arch

  • 10x Iron Ingot
  • 20x Green Rising Penstemon
  • 20x Dandelion
  • 20x White Daisy

Green, Yellow, and White Balloon Cluster

  • 5x Iron Ingot
  • 8x Green Rising Penstemon
  • 8x Dandelion
  • 8x White Daisy

Medium Green Chest

  • 25x Hardwood
  • 5x Iron Ingot
  • 1000x Dreamlight
  • 5x Green Rising Penstemon
How to Make Whimsical Pie in Disney Dreamlight Valley

Small Green Chest

  • 25x Softwood- 25x Stone
  • 5x Green Rising Penstemon

Yellow, Green, and Purple Flower Rectangle

  • 1x Rectangular Soil Area (8x Stone, 8x Soil)
  • 2x Purple Falling Penstemon
  • 2x Dandelion
  • 2x Green Rising Penstemon

Maximizing the Value of Green Rising Penstemons

Suppose players find themselves with excess Green Rising Penstemons or have no immediate need. In that case, they can consider selling them at Goofy’s stall. Each flower can fetch 35 coins, up to over 100 coins for three flowers. This is especially beneficial for players just starting the game, providing them with a decent amount of coins before they can craft more advanced items.

For more Guides, Tips, and Tricks

Check out our Video Games Guide Section for more dedicated guides.

Where to find the Yellow Shipwreck in Dave the Diver

Dave the Diver Yellow Shipwreck is a challenging but rewarding location to explore. If you’re looking for a challenge and some valuable loot, then be sure to check it out.

Are you playing Dave the Diver and searching for the unavailable Yellow Shipwreck? Look no further! In this guide, we’ll help you locate Dave the Diver Yellow Shipwreck in the first chapter, “Duff’s Pink Delivery.” Keep reading to find out how to find this hidden treasure.

Gameplay
Gameplay
Diablo 4 Nightmare Dungeon Tier List

Dave the Diver Yellow Shipwreck Location

The Yellow Shipwreck can be found in the Blue Hole, which houses the Pink Delivery Box containing the coveted figure of Leahs-chan. To begin your search, dive directly beneath the starting point, approximately 150 meters deep. Be sure to upgrade your Diver Suit adequately to reach this depth.

As part of two connected quests, Dave embarks on a mission to retrieve the Pink Delivery Box, which contains the precious Leahs-chan figure. The Dave the Diver Yellow Shipwreck, where you’ll discover the box, is located just beneath the starting point of your dive. The ship and the box rest at a depth of around 100 meters, so make sure your Diver Suit is suitably upgraded to handle the pressure. Upgrading your other equipment at this point in the game is also a good idea.

How to Use The Logistics Menu in Enlisted

If you need help finding the Yellow Shipwreck, remember it is west of the Stalactite Limestone Cave. Watch for a vibrant Yellow Shipwreck accompanied by the Pink Delivery Box you’re after. Unfortunately, your quest is momentarily interrupted as a colossal tentacle snatches the box away. In response, Duff insists that you resurface, so he can assist you in gaining entry into the Shipwreck.

Continuing the Quest

To proceed with the quest:

  1. Return to the surface, where Duff will provide you with a Gas Cutter.
  2. With this new tool, dive back into the Blue Hole and go to the Shipwreck.
  3. Prepare for a mini-game where you must keep the mouse steady within a circle to cut the ship open correctly. Once you’ve completed the task, you can enter the Shipwreck, triggering an epic boss fight that concludes this chapter.
  4. Get ready to face off against a massive squid, so ensure you’re well-prepared for the battle.

Follow these directions precisely, and you’ll uncover the secrets of the Dave the Diver Yellow Shipwreck in a thrilling underwater adventure. Retrieve the Pink Delivery Box and emerge victorious in your battle against the colossal squid. 

Use These Tips Before You Start the Quest

  • Dave the Diver Yellow Shipwreck is around 150 meters, so players must have a Diver Suit that is upgraded enough to withstand the pressure at that depth. If their Diver Suit is not upgraded enough, they will start to take damage and eventually die.
  • The Yellow Shipwreck is home to several enemies, including sharks and jellyfish. If players are not careful, these enemies can quickly kill them. It is essential to bring a good supply of health potions in case they get injured.
  • Dave the Diver Yellow Shipwreck is challenging, and players are likely to die a few times while exploring it. It is crucial to save the game regularly so they can maintain progress if they die.
  • The sonar is a valuable tool that can help players find objects underwater. It is beneficial in finding the Yellow Shipwreck, as it is a relatively small area.
How to Increase Gear Inventory Space in Hogwarts Legacy
Gameplay
Gameplay

Things to keep in mind

  • To find the Yellow Shipwreck, you’ll need to head to the starting point of your dive and then swim straight down. Once you reach a depth of around 150 meters, you should see the Shipwreck before you. The box will be located inside the Shipwreck, near the front.
  • Dave the Diver Yellow Shipwreck is a relatively small area but home to several enemies, including sharks and jellyfish. Be careful when exploring the area, and make sure you have a good supply of health potions.
  • Once you find the Pink Delivery Box, you must take it back to Duff’s Sushi Shack to complete the quest. Completing the quest will reward you with a Deep Sea Headlamp, allowing you to see better in the dark.

For more Guides, Tips, and Tricks

Check out our Video Games Guide Section for more dedicated guides.

How To Get The Braytech Osprey in Destiny 2

The Destiny 2 Braytech Osprey is a Void Rocket Launcher, exclusive to Vanguard Nightfalls. Its versatile pool of perks makes it a challenging weapon in PvE and PvP encounters. 

The Braytech Osprey, a Void Rocket Launcher in Destiny 2, holds a special place in the hearts of Guardians. Exclusive to Vanguard Nightfalls, this returning weapon boasts an array of unique perks that make it highly desired. This guide will get into the details of obtaining the Destiny 2 Braytech Osprey and discuss the coveted God Rolls that can make it even more challenging in your arsenal.

Braytech Osprey stats
How To Get Sunbracers Exotic Armor in Destiny 2

How to unlcok the Destiny 2 Braytech Osprey

To acquire the Destiny 2 Braytech Osprey, Guardians must complete Vanguard Nightfall activities. Although it can be obtained at any difficulty, the chances of getting this weapon increase with higher challenges. The featured Nightfall changes each week, and players must patiently wait for the PsiOps Battleground: Moon to be in the rotation.

It’s worth noting that during this waiting period, other exceptional weapons can be acquired from Vanguard activities. The Hung Jury Scout Rifle in Destiny 2 is one such example, offering its own unique advantages to discerning Guardians. However, those up for the challenge can acquire the Adept Braytech Osprey from the Grand Master PsiOps Battleground.

Vanguard Engrams and Commander Zavala

Once a Destiny 2 Braytech Osprey drops, additional copies can be focused on Commander Zavala in The Tower. Crafting Nightfall weapons is impossible, making understanding how to obtain a desired God Roll is crucial. Guardians need one Vanguard Engram, 25 Legendary Shards, and 20,000 Glimmer to focus on this weapon. These vendor-specific Engrams can be earned by gaining ranks with Commander Zavala, achieved through completing Vanguard Strikes or Nightfall activities.

How to Get the Centrifuse Catalyst in Destiny 2

The Destiny 2 Braytech Osprey God Roll for PvE

Certain perks and attributes can significantly enhance its effectiveness in the Destiny 2 Braytech Osprey God Roll for PvE encounters. Here are two recommended setups:

God Roll 1:

  • Barrel: Quick Launch
  • Magazine: Impact Casing
  • Trait 1: Cluster Bomb
  • Trait 2: Destabilizing Rounds

God Roll 1 maximizes the weapon’s blast radius and defeats multiple targets. Cluster Bomb creates a wider explosion, effectively clearing groups of enemies. Additionally, Destabilizing Rounds applies Explosive to any surviving enemies. The Quick Launch barrel and Impact Casing enhance the weapon’s velocity, handling, and stability, making it ideal for dealing with crowded enemies.

God Roll 2:

  • Barrel: Quick Launch
  • Magazine: Impact Casing
  • Trait 1: Envious Assassin
  • Trait 2: Bipod

God Roll 2 is a future-oriented option that holds potential once Bungie reworks the Bipod trait. Currently, Bipod increases ammo and reserves but decreases damage, blast radius, and reload speed. However, if Bungie buffs Bipod enough, combining it with Envious Assassin will become a fantastic choice. An envious Assassin overflows the magazine from reserves upon rapidly defeating enemies with another weapon. Guardians are advised to keep this God Roll of the Destiny 2 Braytech Osprey in their vault for a future update.

Braytech Osprey
Braytech Osprey
Destiny 2 New Avalon Mission – Everything You Need to Know

Guardians must complete Vanguard Nightfall activities to obtain this weapon, with higher difficulties offering better chances. Focusing on the Braytech Osprey through Vanguard Engrams with Commander Zavala can help get desired God Rolls.

Guardians can maximize the Braytech Osprey’s potential with the recommended God Rolls for PvE encounters. Whether it’s the explosive power of Cluster Bomb and Destabilizing Rounds or the future possibility of Envious Assassin and Bipod, these setups offer different strategies for tackling various enemies.

Patience is key when waiting for the PsiOps Battleground:

  1. Moon Nightfall rotation.
  2. Keep honing your skills, gather the necessary resources, and aim to acquire the Braytech Osprey to enhance your Guardian’s arsenal.
  3. May its power guide you through the challenges that await in the world of Destiny 2.

For more Guides, Tips, and Tricks

Check out our Video Games Guide Section for more dedicated guides.