Cookie Run Kingdom Team Guide – Tips and Tricks

To survive the battles, you’ll need the Cookie Run Kingdom Team Guide. Combat is just as important as running your kingdom in the Cookie Run Kingdom.

While there are several games in a similar genre, Cookie Run Kingdom stands out thanks to its excellent visual direction, extensive and constantly updated narrative mode, and a wealth of material for players to enjoy. Fans searching for a head start on what teams to assemble may discover the knowledge they require in this guide as Cookie Run: Kingdom’s player base continues to increase. 

When it comes to the Cookie Run Kingdom, it’s crucial to remember that the game’s gacha system is the most common means for players to obtain new Cookies. There are presently over 50 Cookies in the game. To enhance their team’s best potential, players should experiment with their Cookies.

Cookie Run: Kingdom is happy to penalize an unbalanced squad, particularly one that focuses solely on unsupported glass cannons. Without shielding or healing, a team of squishy mids and rear damage dealers would frequently wipe out the first few waves before being whittled down in the middle or near the finish.

This game’s PVE is frequently a wild dash across a very long level, with numerous waves obstructing your progress. Because having a balanced team is so crucial, having a pair of Rare tier tanks to cover your Epic tier damage dealers is better than having only Epic tier damage dealers.

With that in mind, let’s check out our Cookie Run Kingdom Team Guide and learn how to put together a strong team.

Cookie Run Kingdom Team Guide: Squad 1

Cookie Run Kingdom Team Guide
Cookie Run Kingdom (Image credit: Cookie Run Kingdom)

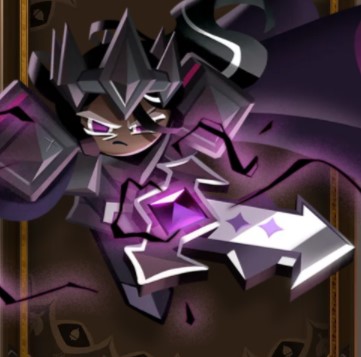
Front 1: Tank Dark Choco Cookie

Front 2: Tank Milk Cookie/ Princess Cookie

Healer: Custard Cookie III/ Pomegranate Cookie

Debuff 1: Onion Cookie/ Cherry Cookie/ Tiger Lily Cookie

Debuff 2: Snow Sugar Cookie/ Cherry Cookie/ Tiger Lily Cookie

Dumping debuffs on adversaries may turn a disastrous fight around for obvious reasons. When facing foes with a greater power rating than your squad, a large stack of debuffs may frequently even the odds. Of course, pitting this squad against an opposing team that has Herb Cookie or Clover Cookie (two debuff cleansers) might be disastrous, so don’t do it.

Cookie Run Kingdom Team Guide: Squad 2

Cookie Run Kingdom Team Guide
Cookie Run Kingdom (Image credit: Cookie Run Kingdom)

Front 1: Purple Yam Cookie

Front 2: Milk/Knight Cookie

Support 1: Licorice Cookie

Healer 1: Custard Cookie III/Herb Cookie

Damage 1: Espresso Cookie

Survivability is the focus of this squad. Purple Yam and Milk Cookie are two cookies that protect Espresso from bad guys. The Grinder vortex of Espresso will send the enemy to hell. To take the heat off of everyone else, Licorice summons mooks upfront. Keep the party alive and healthy with the custard and herb.

Learn about Parfait Cookie Toppings here

Cookie Run Kingdom Team Guide: Squad 3

Cookie Run Kingdom Team Guide
Cookie Run Kingdom (Image credit: Cookie Run Kingdom)

Damage 1: Espressolike

Damage 2: Licorice Cookie

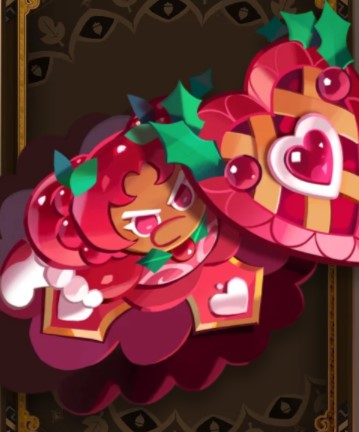
Tactical: Strawberry Crepe Cookie/  Milk Cookie/ Espressolike

Front 2: Dark Choco Cookie

Support (Rear): Herb Cookie, Pure Vanilla Cookie/ Pomegranate Cookie

This was formerly the most meta of meta teams, and we’re keeping it on the list for posterity’s sake. It’s still rather successful in both PVP and PVE, and these cookies tend to complement one another. Your typical modern team might follow suit, substituting a cookie, like Black Raisin or Strawberry Crepe for Milk or Espresso. This has been updated to account for newer cookies.

Cookie Run Kingdom Team Guide: Squad 4

Cookie Run Kingdom
Cookie Run Kingdom (Image credit: Cookie Run Kingdom)

Front 1: Dark Choco

Front 2: Princess Cookie

Damage 3: Espresso Cookie

Damage 2: Rye Cookie/ Tiger Lily Cookie/ Vampire Cookie

Support: Sparkling Cookie/ Custard Cookie III/ Pomegranate Cookie/ Herb Cookie

A team that is extremely similar to the second, but is geared for killing things quickly. In PVP, you’ll encounter a lot of teams that look much like this. It’s understandable why it’s so popular. It still employs the tried-and-true two-tanks-in-front strategy. This time, though, the tanks increase the bite of your whole squad by lowering the enemy’s protection. This way, you’re not just reliant on Espresso to inflict significant damage.

Fans may rely on a squad comprising a Charger, Ambush, Bomber, Support, and Magic Cookie to break past obstacles and beat higher power level levels that they otherwise couldn’t beat.

Werewolf Cookie, Sea Fairy Cookie, Devil Cookie, Parfait Cookie, and Pancake Cookie are other squad that would be a fantastic illustration of this set-up. Players should be able to sail through stages regardless of how high the suggested power level is thanks to this setup’s strong skills and toppings. Players should double-check that the Support Cookie on their team can heal as part of their talent.

Cookie Run Kingdom Team Guide: Squad 5

Battle
Cookie Run Kingdom (Image credit: Cookie Run Kingdom)

Front: Madeleine Cookie/ Strawberry Crepe, Werewolf Cookie

Machinegunner: Pastry Cookie

Healer: Herb Cookie/ Pure Vanilla Cookie/ Custard Cookie III, Swift Chocos/Raspberries

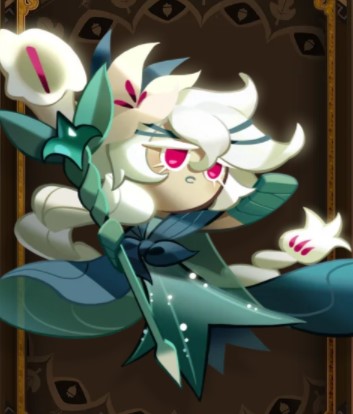
Support 1: Lilac Cookie

Support 2: Mint Choco Cookie

Lilac and Mint Choco’s talent only works on some cookies, especially ones with skills that alter their basic attack in some way. This is because they improve the generally mediocre ATK SPD stat. This doesn’t assist much with most other cookies who have more standard talents, but ATK SPD is effective for Pastry Cookie, Madeleine Cookie, and Werewolf Cookie’s skills. 

When combined with Lilac’s ability to enhance ATK dependent on ATK SPD, these generally underwhelming cookies start dishing out some serious damage. When Madeleine starts spamming sword waves like a sugar-addled hyperactive baby swinging a toy blade, his competence doesn’t seem so cowardly.

For players who want the finest coverage, having a Charger, Defense, two Ambush, and one Support Cookie on their squad is a great approach to ensure they get the most out of their team. For a consistent and steady squad, Princess Cookie, Avacado Cookie, Carrot Cookie, Adventurer Cookie, and Ninja Cookie are good examples.

Upgrading their talents will make it much easier for many teams, including this one and others, to realize their full potential. When it comes to choosing a Support Cookie, the ideal option is to go with one who can heal as part of their talent.

Know more about cotton cookie toppings by reading Cotton Cookie Toppings in Cookie Run Kingdom

Here are some Tips and Tricks for your Cookie Run Kingdom Team

Cookie Run Kingdom
Cookie Run Kingdom (Image credit: Cookie Run Kingdom)

Remember to include your Frontliners

A team’s offensive or defensive orientation is often, but not always, determined by the presence of more damage dealers. It depends on the frontrunners you bring. Dark Choco and Princess are long-lasting debuffers that are widely employed in Arena PVP encounters.

Yam, Madeleine, and Avocado are all in the center, having AOE strikes that are difficult but not as difficult as a specialist damage dealer’s talent. Milk and Knight Cookie act as deterrents, drawing attention away from more powerful yet soft treats like Espresso and Poison Mushroom.

The game relies heavily on treasures

This game necessitates the use of treasures. Players should have the Old Pilgrim’s Scroll treasure at the absolute least. It is immensely strong, especially when compared to other Epic rank treasures. It gives your squad a hefty passive 30 percent ATK increase at level 1. You would believe that this just relates to glass cannon cookies like Espresso, but healers’ essential and skill healing also scale with their ATK stat! This improves your squad’s survival.

Use the Toppings

When it comes to toppings, having five of the same type is more trustworthy than having several sorts of toppings within a cookie. Identical toppings make up a set bonus. When making a list of toppings for your cookies, just one sort of topping should be included per cookie, not all of them.

For more Guides, Tips, and Tricks

Check out our Video Games Guide Section for more dedicated guides.

Swinub, Mamoswine, Piloswine in Pokemon Go — A Complete Guide

You will need a Pokemon Go guide to understand Swinub, Mamoswine, and Piloswine. We have gathered details for you so that you can learn more about these pokemon.

There’s strategy involved whether you’re raiding in PvE content or fighting it out in the PvP Go Battle League. You’ll want to employ Pokémon with type strengths and weaknesses, as well as the most potent movesets available.

Here is the Pokemon Go guide for Swinub, Mamoswine, and Piloswine

Swinub

Swinub is a Pokémon from the Johto region that is Ice and Ground. When fed 25 candies, it evolves into Piloswine, and then into Mamoswine. Swinub forages by rubbing its snout on the ground for food. A mushroom that grows under the shelter of dead grass is its favorite meal. This Pokémon digs up hot springs from time to time. Swinub develops into Piloswine at level 33, and with learning the move Mamoswine, it may further evolve into Mamoswine. Ancient Strength

Pokemon Go guide
swinub (Image credit: Pokemon Fandom)

In Pokémon GO, it is an Ice and Ground-type Pokémon. It has a maximum CP of 837 with the following stats: 90 ATK, 69 DEF, and 137 STA. In Pokémon GO, Swinub’s greatest moves are Tackle and Rock Slide (5.40 DPS). Swinub is weak to moves like Fighting, Fire, Grass, Steel, and Water. Snow and sunny sunshine help Swinub grow. 

When attacking Pokémon in Gyms, Swinub’s greatest moves are Powder Snow and Return. This moveset has the most overall DPS and is also the most effective in PVP encounters.

Pokemon Go guide: Mamoswine

Mamoswine is one of the greatest Generation 4 Pokémon to have in your offensive lineup. Mamoswine is the new ice type meta king since it possesses all the necessary characteristics to be meta significant. To flourish in the meta, you need great stats and a solid moveset, and Mamoswine possesses both. The attack stat of 247 is rather good, and while having an average-tier defensive stat, the stamina stat compensates for it. 

Pokemon Go guide
Mamoswine (Image credit: Pokemon Fandom)

Is it possible to call it hefty as well? It isn’t the biggest pokemon in the world, but it can certainly take a beating. At the very least, it outperforms its nearest competition, Weavile.

Powder Snow and Avalanche are its finest moves. Powder Snow is a fast move with a large energy gain that will assist you in launching as many Avalanches as possible. It has a lower DPS than Ice Shard and Frost Breath. But the greatest EPS of all ice types is Fast Moves. Avalanche, on the other hand, is without a doubt the finest ice type Charge Move available in the game.

How does it fare as a ground-based assailant? To begin with, Mud-Slap and Bulldoze aren’t the most effective ground techniques. Many Ground-type attackers are better than Groudon, Rhyperior, and the yet-to-be-released Garchomp. It isn’t terrible, but there are better alternatives.

The Rayquaza raid is one fight where Mamoswine shines. Rayquaza has a double weakness to ice-type attacks as a dragon and a flying-type Pokémon, and as previously said, Mamoswine is the finest ice-type attacker in the game.

Piloswine

Piloswine is a Pokémon from the Johto region that is Ice and Ground. After being fed 25 candies, it develops into Swinub, and after being fed 100 sweets and a Sinnoh Stone, it transforms into Mamoswine.

Piloswine has an impressive hump on its back and is a big, brown, furry Pokémon. A pair of ice tusks on each tusk appear small, but can be deadly. Piloswine tusks become thicker when it snows, and females have smaller tusks than males. It has a sensitive ear that wiggles in response to sound. In the head of the Piloswine, there are two beady eyes, but these are usually covered with fur tufts. Due to their inability to see, the pigs often inspect the surroundings with their sensitive noses. 

Pokemon Go guide
Piloswine

Typically, its hair covers its short, hooved legs. Its hooves provide even footing on icy surfaces despite the small size of its legs. Pigoswine tends to inhabit cold places such as ice caves, mountainous areas, and frozen tundra. In the winter, it digs around under snow and ice to find food.

In Pokémon GO, it has a maximum CP of 2652 with the following stats: 181 ATK, 138 DEF, and 225 STA. Powder Snow and Avalanche are Piloswine’s greatest moves in Pokémon GO (10.42 DPS). Fighting, Fire, Grass, Steel, and Water-type moves are all susceptible to Piloswine.

For more Guides, Tips, and Tricks

Check out our Video Games Guide Section for more dedicated guides.

Final Fantasy XIV different classes and playstyle

The FFXIV classes and playstyle will affect the storyline as well as your multiplayer experience.

In every MMORPG, finding your role and playing style is crucial. Even if all the characters can be categorized into three categories (DPS, tank, and healer), there are still considerable variances between them. They frequently express themselves in purely mechanical components of the game, such as combinations and special abilities. They do, however, have a significant aesthetic influence. The design of armors and weapons, as well as ability animations, may all contribute to a fantastic theme for each character.

FFXIV advanced character classes are Jobs. After attaining level 30 in the respective class, players can access the original ones. The occupations that were added later (in expansions) to the game need a significant amount of advancement in the Main Story Quest. Final Fantasy XIV has a unique employment structure. 

On a single character, you may level all the classes and occupations, then freely switch between them by equipping different weapons. Final Fantasy XIV has far fewer negative effects of misclassing than most other MMORPGs. Below is a breakdown of FFXIV classes and playstyle.

FFXIV Classes and Playstyle

The classes you have access to at the start of the game serve as a primer for the many roles you’ll play in the game: tank, healer, or damage dealer (DPS).

These three characters play crucial roles in the game’s multiplayer mode. When you’re playing dungeons, trials, or raids, you’ll be partnered up with other players according to which role you’re performing. Dungeons, for example, need a healer, a tank, and two DPS players. These three archetypes apply to all the game’s many classes and occupations.

Symbols representing tanks are blue. In dungeons, they lead the assault by absorbing the brunt of enemy blows. They battle at the front of the group like live shields. They can defend themselves with formidable armor and spells. While they can have the ability to hit powerfully, their primary objective is to endure enemy attacks so that healers and DPS can accomplish their tasks.

Character symbols for healers are green. They provide backline assistance for the party by casting spells that replenish health or offer vital shields. They can deal considerable damage on their own with magical strikes, but they usually serve as the team’s rescuers. Healers may also remove bad effects that adversaries have placed on their party, and some can even resurrect party members who have been knocked out.

Character icons for DPS characters are red. These damage dealers use weapons or magic to attack at close range or from afar. Their main purpose is to annihilate adversaries with devastating strikes. Some are better at doing massive damage to a single enemy, while others can take on several foes at once. While the rest of the team relies on them to eliminate all the opponents in their way, DPS characters require tanks and healers to stay alive.

FFXIV Classes and Playstyle: Tanks

Final Fantasy XIV (Image credit: FFXIV on Steam)

Consider one of the four tank jobs: Warrior, Dark Knight, Gunbreaker, or Paladin if you want to lead the charge in battle.

Warrior

Warriors are formidable brutes who are difficult to defeat. They are ferocious fighters that cut their foes with enormous axes. Their combat style consists of hard-hitting techniques that get even more powerful when they gain abilities that increase their strength. They feature excellent healing and sustaining abilities, as well as a large burst damage window that allows you to slash down adversaries with ferocity. If you’re seeking an outnumbered and able to withstand attacks, warriors are a splendid option. Warrior can only be played after being a Marauder and leveling them up to level 30.

Dark Knight

Dark Knights are the polar opposite of Paladins, being dark, moody, and armed with enormous swords. To gain power, their combat style emphasizes maintaining pressure on foes using darkness-infused physical and magical strikes. The Blackest Night, which places a large shield over a party member and is one of the finest types of mitigation in the game, is one of Dark Knight’s most well-known abilities. It doesn’t have as many talents to restore HP as the other tanks, therefore it’s often seen as the “selfish” tank. Dark Knights are ideal for gamers that desire to play as a well-rounded and edgy tank.

Gunbreaker

Gunbreakers are tanks with a more complex moveset that resembles that of a DPS character. They battle with a gunblade, which is, as you might expect, a sword that can fire bullets. The purpose of combos in this profession is to collect resources and perform even more combos. This is the job for you if you enjoy weaving. Gunbreakers are an excellent choice for gamers that want to play a tank but desire a more engaging playstyle than their peers.

FFXIV Classes and Playstyle: Healer

Final Fantasy
Final Fantasy XIV (Image credit: FFXIV on Steam)

Consider playing a healer if you wish to be the magical backbone of your group, keeping everyone alive. The job has four responsibilities: Sage, White Mage, Astrologian, and Scholar.

Sage

Sages heal and shield their companions with magical, floating laser-shooting rifles. You’ll choose a party member to be your focus with Kardia, and that party member will heal as you perform damage-dealing abilities. Sage is a great choice for someone who likes to cause more harm than good. (However, you should still keep an eye on your HP and heal!) You’ll need the Endwalker expansion and a level 70 character to play as a Sage.

White Mage

White Mages in Final Fantasy XIV suit the traditional image of a healer in most other games. They wield their canes to perform healing magic on comrades and pull upon nature to strike adversaries. With various spells, they may heal their allies in big spurts or over time. Their lily system allows them to repair massive quantities of harm while simultaneously healing massive amounts of health. They are good options to defend your group. First, you must level up to level 30 of the Conjurer class before you can become a White Mage.

Astrologian

Astrologers are healers that help their team using magic and unique cards. They use their skills to restore health over time. They can also use cards from a deck to cast powerful bonuses for their party. Buffs should be distributed wisely and effectively since various cards boost different roles. Astrologians are ideal for healers who wish to be able to help their party in a variety of ways. You’ll need the Heavensward expansion and a level 50 character to play as an Astrologian.

Scholar

Scholars are special healers with the ability to conjure fairies to aid the squad. A Scholar’s companion supports them by utilizing their talents to protect the group, in addition to casting healing abilities and lifesaving shields for the party. To keep shields up, you must control both your fairy and yourself.

Scholars are ideal for gamers who enjoy the concept of having a summoned ally provide passive support. To play as a Scholar, you must first level up as a DPS Arcanist, then convert to the Scholar healer job when you reach level 30.

FFXIV Classes and Playstyle: Physical Ranged DPS

FFXIV Classes and Playstyle
Final Fantasy XIV (Image credit: FFXIV on Steam)

A physically ranged DPS character’s primary purpose is to deal damage, but they also possess abilities that support their party members.

Mechanist

Machinists employ technology to inflict massive amounts of devastation. They may fire firearms at their opponents and send numerous automatons to battle with them. Though, their support for their party may not be as high as other physically ranged DPS heroes. They summon a strong robot to do more damage to compensate. Machinists must also perform a lot of skill weaving to get their high damage numbers. 

Machinists are an excellent choice for gamers who wish to battle alongside a robot. You must own the Heavensward expansion and have a character leveled up to 50 to play as a Machinist.

Dancer

Dancers are elegant combatants who battle using dance skills. While their skills aren’t as powerful as those of other physical ranged DPS, they can choose a “dancing partner” to boost their damage output. Their battle style is rhythmic, and to perform their most essential skills, you must hit precise buttons in a specific order.

Dancers are ideal for gamers who prefer a fighting style that is both engaging and useful for their whole group. You’ll need the Shadow bringers expansion and a level 60 character to play as a Dancer.

If you are interested in RPG games, then read Rage of Destiny Beginner’s Guide – Tips and Tricks for this Idle RPG

Bard

Bards amplify their skills by utilizing the power of song. Their bows can strike adversaries and play melodies that enhance their abilities and help their group become stronger. They use poisons and wind bites to harm their enemies, and their varied songs can help their party during a fight. Bards are ideal for players who desire to add to their party’s fighting capabilities while yet being mobile. To play as a Bard, you must first reach Lv. 30 in the Archer class.

FFXIV Classes and Playstyle: Melee DPS

FFXIV Classes and Playstyle
Final Fantasy XIV (Image credit: FFXIV on Steam)

Choose one of the four melee DPS classes: Monk, Dragoon, Ninja, or Samurai if you want to deal damage up close and personal. Players of melee DPS characters have one advantage over others: their positional abilities. There are certain angles from which each of these jobs’ attacks is most effective, for example from behind.

Monk

Monks are live weapons that battle directly in front of their foes. They employ martial arts to kick and punch their opponents and inflict injury. Because most of their powers have positionals, monks must move a lot. It does damage in a variety of forms and combinations. Monks are ideal for gamers that desire a combat style that involves a lot of mobility and combinations.

Dragoon

Dragoons are damage dealers who soar high in the air. They stab adversaries with their polearms and may fly through the air with jumping assaults that impale foes. Their fighting strategy centers on a limited number of combos and positionals, with specific buffs allowing you to improve your abilities. They’re famed for their leaping powers, which cause them to leap toward the opponent. Dragoons are ideal for those looking for a simple yet strong job.

Ninja

Ninjas use magical techniques to enhance their strikes and do more harm. Their ninjutsu talents allow them to mix and blend various seal jutsus to vanquish adversaries with a variety of strikes and close-range spells. To master all of their techniques, players must remember how to combine diverse powers, which may either terrify or thrill them. Ninjas are ideal for gamers that seek a fighting style that is both involved and adaptable, with a wide range of possibilities. To become a Ninja, you must first reach level 30 in the Rogue class.

Samurai

Samurais are formidable combatants who use heavy weapons. They wield katanas that do huge amounts of damage to single targets, as well as a few area-of-effect attacks. Their combat strategy is to accumulate resources through a variety of combinations and use various amounts to execute numerous special strikes. Players that wish to deal a lot of harm should use samurais. To play as a Samurai, you’ll need the Heavensward expansion and a level 50 character.

If you love action games then read Marvel Future Revolution Beginner’s Guide — Tips and Tricks

Reaper

As well as wielding a scythe, Reaper summons a demonic avatar to assist in combat. You will need to manage buff stacks, a resource bar, and your avatar to be successful in Reaper. Their movement ability is unique as well, being able to move through portals they create. For players who like to manage a wide range of combos and resources, reapers are great. To play as the Reaper, you must have the Endwalker expansion and a job Lv.70.

FFXIV Classes and Playstyle: Magic Ranged DPS

FFXIV Classes and Playstyle
Final Fantasy XIV (Image credit: FFXIV on Steam)

Casting spells takes time, so these characters aren’t as mobile as their physically ranged DPS counterparts, but their attack power compensates for this.

Red Mage

The Red Mage is a one-of-a-kind class that combines melee damage with black magic for assaults and white magic spells for defense and healing. They strike and swipe at adversaries with a rapier while casting spells. These characters can do a variety of elemental magic damage, as well as heal and even perform a resurrection spell. Players who desire a character that can accomplish a little of everything will enjoy Red Mages.

Blue Mage

The Blue Mage is a one-of-a-kind restricted job with specific limitations. Their playstyle entails learning monster attacks to expand their skill set. Blue Mages, on the other hand, cannot be deployed in most scenarios, such as main plot missions or dungeon roulettes, due to this unique mechanism.

Black Mages

Black Mages can unleash very powerful magical spells. Because they cast for longer than others, anticipate to maintain an excellent position while delivering explosive and devastating magic. These mages must vary the sort of magic they cast to restore their mana at higher levels, so they can keep attacking the opponent. For those who want to unleash devastating spells on their enemies, Black Mages are ideal.

For more Guides, Tips, and Tricks

Check out our Video Games Guide Section for more dedicated guides.

Lineage 2M Beginner’s Guide – Tips and Tricks

The following Lineage 2M guide will help beginners become more familiar with the game.

A successful release has taken place for the MMORPG Lineage 2M. Unfortunately, because the game is in Korean, many players may face difficulties. As a resource for beginners, we created a complete Lineage 2M guide containing all the tips and tricks.

The primary gameplay loops in Lineage 2M alternate between PvE (player versus environment) and PvP (player vs player) activity. Incentivizing players to compete against one another in boss hunts strewn around the open globe. But that doesn’t mean everyone is on their own! A solitary player has little chance of defeating a monster, but teaming up with other player characters to defeat a shared foe brings riches, stat-boosting skill books, and, of course, long-lasting friendships.

Lineage 2M Guide for Potions XP

Every city has grocery stores that sell potion XP. There are two kinds of potion XP: orange and red. Orange cannot be automatically used, while red can. 

Your time matters

Lineage 2M Guide
Lineage 2M

The in-game content in Lineage2M is designed to allow players to improve by playing consistently. There are three ways to put this idea to work for you:

Class-Path: Class Cards are the primary means of acquiring ‘Class.’ However, because of this ‘path’ system, users can move to a higher rank of their chosen class after they reach a particular level, which means that if you play consistently, you’ll gather cards and level up.

Codex: Items obtained during gaming may appear to be pointless at first, but that is only until you learn about the Codex system. This mechanism allows players to level up by using the extra stuff they collect while playing. This means that if you play a lot, you’ll naturally complete a lot of Codex entries. You will also collect a lot of goods that may or may not be useful to your character or class. But in Lineage 2M, you’ll get stats and boosts in exchange for those items and your efforts.

Card Fusion: You’ll occasionally get duplicate Class and Agathion cards, just like in any random drawing. You may effectively generate new Class/Agathion cards by ‘mixing’ your superfluous cards. In reality, fusion may allow you to create a more powerful card, therefore the more duplicate class/Agathion cards you have, the better your chances of getting a higher-grade card.

Lineage 2M Guide for Character Development

Lineage 2M Guide
Lineage 2M

You can make consistent progress in this game if you’re willing to check-in and maintain at least a small presence. Players that show up every day to receive daily bonuses, on-time push prizes, passes, and more may expect to see significant development.

Daily Benefits is one of these systems, and it delivers critical products for character development. You may get free things as daily rewards by going to Menu > ‘Daily’ tab. You’ll earn a high-value prize on the last day of a Daily Benefit streak. This ensures that everyone who plays every day will be able to improve their character’s specifications.

On-time Rewards are a different way to level up your character. Every day, at a certain time, tools and objects required for character growth are dropped with alerts. You must check for these prizes via the ‘Mail’ page, but they are time-limited, and if you do not open your mail immediately, the offers will expire.

A newly implemented Pass System will give further help for character growth. Users can utilize the ‘Aden Pass,’ which allows them to do activities and get prizes, and the ‘Beginner’s Pass,’ which allows them to complete core missions and receive an Epic-grade skill book.

Lineage 2M Guide to get the arrows

Arrows and Potion XP may both be purchased in the food store. There are two sorts of arrows: iron (cheaper) and silver (more costly). When it comes to zombie hunting, silver arrows are superior. When hunting common creatures, inexpensive arrows deal greater damage. Use silver arrows if you’re certain your creatures are undead.

Warehouse

There are warehouses in cities where you may keep your belongings, but there is one concern. You do not have to pay anything to place an item, but you must pay 1000 Adena to pick up an item. This is a significant sum of money at the start of the game, so you should be aware of it.

Penalty

Players lose experience gained and some probability items in the event of death. A special NPC with a cross can restore experience and items in exchange for diamonds or Adena. Recovering can also be done by pressing the cross button in the quick menu. Simply click on the currency switch below if you have selected diamonds for recovery.

Lineage 2M Guide for Boss

Lineage 2M Guide
Lineage 2M

Boss creatures may be found in dungeons and fields in a variety of devastating forms and sizes. Because of their size and abilities, it’s impossible to miss one when you see one. To take on boss monsters, you’ll need to create groups with other players, while also participating in faction fights to prevent other groups from hitting their goal. As a result, Lineage2M gamers may enjoy a full MMORPG experience, where collaboration and rivalry occur concurrently on a huge scale at any one time.

Lineage 2M Guide for Clan

Lineage 2M
Lineage 2M Guide

Take advantage of the Lineage 2M optional Clan system, while we’re on the subject of buddies. Join a clan to gain access to exclusive content such as epic boss raids. Increase your clan’s reputation by donating to quests and facilitating membership growth to expand your Clan Hall and Clan Shop, allowing for bragging rights and ties. 

Clan membership is available after level 20. Players cannot join another Clan within 24 hours after leaving a Clan.

That concludes our Lineage 2M guide and tips for a better gameplay experience. More instructions for this game will be released soon.

https://twitter.com/PlayLineage2M/status/1466271044755345409?s=20

For more Guides, Tips, and Tricks

Check out our Video Games Guide Section for more dedicated guides.

Ludwig banned on YouTube just after switching from Twitch

Ludwig Ahgren’s Livestream was banned only a few days after he shifted to only broadcasting on YouTube, according to him.

It felt like a great triumph for both Ludwig and YouTube when prominent streamer Ludwig Ahgren revealed that he had acquired an exclusive agreement with YouTube and would be shifting his immensely popular streams over to the site. However, only a few days after Ludwig made the switch, the collaboration is already having issues since Ludwig’s YouTube account has been suspended.

Why was Ludwig banned on YouTube?

Ludwig’s YouTube account was banned just 72 hours after he joined. Ludwig’s account was suspended in the middle of his broadcast on Dec. 2. His account is still accessible, but he can no longer go live as a result of the ban. Ludwig joked about his suspension on Twitter, writing “you could say the switch has been going well” over an image of his stream being down.

At the time of Ludwig’s suspension, more than 20,000 people were watching, and he saw more than 600,000 viewers during his first stream. His YouTube channel has already gained more than two million subscribers. Ludwig watched YouTube videos and commented on them, and he interacted with the comments his viewers left for him during the time of his suspension.

If you are active on twitch then read The complete Mizkif Girlfriend Drama explained by us.

Ludwig’s account was suspended due to “policy violations”. However, the particular violations were first unclear. Many fans believe Ludwig broke YouTube’s DMCA regulations by playing multiple Cocomelon and Pinkfong videos, including the extremely popular “Baby Shark.” The copyright holder is protected by DMCA laws from having their content presented in a place that is not under their control.

Ludwig banned
Ludwig (Credit: Official Instagram of Ludwig)

Ludwig’s Response

Ludwig has responded to this idea by stating that this is exactly why he was banned.

“I was prohibited from streaming after only two days on YouTube,” he added. “I was trying to find the top fifty finest old YouTube videos when it happened.” I ended up listening to a few seconds of ‘Baby Shark’ along the way, which I won’t dare to listen to ever again.” “In four years on Twitch, I never got banned,” he concluded.

Ludwig didn’t say when his ban will expire, but it appears that he’ll have to be much more cautious about the sorts of content he distributes in his streams in the future.

Ludwig will have to alter the sorts of films he creates to suit the regulations of his new platform. His partnership with YouTube may have sounded like a profitable plan when he first started, but he will have to adjust the types of videos he makes to match the laws of his new platform. Ludwig won’t be banned indefinitely, but his videos may have to change in the future due to this early restriction.

For more stories

Check out the Entertainment section for more stories.

How to use the Parametric Transformer in Genshin Impact — A Complete Guide

The Parametric Transformer is one of many gadgets and items you can use in Genshin Impact, and its ability to transmute gives it the utmost power.

Aside from the major story objectives and character quests that contribute to Teyvat’s plotline and mythology, other game elements compel you to farm for stuff. Those with numerous characters will have their job cut out for them between the experience materials, ascension materials, and Mora.

MiHoYo developed the Parametric Transformer to solve this problem. You will receive the Parametric Transformer gadget after completing the Tianqiu Valley puzzle in Genshin Impact. Through the use of this device, appropriate materials can be transformed into beneficial ones. You can use the Parametric Transformer by following these pointers.

As Genshin Impact introduces new characters and weapons, the quest for resources continues. Because of the many teams, many individuals have goods in their bags that they don’t use, either to level their character or to improve a weapon.

You’re likely to have gathered several hundred random things if you have daily to complete, hilichurls to kill, and domains to vanquish. For example, mint masks or masks that have been damaged. With the Parametric Transformer, you can turn some of these into useful objects. In Genshin Impact, we have detailed instructions on how to use the Parametric Transformer.

Why Is The Parametric Transformer Important?

The parametric transformer accepts elements that are common or rare up to a value of 150 points. More common items are worth fewer points, whereas those that are uncommon are worth more. It then combines these components into five to ten “bundles.” Usually, you’ll get a score of five to seven, with eight to 10 being unusual. One of the following will be included in each bundle:

Parametric Transformer
Mora (Image credit: Genshin Impact fandom)
  • Mora — 20,000
  • Ascension Materials for Three-Star Characters — A random fragment
  • A random guide-level book from Three Star Talent Level-Up Materials
  • Material for Three Star Weapon Ascension — Drops from all level 40 mobs
  • Ascension Materials for Two-Star Characters — Two slivers of a random element.
  • The Three-Star Talent Level-Up Materials include four teaching-level books
  • Materials for two-star weapon ascensions — six materials at a base level
  • Character EXP Materials — Wit of Two Heroes and the Experiences of Three to Four Adventurers
  • Weapon Enhancement Materials — Nine Fine Enhancement Ores and Four Mystic Enhancement Ores

The Parametric Transformer, like other useable gadgets in Genshin Impact, has a cooldown time. It lasts seven days, which is longer than most.

Teyvat resets every Monday morning, allowing you to try the boss domains once more for the following week. It will not, however, reset the Parametric Transformer. The gadget’s cooldown duration is always seven days in actual time from the last time it was activated. Using the Parametric Transformer on Sundays might help you prepare for the next week based on boss drops and how many domains you intend on farming for the week.

How To Use The Parametric Transformer

How To Use The Parametric Transformer
Parametric Transformer (Image credit: Genshin Impact fandom)

It is easy to use the Parametric Transformer, but it does require a few steps to complete. Here are the steps you need to take.

Locate an Appropriate Location to use the Parametric Transformer

To initiate the transition, you must employ an elemental talent, as seen in the image above. This implies that you should not do this at an inconvenient location. Nothing is more frustrating than being assaulted while attempting to convert goods. Unlike some other devices in Genshin Impact, the Parametric Transformer has few constraints on where it may be used. Because monsters do not spawn in these regions, Springvale, Mondstadt, Liyue Harbor, and Qingce Village are suitable places to transmute.

In your inventory, look for the parametric transformer

Parametric Transformer
Parametric Transformer gadget. (Image credit: Hritwik/miHoYo)

As with the Serenitea Pot, you will find the Parametric Transformer in your inventory’s gadget section. Simply click its icon and then the put button to bring it up in front of you, ready to interact with.

Choose the items you want to change

To conduct a transformation, you’ll need things with a value of 150. The rarity of an item determines its worth, and points rise with each level.

  • Items that are commonly used (grey background) a single point
  • Unusual Objects (green background) Two Remarks
  • Items that are very rare (blue background) Three Remarks
  • Exceptional goods (purple background) There are four points
Parametric Transformer gadget
Parametric Transformer gadget. (Image credit: Hritwik/miHoYo)

Mint, berries, and sweet flowers are all excellent transmutation possibilities. Each of these creatures respawns every day across Teyvat. You might potentially be sitting on 300 berries at any given time for the sole purpose of transformation.

Using rare items or ascension materials won’t work in your favor when using the Parametric Transformer because it’s a bit of a gamble. The fourth berry on Valberry bushes is rarer, but it only respawns after 49 real-time hours. The game’s daily reset, however, yields just three lower-quality berries from normal berry bushes. Select the items you want to transmute, then click on initiate transmutation.

Make use of your elemental abilities

You must utilize Elemental Skills to power the Parametric Transformer to use it for transmutation. The transmutation process will be finished once the Parametric Transformer reaches 100%. All Elemental Skills increase the Parametric Transformer’s energy meter by about 5% to 6%, regardless of how charged the skill is or how long its cooldown is. Use characters with low Elemental Skill cooldown times to accomplish it faster.

The type of elemental skill used does not affect the results of the Parametric Transformer, a common misconception. According to players who track their results each week using one elemental type at a time, they have not found a pattern suggesting this.

Earn Rewards

According to our previous discussion, the Parametric Transformer produces five to seven bundles of items most of the time.

In the Parametric Transformer, Use Common Items

By experimenting with different versions, those who keep track of their weekly development haven’t discovered any trends or consistently positive results. Using 100% of an elemental type or all 150 transmutation slots with Cor Lapis will not produce better results than using all those mushrooms you don’t need. Rather than sacrificing ascension and talent material, it’s wiser to take a chance and feed the Parametric Transformer with common, daily respawn goods.

Gather everything you can

You can transmute once a week using the Parametric Transformer, but if you’re utilizing common goods, you’ll need a lot. With this in mind, it’s worthwhile to gather whatever you come across on your travels. Although you may not require all the berries, the products that may be made from them are significantly more valuable.

Mix and match different items

You can utilize more than one sort of object with the Parametric Transformer. If you don’t have enough of one of the transmutation materials, you can split them amongst mint, berries, and sweet flowers. Players haven’t reported a pattern for splitting transmutations so yet. Players do not appear to be penalized or rewarded for utilizing the Parametric Transformer in this manner, so take whatever garbage you have and change it into gold.

For more Guides, Tips, and Tricks

Check out our Video Games Guide Section for more dedicated Guides.

Rocket League Sideswipe Beginner’s Guide – Tips and Tricks for all the new players

The mobile version of Rocket League Sideswipe is now available. For all new players, here is Rocket League Sideswipe Guide and Tips.

Rocket League Sideswipe, a fresh side-on take on the Rocket League experience from Pysyonix, is now available on mobile devices, and many have started playing it. This will feel different from what you’re used to, whether you’re a seasoned veteran of the original Rocket League or a newcomer. To help you get started in the arena, we have compiled a list of Rocket League Sideswipe guides and tips.

Rocket League Sideswipe Guide for Exhibition matches

Once you’ve completed your first training, you’ll play a match against a bot to see whether you can put what you’ve learned together to defeat an opponent. Regardless of your victory or defeat, you’ll be sent into the main game to compete against other Sideswipers.

Given that you’ve only played one match so far, you might wish to return to practice with bots to improve your abilities. To do so, go to the far left’s Training section and then Exhibition. Then you may choose whether your bot match will be 1v1 or 2v2, as well as the bot difficulty and which of the three venues you wish to play on. It’s certainly worth your time to do this before going online.

Aim for the goal

Rocket League Sideswipe Guide
Rocket League Sideswipe

Along with the movement in Rocket League Sideswipe changing, the position of the goals has also changed. You’ll note they sit above the main level of the arena, up a quarterpipe, from the first training session. This implies that merely rushing the ball goalwards will not be enough, and you will need to be more strategic to put the ball in the net.

A nice technique is to use momentum to roll the ball up the quarterpipe and then fly and hit it into the goal. This needs timing or a helpful teammate to pull off. Vertically, the goals are also rather huge, allowing aerial shoots via soaring and jumping much more feasible choices, but difficult to execute at the present.

Striking the ball isn’t always necessary

If you are given the opportunity to strike the ball, your instincts will tell you to do it. A professional, on the other hand, will tell you differently. You don’t always get a chance to score a goal. Your opponent is likely to have a superior angle or be in a better defensive position. You should let the ball drop and defend whenever you’re unsure. With practice, you’ll be able to judge if you’re capable of taking a shot or not.

If you like car games then read Forza Horizon 5 Tips, Tricks, and Strategies

Rocket League Sideswipe Guide for Arena

Rocket League Sideswipe Guide
Rocket League Sideswipe

Sideswipe, like Rocket League, has a variety of arenas from which to pick. Shortstack, S.C. Field, and Dunk House are the three venues in Rocket League Sideswipe. Shortstack is the arena where you finish your training and where everything stays little. With a larger stretching arena and higher-placed goalmouths, S.C. Field provides you with more freedom to maneuver.

Dunk House modifies things significantly by replacing the goals with basketball hoops. Those who have played Rocket League’s Hoops mode will be familiar with what to anticipate here. Players must make their way to the basket by hitting the ball from the top. A ball cannot pass through both borders of the hoops, but an automobile can. Keeping the ball up and allowing it to land in the generously sized hoops requires aerial mobility.

Know who you are up against

Rocket League Sideswipe Guide
Rocket league Sideswipe

Your interaction with other players is maybe one of the most fascinating (but sensible) modifications to Rocket League Sideswipe from the original game. Part of the game in Rocket League was a contact sport, and interrupting others was as important to winning as scoring on the opposite end. You can’t affect other players’ progress in Rocket League Sideswipe since you’re ghosting through them. Similarly, they will not stifle your forward progress.

As a result, concentrate solely on where you want to be with the ball, whether it’s to place yourself in a scoring position or to defend against an attack on your goal by another side.

Rocket League Sideswipe Guide for Camera and Control settings

It’s tempting to get right into a game and start playing right away after downloading the game. However, before you begin your first match, you’ll want to make a few tweaks to your settings to guarantee that you begin adopting excellent habits straight away.

The camera’s default settings aren’t optimal. By default, the camera is uncomfortably near the rear of the vehicle, with a cramped field of vision. Maintaining the original camera settings will make it more difficult to play the game well. To boost your overall visibility, broaden the field of view and shift the camera back a little. This will have a huge good influence on your gaming.

Rocket League Sideswipe Guide for Boost

New players should learn boost management as soon as possible. Boost pads can be found all over the map. Both sides of the field have large boost pads located at the corners and the midfield mark. There are smaller boost pads located throughout the center of the field. The use of the boost is a crutch for many new players, so they often overemphasize it.

Many new players burn through their boost all in one dash down the field. Players with more experience will know when to use and when to save their boosts. Beginners make the classic mistake of over-relying on boosts.

You should learn how to control your boost so that you know when you’ll need it. Only use a maximum boost when you’re speeding swiftly to make a move on the ball, doing an aerial maneuver, or running back to guard your goal. In most cases, a tiny bit of boost is all that is required to bring you up to speed. Instead of holding down the boost button, you may feather it by rapidly touching it. This can be a far more efficient technique to accelerate without burning through a lot of boosts.

As a general guideline, only utilize boost when necessary. To gain momentum and conserve your boost, learn to rely on your other movement features like jumping and evading. Keep in mind that defending your net takes precedence over gaining a boost. Even high-level players frequently make the mistake of purchasing a boost pad, allowing the goal to pass through their net. Make sure you don’t make this error.

For more Guides, Tips, and Tricks

Check out our Video Games Guide Section for more dedicated Guides.

Rage of Destiny Beginner’s Guide – Tips and Tricks for this Idle RPG

Here is a Rage of Destiny Guide that will help you build a powerful team and dominate your opponents.

IGG has released a new action strategy RPG called Rage of Destiny. Rage of Destiny has more in common with a plethora of loosely similar action strategy games than a lot of other action role-playing games. Graphically, the game is excellent, the character designs are brilliant and memorable, and the amount and quality of content are astounding.

What distinguishes Rage of Destiny from other action strategy RPGs are the unique aspects included in its features and game types. Rage of Destiny promises that players, whether novices or veterans, will have a fascinating and engaging experience. There are adventures and challenges contained inside its enormous fantasy universe. No matter how vigorously players strive, they can only gain small amounts of progress with Rage of Destiny. The total progression is, however, heavily influenced by the number of time players can devote to the game.

Rage of Destiny offers several unique features and gameplay mechanics that may take some getting accustomed to. The tutorial session is a quick and easy method to learn the basics. Unlocking new features and game types always comes with useful explanations. You may also view information on each page or window you visit.

If you are new to the realm of Rage of Destiny and want to begin your experience, this is the place to be. We’ve got you covered with our Rage of Destiny guide. It features a slew of tips, techniques, and methods for overcoming each obstacle you come across.

Rage of Destiny guide for campaign

Rage of Destiny guide
Rage of Destiny (Image credit Rage of Destiny on Playstore)

The campaign is the most linear mode of the game, but it is also the most essential one. Once players get through one or two chapters, they realize it’s the same thing over and over again, so they get tired of playing the campaign. Campaigns are necessary, however, for increasing reward amounts in the AFK rewards system and from your inventory items. In order for their accounts to grow stronger, players must advance continuously in the campaign.

Rage of Destiny has an auto-combat and auto-progression campaign option, allowing players to leave their game running forever. The auto-progression will only halt when the game reaches the end of a chapter. If your squad dies during the campaign, the stage will be retried. Reaching the highest stage that your squad is capable of climbing ensures that you get a huge quantity of resources the next day. This is why you should complete at least 15 stages or 1 chapter every day.

Another crucial incentive to proceed as far as possible during the main campaign is because it acts as a key to unlocking some Rage of Destiny’s material and features. The crusade has many open features, but many elements are behind campaign milestones.

Although the opposition team’s power grows with each successive level, you may find that certain later conflicts are simpler for your team to deal with. There is a boss at the end of every level. If you complete the chapter, be sure to press “next” to continue to the next chapter and accumulate more idle prizes.

Rage of Destiny guide for a Balanced Team

The appearance of some champions in Rage of Destiny may make them appear stronger than their peers. This makes them the top choice for your main team. This is especially true for damage-dealing units since they dominate even most team-based strategic battles.

To succeed through Rage of Destiny’s many challenges, it is important to have a well-balanced and synergistic team. And simply combining the most powerful characters won’t likely bring success. Furthermore, some characters may appear weak on their own, but when teamed up with the right unit, their true value becomes evident. In addition to the rarity grade, other traits are critical to consider when evaluating a character’s ability.

Hero rarities can be classified as normal, rare, elite, and mythic. You should avoid investing your effort in characters of normal grade. The ability to raise their rarity grade is not available as they only have two skills. Elite grade heroes can have up to 3 available skills, and rare grade heroes can upgrade to elite grades. Some elite champions can be upgraded to Mythic, while it is not possible for others. In the Hero menu, the album feature allows you to verify this.

The faction of each champion should be taken into consideration when choosing your main team. In Rage of Destiny, there are six factions, including four normal ones and two special ones. They act like the proverbial “rock-paper-scissors” by giving the disadvantaged faction a 25% damage boost.

How many members are in a team?

You will always have 5 members on your team, and you may build a full synergy of allied faction bonuses around different faction combinations within your team. When it comes to ordinary factions, deploying three troops from the same faction offers your entire squad a 10% gain in ATK and HP. Adding two troops from the same faction to your trio instead provides everyone with a 15% HP and ATK boost. 

Having four heroes from the same faction deployed grants everyone a 15% ATK and a 20% HP boost. A full squad of heroes from the same regular faction increases each member’s ATK and HP by 25%.

There are many more than 5 champions to gather for any of the main factions, and selecting ones to consider should be based on their class and function in the squad. On each hero’s page, there are symbols in the top right corner that indicate their faction, type, class, and role. Types can be STR, INT, or AGI, and the type of a unit determines the sort of damage it can deal and the gear it can equip.

Completing your daily tasks

Claim daily rewards, complete expeditions, and finish campaigns in the game. Participating in these game modes earns the player rewards the following day. Diamonds, the most valuable resource in the game, can be earned by placing high in the Arena, for example. Their team or collection can be enhanced by summoning new heroes for the Kingdom.

Daily resets are also possible in some modes. Trade Route, Dragon’s Nest, and the Dwarf Treasure (Guild) are some others. Each day, players can climb Floor 6 of the Dragon’s Nest, granting them access to a variety of awesome resources and equipment. Other game modes offer plenty of useful rewards, but they take less time to complete than Dragon’s Nest. Before the game resets each day, you should always aim to finish the game’s content to 100%.

If you like action RPG games then read Marvel Future Revolution Beginner’s Guide — Tips and Tricks

Rage of Destiny guide for Upgrades

Rage of Destiny guide
Rage of Destiny (Image credit: Rage of destiny Twitter)

It’s a thrilling experience to be able to recruit new champions and expand your army. As you make modifications to your team roster to secure players that are more suited to the squad, a sense of improvement in terms of their fighting performance may be equally gratifying. The variety of upgrading choices available for each character extends the adrenaline-pumping experience even more.

A champion’s total fighting power depends largely on their level. Combat units do not get experience points or level up. However, leveling them up using basic resources is the simplest and most fundamental way to make them stronger. Gold and Hero EXP are the two fundamental resources required for leveling up.

Every tenth level may be more expensive. But it is justified because this milestone either unlocks a new skill for the champion or raises the level of an existing one. Given that leveling up prices increase as the champion’s level increases. A typical and sensible method would be to split resources as evenly as possible between all 5 of your major heroes. You can, to some extent, prioritize some above others. Front-row victors always get first dibs on augmentation operations, according to us.

While each level for any champion results in an improvement in stats and fighting power. Rating them up results in a greater boost in strength. Ranking up advances the hero to the next grade, delivering massive stat bonuses across the board.

Resonance Crystal

In addition, Rage of Destiny contains a Resonance Crystal function that may be located inside your kingdom. This feature allows any of your characters to inherit your fifth-highest level character’s level. You will only be able to level up two more heroes using this approach; but, collecting enough crystal coins from AFK prizes will allow you to unlock extra slots.

With the Resonance Crystal function, you won’t have to reset certain characters just because you changed your team lineups. There are other game types and challenges that demand you to have more than 5 high-level troops. This feature prevents you from spending money on more than 5 champions.

Join a Guild

Rage of Destiny players can also improve by joining a guild and adding friends. There are currency exchanges available for both games. If you wish to raise your character’s power rating, you can pick up some rare equipment in the guild shop.

Players can also earn Friendship Points by adding friends. Through the Summoning Portal, you can summon new heroes using these points. It is less likely that friendship summons will drop Elite Heroes, but that shouldn’t matter, since even rare heroes are useful for fusion materials needed to increase the rank of heroes already owned by you. Even if you don’t like socializing, these benefits alone should sway you to become a friend or join a guild, even if you don’t interact with them.

Always double-check your inventory

Rage of Destiny guide
Rage of Destiny (Image credit Rage of Destiny on Playstore)

The presence of multiple game modes and features to discover and enjoy within Rage of Destiny’s environment is undoubtedly part of what makes the overall journey fascinating and engrossing. As a result of the abundance of things to investigate and participate in, it is easy for novices to overlook less obvious features and places.

Your inventory or item bag contains a range of resources that are not immediately available to you, and some of these goods must be researched and even clicked on before they can be used. One of the item kinds you should constantly keep an eye out for is resource supplies, which provide you with an hour to a 24-hour supply of certain materials. It is possible to obtain large quantities of gold, hero experience, and even mystic dust by consuming these items.

However, using these resources when you need them and being able to execute additional upgrades might help you proceed not just through the campaign stages but also through the many obstacles along the way. You may use these resources for hero upgrades in this regard.

Similarly, hero soulstones from numerous sources have been accumulated in your item bag. You can summon a champion of that grade if you have 60 of either the rare or elite variety. Progressing through the Atonement Tower will very certainly award you a fairly large number of these soulstones, and there is no use in hoarding them. When these things become available, be sure to summon heroes from them, since you will never run out of extra heroes to rank up current ones.

For more Guides, Tips, and Tricks

Check out our Video Games Guide Section for more dedicated Guides.

Marvel Future Revolution Beginner’s Guide — Tips and Tricks

If you are a Marvel fan then we have brought a Marvel Future Revolution Guide of the game with many tips and tricks so that you can win the battles easily.

A huge treat for MARVEL fans as well as MMORPG fans, Netmarble’s MARVEL Future Revolution allows players to take on the role of some of the most popular heroes in the MARVEL Universe.  MARVEL Future Revolution, on the other hand, does not rely exclusively on the franchise’s success, since every component of the game demonstrates how much thought and effort has gone into it.

Given the premise, the primary tale offers a unique yet familiar take on the multiverse notion. The gameplay graphics, as well as the dramatic cut sequences, are stunning. Most significantly, MARVEL Future Revolution is jam-packed with content, all crammed into a fully 3D and enormous open environment.

https://youtu.be/reKCTNmJ2Mc

It’s surprisingly rich, and it throws a lot at you right once, including some traditional mobile-game features and many ways to flesh out your characters. To ensure you get off to a good start, we’ve compiled this crucial list of Marvel Future Revolution Guide.

The first Marvel Future Revolution Guide is about choosing the main hero

Players can choose from eight different superheroes in Marvel Future Revolution. In the initial session, you will be able to experience almost all characters. But before you embark on your true adventure, you will have to choose your lead character. Adding additional heroes to your squad requires 4 slots available to players. The level of your squad needs to be raised at some point by using those additional character slots. You can unlock four additional characters using heroes slot expansion tickets. Buying these tickets costs gems.

Marvel Future Revolution Guide
Marvel Future Revolution. Credit: Netmarble

However, as in most MMORPGs, one character has to be considered the main hero. You will only have extra gear and resources for the other squad members because all your resources will go into this hero. Heroes don’t have specific roles or classes to categorize them, but their skills can be compared to each other.

Beginners are naturally most concerned with choosing one of the available heroes to be their main character. Another common practice is to release a tier list shortly after an MMORPG launches. This allows gamers to rank down the heroes in the game. Consider the strengths and weaknesses of all the characters you’re considering before making a decision. There is also the option to simply choose the character for whom you have the most affection, disregarding their skills and potential and simply making the most of what they have to offer.

Each superhero has a variety of powers, so it is recommended to examine them all. Their unique skill sets suggest potential builds and play styles for each character. All players should be able to associate their preferences with one playstyle more than the rest. You should choose the character that you feel matches your preferences and plays best as your lead hero.

Join forces

Marvel Future Revolution Guide
Marvel Future Revolution. Credit: Netmarble

You will be able to build and join Alliances once you have finished the Epic Mission titled ‘2-12 Assemble.’ These are similar to clans in other games in that they allow groups of players to contribute to an aggregate level of value. You’ll want to join an Alliance as soon as possible since you’ll receive uncommon gifts just by playing as it levels up.

Follow the main storyline as much as possible

MARVEL Future Revolution does not simply create a narrative because it is necessary. Fans of the franchise will enjoy seeing how convergence differs from the various alternate Marvel Universe realities found in different media. It goes beyond merely grabbing their attention. Despite the linearity of the main quests, there are enough side quests. There are collectibles, and various activities in between for players to deviate from constantly embarking on one quest after another.

Aside from immersing yourself in the setting, characters, and events of MARVEL Future Revolution, the primary campaign is crucial for every player. Because it contributes the most to progress in your adventure. Killing monsters and farming for EXP and goods has long been a popular traditional feature of MMORPGs. Although grinding for EXP and equipment is still possible in MARVEL Future Revolution. It should only be used as a last option after you’ve run out of things to do.

If you love mobile games like these then read PUBG New State Guide for Beginners – Tips and Tricks

Upgrade your lead hero

Resource management is a typical feature of RPGs as well as other game genres with lengthy playtime. The normal scenario is that you would conserve practically every form of resource for future use. Especially those that are harder to come by and maybe utilized for several other purposes. In most circumstances, we would advise caution when it comes to spending resources. But in MARVEL Future Revolution, every CP rise counts. So going all-in, especially for your main character, is the best course of action.

Marvel Future Revolution
Marvel Future Revolution. Credit: Netmarble

There are two types of factors that boost each hero’s CP: those that affect the hero and those that affect the entire squad or every hero on your roster. Leveling up is the most basic way to raise a hero’s stats and CP, as well as unlocking the possibility for new upgrade choices to become accessible. The sole method to get EXP and move through the levels is through quests and fighting. While EXP gained from opponents defeated is not as important. The EXP awards from missions completed allow for very quick growth of development.

The heroes also have 5 active skills and one ultimate skill in addition to their basic attacks. When a hero levels up, he or she can upgrade their existing skills as well as earn skill masteries. The other 4 slots can be filled with any of the 7 available skills for the hero, except for the first. Skills, basic attacks, and ultimate attacks can be upgraded with gold once you reach certain hero levels. These skills should be upgraded as soon as they are available.

At the cost of gold, each of the 8 active skills can also be unlocked through skill masteries. Remember that skill masteries don’t necessarily make the hero stronger, but rather provide you with options for choosing between the effects of each skill. MARVEL Future Revolution allows you to save 3 skill sets with a variety of combinations of skills and skill mastery setups. Make sure you combine the skills that appeal to you.

Marvel Future Revolution Guide for Omega Cards

https://twitter.com/MarvelFutureRev/status/1465848304667746304?s=20

Omega Cards are a one-of-a-kind aspect in MARVEL Future Revolution that not only boosts heroes but also allows players to personalize their heroes. Omega Cards might be common, uncommon, or exceptional, but these characteristics do not make one superior to another. The stars on the cards can range from 1 to 6. By combining cards, you can increase the stars. Depending on a card’s star rating and quality, it provides you with a variety of bonus stats.

Higher grade and quality Omega Cards may not be the ideal choice for your hero. Aside from additional stats, cards may also offer special stats that can only be unlocked by equipping them on a certain hero. Similarly, Omega Cards have predetermined effects. Each Omega Card is part of a set of six cards, and equipping two of them grants the hero extra stats.

Obtain additional hero slots

You will need 400 gems to acquire an additional hero slot. This may be obtained during the first few hours of playing by completing Daily Challenges. Save your gems and make an additional hero slot, the first thing you buy in the store with them. It’s an excellent investment and the simplest method for a free-to-play gamer to obtain additional characters.

Don’t Count on Auto Mode

Marvel Future Revolution
Marvel Future Revolution. Credit: Netmarble

The advent of auto modes has undoubtedly made it easier for mobile gamers to navigate the worlds they enter. Auto modes, like the one seen in MARVEL Future Revolution, not only make it easier and more comfortable for players to go from one location to another, but they may also make starting and finishing tasks easier.

The auto mode in battle is a very useful function, especially when switching to sleep mode when your hero is constantly farming for EXP and things from monsters. When it comes to significant and difficult encounters, such as boss bouts, auto mode is not something you should rely on.

Beginners may need some time to become used to manually managing their heroes in combat. Auto mode can outperform them, applying talents as they become available and never tiring regardless of how long the combat lasts. It does, however, have several drawbacks, particularly in terms of skill activation without adequate planning. Another significant downside of auto mode is that it never uses the ultimate skill or the dodge feature.

Even if auto mode is on, you may still take control of your character manually. You can use the ultimate talent whenever you want and evade it as needed. The fundamental distinction is in the character of behavior that persists after your inaction. For example, letting off of the virtual D-pad will send your character charging into the fight, regardless of how much HP the hero has left.

This is undoubtedly a threat to the character’s existence in the face of boss encounters that deal tremendous damage as well as other negative consequences. To a large extent, you may even lose to a boss with a lower CP than your hero. Playing in manual mode, as difficult as it may appear, ensures a better percentage of success and survival. Even for total beginners, the red highlights indicating an approaching boss strike are quite easy to avoid. Activating talents and ultimate powers sequentially can enforce the strategy.

Remove badges

Your inventory will quickly pile up, which will be an issue early on. This is primarily due to the many badges you will earn while playing. To conserve space, dismantle any 1 or 2-star badges you receive. You may also utilize Squad Storage to share resources with the rest of your squad, freeing up your primary hero.

https://twitter.com/MarvelFutureRev/status/1463673966564831240?s=20

This was all Marvel Future Revolution Beginner’s Guide for you. Apply this in your game and win easily.

For more Guides, Tips, and Tricks

Check out our Video Games Guide Section for more dedicated Guides.

What is Stigma in Honkai Impact 3rd — Guide

What is Stigma in Honkai Impact 3rd? You will need to know all the details about the Stigmas to reach further in the game.

Honkai Impact 3rd is about balancing and improving your Valkyrja squads, then using their talents deftly to keep the upper hand in the fight. This may be accomplished in a variety of methods, beginning with simply leveling them via experience, progressing through upgrading weapons, unlocking and upgrading new talents, and augmenting your team members with various stigma.

Your Valkyries’ Stigmata, often referred to as Stigmas, provide an advantage in combat. Who are these or what do they do? Stigmas exist in a variety of forms, each with its own set of benefits that may be best suited to a Valkyrja with a certain skill set. This article will go through how to best apply various stigmas. Now you may be wondering, “What is Stigma?” We are here to help and answer any queries you may have.

Stigma in Honkai Impact 3rd

A stigma is a non-playable character that offers various buffs (generally attack or health) to the Valkyrja assigned to them. Rather, they are equippable materials that boost the stats of your Valkyries.

Despite what you may perceive, the most important step before making a good selection is to describe your stigmata. There are three elements to every stigma. Understanding the stigma skill, affix skill, and set skill, and assessing each element individually, will help choose a stigma.

What is Stigma
Ana Schariac Stigmata (Image credit: Honkai Impact 3 fandom)
  • Stigmata Skill: A stigma is an individual ability with the same stigma, so it does not change between copies.
  • Affix Skill: This skill carries each stigma individually and varies from copy to copy.
  • Set skills: They are two skills that contain all stigmata, but require a Valkyrie to have equipped two or three parts; Top (T), Mid (M), and/or Bot (B).

Stigmata is usually the strongest skill, so it should always be considered first. Then prioritize if equipping two pieces of the same set is worth it to gain the Set Skill, then the Affix, which is not so important and is rather extra. In the instance of Knight Moonbeam, choose Rinaldo (T, M) since each stigmata’s power is incredible:

The paralysis talent of Rinaldo (M) is ideal for Knight Moonbeam since it obtains a damage boost against immobilized foes. Selecting Rinaldo (T) grants access to the Set Skill of 15% Critical Rate, which is ideal for a Valkyrie that hits quickly and frequently, such as Moonbeam. Choose Attila (B) for Bot because your Stigmata Skill has a greater synergy with characters that can swiftly and easily build a high combo.

How Do Stigmas Work in Honkai Impact 3rd?

Different stigmata offer different types of buffs to valkyries when equipped. There will be different stigmas that are beneficial for different types of Valkyries. So it’s essential to read the effects of each stigma and compare them to the basic style of fighting of the Valkyrie you intend to equip it to. Stigmata can also be matched in sets of two or three on a Valkyrie for bonus effects. To become more powerful, stigmata will need to be enhanced and upgraded. By doing so, they will be graded and become more powerful.

Set bonuses help, but it’s usually better to equip stigmas with higher star ratings. Nevertheless, you should keep in mind each individual’s effects. It’s not all that useful if the stigma’s effects don’t fit with the chosen Valkyrja’s fighting style. On the whole, it’s better to equip stigmata with higher star ratings than stigmata with lower star ratings. If you’re unsure of what’ll work best with your playing style, check out the stigmas and test out a few pairings.

If you want codes for the game then read Honkai Impact 3rd all active codes – December 2021

How Do You Increase the Number of Stigmas?

What is Stigma
Honkai Impact

When you invest in an x10 Supply draw, you’ll likely get a few stigmata. Of course, various Supply draws give you a chance at different goods, so check the specifics to learn which ones give you stigma drops. You may also get them as a prize for finishing certain Story Stages.

If you want to bring a stigma into your Dorm Room, you’ll need to accomplish their Move-in Quests, which aren’t as difficult as they seem. Move-in tasks usually consist of leveling stigmas a particular number of times before they may join the dorm.

What will you do with the stigmata?

Honkai Impact 3rd (Image credit: Official Facebook of HonkaiImpact)

It is critical to understand that Honkai Impact 3rd has many game modes, and each of these game types demands you to adjust to your Valkyries; for example, playing the narrative mode is extremely different from playing in the endless abyss.

When playing the endless abyss, keep in mind that mob damage increases as well as “bleeding,” which gets more hazardous as the combat progresses and the temperature of the abyss rises. As a result, you have two choices: utilize stigmata that do a lot of damage to end the combat fast, or use stigmata that provide resistance and cure. Lier Escarlet is one of the best abyss stigmas; its effect is to mitigate 70 percent of the harm caused by negative effects (like bleeding)

When facing a boss, on the other hand, you may prefer stigmata’s that harm against certain goals or boost a character that is in charge of doing all the damage. However, these are only a few instances. Other game variants will need some ingenuity in terms of stigmata selection. Of course, as time passes and you continue to play, you will get more experience. This is only a preliminary and general guide on selecting stigmas. Each Valkyrie is distinct, with different gaming styles that necessitate different stigmas.

For more Guides, Tips, and Tricks

Check out our Video Games Guide Section for more dedicated Guides.