Wo Long Fallen Dynasty Guide – Tips and Tricks

With the help of the Wo Long Fallen Dynasty Guide, you will learn more things about the game that will help you to become better.

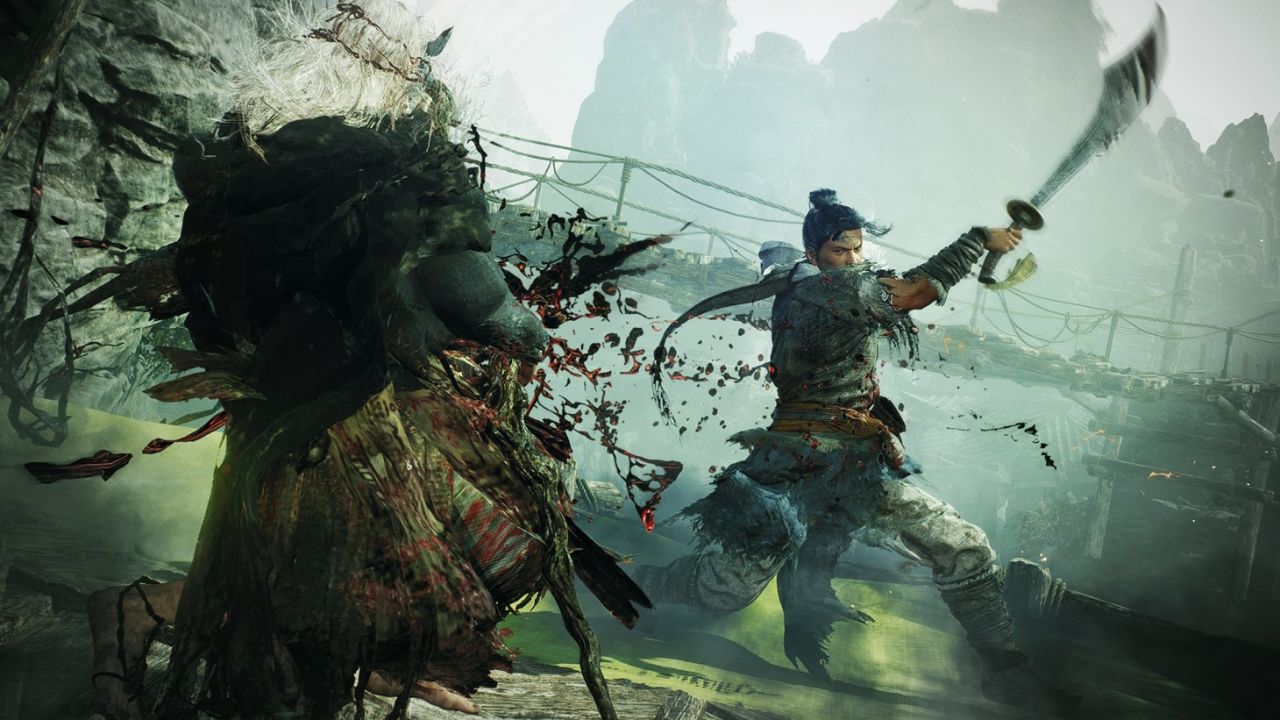
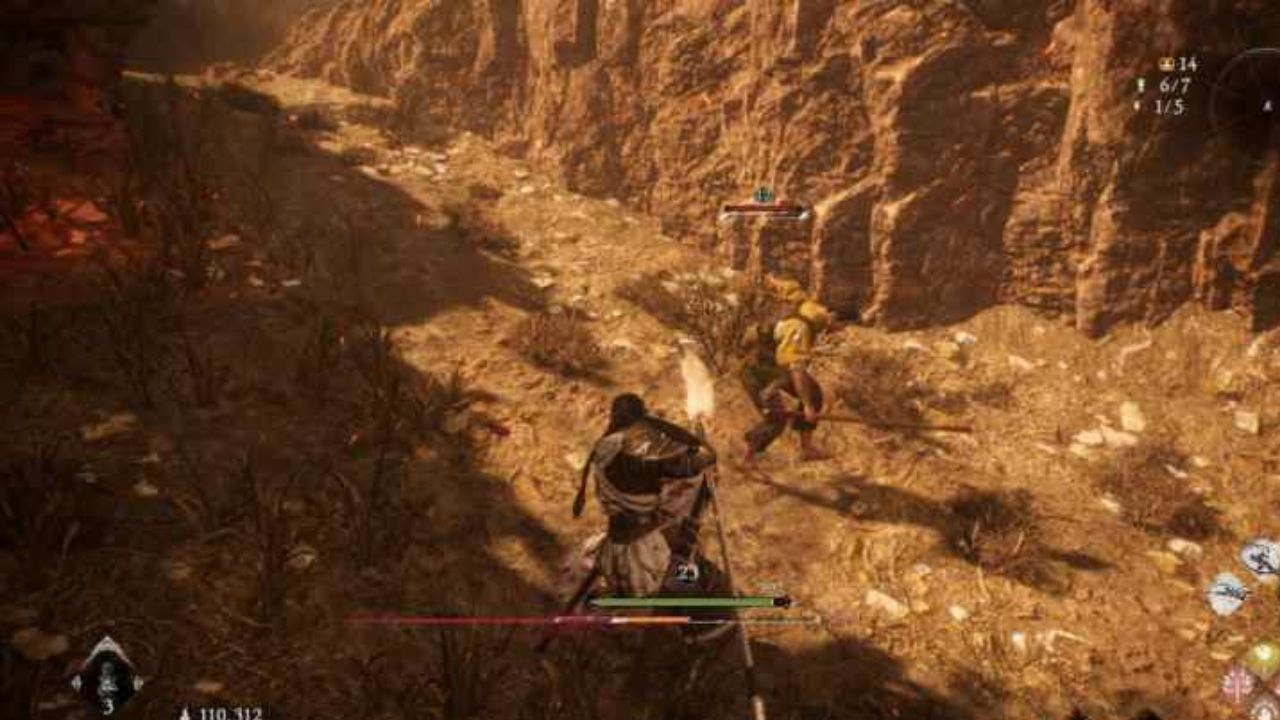
Wo Long: Fallen Dynasty is a game where players create their own character at the start and choose from five different phases. There are two ways to attack enemies up close, and to succeed in combat, players need to use their weapons to deflect enemy attacks and create openings for counterattacks. 

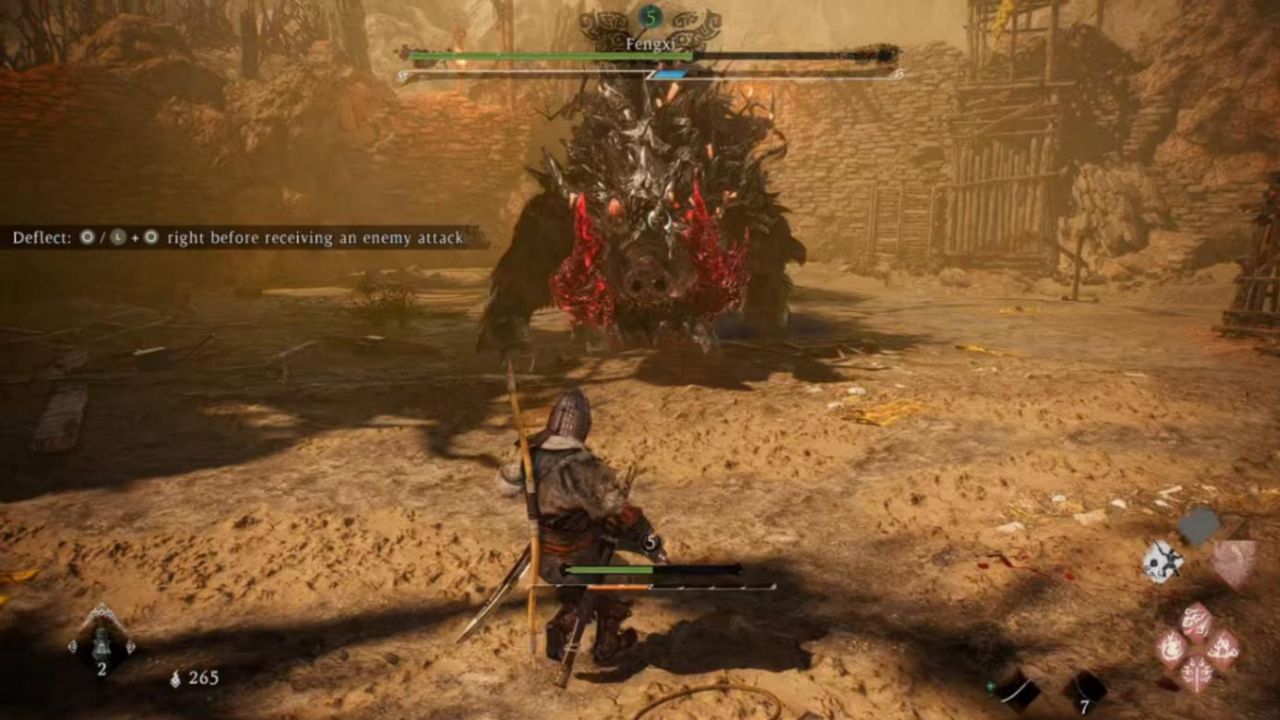
The difficulty of an enemy is indicated by their “Morale rank”, and defeating tougher enemies results in more valuable loot. As players attack enemies, their spirit gauge will fill up and eventually allow them to perform special moves and elemental spells. Players can also choose a “Divine Beast” to assist them in combat or provide benefits through “Divine Beast Resonance”. The Wo Long Fallen Dynasty Guide has some of the best tips and tricks for you.

Wo Long Fallen Dynasty Guide: Spirit System

Wo Long Fallen Dynasty is a game that rewards aggressive gameplay with its spirit system. Your standard attacks and well-timed deflects raise your spirit, which is essential for unleashing amazing moves or heavy attacks. Therefore, it’s crucial to maintain your spirit by staying on top of enemies with attacks and deflecting their swings when possible.

It’s important to strike a balance between blocking, dodging, and attacking. Spending too much time blocking or dodging and not enough time dishing out standard attacks will quickly deplete your own spirit. This will leave you vulnerable and stunned. The key to success in Wo Long Fallen Dynasty is to find the right balance between aggression and defense.

The spirit system is particularly important when facing tougher enemies, bosses, or other formidable enemies. In these cases, spending spirit on heavy attacks or Martial Arts moves can deal significant damage and make the difference between victory and defeat. In addition to standard attacks and deflects, there are also other ways to increase your spirit. For example, you can perform environmental kills or use consumable items like spirit potions to give yourself a boost.

Wo Long Fallen Dynasty Guide: Morale and Fortitude Ranks

Your Morale Rank is an important factor that determines your performance in battle. Your Morale Rank represents your fighting spirit and determines your access to special abilities and attacks. On the other hand, your Fortitude Rank reflects your physical resilience and determines your maximum health and resistance to enemy attacks.

It’s important to note that your Morale Rank will not go below your Fortitude Rank. This means that if your Fortitude Rank is low, your Morale Rank will also be limited. To increase your Fortitude Rank, you need to find and collect Battle Flags in your missions. These flags are scattered throughout the levels and are marked with a unique symbol.

When you collect a Battle Flag, your Fortitude Rank increases, and you receive a boost to your health and resistance. It’s important to collect as many Battle Flags as possible, as your Fortitude Rank resets at the start of each new mission. This means that if you don’t collect any Battle Flags in a mission, you will start the next mission with a low Fortitude Rank, making it more challenging to survive in battle.

Gameplay
Gameplay

Experiment with Builds and Weapons

As you progress through the first few missions, you will gain access to an NPC in the village hub that allows you to respec your character’s stats for free at any time. This feature gives you the freedom to try out different builds, weapons, and approaches without the fear of wasting valuable resources.

You won’t need to invest heavily in weapon and armor upgrades until later in the game, allowing you to focus on exploring the game’s mechanics and testing different playstyles. However, once you have discovered a few weapons you prefer, it’s best to start conserving your resources and narrowing your focus to avoid excessive grinding.

Choosing the right armor

In Wo Long Fallen Dynasty, choosing the right armor for your playstyle is crucial to your success. Every armor you equip has a weight value, which affects your mobility and how much spirit you use when evading enemy attacks. If you prefer to take a few extra hits from enemies and don’t mind sacrificing mobility, heavy armor might be the right choice for you. But keep in mind that heavy armor will use more spirit when evading enemy attacks.

On the other hand, if you prefer to dodge enemy attacks easily and use less spirit, lighter armor might be the better choice for you. However, lighter armor won’t be able to withstand much damage, so you’ll have to rely on your evasive skills to avoid taking too much damage.

Wo Long Fallen Dynasty Guide: Qi 

In Wo Long Fallen Dynasty, defeating opponents rewards you with Genuine Qi. This valuable resource can be used to level up your character at a Battle Flag. Each time you level up, you’ll need more Qi than before, so it’s important to keep earning it through battles.

Leveling up is crucial for progressing through the game and becoming a more powerful warrior. It grants you access to new skills and abilities, increases your health and spirit pools, and makes you more effective in combat.

To ensure you have enough Genuine Qi to level up when you need to, make sure you’re engaging in battles as often as possible. Don’t be afraid to take on tougher opponents, as they will reward you with more Qi than weaker enemies. Additionally, try to avoid wasting Qi on unnecessary upgrades or purchases, and prioritize leveling up to gain the most benefits.

Use Absorb Vitality Spell

In Wo Long Fallen Dynasty, there’s a wizardry spells tree called Wood Phase that you can put points into. Once you’ve put 3 points into it, you can purchase a spell called Absorb Vitality. This spell can be used to absorb health from enemies, but you need to time it properly for it to work effectively.

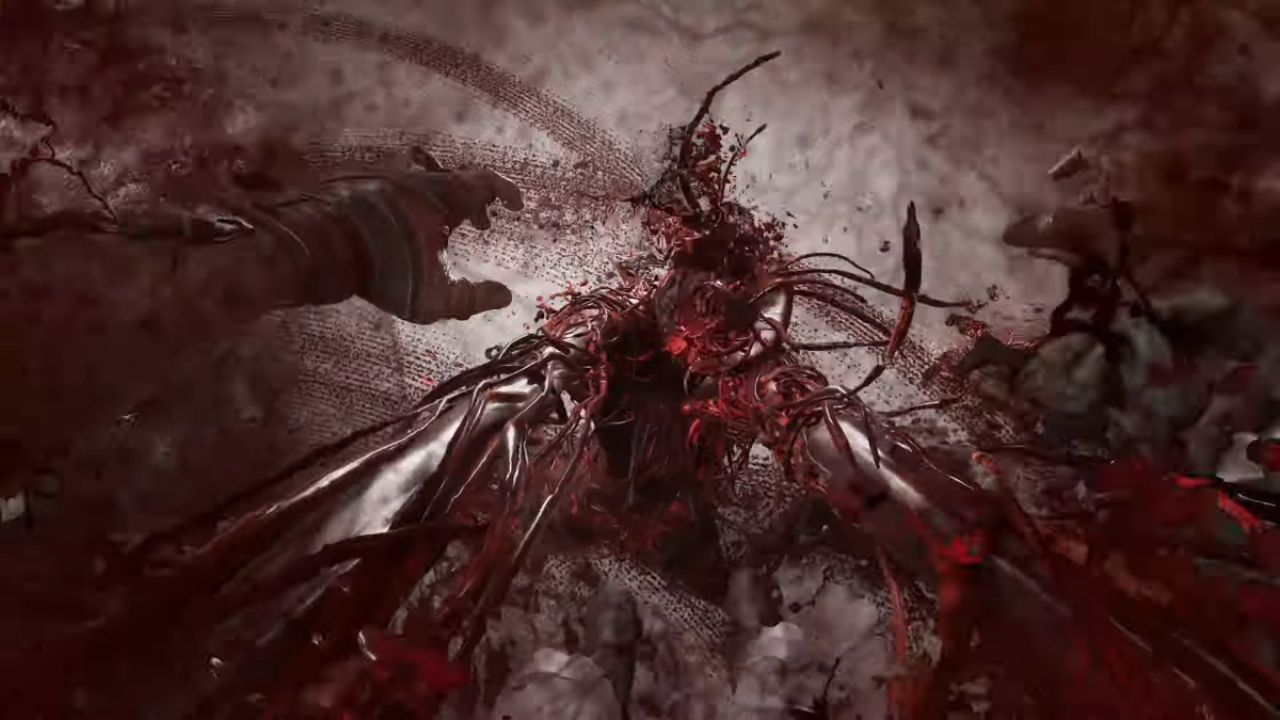
When facing a large enemy or boss, you can first use standard attacks to whittle down their spirit. Once their spirit is low enough, you can perform a fatal strike (critical blow) to deal massive damage to their health. This is where Absorb Vitality comes in. Before performing the fatal strike, cast the spell and then quickly follow up with the fatal strike. The result is a huge chunk of health absorbed from the attack, like a vampire draining blood. Keep in mind that simply casting Absorb Vitality before standard attacks won’t yield significant returns in health.

Gameplay
Gameplay

Wo Long Fallen Dynasty Guide: Dragon Vein

There is a good chance you’ll find Dragon Vein Crystals and Dragon Vein Essences if you thoroughly explore levels. This will boost the effectiveness and usage limits of Dragon’s Cure Pot. It may not be immediately obvious, though, that you need to manually use these unique items to apply them. Make sure you’re using your healing options by hitting “use” on them in your inventory.

For more Guides, Tips, and Tricks

Check out our Video Games Guide Section for more dedicated guide

How to Pet Small Kemono in Wild Hearts

Petting Wild Hearts Small Kemono can be a very difficult task. If you are also facing difficulties then do not worry, our guide will help.

In the vast world of Wild Hearts, players can encounter a diverse range of creatures to explore and discover. While most players are likely to be aware of the large Kemono monsters that require repeated hunting. There are also numerous smaller Kemono that can be found throughout the game. 

These smaller creatures can provide essential materials needed for progress. However, players need not always resort to slaying them to obtain these resources. In fact, sometimes players can interact with them in a more friendly manner by petting them. Petting Wild Hearts Small Kemono can be a fun and profitable way to engage with the game’s world and its inhabitants.

Gameplay
Gameplay

How to Pet Wild Hearts Small Kemono 

Wild Hearts Small Kemono creatures play an important role in the game’s material gathering system. Unlike their larger counterparts, small Kemono can be approached and interacted with in a non-violent manner. By petting these creatures, players can collect unique materials that are distinct from those acquired by slaying them.

Petting small Kemono is a simple process, but it requires a bit of patience and careful planning. Sneaking up on a small Kemono and pressing the Pet button prompt is the key to successfully petting them. However, players must be careful not to startle the creatures or make them feel threatened. If a small Kemono detects a player’s presence, they may flee or even attack, making it impossible to pet them until they have calmed down.

It’s worth noting that players may encounter the Pet prompt during the tutorial phase of the game. Any materials collected during this stage will carry over to the rest of the game. When petting small Kemono in Wild Hearts, players can only acquire one unique material per creature. After successfully petting a Kemono, players should look closely at the ground nearby, as a small green-glowing stone will appear, representing the material that has been obtained.

Benefits of Petting Small Kemono in Wild Hearts

While some Wild Hearts small Kemono cannot be petted due to their aggressive nature, there are many others that can be approached and petted for unique materials. As you explore the vast world of Wild Hearts, you’ll come across dozens of these creatures that can provide essential materials for crafting new weapons or armor pieces.

Gameplay
Gameplay

It’s crucial to make a point of petting each small Kemono you encounter as you hunt the zone they occupy, as you’ll likely need at least one of their dropped materials to craft new items. Additionally, petting the Kemono is a relaxing and enjoyable way to unwind during a hunt or at the beginning of a new adventure. The little beasts will appreciate the gesture, whether they give you something in return or not.

In addition to providing crafting materials, petting the small Kemono can also help you upgrade other areas of the town of Minato. For example, materials obtained from the Kemono can be used to improve the bathhouse or other unlockable areas. So, take the time to explore and appreciate the vast world of Wild Hearts, and don’t forget to show some love to the small Kemono along the way.

For more Guides, Tips, and Tricks

Check out our Video Games Guide Section for more dedicated guide

How To Extract Weapon Patterns In Destiny 2

Want to know how to Extract Destiny 2 Weapon Patterns? The guide below will give you all the details about it. 

Destiny 2 players looking to extract weapon patterns need to know that the process has changed with the release of the Lightfall expansion. In the game’s new year, players can head to The Enclave to create custom weapons. They can do it by collecting weapon patterns and leveling them up to change their perks.

Before there were different ways to extract Destiny 2 weapon patterns. One method involved leveling weapons with Deepsight Resonance to unlock the pattern and then extracting it. This process is applied to all weapons, including the Fire and Forget Linear Fusion Rifle. Another way to unlock the pattern was to dismantle Deepsight weapons with red borders. However, some weapons required players to acquire multiple patterns before unlocking the entire pattern. Let’s learn in detail how to extract Destiny 2 weapon patterns and also how to check the progress.

Gameplay
Gameplay

How to Extract Destiny 2 Weapon Patterns

Destiny 2’s Lightfall expansion has changed the process of extracting weapon patterns. To obtain a weapon pattern, players must obtain a weapon with a red border and inspect it. In the Mod section, they will find the Pattern section. There, they can click on the “Extract Pattern” button to complete the extraction process.

Once players have obtained the necessary weapon patterns, they can visit The Enclave to forge their customized weapons by changing their perks. However, some weapons require multiple pattern extractions before the full pattern is unlocked. This means that players will have to obtain and extract the Deepsight Resonance weapon pattern several times. This will be before being able to fully customize and forge their desired weapon. The arrival of the Lightfall expansion has brought forth many new weapons for players to obtain and shape. It is providing an even more personalized gameplay experience.

How To Check The Progress

Now that you know how to Extract Destiny 2 Weapon Patterns, checking the progress is the next step. In order to keep track of their progress in extracting weapon patterns in Destiny 2, players need to access the Collections page. This page allows players to view how many times they need to extract a pattern before it is complete and can be used to forge a weapon. 

Earlier, the Patterns and Catalysts page was accessed through the Triumphs page, but with the arrival of the Lightfall expansion, this has changed. Now, players can access the Patterns and Catalysts page through Collections. This page provides players with a comprehensive overview of the craftable weapons and the progress they have made on each weapon pattern.

Gameplay
Gameplay

Although the process of shaping weapons is not yet perfect, it is an effective way of creating God Rolls and customizing gameplay to suit individual playstyles. The process to Extract Destiny 2 Weapon Patterns is an essential part of this process, as it allows players to create unique weapons that are tailored to their preferences. By familiarizing themselves with the weapons they use and how they should use them, players can maximize their gameplay experience. 

Conclusion

It’s important to keep an eye on your loot stream, as you’ll be notified once you’ve obtained a Weapon Pattern. With a bit of patience and persistence, you’ll be able to unlock Patterns for all your favorite weapons and Shape them to your liking. The ability to Shape your weapons is just one of the many quality-of-life additions that have been implemented in Destiny 2’s Lightfall expansion. It provides players with even more ways to customize their gameplay experience.

For more Guides, Tips, and Tricks

Check out our Video Games Guide Section for more dedicated guide

How to Defeat Plyusch in Atomic Heart

Facing difficulties to take down the Atomic Heart Plyusch boss? Do not worry because the guide below is going to help you.

If you’re playing Atomic Heart, you’ll notice that there aren’t many boss battles early on in the game. This means that when you do encounter Plyusch, a monstrous creature, it can catch you off guard. As you search for Claire’s arm, you’ll receive a clue that it might be located in a place that’s red, warm, and made of polymer. The perfect fit for this description is the Plyusch, a polymeric muscle blob implanted with a dog’s brain that hasn’t been properly secured.

The Plyusch is incredibly agile and can move at a fast pace. It primarily stands on two legs and attacks with its long-reaching arms. The creature is resistant to gunfire and shock, but it’s vulnerable to fire and melee attacks. So how are you going to beat this boss? The guide below will help you in defeating Atomic Heart Plyusch.

Gameplay
Gameplay

How to beat Atomic Heart Plyusch

When facing off against the Plyusch in Atomic Heart, it’s important to choose the right weapons. The Zvezdochka, Fox, Snowball, and Swede are all viable options, but keep in mind that the Plyusch is a fast-moving enemy, so you’ll want to select weapons that can be swung quickly. While the Fox and Snowball can be effective due to their speed, they may lack power. As a result, the Swede, a classic weapon, is a solid choice.

The Atomic Heart Plyusch has three different attacks, two of which are powerful strikes. The first power attack is signaled by two circles on its arms. This means that the Plyusch will dash toward you and lash out with its tendrils. For its special attack, a large circle will appear. This move is incredibly dangerous and can be lethal. If you fail to dodge it, the Plyusch will grab you and attempt to devour you. You’ll have to complete a series of quick-time events to avoid this fate. If you fail, it’s an automatic game over.

Taking down the Plyusch in Atomic Heart requires a strategic approach, and you should be prepared for a prolonged battle. If you haven’t already done so, head to the Character upgrade menu and purchase Second Wind. This ability grants you an extra dodge charge, which can prove to be invaluable. Additionally, consider taking Morning Exercise to boost your movement speed.

Make sure to stock up on neuromed capsules and, if possible, Adrenaline Capsules. These items will not only restore your health, but also speed up your dodge recovery time for up to two minutes. By using these items wisely, you’ll be able to keep yourself alive while maintaining your mobility during the fight.

Mass Telekinesis won’t work 

It’s important to note that Mass Telekinesis won’t work on this enemy. It will remain rooted to the ground, so don’t waste your time with this ability. While Atomic Heart Plyusch boss is resistant to shock, using it can be a powerful tactic. Shock can interrupt the Plyusch’s attacks and even stun it temporarily, allowing you to land hits or avoid a lethal attack.

During the fight, the Atomic Heart Plyusch boss will move quickly in a straight line when it lunges at you. To reduce the amount of damage you take, always dodge to the side. Once you’ve dodged an attack successfully, turn around and focus your attacks on the Plyusch’s back. Its missed lunges are the best opportunity to deal damage but don’t get too greedy or you’ll risk getting hit.

Gameplay
Gameplay

Ultimately, this fight requires careful management of your dodge and shock abilities, as well as timing your attacks and anticipating the boss’s movements. By following these tips and whittling down its health bar, you’ll be able to emerge victorious against the Atomic Heart Plyusch boss.

For more Guides, Tips, and Tricks

Check out our Video Games Guide Section for more dedicated guide

WoW Dragonflight Magmashell Snail Mount – Best Way to Find

Are you in search of the WoW Dragonflight Magmashell Snail Mount? We will tell you the best way to find it easily. 

There are a range of new mounts that players are eager to obtain and showcase at the auction house in Orgrimmar or Stormwind. Among these mounts, the Magmashell fire snail has become a popular choice. Acquiring this mount from the Dragon Isles is a confusing process. So it can be very difficult for a few players. Therefore, we have the best way to find WoW Dragonflight Magmashell Snail Mount. 

WoW Dragonflight Magmashell Snail Mount

WoW Dragonflight Magmashell Snail Mount

In order to obtain Dragonflight’s Magmashell mount, the first step is to travel to the Waking Shore. It is the initial questing area of the Dragon Isles, and acquire an Empty Magma Shell. This item can be obtained by farming mobs in the Waking Shore or by purchasing it from the Auction House. It can cost between 1,000 to 10,000 gold depending on the realm’s current market prices.

For players who choose to farm the item, the best location to do so is near the Obsidian Sanctum to the South. Specifically the river of lava. Although various mobs on the Dragon Isles have a chance of dropping the Empty Magma Shell, Lavaslurpers and Basalt Shell mobs along this river have the highest likelihood of dropping it. However, the odds of obtaining the item from these creatures are roughly 1 in 100. It requires players to spend a significant amount of time farming in World of Warcraft: Dragonflight.

Obtaining the Magmashell Mount

After obtaining the Empty Magma Shell item, the next step in acquiring the WoW Dragonflight Magmashell snail mount is to travel North to Scalecracker Keep. It is located on the northern edge of the map. At the top of the mountain where the Keep is situated, there is a large pool of lava to the East of the map image around coordinates 71 and 25. At the bottom of the pool, players can find the Empowered Snail NPC, which is the key to obtaining the mount.

To initiate the process of obtaining the mount, players must interact with the Empowered Snail while having the Empty Magma Shell in their inventory. This interaction will activate a spell called ‘Embiggening Snail,’ which lasts for 20 seconds. However, due to the damage caused by the lava, players often die before completing the spell. Therefore, to successfully obtain the Magmashell mount, players must find a way to heal themselves reliably. This can be achieved by having a healer accompany them or by casting a Heal-over-time spell before jumping into the pool, such as the Preservation tree spell from World of Warcraft’s new class, the Evoker.

Gameplay
Gameplay

Everlasting Horn of Lavaswimming

Aside from the challenging method of acquiring the WoW Dragonflight Magmashell snail mount, players can also obtain it by acquiring the Everlasting Horn of Lavaswimming item. This alternative method allows players to avoid any damage caused by lava pools on the Dragon Isles’ Overworld for 10 minutes, which makes it much easier to complete the ‘Embiggening Snail’ spell without dying.

However, the Everlasting Horn of Lavaswimming is a item that can only be obtained through event rewards. Recently, it has also become available as a possible drop from the Dragonbane Keep Reward Chests. Once players have the item in their inventory, they can use it to swim through the lava pool to reach the Empowered Snail NPC at the bottom of the pool. Completing the ‘Embiggening Snail’ spell successfully will reward players with the fiery Magmashell mount.

For more Guides, Tips, and Tricks

Check out our Video Games Guide Section for more dedicated g

How To Unlock The Suzusaurus Minion In Final Fantasy XIV

Are you looking for the Final Fantasy XIV Suzusaurus Minion? The guide below will give you all the information you need.

Final Fantasy XIV features numerous minions, each with its own unique characteristics. While many of these minions are obtainable through normal in-game activities, the rare Suzusaurus is available to members of a Free Company. To acquire this minion, players must participate in Subaquatic voyages introduced during the Stormblood expansion.

Due to the limited availability of these underwater submarine activities, the Suzusaurus is highly popular. Players can get a high price on the open market. Players who are looking to earn extra Gil in Final Fantasy XIV can consider selling this minion to other players who are willing to pay for it. This provides an opportunity for wealthier players to acquire the Suzusaurus without investing as much time or effort. However, the guide below will help you get the Final Fantasy XIV Suzusaurus Minion.

Gameplay
Gameplay

How to get the Final Fantasy XIV Suzusaurus Minion

In order to get the Final Fantasy XIV Suzusaurus Minion, you will need to understand everything about Free Companies. Final Fantasy XIV subscribers can join guilds called Free Companies. The unlimited free trial option is locked for those on the free trial. The official Community Finder is the best way for players to find a Free Company. There are a variety of filter options available, including servers, goals, active hours, languages, and members. 

The leader’s mission statement will appear on the individual Free Company page, along with a number of recruitment slots and images of the current members. In Final Fantasy XIV, players will have the option of creating their own Free Company to skip the application process. The leader’s profile can be viewed at the bottom of the recruitment page and he or she can be reached in-game to join.

In order to join a Grand Company, one must first reach level 25 in a combat job and progress the main story far enough. A leader must then seek the approval of at least three other players to sign the application and become founding members of the Grand Company. Next, the leader must speak to their OIC admin at the Grand Company’s headquarters. Once a minimum of four people have been recorded, the leader must pay the OIC 15,000 Gil in order to open a new Free Company.

Buy House

Once a Free Company is formed, its members must collectively buy a house. As a way to prevent monopolies, Final Fantasy XIV houses are distributed according to specific schedules. The cost of each lot varies, but it can range from 1.5-40 million Gil, depending on the size and location.

Free Company members can pool together this amount, but the leader must purchase the house within a set period of time after the lottery or forfeit the house. After building a house, players will need to visit the basement workshop. High-level crafters will then need to use various materials to create Submersibles, with more successful missions per level.

Additionally, the Free Company must pay credits to obtain Cerium Tanks from the Resident Caretaker in the housing ward. Final Fantasy XIV submarines will begin at rank one but will progress through each voyage as they go. Finally, at rank 104, players will have the chance to obtain the Final Fantasy XIV Suzusaurus Minion by visiting the Bloodbreak sector.

Gameplay
Gameplay

Conclusion

Patch 6.3 introduced several new rewards for completing Subaquatic Voyages at higher levels. One such reward is the Final Fantasy XIV Suzusaurus minion. However, the location where this minion can be found is still unknown. It is believed that players must have a submarine level of at least 50 to access this location.

Although the Suzusaurus is a tradeable and sellable item, it remains quite expensive, with prices ranging in the millions of Gil. In fact, it is almost as costly as purchasing a Free Company house and acquiring the minion through that means. As a result, it may be more worthwhile to attempt to obtain the Suzusaurus through Subaquatic Voyages with your Free Company, rather than spending a large amount of Gil to purchase it from the Market Board.

For more Guides, Tips, and Tricks

Check out our Video Games Guide Section for more dedicated g

Crowfall Confessor Build – Tips and Tricks

If you are looking for the Crowfall Confessor Build then you are at the right place. Follow the tips and tricks to play more effectively.

Crowfall has three categories of classes: Fighter, Rogue, and Mage. The Fighter classes, such as the Knight and Myrmidon, engage in close-range melee attacks against enemies. Rogue classes, like the Ranger and Assassin, use non-traditional methods to achieve success in battle. 

Mage classes, like the Confessor and Frostweaver, cast spells from a long-range to keep the enemies away. In addition to their main category, each class has its unique specializations called promotions. This guide focuses on the Confessor class and its promotions in Crowfall, providing information on the best builds for players.

Gameplay
Gameplay

Crowfall Confessor Build

Crowfall offers the Confessor class to the Elken, High-Elf, and Nethari races. This class is equipped with leather armor and books. Moreover, Confessors can select from three unique promotions that lead to distinct playstyles. These promotions include the Fanatic, the Inquisitor, and the Sanctifier. Players can opt for specific builds to align with their chosen promotion.

Crowfall Confessor Build: Fanatic 

The Fanatic class in Crowfall is a ranged DPS (damage per second) class that is capable of dealing damage from a distance. This class boasts increased attack power, mana, critical strike chance, critical damage, and fire damage. Fanatics also possess several abilities that set them apart from other classes.

Altered Fire Tornadoes are one such ability that allows Fanatics to hit their targets multiple times. The altered Hellfire Aura also has an increased radius, allowing Fanatics to deal damage to a wider area. In addition, Fanatics’ auto-attacks can apply an elemental break and stacking damage buff.

Another ability in the Fanatic’s arsenal is Fire Wave, a cone-shaped AoE (area of effect) attack that deals damage and burns targets. Fanatics also have access to the Justice, Fire, or Music Domains, allowing for further customization of their play style.

To maximize the potential of the Fanatic class, players should consider using specific major and minor disciplines. The best major disciplines for Fanatics are Arkon’s Disciple, Molten Mage, and Redeemer. Additionally, the best minor disciplines are Spreading Flame, Weapon Finesse, and Stay in the Fight.

Crowfall Confessor Build: Inquisitor 

The Inquisitor class in Crowfall is a unique hybrid class that offers both healing and ranged DPS (damage per second) capabilities. While not a pure healer build like a Frostweaver Icecaller, Inquisitors can still provide acceptable healing to their group. Inquisitors gain increased support power, mana, critical damage, critical healing amount, critical healing chance, and fire damage.

One of the unique abilities of the Inquisitor is the altered Fervor, which has a shorter cooldown and can heal all group members. Additionally, their altered Fire Tornadoes can heal friendly targets. The altered Hellfire ability is another healing option for Inquisitors that can heal allies without being consumed by tornadoes. Inquisitors can also unlock Fire of Life, an ability that heals the weakest group member and temporarily prevents them from dying. 

To further customize their playstyle, Inquisitors have access to the Light, Fire, or Storm Domains. To maximize the potential of the Inquisitor class, players should consider using specific major and minor disciplines. The best major disciplines for Inquisitors are Redeemer, Cloisterer, and Convictor, while the best minor disciplines are Weapon Finesse, Thornshield, and Reaper.

Gameplay
Gameplay

Crowfall Confessor Build: Sanctifier 

The Sanctifier is a melee tank class in Crowfall that offers high survivability and strong offensive capabilities. Sanctifiers have access to mail and plate armor and gain increased HP, mana, critical damage, and fire damage. One of the unique abilities of the Sanctifier is the altered Fire Tornadoes, which apply a knockdown to enemies. 

The altered Hellfire Aura also has increased damage and can hit up to seven targets, making it a formidable offensive option. This ability can’t be consumed by tornadoes, making it even more useful in combat. The altered Fervor ability also provides additional defensive capabilities for Sanctifiers, making the player immune to crowd control and increasing resistance.

Additionally, the ability has a shorter cooldown, making it more reliable in combat. Sanctifiers can also use the altered Meteor Purge ability, which has a shorter cooldown and applies a barrier to the player. To further enhance their abilities, Sanctifiers can unlock Blink of Faith, a 30-meter, leaping AoE attack that also applies a barrier and dismounts enemies. 

Sanctifiers have access to the Music, Fire, or Protection Domains. To maximize the potential of the Sanctifier class, players should consider using specific major and minor disciplines. The best major disciplines for Sanctifiers are Convictor, Cloisterer, and Arkon’s Disciple, while the best minor disciplines are Stay in the Fight, Thornshield, and Weapon Finesse.

For more Guides, Tips, and Tricks

Check out our Video Games Guide Section for more dedicated g

How to Solve the Boiler Room Puzzle in Atomic Heart

Facing difficulties in solving the Atomic Heart Boiler Room puzzle? Do not worry. Below you will find a step-by-step guide.

Atomic Heart is a game that challenges you with dangerous robots, but that’s not all there is to it. Among the various challenges, you’ll encounter tricky puzzles that can be very irritating and frustrating. One such puzzle is the Boiler Room puzzle, and it’s known to be particularly challenging due to some bugs. Do not worry because we have a guide that will tell you how to solve the Atomic Heart Boiler Room puzzle.

Gameplay
Gameplay

How to solve the Atomic Heart Boiler Room puzzle

Solving the Atomic Heart Boiler Room puzzle is not a difficult task. You will just have to keep a few things in mind. Follow the steps below so that you can complete the puzzle easily.

  • Clear out the adjacent rooms from any Lab Tech bots to avoid being attacked while solving the puzzle.
  • Head to the back of the boiler room and locate the exploded boiler with the stack of Fahrenheit candle orbs.
  • Use your telekinesis to lift one of the orbs and carry it into the side room with the modified lab techs.
  • Insert the orb into the boiler in the side room, and do the same with the other two boilers in the adjacent rooms.
  • Once all three boilers have the orbs inserted, press the button to activate them.
  • Return to the main boiler room and press the button to open the door.
  • Locate the chute against the wall where you need to insert the candle.
  • Approach the chute and get into proximity.
  • Once the candle appears in the clear tube, use your telekinesis to guide it to the correct boiler.

The Three Boilers!

Boiler 1:

  • Press the interact button to insert the Fahrenheit candle into the chute.
  • Guide the candle down and then right.
  • Follow the pipe until you reach a crossroad and take the first right.
  • The candle should drop into the boiler, cooling boiler 1.
  • Grab another Fahrenheit candle and start the process again for the other boilers.

Boiler 2:

  • Insert the candle into the chute.
  • Guide the candle down and then left.
  • Keep the candle going left without changing its path or turning in any way.
  • The candle should drop into the boiler, cooling boiler 2.

Boiler 3:

  • Insert another Fahrenheit candle into the chute.
  • Guide the candle down and then left.
  • Guide the candle down again and follow the path for a long time.
  • At the first available left, take it. If you find it hard to get the candle to make the turn, reposition yourself so you’re almost under it.
  • Guide the candle down the path until it drops into the boiler, cooling boiler 3.
  • Be prepared for two more lab techs attacking you, but you’ve finally solved the boiler room puzzle.
Gameplay
Gameplay

By following these steps, you will cool down all three boilers and your Atomic Heart Boiler Room Puzzle will be solved.

For more Guides, Tips, and Tricks

Check out our Video Games Guide Section for more dedicated g

How to Get Draconium Ore in WoW Dragonflight

In this guide, we will tell you how to get the WoW Dragonflight Draconium Ore. We will also tell you what you can do with it.

In WoW: Dragonflight, one of the valuable crafting resources that players should definitely get is Draconium Ore. Players can get this Uncommon Ore from Draconium Deposits that can spawn across the open-world map. While players can find these deposits and veins by exploring the game world, it can be a tedious process.

To make the search for Draconium Ore more efficient, players can look for the best farming locations. These locations are where the deposits and veins are more likely to spawn, making it easier for players to gather the ore. Some locations are better than others.

By farming in the best locations, players can acquire Draconium Ore more quickly and easily. This will help them in their crafting. With some perseverance and the right knowledge, players can obtain all the WoW Dragonflight Draconium Ore they need to craft their desired items.

Gameplay
Gameplay

How to get the WoW Dragonflight Draconium Ore

One of the best routes for farming Draconium Ore is in The Waking Shores. It is specifically the area between the Obsidian Citadel and the Obsidian Bulwark. While this area is full of dangerous enemies and elite creatures, it is also rich with Draconium Deposits. This contains the WoW Dragonflight Draconium Ore.

Players can fly on their dragons to quickly travel. However, it is important to fly low to the ground to avoid missing any deposits. It is also recommended to use add-ons that can provide extra HUD elements to optimize one’s route, which can make farming for Draconium Ore more efficient.

While farming in The Waking Shores, players should be prepared for encounters with tough enemies, including elite monsters. It is advisable to bring a group of adventurers to help with the battles and to improve the chances of survival. With a good strategy and a bit of caution, players can safely farm for Draconium Ore in The Waking Shores and obtain the valuable crafting resource they need in WoW: Dragonflight.

Work with other players

It is best to conduct mining expeditions when other players are present in the area. This is because players can form temporary alliances to fight against enemies and elite mobs. These are the ones that spawn or patrol the spots where the WoW Dragonflight Draconium Ore nodes appear.

By working together with other players, players can not only defend themselves against dangerous enemies but can also split the resources. They can then increase their overall efficiency in mining for Draconium Ore. With the right strategy and cooperation, players can make the most of the farming route in The Waking Shores. Then they will get the benefits of this valuable crafting resource in WoW: Dragonflight.

Draconium
Draconium

What to do with the Draconium Ore?

After gathering enough Draconium Ore in WoW: Dragonflight, players can make a considerable profit by selling it at the in-game auction house or using it to create useful gear and tools. Blacksmiths and leatherworkers, for example, can use WoW Dragonflight Draconium Ore to craft specialty equipment like the Draconium Blacksmith’s Hammer or the Draconium Leatherworker’s Knife. 

Adventurers who prefer to use weapons can use the Draconium Axe, Great Mace, or Stiletto. These are all effective weapons made from this ore. Players can also use Draconium Ore in their craft to create helpful items like the Draconium Delver’s Helmet or the Draconium Brainwave Amplifier. With the many possibilities that WoW Dragonflight Draconium Ore offers, players can decide what to do with their resources based on their character’s needs and interests.

For more Guides, Tips, and Tricks

Check out our Video Games Guide Section for more dedicated g

Tower of Fantasy Three Mushrooms Puzzle Guide

Facing difficulties to solve the Tower of Fantasy Mushrooms Puzzle? Do not worry, our guide has the best tips and tricks for you.

Glowshrooms are a type of environmental puzzle found in Tower of Fantasy. It is commonly known as the “three mushroom puzzle”. Players need to jump on the caps of giant shrooms in a specific order to solve it. Once players hop on the shroom caps, a bluish particle effect will appear and players will hear a boing sound. If players step on a particular Glowshroom node in the correct order, they will hear an audible piano note.

To solve the puzzle, players need to step on all the right mushroom caps in the correct order. If they manage to do so, a Gold or Black Nucleus will spawn as a reward. This can be a great reward to solve the puzzle, as these rewards can help players progress further in the game. In this guide, we will tell you how to solve the Tower of Fantasy Mushrooms Puzzle easily.

Gameplay
Gameplay

How to solve the Tower of Fantasy Mushrooms Puzzle 

Glowshroom puzzles can be tricky to solve. Players who pay attention to the musical notes produced by each shroom and stomp on them in the right order can complete the puzzle and earn valuable rewards.

To solve the Glowshroom puzzle in Tower of Fantasy, players need to follow a specific sequence. First, they should look for the smallest shroom in the group, which is characterized by its miniature size. Once they find it, they need to stomp on it to trigger the puzzle.

After stomping on the smallest Glowshroom, players should look for the mushroom in the game that is slightly larger in size. They need to jump on the medium-sized Glowshroom before bouncing onto the largest shroom in the group. If players perform the sequence correctly, they will hear musical notes play for each bounce.

If they manage to land on the largest Glowshroom in the correct order, a Nucleus will appear as a reward. This can be a great way to earn valuable items and progress further in the game. Players should keep in mind that the sequence is important and they need to jump on the mushrooms in the correct order to solve the puzzle.

More Tower of Fantasy Mushrooms Puzzle

Although the Glowshroom puzzle in Tower of Fantasy is commonly known as the “three mushrooms puzzle,” there are actually other puzzles that involve more than three shrooms. Throughout Navia and Crown Mines, players will find puzzles with six Glowshrooms per puzzle, some of which are of the same size. This makes the “order-of-size” technique ineffective.

Nevertheless, the size of the Glowshrooms still matters in solving the puzzles. When players interact with four or more shrooms, they must rely on trial and error to figure out the correct order. Smaller shrooms should still be interacted with first before larger ones.

Gameplay
Gameplay

When dealing with same-sized shrooms, players can determine which ones come first in the hierarchy by experimenting with the order of interaction. If a shroom is interacted with in the correct order, it will glow with a bluish hue until the puzzle is complete or a mistake is made. By following these tips, players can successfully solve the Glowshroom puzzles in Tower of Fantasy and earn valuable rewards.

So this was everything you needed to know about the Tower of Fantasy Mushrooms Puzzle.

For more Guides, Tips, and Tricks

Check out our Video Games Guide Section for more dedicated guide