How to Get Dandelion Seeds in Tower of Fantasy

Are you aware of the Tower Of Fantasy Dandelion Seeds? It is a very important thing in the game and you should not miss it. 

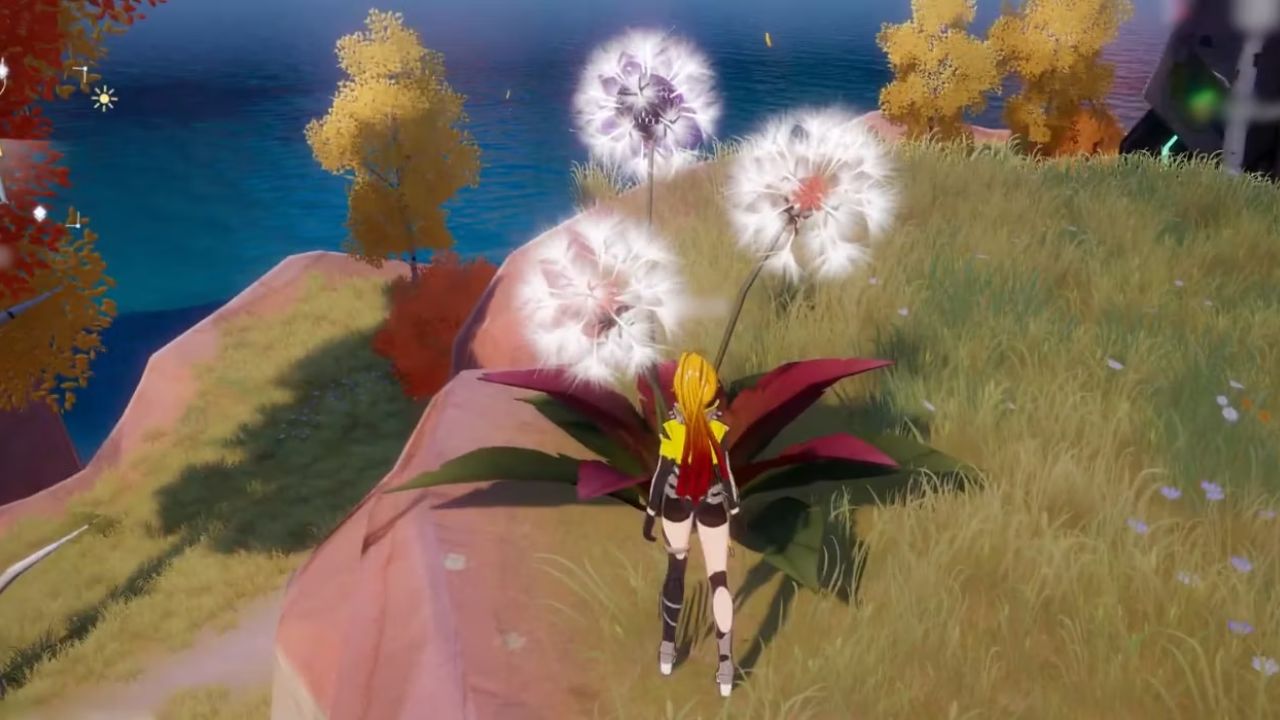
In Tower of Fantasy, Dandelion Seeds are a valuable plant-based resource that players can consume for various benefits or use it to prepare a specific recipe. These seeds can be obtained by gathering Dandelions. It bears a resemblance to real-world seed-dispersing flowers. 

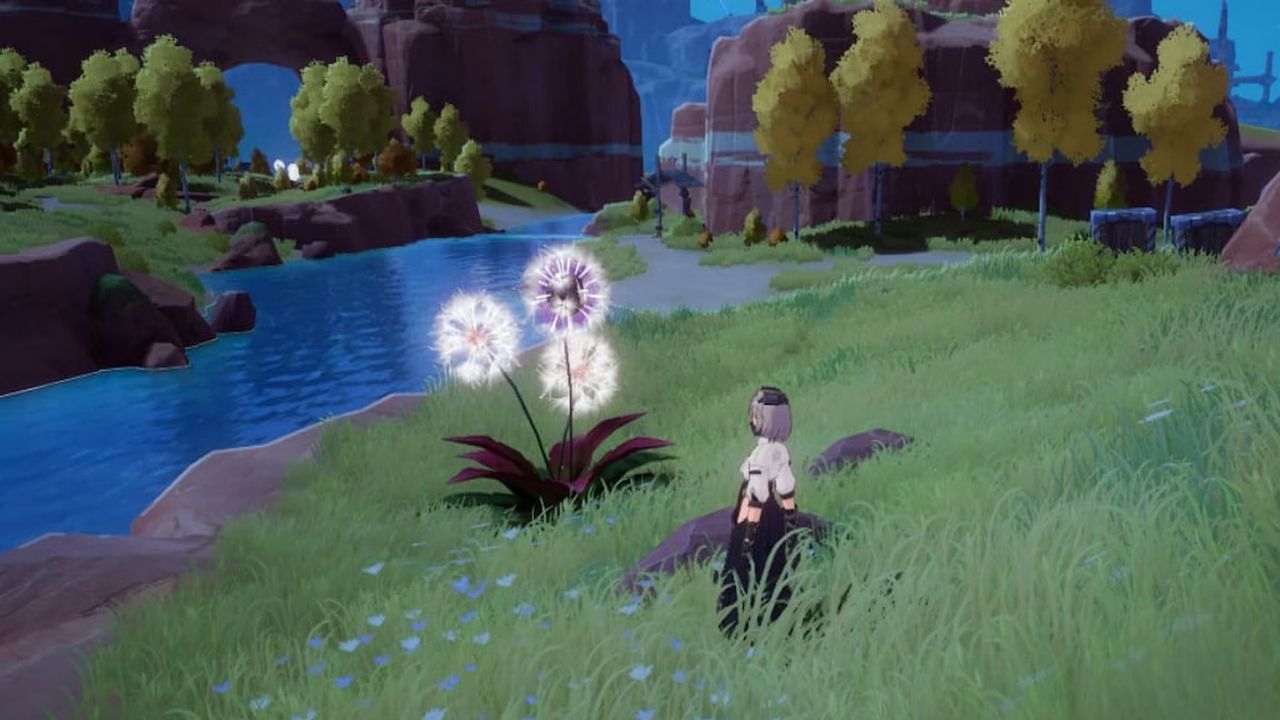
In the game, however, these Dandelions are much larger in size compared to their real-life counterparts. As a result, players shouldn’t face much difficulty in locating and harvesting Tower of Fantasy Dandelion Seeds due to the huge size of the plants.

Large size of Dandelion seeds

Tower Of Fantasy Dandelion Seeds Location

In Tower of Fantasy, players can find Dandelions scattered throughout the starting region of the game’s map. These plants are hard to miss due to their massive, fluffy appearance. It has broad dark red and green leaves underneath their stems. Thanks to their abnormal size, players should have little trouble identifying them in the open world.

However, if players find themselves struggling to locate a Dandelion, there’s no need to worry. They can climb any of the numerous elevated structures or ridges throughout the region to get a better view. From these tall vantage points, players can easily spot a Dandelion and plan their next move accordingly. It’s worth noting that players should take care when returning to ground level. It’s always best to glide rather than risk a fatal fall.

In addition, keep in mind that Dandelions are a critical resource for players to gather. They can be used in a variety of ways, from direct consumption to creating essential recipes. As a result, taking the time to locate and collect Dandelions can be a significant advantage to a player’s progress. So, be sure to keep an eye out for these massive flowers while exploring Tower of Fantasy.

Harvesting Dandelion Seeds in Tower of Fantasy

Harvesting Tower of Fantasy Dandelion Seeds is a crucial task that players must undertake to progress in the game. To do so, players will need to locate a Dandelion harvesting node. Players can find it scattered throughout the game’s starting region.

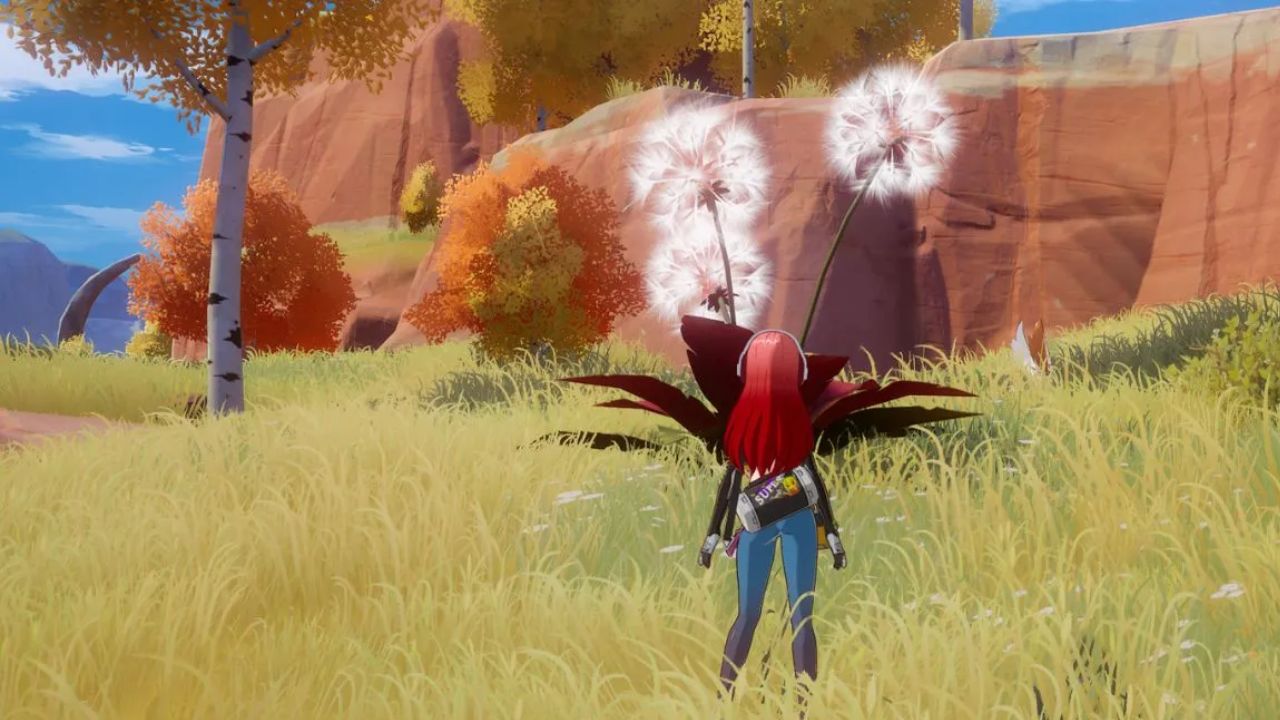
Once players find the Dandelion harvesting node, they must interact with it to begin the harvesting process. To harvest Dandelion Seeds, players need to strike the plant, causing its fluffy spherical orbs to fall to the ground or float in the air.

Players must approach one of the floating clumps to acquire a single Dandelion Seed in Tower of Fantasy. However, if another batch of seeds is floating out of reach, players can switch to a ranged weapon and shoot it out of the air to retrieve its contents.

It’s important to note that harvesting Tower of Fantasy Dandelion Seeds is a time-sensitive process. If players don’t collect the seeds quickly, they’ll float away and become unobtainable. Therefore, players must act fast and efficiently to collect as many Dandelion Seeds as possible before they disappear.

Gameplay
Gameplay

Using Tower Of Fantasy Dandelion Seeds 

Tower Of Fantasy Dandelion Seeds are a versatile resource that players can use in a variety of ways. As mentioned earlier, they’re primarily used for cooking recipe. It can be made at one of the many cooking pot robots scattered throughout the game’s map. However, it’s worth noting that additional ingredients are required to make a complete dish.

On the other hand, players can also eat Dandelion Seeds directly from their inventory to replenish their HP. Each seed restores 1,000 points of health. It is equivalent to 3% of their maximum health. In addition, the seed also regenerates one Satiety. It is a unique stat that players consume to enable passive healing outside of combat.

The versatility of Tower Of Fantasy Dandelion Seeds is a significant advantage for players. Whether they need to prepare for a challenging battle or recover from a recent skirmish, these seeds provide a reliable source of healing and sustenance. Moreover, since they’re relatively easy to acquire, players can quickly get a sizable collection of Dandelion Seeds to use as needed.

For more Guides, Tips, and Tricks

Check out our Video Games Guide Section for more dedicated guide

How To Get Eitr in Valheim

Want to know how to get the Valheim Eitr? This resource is very useful for players in the game. Therefore it is a must for all.

In Valheim, Eitr is a valuable resource. Players can use it in two different ways. First as a crafting material for powerful mythical armor and weapons. Secondly, use it as a stat-boosting consumable that can be obtained by consuming foods infused with Eitr.

Refined Eitr is a key component in the creation of some of the game’s most formidable equipment. Crafted by refining raw Eitr through a process that involves the use of various materials, refined Eitr can be used to create weapons and armor that offer exceptional damage output and defense.

Gameplay
Gameplay

But Eitr’s benefits aren’t limited to just crafting. When consumed, Eitr-infused foods will provide a temporary boost to various player stats, including health, stamina, and speed. However, these boosts will wear off over time and the Eitr stats will need to be regenerated. You can speed up this process by wearing armor made with Valheim Eitr. This is because the material’s regenerative properties will synergize with the wearer’s natural healing abilities to speed up the process. In this guide, we will tell you how to get the Valheim Eitr.

How to get the Valheim Eitr

Valheim has quickly become one of the most popular games. One of the most important resources in the game is Eitr, which can be used for both crafting and stat-boosting purposes. In order to harness the full power of Eitr, players must first understand how to obtain it and use it effectively. Continue reading below to know how to get Valheim Eitr.

Consuming foods

One of the easiest ways to get Eitr in Valheim is by consuming certain foods that have been infused with the substance. Stuffed Mushrooms, Yggdrasil Porridge, Seeker Aspic, and Minor Eitr Mead are all examples of consumables that can provide Eitr stats when eaten. These foods can be prepared using a variety of ingredients that can be found throughout the game world, making them accessible to players at all stages of the game.

Crafting

Obtaining Valheim Eitr stats through food consumption is a relatively straightforward process. However, the process of crafting Refined Eitr is a bit more involved. Refined Eitr is a key ingredient in some of the most powerful weapons and armor in the game, making it a valuable resource for players who are looking to gain an edge in combat. To craft Refined Eitr, players must first collect Sap using a Sap Extractor. This process involves placing the extractor on a tree and waiting for it to slowly fill with sap over time. Once enough Sap has been collected, it can be used in the Eitr Refinery to produce Refined Eitr.

The Valheim Eitr Refinery is a crafting station that can be built by players who have unlocked the necessary materials and recipes. Once the Refinery has been constructed, players can begin the process of converting Sap into Refined Eitr. This process requires players to add Sap to the Refinery and then use a fuel source to heat it up. Once the Sap has been heated to the appropriate temperature, it will transform into Refined Eitr that can be used for crafting purposes.

How to Craft Sap Extractor

Sap can be used to create a variety of items and structures that can help players on their journey. In order to obtain sap, players must first craft a sap extractor, which requires a number of specific materials and a bit of planning. To craft a sap extractor in Valheim, players will need 10 Yggdrasil Woods, 5 Black Metal, one Dvergr Extractor, and one Work Bench. 

Yggdrasil Woods

Yggdrasil Woods can be obtained by chopping down Yggdrasil trees, which can be found throughout the game world. These trees are often found in clusters and are easily identifiable by their distinct appearance. Players will have to gather 10 Yggdrasil Woods.

Black Metal

Black Metal is another key ingredient in the sap extractor recipe, and can be obtained as a drop from Fulings. Fulings are aggressive humanoid creatures that can be found in certain biomes throughout the game world. They are known for their formidable strength and their ability to drop valuable items, including Black Metal. Players will need to defeat a number of Fulings in order to gather the 5 pieces of Black Metal needed to craft the sap extractor.

Gameplay
Gameplay

Dvergr Extractor

Once players have collected the necessary materials, they will need to craft a Dvergr Extractor. Players can find it in Dvergr villages. Dvergr are dwarven creatures that can be found in underground areas throughout the game world. They are known for their craftsmanship and their ability to craft advanced items and structures. To obtain a Dvergr Extractor, players will need to explore these villages and search for one that contains the necessary crafting materials.

Craft sap extractor to get Valheim Eitr

Once players have gathered all of the necessary materials, they will be ready to craft the sap extractor. The final step in the process is to locate a glowing green Yggdrasil Root. Players can find it scattered throughout the game world. Once players have located one of these roots, they will receive a notification that says “The ancient root is pulsating with energy.” This is a sign that the root can be used to create sap.

To craft the sap extractor, players will need to place the Work Bench and the sap extractor on it. Once the sap extractor has been placed, it will begin collecting sap over time. This sap can then be used in the Eitr Refinery to create Refined Valheim Eitr.

For more Guides, Tips, and Tricks

Check out our Video Games Guide Section for more dedicated guide

Revelation: Infinite Journey Beginners Guide – Tips and Tricks

With the help of the Revelation Infinite Journey Guide, you will have all the important knowledge about the game that is needed.

Revelation: Infinite Journey is a game that encourages players to embody the persona of a courageous character. It has a character creation system that provides high customization options. Players can create their own unique avatars with a deep fashion system that offers the highest degree of freedom. The details in the game are of exceptional quality and depth. The NPCs in the game have an advanced AI system to provide players with an immersive experience.

The game features social and job systems that allow players to unleash their creativity. They can freely express themselves by becoming musicians, dancers, designers, chefs, or vigilantes. Players can also build a comprehensive ecosystem with like-minded players. To get a head start, you will need the Revelation Infinite Journey Guide. The guide below has the best tips and tricks for you.

Revelation Infinite Journey Guide: Battles

Battles serve as one of the most thrilling and adventurous aspects of the game. It provides an adrenaline rush and an opportunity to showcase your skills and strategy. The intensity of these battles can be heightened by the use of realistic graphics and sound effects. It allows players to immerse themselves in the game and feel as though they are truly in the midst of the action.

The key to success in battle lies in taking it seriously and approaching it with a strategic mindset. You must be fully prepared, both mentally and physically, for each encounter with an enemy. You must anticipate their moves and respond accordingly. Each battle presents a unique challenge, requiring you to adapt your tactics and utilize your strengths to overcome your opponent.

Boost skills

In Revelation: Infinite Journey, your character’s skills play an important role in battles. It determines your success and progression throughout the game. As such, it is essential to invest time and effort into boosting your character’s skills to ensure maximum efficiency and effectiveness in battle.

To access your character’s skills, navigate to the main menu from the main game screen and tap on the “Skills” option. Here, you will be able to view your character’s existing skills and ultimate skills, as well as the necessary requirements to boost each skill.

Boosting your character’s skills involves investing in the relevant necessities. This can include experience points, in-game currency, and other items specific to each skill. By investing in these requirements, you can gradually increase your character’s skill level. It will make them stronger and more efficient in battle.

Revelation Infinite Journey Guide: Main Quests

As a beginner player in Revelation: Infinite Journey, completing main quests is essential to your progression and overall gaming experience. These quests serve as your guide throughout the game, leading you through various challenges and helping you to become familiar with the game’s mechanics and features. Upon entering the game, players may only have access to a limited number of features. 

This makes it necessary to follow the main quests presented. By doing so, you can unlock new areas of the game, gain valuable resources, and build your character’s skills and abilities. The main quests can be found at the top left side of the game screen, and it is important to follow them closely as they serve as a roadmap for your journey. Each quest presents a unique challenge. It requires you to utilize your skills and strategy to overcome obstacles and progress through the game.

Revelation Infinite Journey Guide: Auto Battle System

It’s important to keep working on the grind in order to level up and collect resources. One very useful feature of Revelation Infinite Journey is the Auto-battle system. It allows players to automatically engage in battles with enemies without requiring any input from the player.

With the Auto-battle feature, players can keep grinding for experience points (EXP) and materials even when they need to go AFK (away from keyboard). This is particularly helpful for players who are busy with other tasks or have limited time to play the game.

different styles in the game

Revelation Infinite Journey Guide: Health Potions

Revelation: Infinite Journey is an intense combat game that requires players to be fully immersed in the gameplay to emerge victorious. While mastering the combat techniques is crucial, maintaining your character’s health is equally important. This is where the role of health potions comes in, which often goes unnoticed by players.

In battles, you are likely to face tough opponents that can drain your character’s health points rapidly. Therefore, you need to ensure that your character’s health is restored to its maximum level regularly. Health potions are the key to achieving this. These potions can be found while fighting enemies and completing quests, making it vital to collect as many as possible.

Not only do health potions replenish your character’s health, but they also prevent your character from dying and losing the battle. By using health potions effectively, players can prolong their characters’ longevity and keep them fighting for longer durations.

However, it is essential to note that health potions are not unlimited, and their availability may vary depending on the game’s level. Therefore, it’s important to use them with a good strategy. Keep this in mind, particularly when facing challenging opponents.

Upgrade Special Abilities

In Revelation: Infinite Journey, mastering combat techniques alone is not enough to succeed in battles. Your character’s special abilities can make all the difference between winning and losing. Special abilities are unique moves that allow players to deal more damage, stun opponents, or heal themselves, among other benefits. However, to make these abilities more potent, players need to invest in upgrading them regularly.

One of the significant benefits of upgrading your special abilities is the increase in battle points. Battle points are essential in determining your character’s strength and abilities, and upgrading your skills directly impacts your battle points. As a result, your character becomes stronger, and you can clear enemies faster.

Moreover, special abilities are often the biggest damage-dealing component that players have in battles. Upgrading your skills can increase your character’s overall damage output, making them a formidable force in combat.

For more Guides, Tips, and Tricks

Check out our Video Games Guide Section for more dedicated guide

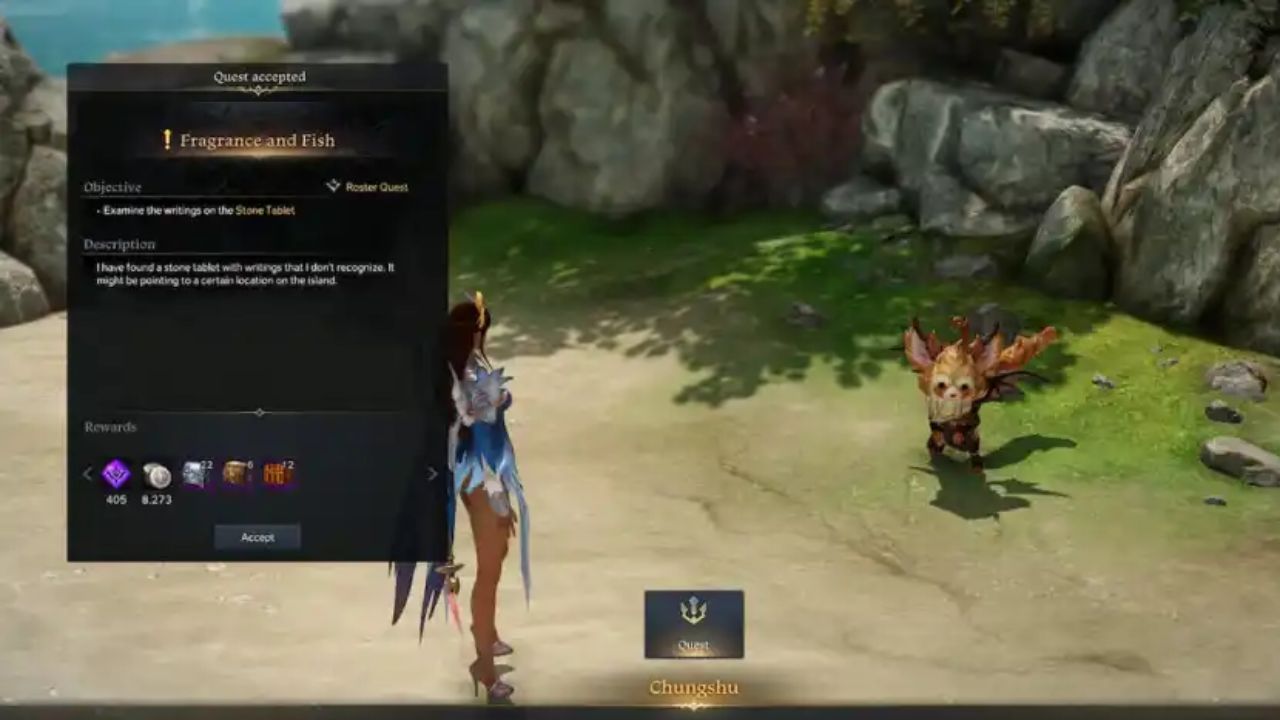
Lost Ark Fragrance and Fish Quest Guide

Are you facing difficulties in solving the Lost Ark Fragrance and Fish quest? Do not worry because our guide will help you.

In the world of Lost Ark, obtaining rare materials can be a tiring task, but fear not. Completing quests is a surefire way to boost your arsenal. With a bunch of quests available in Lost Ark, players will find themselves busy traversing the game’s vast and immersive world.

One quest that stands out from the rest is Fragrance and Fish. It offers much-needed resources that are essential to players’ progression. Not only is the quest rewarding, but it also serves as an excellent opportunity for players to hone their skills and gain valuable experience.

Completing Fragrance and Fish is no easy feat, but it’s worth the effort. The quest requires players to embark on a journey to gather rare ingredients, including the Fish of Fragrance. Once players have obtained all the necessary materials, they must craft a powerful elixir that will aid them in their adventures.

Gameplay
Gameplay

How to Start Lost Ark Fragrance and Fish Quest

In order to embark on the Fragrance and Fish quest in Lost Ark, players must first set sail to Panda Island. It is a location situated north of Anikka and east of Pleccia.

Upon arrival at Panda Island, players will encounter two non-playable characters, or NPCs. They are Puppa in the northern area and Chungshu in the eastern area. It’s essential for players to head towards Chungshu, as they are the ones who will offer the Fragrance and Fish quest to the players. You can see it in the image above.

Once players have accepted the quest, they will be directed to read a mysterious Stone Tablet. This will provide them with vital information about the quest’s objectives. To progress further, players must visit three secret locations. Each of these locations presents unique challenges and obstacles that players must overcome to obtain the necessary ingredients.

Players are advised to make use of their mounts. It will help them traverse the vast distances between the quest’s locations swiftly. Players must be cautious during their travels, as the game’s world is filled with danger. They may encounter enemies or other players looking to disrupt their progress.

First Hidden Location

The first of these hidden locations is “behind a Stone Lantern.” This elusive Stone Lantern is located northeast of Chungshu and can be found by following the path beyond the dead end on the world map. Once players have reached the Stone Lantern, they should continue down the path until they encounter an NPC who will provide further instructions.

Second Hidden Location

The second secret area, known as “past the panda,” is located on the western side of Panda Island. Players will need to keep a sharp eye out for a lone panda cub near some trees. Once players have located the cub, they should proceed deeper into the woods to uncover the next part of the quest. This area presents its own unique challenges, so players must be prepared to face whatever obstacles lie ahead.

Final Hidden Location

The last and final secret location in the Lost Ark Fragrance and Fish quest is to the south of the panda cub that led players to the second hidden area. However, to access this secret area, players will need to make use of jumping. Once players have successfully done the required jump, they will enter the final secret location. This will bring them one step closer to completing the Lost Ark Fragrance and Fish quest.

Upon arriving at the final secret area, players will face their toughest challenge yet. There will be obstacles and enemies standing between them and the quest’s completion. Players must use their wits and combat skills to overcome these obstacles and progress toward the quest’s end.

As players progress through each of these secret locations, they will encounter various puzzles, enemies, and obstacles that require a combination of strategy and skill to overcome. Players must be vigilant and use all the tools at their disposal, including mounts and weapons, to progress through each area successfully.

Gameplay
Gameplay

Lost Ark Fragrance and Fish Quest Rewards 

The rewards for completing the Lost Ark Fragrance and Fish quest make the effort well worth it. Players will receive x12 Epic Splendid Shard Chest M, 6x Epic Lavish Guardian Stone Fragment Chest, 22x Splendid Destruction Stone Fragment Chest, 8,273 Silver, and 405 Experience. These rewards are highly sought-after and can aid players in their future endeavors. This is why this quest is a valuable experience for any Lost Ark player seeking to improve their character’s strength and resources.

For more Guides, Tips, and Tricks

Check out our Video Games Guide Section for more dedicated guide

How to Unlock the Jetboard in Tower of Fantasy

Want to know how to get the Tower of Fantasy Jetboard so that you can travel in the water easily? The guide below has all the answers for you.

Tower of Fantasy’s Jetboard is a highly sought-after SR Relic in the gaming world. It offers players an amazing experience of surfing through the water at lightning-fast speed. This surpasses the limitations of slow swimming. This unique and innovative mode of transportation has quickly become a game-changer in the realm of exploration and traversal.

For Tower of Fantasy players, the Jetboard can seem like a game-changing Relic that’s out of reach. However, acquiring this coveted hoverboard is not as difficult as it may seem. Players can breathe a sigh of relief as the Jetboard is available relatively early on in the game.

Gameplay
Gameplay

Unlike other Relics that require players to actively seek them out, the Tower of Fantasy Jetboard is unlocked as players progress through the game’s main storyline. This means that players don’t have to go out of their way to find it, saving them valuable time and effort. Moreover, the best part is that the Jetboard is provided to them for free. This eliminates the need for players to grind for in-game currency to purchase it. The guide below will help you to get the Tower of Fantasy Jetboard easily.

Tower of Fantasy Jetboard

The Tower of Fantasy Jetboard is not just a means of transportation but a versatile tool that can also be used to inflict damage on enemies. Upon impact, players can launch targets, dealing considerable damage while maintaining momentum on their journey. Although the Jetboard may not be as effective on land, players can still reap the benefits of its speed-boosting capabilities by riding down slopes.

One of the most impressive aspects of the Jetboard is its ability to be activated while swimming. This makes it a truly versatile asset in a player’s inventory. With this feature, players can seamlessly switch between water and land modes. This will help them to explore their surroundings without having to pause.

How to get the Tower of Fantasy Jetboard

Unlocking the Tower of Fantasy Jetboard Relic requires players to complete the main story content in Chapter 1 in Astra. This chapter serves as a tutorial for players. It introduces them to the game’s basic mechanics and gameplay while laying the groundwork for exploration in Aesperia. Completing this segment of the quest line should only take an hour or two. However, players who prefer to take their time exploring all of Astra may take longer before reaching the start of Chapter 2.

As players progress through the story, they will eventually come to a point where they must leave Astra Shelter and bid farewell to Palu and Celine. However, before their departure, the player will be gifted the Jetboard. This will allow them to travel effortlessly up the river northward to reach Banges in the Tower of Fantasy.

Gameplay
Gameplay

Once the player obtains the Jetboard, they will have access to a versatile and exciting means of transportation. This will significantly enhance their ability to explore the game world. Players can surf across the water with unparalleled speed and efficiency. It will allow them to reach previously inaccessible areas and discover new secrets.

For more Guides, Tips, and Tricks

Check out our Video Games Guide Section for more dedicated guide

Final Fantasy 16 – Release Date, Trailers, Story, Gameplay, and more

Final Fantasy 16 is set to release soon. It features Eikons as a central gameplay element and promises a fresh take on the series’ story and combat.

As the highly anticipated release of Final Fantasy 16 approaches, Square Enix has been providing fans with a lot of information about the game. Among the details unveiled so far are the official release date, and story. We also know the exciting gameplay mechanics that include the concept of Eikons.

Square Enix is surely eager to redeem itself with a game that will exceed the expectations of both critics and fans alike. One of the main criticisms of Final Fantasy 15 was its sluggish combat system and decent open-world design. This left many players disappointed. Therefore, Square Enix is most likely aiming to make the series with a fresh and outstanding entry that addresses these issues and delivers an exceptional gaming experience.

With Final Fantasy 16 already generating buzz and excitement, fans are eagerly awaiting to see how Square Enix will deliver on their promises. Fans are also waiting to see how they will create a game that will live up to the Final Fantasy legacy. Continue reading below to know all the details about Final Fantasy 16.

Final Fantasy 16 Release Date

After a wait of six and a half years since the release of Final Fantasy 15 in 2016, Square Enix has announced the release date for Final Fantasy 16. It is set to release on June 22, 2023. During this time, the game developer primarily focused on the world of Final Fantasy 7. We saw the release of FF7 Remake and Crisis Core Reunion. 

As the release date for Final Fantasy 16 on June 22, 2023, draws nearer, fans are eagerly anticipating the game’s arrival. Square Enix is set to release a playable demo for the game, which will only add to the hype. The trailers released so far suggest that the game is living up to the high standards set by previous titles in the series. 

Final Fantasy 16 Trailers

FF16 marks the first entirely new story in the Final Fantasy universe in a long time. The hype around FF16 has been building up for two years with the release of four trailers. Those trailers were Awakening, Dominance, Ambition, and Revenge. These have left fans eager to see what the new game has in store.

By reimagining Summons as Eikons, Final Fantasy 16 is offering something fresh and exciting for fans. The trailers also hint at a departure from the crystal-centric plots that have characterized past Final Fantasy games. Given the sheer scope of JRPGs, it remains to be seen just how expansive and ambitious Final Fantasy 16 truly is.

Who are Eikons?

The core of Final Fantasy 16 has been made clear through the release of several trailers which focus on the game’s central theme: Eikons. Essentially, Eikons are the new name for Summons from previous Final Fantasy titles or Primals from FFXIV. Fans will be pleased to know that many beloved Eikons from previous games will be making a return in FF16. This includes Ifrit, Shiva, Titan, and Garuda, among others. In FF16, each Eikon corresponds to a particular element, such as fire for Ifrit and ice for Shiva. 

However, the Awakening trailer suggests that this system will be different. It will lead to a War of the Eikons and setting the stage for the game’s events. Importantly, FF16’s Eikons are linked to people known as Dominants. The details of this connection are not entirely clear. It seems that Dominants have the ability not only to summon Eikons but also to transform into them.

For example, the character Benedikta is shown wielding the Eikon Garuda, and players are previewed to see a gameplay scenario where they fight against Benedikta in Garuda form. It remains unclear whether this power is inherited from birth or bestowed upon a person later in life. The trailers suggest that Dominants are employed by their kingdom to fight in wars, and each time they use their Eikon, they appear to be permanently damaged.

Final Fantasy 16 Story

The story of Final Fantasy 16 takes place in the world of Valisthea. It has been decimated by a malevolent force known as Blight. In this land, each clan relies on its Mother Crystal to produce mana and support their people’s survival. Fans of the series will recognize the focus on crystals, similar to games like Crystal Chronicles. However, in FF16, the Blight has caused a shortage of resources, leading to inter-clan conflicts and wars. Dominants and their powerful Eikons are often at the center of these conflicts, as clans seek to obtain or destroy each other’s Eikons.

One of the clans in Valisthea is the Grand Duchy of Rosaria. It is a traditional stronghold inspired by French culture. The Arch Duke’s younger son, Joshua Rosfield, is a crucial figure in Rosaria. He is the Dominant of Phoenix, an Eikon that heals people using its fire-based powers. 

However, the game’s protagonist is actually Joshua’s older brother and personal guard, Clive Rosfield. The two brothers share a close bond. This makes it all the more devastating when Joshua is killed during an attack on Rosaria. The story of FF16 jumps ahead to a more mature and vengeful Clive, who is now embroiled in the Eikon wars while seeking to avenge his brother’s murder.

Gameplay
Gameplay

Clive’s journey to quell the flames of revenge in FF16

Notably, Clive Rosfield is revealed to be the Dominant of Ifrit, a powerful fire-based Eikon that clashes with his late brother’s Phoenix in the game’s logo. This contrast could reflect Clive’s journey to overcome his thirst for revenge and instead use his abilities to fight against the Blight and save the world. 

In order to do so, Clive must journey to other kingdoms and confront the Eikons that they worship. Those include the Holy Empire of Sanbreque, the Dhalmekian Republic, the Kingdom of Waloed, and the Iron Kingdom, known for their disdain towards Dominants. As Clive fights to cure the world of Blight, he must also learn to control his own destructive powers and channel them toward a greater purpose.

Final Fantasy 16 Gameplay

The Eikons in Final Fantasy 16 not only have a significant impact on the game’s story but also play a crucial role in the gameplay and combat system. Clive uses Eikon-related abilities during battles. This provides him with different elemental powers to defeat his enemies. While Ifrit is his primary Eikon, Clive learns to use other Eikons’ powers as he progresses through the game. 

In the gameplay footage, Clive showcases his combat skills, executing midair combos using Garuda’s wind-based Eikon power, This crushes the enemies with Titan’s earth-based Eikon abilities. These Eikon powers have cooldowns. Players can swap between them mid-combo to create chains of high-damage output and stagger enemies.

Abilities

Final Fantasy 16’s combat system offers a combination of weighty impacts and fluid gameplay. Clive’s fire-based abilities activate quickly, despite their power. This helps streamline the flow of battle. Movement is crucial to success in combat, as there are various movement-based abilities available. 

There is a lightning-based ability that warps Clive close to enemies, a teleport to finish off downed enemies, and both backward and aerial dodges to increase evasion. In addition to this, Clive has a new companion named Torgal, a wolf that can be called upon to help in combat by either attacking monsters or healing Clive.

Gameplay
Gameplay

Animations and effects

The new look of the game brings cinematic camera movements to regular combat. The attack animations combine particle effects with the gritty style of Dark Souls. The battles in FF16 also get bigger with Eikon vs Eikon fights. It features the two fighters transforming into kaiju-like creatures to wreak havoc. The game captures the weight of each Eikon’s attacks and immerses the player into larger set pieces with well-placed quick-time events. While not entirely unique, these battles are truly epic and make an unforgettable combat experience.

For more Guides, Tips, and Tricks

Check out our Video Games Guide Section for more dedicated guide

How to get the Iron Hatchet in Final Fantasy XIV

Want to know how to get the Final Fantasy XIV Iron Hatchet? The guide below will give you all the details about it.

The players in Final Fantasy XIV’s Island Sanctuary can use the Iron Hatchet, a Tool for harvesting resources from trees. The resources like Island Resin, Island Coconuts, and Island Beehive Chips. This Final Fantasy XIV Iron Hatchet is an upgrade from the Stone and Bronze Tools. It was there before Patch 6.3. 

With the new resources obtained from the Iron Hatchet, players can keep improving their island paradise. Moreover, they can discover new crafting recipes. However, players must meet a prerequisite to obtaining the Hatchet’s crafting recipe from Felicitous Furball. Keep reading to know how to get the Final Fantasy XIV Iron Hatchet and guides.

Iron Hatchet
Iron Hatchet

Requirements to unlock Final Fantasy XIV Iron Hatchet

If you want to obtain the Iron Hatchet in Final Fantasy XIV’s Island Sanctuary, there are a few prerequisites you must fulfill. First, you must reach Rank 10, which requires significant effort and time investment in developing your island. Additionally, players must have crafted all the previous Tools before they can obtain this upgrade.

Getting to Rank 10 will require you to complete daily and weekly tasks. Also, you will have to craft items to achieve objectives and manage your livestock. While it may take several days or even weeks to reach this goal, expanding and upgrading your homestead should always be a priority before investing in cosmetic purchases.

How to craft the Final Fantasy XIV Iron Hatchet

Once Final Fantasy XIV players reach Rank 10 on their Island Sanctuary, they can obtain the recipe for the Iron Hatchet from Felicitous Furball at the coordinates (X:12.6, Y: 28.4). Players will need Island Log × 3, Island Iron Ore × 2, and Island Quartz × 3 to craft the Hatchet. By the time players reach Rank 10, they will likely have all the required materials in their stockpiles. However, if they are missing any of these resources, they players can find them at specific locations on the island.

Finding Island Logs, Island Iron Ore, and Island Quartz

Players can get the Island Logs from trees located at (X: 20, Y: 23), Island Iron Ore can be taken from mineral nodes at (X: 26, Y: 20), and Island Quartz is available from nodes at (X: 22, Y: 16). To make the process more efficient, players should unlock flying on the Island Sanctuary, as locating these nodes on foot can be time-consuming.

Harvestable Resources with Iron Hatchet 

With the Final Fantasy XIV Iron Hatchet in hand, players can start harvesting a variety of resources on their Island Sanctuary. Here are the resources that players can obtain with the Iron Hatchet and where they can find it:

Island Resin

Harvested from Tualong Trees, Island Resin is a key ingredient in various crafting recipes for furniture, decorations, and even food items. Tualong Trees are available in different locations on the island, and their resin is helpful to craft materials for Rank 10 and above.

Island Beehive Chips

Apple Trees provide players with the sweet nectar of Island Beehive Chips. They are essential for crafting consumables like honey-glazed pastries, beverages, and more. Players can harvest Apple Trees using the Iron Hatchet, but they should be careful as bees can get agitated when disturbed.

Island Wood Opal

Mahogany Trees yield Island Wood Opals, a semi-precious gemstone used to craft accessories and high-level gear. As players progress towards higher ranks on their island, they will require more of these Opals, so having a steady supply of them can be very beneficial.

Island Coconuts

Palm Trees bear Island Coconuts, a valuable resource that can be used to create a range of dishes, including coconut milk, desserts, and other treats. The trees can be harvested using the Iron Hatchet, but players should be wary of the nuts falling on their heads.

Island Coconut
Island Coconut

Multicolor Islebloom

This resource is more challenging to acquire than the others and requires players to have flying unlocked on their Island Sanctuary. Once flying is available, players can locate nodes atop ridges to harvest Multicolor Isleblooms. These flowers are used in crafting various items such as dyes and glazes.

For more Guides, Tips, and Tricks

Check out our Video Games Guide Section for more dedicated guide

How to Increase Charisma in Lost Ark

Want to know how to increase Lost Ark charisma easily? We will give you some of the best ways that will help you.

In Lost Ark, developing your character is a vital part of the gameplay experience, and there are multiple ways to accomplish this. One of the ways to boost your character’s appeal is by increasing their Charisma through Virtues. Fortunately, Lost Ark offers a variety of methods to do this. In this guide, we will tell you how to increase Lost Ark Charisma.

Gameplay
Gameplay

How to increase Lost Ark Charisma

Sidequests 

While the main quests and boss fights in Lost Ark offer substantial rewards, players shouldn’t overlook the benefits of completing side quests. Not only do these quests provide additional content to explore, but they also offer an excellent opportunity to increase your Lost Ark Charisma. Since main quests are limited in number, taking on side quests is a smart move for long-term character development. Therefore, increasing your character’s Charisma by completing side quests is one of the most effective methods in Lost Ark.

Charisma Potions

In Lost Ark, Charisma Potions can be obtained while playing a wide variety of activities. However, it’s easy to lose track of how many of these potions you have and where you acquired them. To check how many Charisma Potions you currently possess and their origins, simply press ALT+D to open the Codex.

Charisma Potions are highly valuable because consuming just one will permanently increase your overall Charisma points by 10. The only reason players may not have noticed this item in their possession is that it cannot be sold, destroyed, or dismantled. It remains with your character until you consume it, providing a permanent boost to your Charisma.

Achievements

To increase your Lost Ark Charisma, completing and unlocking Achievements and titles is a great way. To access them, click on the Legacy at the bottom of the screen and go to titles. There, you’ll find a list of Prefixes and Suffixes that grant your character Virtue points. These titles don’t require activation. Once you earn them, they will automatically reward your character with +1 Charisma, Kindness, or other Virtue bonuses.

In addition, visiting the Achievements section will allow you to track your progress toward completing achievements. Focus on those that are close to completion, as reaching 100% completion will grant you Virtue points that are crucial for improving your character’s overall personality traits in Lost Ark.

Play songs

Under the Adventure section, you can find the Normal tab where you will come across a tracker for playing certain songs. For instance, playing the Song of Resonance 150 times will grant you a completion reward along with a possible Charisma level boost of +2 or more in Lost Ark.

While this may not be the quickest way to increase your Lost Ark Charisma, it is a viable option if you want a permanent boost but do not want to undertake quests, missions, or other tasks mentioned earlier.

Una’s Tasks

If you’re feeling burnt out from doing main and side quests continuously in Lost Ark, you can take a break and focus on completing Una’s Tasks instead. These are daily and weekly missions that players can undertake to earn quick rewards or work towards a more substantial reward over the course of a week.

The daily missions reset frequently, while the weekly ones take longer to complete, but both provide ample opportunities to boost your character’s Charisma in Lost Ark. Completing Una’s Tasks not only improves your Charisma but also grants you a significant boost to the other three Virtues.

Adventure book

It’s recommended that you explore the Adventure Book to earn charisma points in Lost Ark. You’ll discover several opportunities there to increase your Virtues, usually gaining +1 or +2 points, and the missions will only take around 20 or 30 minutes to complete. Therefore, it’s worthwhile to finish these Hidden Stories found in the Adventure Book to boost your Lost Ark Charisma.

Adventure book
Adventure book

Build strong rapport

As you progress through Lost Ark, building a strong rapport with NPCs will have a positive impact on your character’s charisma. When you complete missions for NPCs and improve your relationship with them, you can earn rewards and boosts to all of your character’s Virtues, including Charisma. 

By completing more quests, you can not only improve your Rapport with NPCs but also increase your overall Lost Ark Charisma. So, the next time an NPC offers you a quest, don’t hesitate to accept it, as it can help you improve your Rapport rank and potentially give you a Charisma boost.

For more Guides, Tips, and Tricks

Check out our Video Games Guide Section for more dedicated guide

Destiny 2 Synchronic Roulette God Roll Guide – PvP and PvE 

Here is the Destiny 2 Synchronic Roulette God Roll Guide that will help you in the PvP and PvE. Read the guide carefully to learn everything.

Destiny 2 players who own the Lightfall expansion may stumble upon the Synchronic Roulette, a submachine gun that boasts impressive firepower. While it has a range of possible perks, only a few can make it truly exceptional. If you want to optimize your gameplay experience in both PvE and PvP, you’ll need to obtain the best Synchronic Roulette god rolls. Here’s what you need to know about the Destiny 2 Synchronic Roulette.

Terminal Overload
Terminal Overload

How to get Destiny 2 Synchronic Roulette

Before diving into the god rolls, it’s crucial to first obtain the Synchronic Roulette. This submachine gun is a rare find, so Lightfall expansion owners must be alert in their searches. 

If you’re looking to obtain the Destiny 2 Synchronic Roulette, there are a few methods you can try. One way is to complete the Lightfall campaign, after which the weapon may appear as a reward. Another option is to team up with other Guardians and tackle missions on the Beyond Light difficulty level. The Weekly Campaign mission is also worth considering if you’re eager to get your hands on this submachine gun.

The Synchronic Roulette is a coveted weapon in Destiny 2, and it can be a valuable asset in your arsenal. By working your way through the Lightfall campaign and venturing into the Beyond Light missions, you increase your chances of finding this weapon and improving your gameplay experience. 

Best Perks for Synchronic Roulette in Destiny 2 PvE and PvP

The Destiny 2 Synchronic Roulette is a popular submachine gun that has various perks to make it stand out. For PvE encounters, the weapon is one of the most powerful submachines available, making it an ideal choice for various situations. Some of the best perks to roll for the Synchronic Roulette in PvE include Envious Assassin, Under Pressure, Keep Away, Kill Clip, and Target Lock. These perks can appear in the first or second slots, with Hatchling being a highly desirable second-slot perk.

On the other hand, Synchronic Roulette may not be the best option for PvP encounters. However, players can still give it a try and experiment with different builds. Some viable perk choices for PvP include Pulse Monitor, Perfect Float, and Elemental Capacitor. With the right perks and playstyle, the Synchronic Roulette can become a powerful weapon to add to any Guardian’s arsenal in both PvE and PvP encounters.

Synchronic Roulette
Synchronic Roulette

Destiny 2 Synchronic Roulette: PvE and PvP God Rolls

Acquiring Destiny 2 Synchronic Roulette with the perfect god rolls is every Guardian’s dream is very beneficial. Whether you’re looking for a powerful weapon for PvE or PvP encounters, here are some of the best god rolls for Synchronic Roulette.

For PvE encounters, the ideal barrel and magazine combo is Arrowhead Brake and Ricochet Rounds. These provide increased stability and range, respectively. The first perk you should aim for is Under Pressure, which boosts stability and accuracy when your magazine is low. The second perk should be Hatchling, which spawns additional Strand Hatchlings during a fight when you land Precision shots against an opponent. For the masterwork, choose either Range or Stability, depending on your preference. Finally, the Nanotech Tracer Rockets origin trait will give you increased tracking and damage against enemies.

On the other hand, for PvP encounters, the best barrel and magazine combo is Corkscrew Rifling and Armor-piercing Rounds, which increases range and armor penetration. The first perk to aim for is Pulse Monitor, which reloads your weapon and grants you bonus weapon handling when your health is critical. The second perk should still be Hatchling for the chance to spawn additional Strand Hatchlings during combat. For the masterwork, choose either Range or Stability. Lastly, the Nanotech Tracer Rockets origin trait will still provide increased tracking and damage against enemies.

For more Guides, Tips, and Tricks

Check out our Video Games Guide Section for more dedicated guide

How to Beat Minotaur in Tower of Fantasy

If you are facing any problem in beating the Tower of Fantasy Minotaur then do not worry. The guide below will give you the best tips and tricks.

Tower of Fantasy offers players a lot of challenging enemies and bosses to face. Among them is the Minotaur, a boss that awaits players in the early stages of the game. This dungeon-ending boss is an excellent test of a player’s combat and dodging skills. This is sure to provide a thrilling experience.

While the Tower of Fantasy Minotaur may seem intimidating at first, players who prepare correctly and set their expectations right will have no trouble defeating it. As with many of the bosses, the primary reward for fighting the Minotaur is dungeon completion. Moreover, players will get the experience gained from defeating it. 

By facing off against the Tower of Fantasy Minotaur, players can get a glimpse of what stronger bosses will look like in the game. They can then hone their skills to face even greater challenges later in the game. For those looking beat Tower of Fantasy Minotaur, the guide below will help you.

Gameplay
Gameplay

Tower of Fantasy Minotaur Location

Locating the Minotaur in the Tower of Fantasy is a straightforward task. Players will get the location by heading to Ruin B-02. Although the boss may appear in a Void Rift, players can reliably encounter it in this dungeon. Located in the Banges region, which is a lush forest region to the Southwest of Asperia’s central continent, Ruin B-02 is easily accessible by exploring the beaches to the west of Banges dock. 

Once players navigate through the dungeon’s puzzles and fight through the enemies, they will encounter the Minotaur as the dungeon’s final boss. Knowing where to find the Minotaur is a crucial step in the player’s journey to test their mettle against this boss.

Minotaur Attacks

When taking on the Minotaur in Tower of Fantasy, players must be prepared for its powerful attacks. One of the essential requirements is to have a good Shatter weapon to break through the boss’ shield, which is present in both solo and multiplayer modes. Here are the different attacks that players should watch out for:

  • Shield Slam – The Minotaur will jump and slam the ground with its shield, dealing damage to players caught in the area. This attack can even happen in the middle of combos, making it difficult to predict.
  • Large Swipes – The Minotaur will swing its axe wildly, covering the area around it. This attack can hit players even behind the Minotaur, making it crucial to keep a safe distance.
  • Charged Axe – Players can notice when the Minotaur is about to perform a powerful charge attack by its golden appearance. Dashing backward is an effective way of triggering Phantasia, a time-slowing mechanism that allows players to dodge the attack easily.
  • Six Swipes – When the Minotaur’s health drops below a certain level, it will stop performing double swipes and instead perform a long combo. Parts of the combo deal area-of-effect damage and are best avoided by running as far away as possible.
Gameplay
Gameplay

How to beat Minotaur in Tower of Fantasy 

Preparing for a fight with the Minotaur in Tower of Fantasy requires careful planning and execution. To begin with, players must bring a weapon with a good Shatter rating to break through the boss’ shield that guards against offensive attacks. It’s also essential to have a dodging mindset, as the Minotaur wields an ax with a long range for offense. Players must be aware of certain swings that can even reach behind the Minotaur, as well as a special jumping shield attack that the boss employs in combat, which can severely damage players.

However, the Tower of Fantasy Minotaur usually indicates which move is coming next, making attacks easier to predict and dodge. While the boss’ attacks are slow and easy to read, players should still aim to maximize counter-attacks while keeping a safe distance from the ax’s range. When the Minotaur’s health drops below 25 percent, it switches to an aggressive six-swing combo that’s especially hard to dodge, so players must keep their distance to avoid taking damage.

Whether tackling this boss solo or with friends, overcoming the Minotaur and future dungeon bosses in Tower of Fantasy becomes more manageable by proving one’s capabilities.

For more Guides, Tips, and Tricks

Check out our Video Games Guide Section for more dedicated guide