Lost Ark Astray Crafting Guide

In this guide, we will walk you through the process of obtaining and maximizing the Lost Ark Astray, providing detailed steps and some tips.

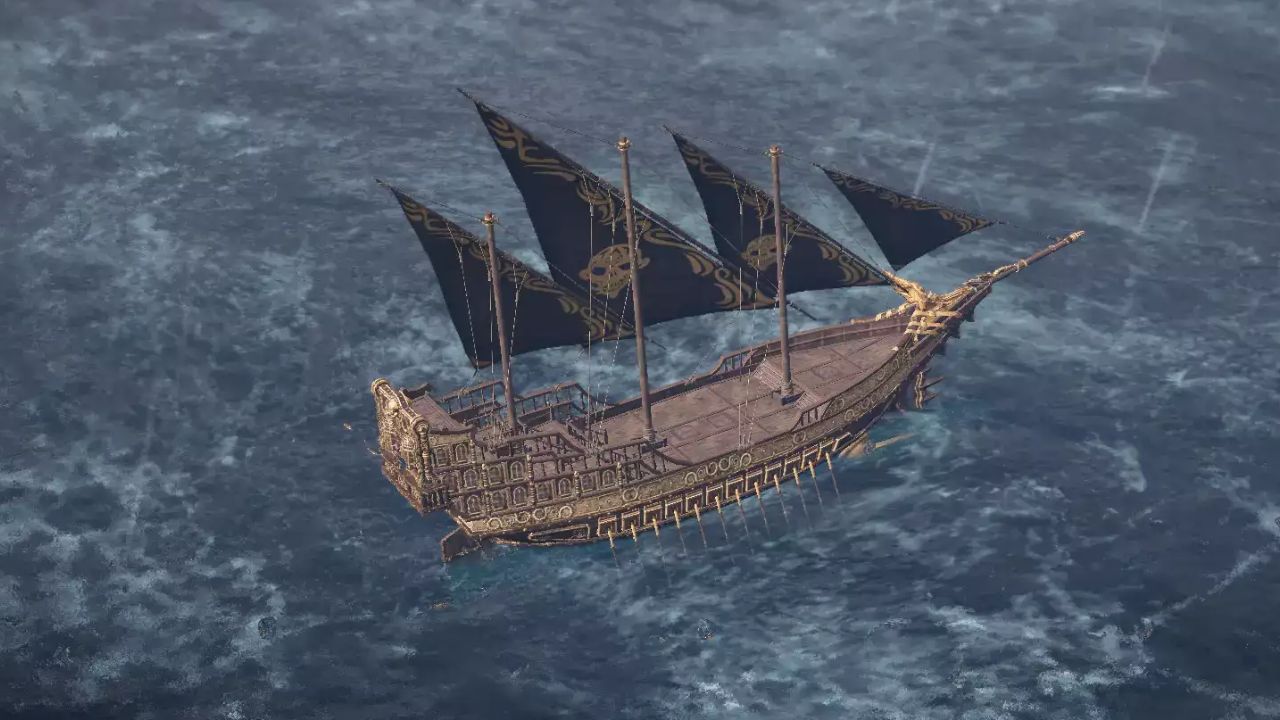
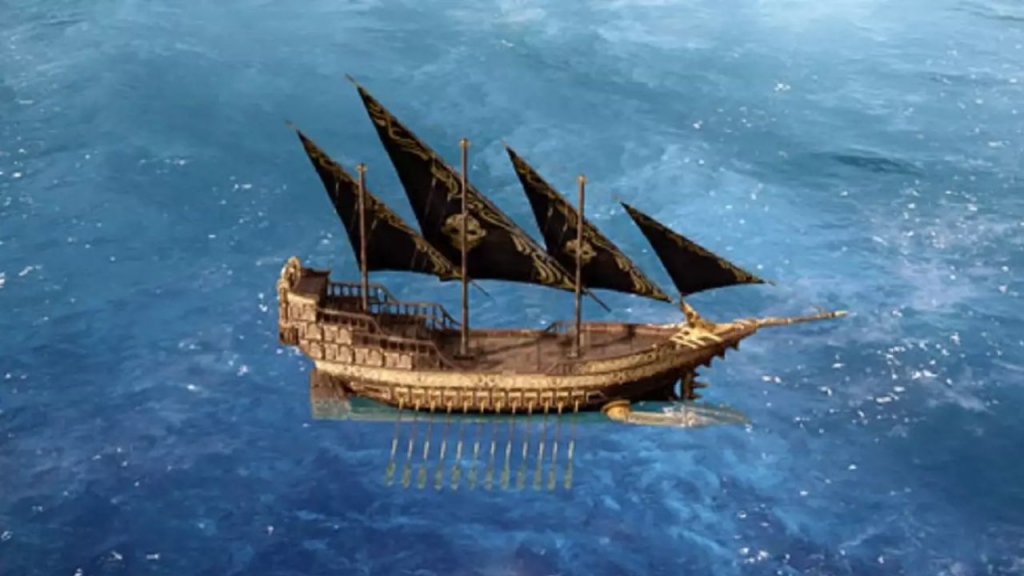
The Astray is widely regarded as the best ship in Lost Ark, making it a popular asset for adventurers. However, it’s important to note that crafting the Astray is time-consuming and resource-giving. Before diving into the process, it’s crucial to understand the commitment required to obtain and maximize this exceptional ship.

Crafting the Astray, the popular ship in Lost Ark, requires dedication and resources. By following this guide, you’ll be well-equipped to build your own Lost Ark Astray and enjoy the benefits it brings. Let’s set sail on this exciting journey.

Gameplay
Gameplay

Lost Ark Astray Crafting Guide

To embark on the Lost Ark Astray crafting journey, you need to gather several key materials. Here’s a list of the items required:

  • Astray Construction Blueprint
  • Astray Operation Manual
  • Certificate of Pirate
  • 570 Timber
  • 375 Uncommon Ship Parts Material

Now, let’s delve into each of these items and explore how to acquire them.

Astray Construction Blueprint

The Lost Ark Astray Construction Blueprint is a vital component for crafting the Astray. To obtain it, you must complete the Una’s Task called “She Drifts, Sea Gifts.” However, be prepared for a significant time commitment, as this task spans 25 days. Here’s a breakdown of the tiers within this task:

  1. Tier one – 50/50 (five dailies), rewards 12,000 pirate coins.
  2. Tier two – 80/80 (four dailies), rewards 19,000 pirate coins.
  3. Tier three – 80/80 (eight dailies), rewards Astray Construction Blueprint and 29,000 pirate coins.

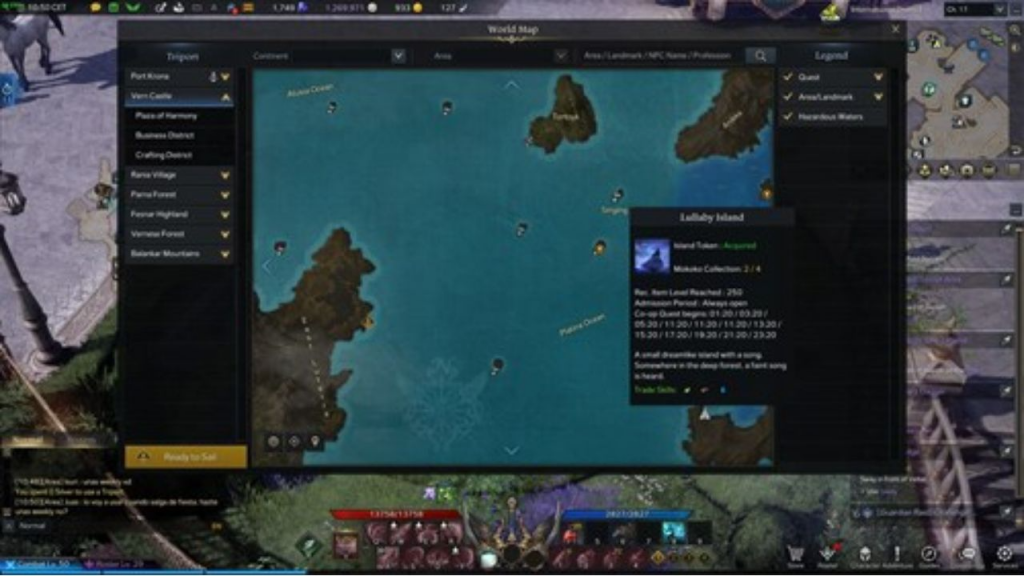
To maximize your progress in this task, keep an eye out for the Co-op Sailing Events. The Arthetine and Yorn events reliably spawn the treasure salvaging event required for this task. If those events are not active, you can try other events, but note that they have a chance of spawning the necessary event.

Remember to read Blackfang’s note before attempting to complete the task during the Co-op Sailing Event, as neglecting this step will result in no progress. Utilizing “Una’s Task Instant Complete Tickets” can be advantageous, saving you significant time in the long run. Just ensure you have completed the quest at least once before using the instant complete tickets.

Astray Operation Manual

The Lost Ark Astray Operation Manual is an item rewarded at the end of a small quest chain. To initiate this chain, acquire the item “Pirate Star: Astray” from Mariner Rosa, available for purchase at a cost of 300,000 pirate coins. However, to complete the quest chain and receive the operation manual, you need to reach the trusted Rapport rank with Blackfang.

While it’s possible to buy the “Pirate Star: Astray” item whenever you have the necessary pirate coins, achieving the trusted Rapport rank is essential. Invest time in building rapport with Blackfang to ensure you can progress through the quest chain smoothly and obtain the operation manual.

Certificate of Pirate

The Certificate of Pirate is obtained by completing the Una’s Task named “Pest Control” and maxing out its reputation. This daily task is relatively straightforward and involves eliminating pirates on Blackfang’s Den. It’s important to note that these pirates only spawn during the island’s event, which occurs every 15 minutes.

Here’s a breakdown of the tiers and their rewards for completing the “Pest Control” task:

  • Tier one – 30/30 (three dailies), rewards 6,000 pirate coins.
  • Tier two – 40/40 (four dailies), rewards 8,000 pirate coins.
  • Tier three – 80/80 (eight dailies), rewards Certificate of Pirate, a vitality increase potion, and 16,000 pirate coins.

By diligently completing this Una’s Task for 15 days, you not only secure one of the crucial materials for crafting the Astray but also accumulate a substantial amount of pirate coins toward the required 300,000 for the “Pirate Star: Astray” item.
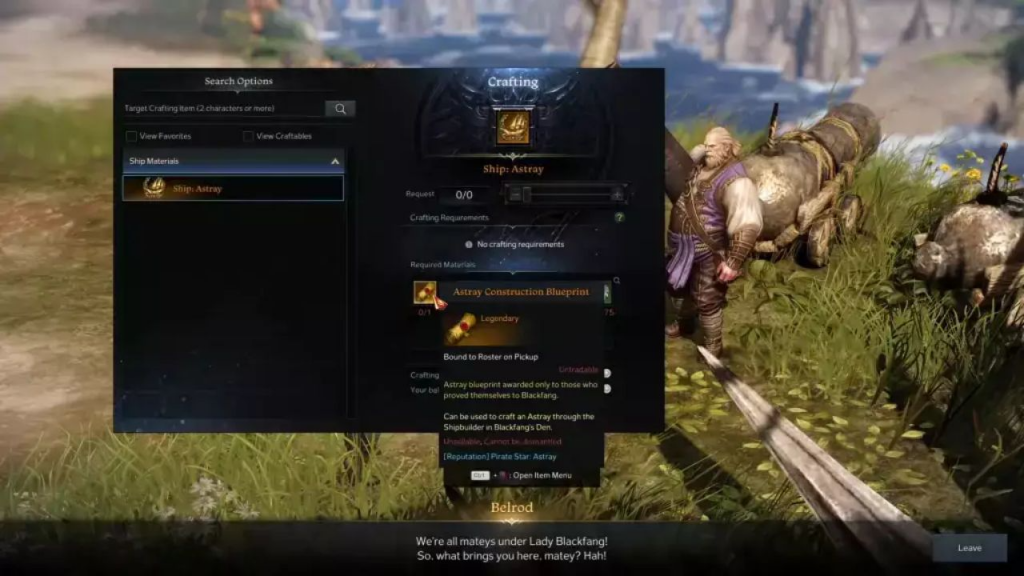
Crafting the Astray

Once you have gathered all the necessary materials, it’s time to craft the Lost Ark Astray itself. Proceed to Blackfang’s Den and find Belrod, the only craftsman capable of constructing the Astray. The crafting cost for the Astray is 10,000 silver, which is relatively modest considering the overall investment required.

Additionally, ensure that you have sufficient uncommon ship parts. If you lack these materials, visit the Processor NPC in any city. Scroll down to the “Part Materials” tab to find and craft the required uncommon ship parts.

Astray
Astray

Conclusion

Crafting the Astray in Lost Ark is a challenging yet rewarding task. By following the detailed steps outlined in this guide, you’ll be well on your way to obtaining the best ship in the game. Remember, patience and dedication are key to successfully completing Una’s Tasks, acquiring the necessary materials, and maximizing Astray’s potential.

For more Guides, Tips, and Tricks

Check out our Video Games Guide Section for more dedicated guide

How to Get the Centrifuse Catalyst in Destiny 2

Are you looking for the Destiny 2 Centrifuse Catalyst? We have made the process into three simple steps, allowing you to quickly obtain and wield this powerful weapon.

With the arrival of the Season of The Deep in Destiny 2, a host of new weapons has emerged, including the formidable Centrifuse auto rifle. Featuring a low rate of fire and magazine size, this weapon packs a punch, making it an excellent choice for Arc-style players and a formidable option for anyone with sufficient practice. 

While acquiring the Centrifuse itself is relatively straightforward, obtaining its Catalyst requires additional effort and dedication. In this comprehensive guide, we will walk you through the steps to obtain the coveted Centrifuse Catalyst in Destiny 2.

Season of The Deep

How to Get the Destiny 2 Centrifuse Catalyst 

To begin your journey towards obtaining the Destiny 2 Centrifuse Catalyst, you must first acquire the Centrifuse itself. This auto rifle is awarded through the season pass, making it accessible to players who have reached level one of the current season. For players who don’t possess the season pass, the Centrifuse becomes available at level 35. Once you have this powerful weapon in your arsenal, it’s time to go on the quest for its Catalyst. Follow the steps below to get the catalyst

Step 1: Banshee-44’s Mission

The first step towards obtaining the Destiny 2 Centrifuse Catalyst involves visiting Banshee-44 in the Tower. Upon meeting him, he will provide you with a mission that serves as the initial stage of acquiring the Catalyst. This step requires you to achieve 20 rapid kills and 40 Final Blows with Arc damage. While this may sound challenging, it can generally be accomplished within a single run-through. To maximize your damage potential, ensure that your loadout is optimized for Arc damage. Once you successfully complete this step, return to Banshee-44 to progress further.

Step 2: Enemy Annihilation and Calibration Data

Moving on to the next stage, you’ll need to go on a slightly lengthier part. This step requires the elimination of 450 enemies while simultaneously generating Calibration Data. Calibration Data can be acquired by achieving kills in Crucible, Vanguard, and Seasonal events. It is worth noting that engaging in these activities at higher difficulty levels can yield even greater amounts of Calibration Data. Upon successfully accomplishing this task, it’s time to once again seek out Banshee-44 to unlock the final step of the Centrifuse Catalyst.

Step 3: A Test of Dedication

The final step of the Destiny 2 Centrifuse Catalyst quest truly separates the dedicated players from the rest. Catalysts are renowned for being awarded to those who have demonstrated an unwavering commitment to their chosen weapon, and the Centrifuse Catalyst is no exception. In this last stage, you must achieve approximately 700 kills with the Centrifuse itself. This undertaking will require persistence, patience, and a desire to truly master the weapon. Embrace the challenge, venture forth, and immerse yourself in the pursuit of excellence.

The Power of the Destiny 2 Centrifuse Catalyst

Once you have successfully acquired the Destiny 2 Centrifuse Catalyst, your efforts will be rewarded with enhanced capabilities. The Catalyst enables the weapon to gradually build overcharge while amplified, further amplifying its Arc damage. 

With the Catalyst equipped, the Centrifuse becomes an exceptional choice for PvE activities, allowing you to swiftly clear mobs of enemies within seconds. Harness this newfound power and witness the devastating impact of the Centrifuse as you dominate the battlefield.

For more Guides, Tips, and Tricks

Check out our Video Games Guide Section for more dedicated guide

Tower of Fantasy PlayStation Showcase – Release Date, Trailer, and More

If you are a Tower of Fantasy fan then hold on! Tower of Fantasy PlayStation is coming soon and here are the details.

Tower of Fantasy is a free-to-play open-world RPG that captured the hearts of gamers worldwide upon its global release in December 2021. It is now gearing up for an exciting expansion. During the electrifying PlayStation Showcase of 2023, a new trailer hinted at the game’s imminent arrival on PlayStation platforms. In this article, we will get into the details of the Tower of Fantasy PlayStation release date, trailer, and much more.

Tower of Fantasy PlayStation Release Date

An exact release date for the PlayStation version is yet to be announced. It is expected to grace our consoles in the summer of 2023, promising an immersive and thrilling experience for players. 

Tower of Fantasy PlayStation Set to Conquer

Tower of Fantasy is developed by an exceptional team led by the visionary designer Sky. It has been officially confirmed for release on both the PlayStation 4 and PlayStation 5 consoles worldwide. Players eagerly awaiting this epic adventure can rejoice as the game is slated to launch in the summer of 2023. With the arrival of Tower of Fantasy PlayStation, a new chapter of excitement and discovery is about to unfold.

Enter Domain 9

Tower of Fantasy’s expansion introduces players to the enchanting realm of Domain 9. This new region focuses on “oriental magic world building” and showcases a stunning display of artistry and imagination. As you traverse Domain 9, be prepared to witness breathtaking landscapes. Encounter intriguing characters, and unveil the secrets of this magical domain. Immerse yourself in the rich tapestry of oriental-inspired lore, adding depth and diversity to your Tower of Fantasy adventure.

Simulacrum Characters

The latest release of Tower of Fantasy introduces a diverse lineup of Simulacrum characters, each boasting unique play styles. With over 30 distinctive weapons to choose from, players can tailor their approach and find the perfect match for their preferred combat style. Whether you prefer the swift strikes of a dual blade or the devastating power of a heavy hammer, the game caters to a wide range of play preferences, ensuring a truly personalized and immersive gaming experience.

Grand Sea Region

Prepare to be enthralled as Tower of Fantasy’s upcoming expansion introduces the awe-inspiring Grand Sea region. This exclusive underwater domain is brimming with a meticulously crafted ecosystem, offering players a captivating and immersive experience. Prepare to dive into uncharted depths, engaging in adaptive combat and thrilling exploration, all within the vibrant cyberpunk-themed world that Tower of Fantasy is renowned for.

Tower of Fantasy PlayStation Online Cooperative Multiplayer

The Tower of Fantasy PlayStation version brings an exciting addition for players craving social interactions. With the inclusion of online cooperative multiplayer functionality, you can team up with friends and fellow adventurers to conquer challenges together. Forge alliances, coordinate strategies, and embark on memorable journeys as you explore the vast and immersive world of Tower of Fantasy. Engage in real-time communication with social features such as photo sharing, poses, and messaging, fostering a vibrant community within the game.

Cross-Play and Cross-Save

While details are yet to be confirmed, fans eagerly anticipate the potential inclusion of cross-play and cross-save functionality in the Tower of Fantasy PlayStation version. The ability to seamlessly connect and enjoy the game with friends across different platforms would be a welcome addition, enhancing the cooperative multiplayer experience and uniting gamers regardless of their chosen console. Stay tuned for further updates as the release draws near, and the full extent of the game’s connectivity options becomes clear.

For more Guides, Tips, and Tricks

Check out our Video Games Guide Section for more dedicated guide

How to Beat the Bonanza Challenge in Clash of Clans

Facing problems in the Clash of Clans Bonanza Challenge? Do not worry. We have a complete guide to help you.

The highly anticipated Builder Base 2.0 update is already out. While the ongoing May 2023 season doesn’t feature a regular challenge, we have the special Builder Base Bonanza Challenge to keep you engaged and motivated. In this guide, we will walk you through each stage of the Clash of Clans Bonanza Challenge, providing detailed strategies to help you clear the bases and earn those valuable stars.

Get a 3 star
Get a 3 star

Clash of Clans Bonanza Challenge

The Bonanza Challenge is not your typical one-time battle; it’s a series of bases with preset troop combinations that will test your skills and strategic thinking. This challenge starts at Builder Hall Level 2 and progresses all the way up to the newly introduced Builder Hall Level 10. To unlock the next base, you need to win at least one battle and earn a minimum of one star.

What makes the Clash of Clans Bonanza Challenge enticing is the rewards it offers. The rewards are distributed based on the number of stars you accumulate throughout the battles. You have the freedom to attempt each base multiple times, aiming for the maximum number of stars possible. It’s important to note that the challenge incorporates the new Bronze and Silver stars system, with the lower builder halls not having a second stage.

Now, let’s dive into the strategies for conquering each stage of the Bonanza Challenge.

Builder Hall 2

The first challenge is relatively easy compared to the later stages. Your primary target is the corner defenses. Deploy Sneaky Archers, placing one on each side to stealthily take down the Cannons. As their ability is about to expire, deploy Raged Barbarians to redirect the defenses’ attention towards them. If any defenses remain, use the remaining Sneaky Archer as backup to eliminate them.

Builder Hall 3

Builder Hall 3 of the Clash of Clans Bonanza Challenge introduces a slight increase in difficulty. You’ll encounter three air-targeting defenses. Your initial objective is to eliminate the Firecracker to create a path for the Beta Minions. Deploy one Sneaky Archer to clear the way on one side, and simultaneously deploy a Giant on the other side to take down the Archer Tower. Accompany the Giant with another Sneaky Archer to deal with the Cannon.

Trigger the Hidden Tesla on the left side with the Sneaky Archer, and once it activates, use the Beta Minions’ ability to destroy it. By doing so, you eliminate all the air-targeting defenses, allowing the Beta Minions to effortlessly clear the rest of the base.

Builder Hall 4

In this stage, the Baby Dragon plays a vital role. Start by triggering the Tesla at the top using the Boxer, followed by deploying the Bomber surrounded by Sneaky Archers. When the Bomber approaches the Archer Tower, activate its ability to clear a path through the walls. You can repeat this ability if necessary.

Wait until the ground troops take down the Firecracker, and then deploy the Baby Dragon on the opposite side of the base. Let the Baby Dragon work its way towards the Archer Tower, and utilize its ability to eliminate the remaining air-targeting defense. Once accomplished, clearing the rest of the base becomes relatively easy.

Builder Hall 5

Builder Hall 5 of the Clash of Clans Bonanza Challenge provides an interesting challenge with the Cannon Cart’s unique ability to outrange certain defenses. Deploy the Cannon Cart on the left side to clear the buildings. Before it falls within range of the Archer Tower, switch it to Mortar Mode, allowing it to eliminate the Archer Tower and nearby Firecrackers. Once the threat is neutralized, switch back to Cannon Mode. Repeat this process near the remaining Firecrackers.

Next, deploy the Battle Machine near the Builder Hall and the Boxer and Bomber near the walls. Activate the Bomber’s ability instantly to clear the walls. Instead of spamming troops, save the Battle Machine’s ability for the final stage. The Baby Dragon, along with your remaining troops, will efficiently clear the base.

Builder Hall 6

Builder Hall 6 presents a two-stage challenge, where surviving troops carry over, providing a significant advantage. Begin with the Battle Machine, Boxer Giants, and Night Witch. Utilize the Night Witch’s ability to unleash as many raged bats as possible, while the Battle Machine focuses on clearing the center of the base.

Deploy two Archers on the left side to trigger the Hidden Tesla, followed by two more Archers on the right side. Avoid saving troops for later stages, as having a higher number of troops increases the chances of quickly finishing the base and saves troops for the subsequent stage. Once you clear the first stage, proceed to the next stage through the cave entrance.

The second stage becomes relatively easy if you have a sufficient number of troops from the previous stage. The Night Witch proves invaluable once again, while the Battle Machine and the unchangeable reinforcement troop, the Boxer Giant, work together to clear almost the entire base. Use abilities strategically as needed, and you’ll be on your way to achieving a 6-star victory.

Builder Hall 7

With the presence of the Drop Ship, the first stage of Builder Hall 7 can be cleared with relative ease, as there are only two Archer Towers. Begin by deploying the Battle Machine to clear the outer area of the base. Simultaneously, deploy Drop Ships to handle the Crushers. As the Archer Tower focuses on the Battle Machine, deploy Minions to eliminate the remaining defenses.

Repeat the same strategy for the second stage, with the Battle Machine targeting one side, particularly to neutralize the Roaster, while Drop Ships and Minions clear the other side. Utilize abilities to counter traps effectively. This stage doesn’t require a complex approach and can be conquered with relative ease.

Gameplay
Gameplay

Builder Hall 8

Builder Hall 8 of the Clash of Clans Bonanza Challenge may appear difficult at first glance. However, the presence of the Power PEKKA makes it manageable. Deploy three PEKKAs, assigning one to each opening, followed by the Battle Machine. It’s crucial to eliminate the Crusher, so activate the Battle Machine’s ability when it’s in close proximity. Deploy Giants next and Barbarians near the Builder Hall to handle the Hidden Teslas.

The second stage poses a minimal threat if you have troops carried over from the previous stage. Begin from the side of the OTTO Hut, allowing the Battle Machine to eliminate the Firecracker. Accompany the Battle Machine with Raged Barbarians. Once the Roaster and Firecracker are neutralized, deploy Minions around the base, followed by the Copter on any side for an easy 6-star victory.

Builder Hall 9

In Builder Hall 9, your primary focus should be on the top side of the base. Deploy the Battle Machine and PEKKA, ensuring they reach the Crusher before activating their abilities. Use Hog Gliders in two separate directions to clear defenses, and deploy one in the center while using the rest from the opposite direction. Surprisingly, this strategy often results in a three-star victory.

In the second stage, troops carried over provide another advantage. Deploy the Battle Copter at the top of the base to eliminate the high-damage Double Cannon, Camps, and Crusher. This action significantly weakens the toughest part of the base. Next, spread out Hog Gliders to clear the remaining defenses, utilizing the Copter’s ability to neutralize Zappies.

Builder Hall 10

The final stage of the Clash of Clans Bonanza Challenge may be the toughest. In the first stage, target two corners with the new Wizard in Electro Mode to trigger its chain and eliminate the X-bow entirely. Once these defenses are cleared, deploy Giants, PEKKA, and the Battle Machine in the top center, focusing on neutralizing the Crusher by activating their abilities.

When your troops approach the Builder Hall, switch the Wizard’s ability to Inferno Mode to increase their attack speed. After clearing the Firecrackers, deploy the Baby Dragon on the left side, targeting the Cannons to swiftly clear the base.

The second stage follows a similar pattern as the previous stages. Begin by deploying the Giant and the Battle Machine to clear the outer portion of the base, with Archers providing support. Once the outer area is cleared, deploy the Wizards in Electro Mode to chain out the defenses inside. Place the Baby Dragon near the Teslas on the right side. The combined efforts of your troops and the reinforcement troops will ultimately secure victory in the challenge.

For more Guides, Tips, and Tricks

Check out our Video Games Guide Section for more dedicated guide

Tower of Fantasy Hide and Seek Deepsea Event Guide

Read the Tower of Fantasy Hide and Seek Deepsea Event Guide before you start the event. It has some important tips that you need.

Tower of Fantasy, the popular online role-playing game, has recently unveiled its highly anticipated Version 2.5 update. Packed with exciting new features and thrilling gameplay experiences, this update introduces a series of upcoming events and playable Simulacrums that are sure to excite players. 

One such event is the Hide and Seek Event, which takes place in the mesmerizing Deepsea area. If you’re eager to immerse yourself in this event, read our Tower of Fantasy Hide and Seek Deepsea Event guide. It has some valuable tips on how to make the most of your experience in the event.

1. Preparation Phase: Setting the Stage

The Hide and Seek Event consists of three stages, starting with the Preparation Phase. To embark on this thrilling adventure, participants must access the event through the corresponding screen within the designated countdown period. During this phase, you’ll have a total of 50 seconds to make a critical decision – whether to assume the role of an esteemed Optical Agent/Seeker (Blue) or the guise of a discreet Concealed Operative/Hider (Red).

Choosing your role wisely is crucial, as each role comes with unique skills and gameplay mechanics. If multiple individuals aspire to become Optical Agents, two fortunate players will be selected at random. In the absence of volunteers, two Optical Agents will be designated randomly from the pool of all participants.

2. Hiding Phase: The Art of Subterfuge

Once the Preparation Phase concludes, it’s time to enter the Hiding Phase. As the game begins, the esteemed Optical Agents will find themselves confined within the ready area for a predetermined duration of 45 seconds. Meanwhile, all Concealed Operatives will be discreetly relocated outside the ready area, their objective being to find suitable hiding spots and employ their ingenuity to remain undetected by the vigilant Optical Agents.

Concealed Operatives can seamlessly morph into various objects or skillfully blend into their surroundings, making it challenging for the Optical Agents to locate them. This phase requires strategic thinking, quick decision-making, and the ability to navigate the environment effectively. The better you conceal yourself, the greater your chances of success in this thrilling game of hide and seek.

3. Searching Phase: Unveiling the Mystery

Following the Hiding Phase, the stage is set for the search and pursuit to begin. The skilled Optical Agents, equipped with their sharp instincts and astute observation skills, must now endeavor to capture as many Concealed Operatives as possible within the given timeframe of 300 seconds.

During this intense search, the Optical Agents, accompanied by their trusted Agent’s Assistants, will meticulously scour the area, leaving no stone unturned in their quest to apprehend the elusive Concealed Operatives. Cooperation and effective communication among the Optical Agents and their Assistants are vital for success.

If the Optical Agents, with the assistance of their trusted Agent’s Assistants, manage to capture all the Concealed Operatives within the allocated time, victory will be claimed by the diligent Seekers team. However, if any Concealed Operatives remain uncaptured, the triumph will be attributed to the cunning Concealed Operatives and their counterparts, the Concealed Viruses.

Roles: Agent’s Assistants and Concealed Viruses

The first two Concealed Operatives who are captured have a choice to make. They can align themselves with the Agent’s cause and become Agent’s Assistants, assisting the Searching Agent in tracking down other Hidden Operatives. Alternatively, they can embrace their covert nature as Concealed Viruses, leveraging their unique skills to interfere with the Searching Agent and other Agent’s Assistants.

It’s important to note that while Agent’s Assistants play a supportive role, aiding the Searching Agent in locating the Hidden Operatives, they are not allowed to directly capture them. On the other hand, Concealed Viruses specialize in supporting Hidden Operatives by utilizing their unique skills to hinder the Searching Agent and other Agent’s Assistants. This dynamic adds an additional layer of complexity and strategic depth to the gameplay.

Tower of Fantasy Hide and Seek Deepsea Event: Roles Explained

Let’s take a closer look at the different roles in the Tower of Fantasy Hide and Seek Deepsea event:

Team Concealed:

Concealed Operatives:

Concealed Operatives form the hiding team during the match. Their primary goal is to find a suitable position to either morph, hide, or camouflage themselves from the opposing Seekers. They are granted a total of 45 seconds to accomplish this task. Once the hiding phase ends, their objective is to survive for a duration of 300 seconds without being caught. To aid them in their endeavor, Concealed Operatives have access to two unique abilities:

  • Transformation: This ability allows them to transform into a specific item within the game area. Tapping the ability again cancels the transformation.
  • Invisibility: By activating this ability, Concealed Operatives become temporarily invisible, making it difficult for the Seekers to locate them. However, movement or being scanned by certain abilities will make them visible again.

Concealed Viruses:

Concealed Viruses serve as the Assistants to Concealed Operatives. Once a Concealed Operative is caught by an Optical Agent and selects their role, they become a Concealed Virus. The primary objective of Concealed Viruses is to aid their fellow Operatives in winning the match and thwarting the efforts of the opposing Seekers. Similar to Concealed Operatives, they possess two unique abilities:

  • Speed Boost: This ability increases the movement speed of nearby Concealed Operatives by 30% for a duration of 10 seconds.
  • Confinement Space: By deploying this ability, Concealed Viruses create a space that only hinders the Optical Agent and Agent’s Assistants, providing an advantage to the hiding team.

Team Agents:

Optical Agents:

Optical Agents are tasked with the role of Seekers in the Hide and Seek Deepsea event. Their objective is to locate and capture every Concealed Operative within the given time frame of 300 seconds. During the Hiding Phase, Optical Agents are confined by a barrier and can only observe the Operatives through it. To enhance their chances of success, Optical Agents possess two unique abilities:

  • Scanner: By activating this ability, Optical Agents can scan a specific area centered on themselves. The color and special effects change when Concealed Operatives are detected within the scanned area, granting a speed boost to the Optical Agent.
  • Electromagnetic Trap: This powerful area-of-effect skill allows Optical Agents to eliminate Concealed Operatives upon contact, greatly aiding in their capture.

Agent’s Assistants:

Agent’s Assistants are counterparts to Concealed Viruses, but in the Seeker’s team. When a Concealed Operative is caught by an Optical Agent and chooses the Assistant role, they become an Agent’s Assistant. Unlike Optical Agents, Agent’s Assistants are not directly involved in capturing Operatives. Instead, their primary role is to assist the Optical Agent in hunting down hidden Operatives. Agent’s Assistants possess two unique abilities:

  • Fake Scanner: This ability mimics the Optical Agent’s scanner, enabling Agent’s Assistants to scan certain areas centered on themselves. Similar to the actual scanner, the color and special effects change when Concealed Operatives are detected within the scanned area.
  • Speed Reduction: By creating an area on the point, Agent’s Assistants can reduce the movement speed of Concealed Operatives by 50%, making it harder for them to escape.
Roles
Roles

Tower of Fantasy Hide and Seek Deepsea Event: Settlement Rewards

Rewards in the Tower of Fantasy Hide and Seek Deepsea event are divided into two categories: Result Rewards and Role Rewards. Each category offers unique incentives for players based on their performance and the roles they assume during the gameplay.

Optical Agent Rewards:

Players who take on the role of Optical Agents in Hide and Seek Deepsea have the chance to earn rewards regardless of whether they win or lose the match. Additionally, the number of operatives they successfully capture during the game also contributes to their overall rewards. The more operatives captured, the more substantial the rewards, even if the Optical Agents do not emerge as the victors.

Concealed Operative/Concealed Virus/Agent’s Assistant Rewards:

For players assuming the roles of Concealed Operatives, Concealed Viruses, or Agent’s Assistants, rewards are also based on their performance and the duration of time they manage to survive. The longer they remain undetected and uncaptured, the better their rewards become. In the event that they are caught by the opposing team, their objective shifts to assisting their teammates in achieving victory.

Tower of Fantasy Hide and Seek Deepsea Event Rewards

Upon completing a match in the Hide and Seek Deepsea event, players are rewarded with Event Currencies known as Camo Coins based on their performance during the game. These Camo Coins can be exchanged for various rewards and items in the in-game Store. Here is a comprehensive list of the rewards available for players to obtain:

  • Dark Crystal ×100
  • Red Nucleus
  • Avatar Frame: Brilliant Alloy
  • Mechbird: Head
  • Mechbird: Torso
  • Core Control Module
  • Augmentation Factor
  • Energy Crystal Dust ×100
  • Spacetime Crystal Fragments
  • SSR Relic Shard Box
  • SR Relic Shard Box
  • Joint Supply Chip I
  • Mira ×100
  • Cluster
  • Weapon Augmentation Box II
  • Weapon Augmentation Box I
  • Gold ×1,000
  • Weapon Battery III
  • Matrix Data Pack III
  • Elemental Ore Box
  • Elemental Ore Shard Box
  • Mechbird: Legs (Spend 8,000 tokens)
  • Mechbird: Core (Spend 8,000 tokens)
  • Core Control Module (Spend 8,000 tokens)
  • Augmentation Factor (Spend 8,000 tokens)
  • Fortress Microreactor (Spend 8,000 tokens)
  • Red Nucleus (Spend 8,000 tokens)

It is important to note that on the first day of the event, players can accumulate a maximum of 1,200 Camo Coins. However, this limit increases by 1,200 Camo Coins each subsequent day, culminating in a total of 16,800 Camo Coins at the end of the event.

For more Guides, Tips, and Tricks

Check out our Video Games Guide Section for more dedicated guide

How to Get the Heated Madness Blueprint in COD Warzone DMZ

Want to know how to get the COD Warzone DMZ Heated Madness Blueprint? Follow this guide till the end.

Weapon blueprints are a great feature in Call of Duty Warzone, offering players unique customizations for their favorite weapons. One such blueprint that has caught the attention of many is the DMZ Heated Madness blueprint for the Kastov 762. In this guide, we will walk you through the steps to unlock this blueprint in the Warzone’s DMZ, providing you with all the necessary details and tips to make your journey a successful one.

Gameplay
Gameplay

COD Warzone DMZ Heated Madness Blueprint

The DMZ Heated Madness blueprint for the Kastov 762 was introduced in the Reloaded mid-season update on May 10. Unlike many other blueprints that are locked behind paywalls, this particular blueprint can be obtained for free within the game. However, it does require some effort and determination on your part.

Unlocking the DMZ Heated Madness Blueprint

To unlock the DMZ Heated Madness blueprint, you will need to venture into the Koschei Complex, a hidden underground facility located in Al Mazrah. Your objective is to find all five parts of the custom Kastov 762 scattered throughout the complex and successfully exfil.

It’s worth noting that you don’t have to collect all five parts in a single run. If you prefer, you can acquire one piece at a time and exfil to save your progress. Now, let’s delve into the specific locations of each weapon part.

1. Heated Madness Magazine

To obtain the Heated Madness magazine, enter the Koschei Complex through the Oasis entrance. As you navigate the gas chamber puzzle, pay attention to the section names for each main room. The last main room should be labeled “Section One.” Look for a smaller bunker room adjacent to the main chamber, behind the tall gas tanks. The magazine case will be located at the very back of this room. Remember to equip a gas mask before entering, as the room is filled with toxic gas.

2. Heated Madness Barrel

To acquire the Heated Madness barrel, make your way to the Chemical Plant within the Koschei Complex. This area is pitch black, so it’s advisable to equip a pair of night vision goggles. Once inside, you will come across small offices and subterranean vents connecting the middle of the facility. Crawl into these vents, and you will find the barrel weapon part inside one of them at random. If you cannot locate it, it’s possible that another player has already secured it.

3. Heated Madness Grip

Obtaining the Heated Madness grip requires a spare car battery and jumper leads. After entering the Koschei Complex’s Chemical Plant, search for the large bunker door labeled C-2. Although the door lacks power, you can attach your battery and leads to an open panel nearby. Connect the parts, open the bunker, and proceed into the Alpha Cluster. Inside this room, you will find a collection of computer servers. 

Look for three AQ Laptops spread across the Koschei Complex and bring them to the raised servers in the Alpha Cluster. This action will allow you to interact with the server cluster, opening a nearby door that leads to a room filled with loot and the grip weapon case.

4. Heated Madness Optic

To acquire the Heated Madness optic, enter the Koschei Complex via the Taraq Road bridge bunker. Once inside, head towards the Barracks. As you progress through the flooded room, try to find a Rebreather if possible. Continue towards the Chemical Plant until you encounter a fork in your path after the first swimming puzzle. 

Take the right path twice until you come across a hole in the wall covered in wooden boards. Break through the wall, equip the rebreather, and dive into the water. At the back of the flooded room, you will discover a set of doors. Swim through and locate the optic weapon case in the back corner of the room.

5. Heated Madness Muzzle

The final piece, the Heated Madness muzzle, requires some additional effort. Similar to acquiring the grip, you may want to have an extra car battery and jumper leads at hand. Enter the Koschei Complex through any entrance and proceed to the Chemical Plant, then head into the Alpha Cluster. Along the way, be sure to find an R4D Detector, as it will be crucial for solving the final puzzle. Once inside the Alpha Cluster, locate a yellow door with a keypad on one of the balconies overlooking the main server room. Use your R4D Detector to observe three Cyrillic symbols above the keypad. 

Heated Madness
Heated Madness

These symbols represent the code to open the door in a specific order. Return to the center of the room and examine the blackboards around the server racks using the R4D Detector. Look for the three symbols with lines drawn connecting them to numbers. Once you have identified two numbers, make an educated guess for the third. You have unlimited attempts, so proceed to the keypad once you have two numbers. If the code is correct, the door will open, and you will retrieve the muzzle piece.

Conclusion

With this guide, you are now equipped with the knowledge and strategies to obtain the COD Warzone’s DMZ Heated Madness blueprint. Remember, each part of the blueprint can be collected individually, allowing you to progress at your own pace. Prepare yourself for the challenges within the Koschei Complex, and emerge victorious with the powerful Kastov 762 blueprint in your arsenal. 

For more Guides, Tips, and Tricks

Check out our Video Games Guide Section for more dedicated guide

Destiny 2 New Avalon Mission – Everything You Need to Know

Uncover the secrets of the new Destiny 2 Avalon mission. Dive into an exciting adventure, encounter popular characters, and unravel the mysteries of the Veil.

A new chapter unfolds in the vast universe of Destiny 2 Season 21, as Guardians prepare to embark on a thrilling adventure in the upcoming Avalon mission. This follows in the footsteps of the original Avalon mission introduced alongside the Lightfall expansion. This left players excited and eager for more. In this article, we will tell you everything you need to know about the Destiny 2 Avalon Mission.

Destiny 2 Avalon Mission

The first Destiny 2 Avalon Mission was shrouded in mystery, requiring Guardians to embark on a quest to locate hidden Vex nodes scattered throughout the European Dead Zone (EDZ). By successfully interacting with these enigmatic nodes, players unlocked the entrance to the secret mission. Although the details of the new Destiny 2 Avalon mission remain undisclosed, it is expected to involve beloved characters who played significant roles in the previous quest. This adds an extra layer of excitement and anticipation.

A Return to Mystery: Bungie’s Morse Code Tease

Bungie, the creative minds behind Destiny 2, rarely fails to excite its community. As the countdown to the Season of the Deep draws near, the developers took to Twitter with an enigmatic message. Accompanied by intriguing images depicting a Vex network, the cryptic code read “Assistant. Avalon Awaits.” This puzzling revelation raises intriguing questions and speculations. Who is the enigmatic assistant referred to in the message? 

If it is not Asher Mir himself, then who could this assistant be? Is there another branch of the Avalon node known as “assistant”? The answers to these questions remain elusive, adding an air of excitement and anticipation to the upcoming mission. Regardless, one thing is certain: Guardians will once again set foot within the Avalon network.

Unraveling the Veil: Clues within the New Mission

While many aspects of the new Destiny 2 Avalon mission remain shrouded in secrecy, speculation suggests that it may shed light on the Veil, a mysterious artifact intertwined with the forces of Light and Darkness. The veil has long piqued the curiosity of Guardians, and this mission might provide invaluable insights into its origin, purpose, and significance within the Destiny universe. As we eagerly await further details, one can only imagine the revelations and discoveries that lie in store.

Changes in the Upcoming Season

Destiny 2 might undergo a significant transformation in the Season of the Deep, promising a host of changes that will breathe new life into the game. The upcoming season marks the beginning of a series of alterations that were initially planned for the Lightfall expansion. Among the notable adjustments are weapon reticle enhancements, which aim to provide a more immersive and engaging experience for Guardians. 

Furthermore, an Exotic mission rotator is slated to arrive in the subsequent season, granting players the opportunity to revisit beloved fan-favorite missions such as Zero Hour and Whisper. The return of these iconic missions is sure to ignite nostalgia and excitement among Guardians, who will relish the chance to relive these memorable moments.

Exploring Titan’s Depths

One intriguing aspect of the Destiny 2 universe is the enigmatic moon of Titan. With the end of the Season of the Deep, players will finally be able to explore the depths of Titan’s vast oceans. This new frontier offers uncharted territories and untold mysteries waiting to be unraveled. 

Exciting leaks have also surfaced, suggesting that Guardians might even have the opportunity to engage in a spot of fishing within the world of Destiny 2. These additions, along with the broader overhaul planned for the upcoming season, signify Bungie’s commitment to continually expand and enhance the gaming experience.

For more Guides, Tips, and Tricks

Check out our Video Games Guide Section for more dedicated guide

New World Fury of the Spriggan Event Guide

The New World Fury of the Spriggan Event is coming and there are lots of rewards you can get from it. Learn everything below.

New World’s Fury of the Spriggan event is just around the corner, promising exciting gameplay and exclusive rewards for players who take on the invading Dryads. From May 24th through June 13th, Aeternum’s bravest warriors will join forces to confront these woody enemies and save the land from the fury of the Spriggan. In this guide, we’ll show you how to prepare for the event, where to find the Dryad Shamans, and what rewards you can expect to earn.

Fury of the Spriggan Event

Lore: The Wrath of the Earth

The Fury of the Spriggan event is not just a battle for loot and glory. It’s a struggle for the very soul of Aeternum. The Earth has been uneasy ever since the Ennead awoke, and the Dryads have gathered to summon a mighty Spriggan to strike down those who threaten the natural order. The Spriggan is a force of nature, a giant kin of the fauna who will stop at nothing to defend the land from corruption and destruction.

How to Participate in the Event

To join the Fury of the Spriggan event, all you need is a character level 20 or higher. Then, simply log in to New World during the event period (May 24th through June 13th) and look for the Dryad Shamans who will arrive on a regular basis to take out that fury.

You can encounter the Dryad Shamans in several locations throughout Aeternum, including Brightwood, Ebonscale Reach, Edengrove, Mourningdale, and Brimstone Sands. When you find them, be sure to construct Flame Braziers to strengthen your weapons before engaging in battle.

One strategy to keep in mind is that groups of 20 or more players can take on the Shamans that will spawn around these areas. Joining forces with other players will increase your chances of success and help you earn event-specific rewards.

How to Prepare for New World Fury of the Spriggan Event

To increase your chances of success in the Fury of the Spriggan event, you should take some time to prepare beforehand. Here are some tips:

Upgrade Your Weapons: The Dryad Shamans are tough opponents, so make sure your weapons are as powerful as possible. You can upgrade your weapons by visiting a Forge and using the resources you’ve gathered throughout your journey.

Stock Up on Consumables: During the event, you’ll face a lot of enemies, and you’ll need to keep your health and stamina high. Make sure you have plenty of food, potions, and other consumables to keep you going.

Join a Company: Joining a Company is a great way to meet other players and coordinate your efforts during the event. You can share resources, trade items, and support each other during battles.

What Rewards Can You Expect?

  • The Fury of the Spriggan event offers a range of rewards for players who participate. These rewards include:
  • Guaranteed Useful Items: You can earn a range of useful items during the event, including consumables and Obsidian Gypsum.
  • Event-Specific Rewards: Complete event-specific challenges and receive special rewards, including exclusive gear and weapons.
  • Major Loot: In addition to the guaranteed rewards, players have a chance to earn major loot during the event.

New World Fury of the Spriggan Event Rewards for Completing the Event

Each victory in the New World Fury of the Spriggan Event will yield one of the following rewards:

  • There’s a 50% chance of receiving a procedural weapon or armor piece suitable for your current level. The guaranteed rarity for these items is Rare or higher.
  • There’s a 30% chance of acquiring an item from the Global Named List.
  • There’s a 20% chance of obtaining an item from the Spriggan Arena Named List.

Additionally, there are several other guaranteed spoils that players can look forward to:

  • Various container resources can be obtained through a dice roll.
  • You’ll have a chance to receive consumables appropriate for your level, such as health and mana potions.
  • Each completion awards you with 1 Obsidian Gypsum, while adhering to the standard 3x loot limit.

New World Fury of the Spriggan Event Daily Bonus Rewards

While players have the opportunity to defeat the Spriggan multiple times within a day, they can only receive a maximum of 3 daily bonus rewards. These rewards reset at 5 AM local time. For instance, if a player claims their third Cache at 4:58 AM, they’ll be eligible to earn another at 5:01 AM.

Defeating the Spriggan will grant you a special Cache, which can be earned up to 3 times a day. The Cache contains event-specific loot, including:

1 event-exclusive Mossborne Weapon:

  • Guaranteed to possess Weapon Appropriate Attribute
  • Comes with an Empty Gem Slot
  • Features Angry Earth Bane Perk

1 event-exclusive Mossborne Armor Piece:

  • Guaranteed to have Armor Weight Appropriate Attribute
  • Contains an Empty Gem Slot
  • Possesses Angry Earth Ward Perk
  • 250 Umbral Shards
  • 3 to 5 Flame Cores

Triumphant players will also have the chance to roll for additional rewards:

  • A 33% chance to acquire one of 12 selected perk resources.
  • A 25% chance to obtain one of 6 exclusive Named items.
  • A 5% chance of receiving a Timeless Shard.
  • Lastly, there’s a 2% chance of acquiring the Spriggan Flame Brazier housing item with each roll. This percentage chance slightly increases after each attempt.
Fury of the Spriggan Event

Conclusion

The Fury of the Spriggan event is a thrilling opportunity for New World players to band together and fight for the fate of Aeternum. By preparing your weapons, stocking up on consumables, and joining forces with other players, you can take on the Dryad Shamans and earn a variety of rewards.

For more Guides, Tips, and Tricks

Check out our Video Games Guide Section for more dedicated guide

How To Get Mythic Spider-Verse Web Shooters in Fortnite Chapter 4 Season 2

Want to know how to get the Mythic Fortnite Spider-Verse Web Shooters? This guide will tell you every detail you need to know.

Fortnite Chapter 4 Season 2 has brought exciting new content to the game with its latest update 24.40. One of the most thrilling additions is the collaboration with the upcoming Spider-Verse movie. It has been introducing a range of Spider-Verse-themed items, cosmetics, challenges, and even mythic items. Among these, the highly coveted Fortnite Spider-Verse Web Shooters offers a stylish accessory. It is also a valuable mobility tool for navigating the Fortnite map.

If you’re eager to get your hands on the Mythic Fortnite Spider-Verse Web Shooters, this guide will assist you in locating and obtaining these powerful items.

Finding the Mythic Fortnite Spider-Verse Web Shooters

In Fortnite Chapter 4 Season 2, the Spider-Verse Web Shooters can be acquired from chests. These are scattered throughout the game’s expansive map. These chests are randomly placed, presenting an element of excitement and unpredictability as you explore different areas in search of this mythic item. However, there are specific locations where the chances of discovering the Web Shooters are notably higher.

To maximize your chances of obtaining the Mythic Spider-Verse Web Shooters, consider exploring the following areas:

Landmark Locations:

  • Weeping Woods: This lush forested area often hides valuable loot, including mythic items.
  • Lazy Lake: The bustling town of Lazy Lake may hold surprises, so explore its buildings and surroundings thoroughly.
  • Misty Meadows: This scenic village boasts various chest spawns, making it a promising location for finding Web Shooters.
  • High-Traffic Zones:
  • Salty Towers: As a popular landing spot for players, Salty Towers presents an increased likelihood of encountering chests with mythic items.
  • Retail Row: The revamped Retail Row is a bustling area where numerous chests may contain the coveted Fortnite Spider-Verse Web Shooters.

It’s important to note that the specific locations with higher chances of obtaining the Mythic Spider-Verse Web Shooters may change as the game evolves. Staying up-to-date with the latest Fortnite news and updates will help you adjust your search strategy accordingly.

Understanding the Spider-Verse Web Shooters

Once you acquire the Mythic Fortnite Spider-Verse Web Shooters, you’ll notice they function similarly to the Spider-Man Mythic Web Shooters from a previous collaboration. However, in this Spider-Verse collaboration, the Web Shooters feature a fresh appearance and possess 80 uses before they need to recharge.

The Web Shooters provide remarkable mobility, allowing you to swing through the map like a true superhero. As you engage in battles or traverse the terrain, the Web Shooters grant you enhanced maneuverability and the ability to quickly rotate, gaining a tactical advantage over your opponents. Additionally, the Web Shooters can be used to complete specific challenges, earning you valuable rewards along the way.

Keep in mind that the Mythic Spider-Verse Web Shooters are available only during the collaboration event with the Spider-Verse movie. Therefore, make sure to seize the opportunity and make the most of these extraordinary items while they are accessible in Fortnite Chapter 4 Season 2.

For more Guides, Tips, and Tricks

Check out our Video Games Guide Section for more dedicated guide

Lost Ark Lullaby Island Guide

With the help of the Lost Ark Lullaby Island guide, you will learn everything about this island. Explore and get the rewards quickly.

Lost Ark is a popular MMORPG game with a vast world full of surprises, secrets, and collectibles. One of the most popular items in the game is the sheet music. It allows players to play beautiful melodies in-game. In this guide, we will take you through everything you need to know about finding Lost Ark Lullaby Island. Here, you can get your hands on the Forest Minuet sheet music.

Lost Ark
Lost Ark

What Is Lost Ark Lullaby Island?

Lost Ark Lullaby Island is a small island located in the southwestern part of the game’s world. The island is home to a unique questline that rewards players with the Forest Minuet sheet music upon completion. The island used to be a limited-time event, but it became so popular that it was later added permanently to the game’s world.

How to Reach Lullaby Island

Before you can access Lullaby Island, you must reach the end-game portion of Lost Ark. This means you must have a combat level of at least 50 and access to Lost Ark ships. Once you meet these requirements, you can begin your journey to Lullaby Island.

To reach Lullaby Island, you first need to purchase the Song of Resonance from an NPC named Treasure Hunter Igran. You can find him on the Deck Ship on Pleccia Island. It is located to the west of the Anikka continent. The Song of Resonance costs 16,500 Lost Ark Pirate Coins. You can earn it by completing quests, defeating monsters, and selling items.

Once you have the Song of Resonance, head to the southwestern part of the Anikka continent, and you will find Lullaby Island. Dock your ship, and enter the island to begin the questline.

Quests on Lost Ark Lullaby Island

The questline on Lullaby Island is quite unique and takes you through a variety of tasks. This includes puzzle-solving, combat, and music playing. The main objective of the questline is to help a group of Mokoko birds reunite with their lost family members.

As you progress through the questline, you will unlock various rewards. This inlcudes Lost Ark Pirate Coins, gear, and, most importantly, the Forest Minuet sheet music. To complete the questline, you will need to solve puzzles, defeat monsters, and play the right notes on your instrument.

Lost Ark Mokoko Seeds on Lullaby Island

In addition to the questline, Lost Ark  Lullaby Island is also home to Mokoko Seeds. These collectibles can be found scattered throughout the island and can be exchanged for rewards such as Pirate Coins, gear, and more.

To find the Mokoko Seeds, you will need to explore the island thoroughly, searching every nook and cranny for these hidden treasures. Some of the seeds are easy to find, while others are more challenging and require you to solve puzzles or defeat enemies.

Starting the Quest Chain on Lost Ark Lullaby Island

To start the quest chain on Lost Ark Lullaby Island, you need to find an NPC called Traveler Eclipse. Once you find Traveler Eclipse, they will give you the first quest in the chain, called The Forest Where Fairies Sing. This quest will require you to find three fairies across the island, who are invisible but can be located by getting close to them.

The first fairy is located on the west side of the island, the second in the centre of the island, and the third in the north. Each fairy will ask you a series of questions, which you need to answer correctly to progress the quest. Make sure you pay close attention to the questions and answer them correctly, as getting them wrong will result in failure.

After talking to all three fairies, the second quest in the chain will trigger, directing you towards a secret passage on the east side of the island. To enter the cave, you will need to play the Song of Resonance, which you can learn by interacting with the pianos scattered around the island. Once inside the cave, the last quest will trigger, asking you to play the Song of Resonance three more times to receive three Voice of the Forests.

Claiming the Forest Minuet Song

After collecting the three Voice of the Forests, you need to return to the third fairy and give her the items. This will result in her awarding you the Forest Minuet song and the quest finishing. The Forest Minuet song is a beautiful melody that you can play on your flute, and it is a great addition to your music collection.

Thaitalos Lost Ark Guardian Raid

If you are looking for a challenge on Lost Ark Lullaby Island, then you should consider taking part in the Thaitalos Lost Ark Guardian Raid. This raid is a difficult but rewarding activity that requires a group of players to work together to defeat Thaitalos, a powerful guardian who is terrorizing the island.

To participate in the raid, you need to be at least level 50 and have a group of five or more players. Thaitalos is a tough opponent, so you need to come prepared with the right gear and skills. If you manage to defeat Thaitalos, you will be rewarded with powerful items and valuable loot.

Island location
Island location

Other Activities on Lullaby Island

Apart from the quest chain and raid, Lost Ark Lullaby Island offers a range of other activities that you can enjoy. One of the most popular activities on the island is fishing, which allows you to catch a variety of fish and earn rewards. You can also explore the island and discover hidden treasures, which can include rare items and valuable loot.

If you are looking for a break from the action, you can visit the island’s hot springs and relax in the warm waters. The hot springs offer a range of benefits, including restoring your health and giving you a temporary buff. You can also interact with the NPC on the island and learn more about the island’s history and lore.

Conclusion

Lost Ark Lullaby Island is a unique and exciting destination for players who are looking for something new in the game. By completing the quest line on the island, you can obtain the Forest Minuet sheet music and other valuable rewards. Additionally, the island is home to Lost Ark Mokoko Seeds, which offers even more opportunities for exploration and discovery.

For more Guides, Tips, and Tricks

Check out our Video Games Guide Section for more dedicated guide