The Diablo 4 Aspect of Fortune is one such Aspect that requires a special method to obtain. Do not know how to obtain it? Read below.
As you go deeper into the world of Diablo 4, you’ll discover that Aspects play a crucial role. It helps in elevating your Epic gear to Legendary status. By imbuing your favorite equipment with an Aspect, you can unlock unique buffs and statistics that you cannot obtain through any other means. Many Aspects are readily available through dungeon exploration and boss battles. But, there are a select few, like the Diablo 4 Aspect of Fortune, which require additional effort to acquire. In this guide, we will explore the methods to obtain the Diablo 4 Aspect of Fortune.
Finding the Diablo 4 Aspect of Fortune
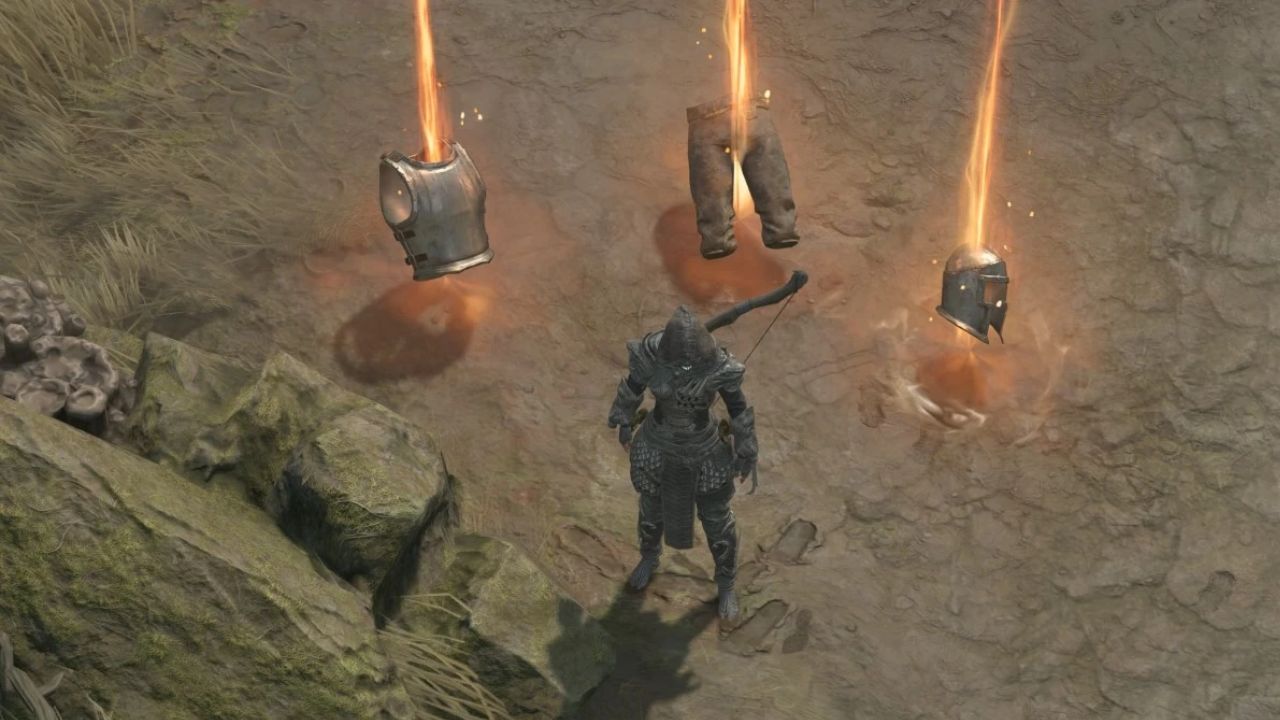
Unlike most Aspects that you can earn by progressing through dungeons and defeating powerful enemies, the Aspect of Fortune demands a different approach. To obtain this rare Aspect, you must first locate a piece of gear that already possesses it. Keep in mind that the Aspect of Fortune is not in the Codex of Power, making it all the more intriguing and challenging to obtain.
Extracting the Aspect
Once you’ve managed to find a piece of gear adorned with the Diablo 4 Aspect of Fortune, the next step is to extract it. This process requires the assistance of an occultist, who possesses the necessary knowledge and skills to separate the Aspect from the gear. However, it’s important to note that extracting the Aspect will result in the loss of the original piece of gear. Nevertheless, you will gain the ability to transfer the Aspect onto another equipment of your choice. This extraction method is the sole means of acquiring the Aspect of Fortune in Diablo 4.
After the extraction, you will receive the Aspect of Fortune as an item in your inventory. Now comes the exciting part, you can choose which piece of equipment you want to bind the Aspect to. Whether you prefer to enhance your helm, chest armor, gloves, boots, shield, or amulet with the Aspect of Fortune, the choice is yours. Select the gear that best complements your playstyle and maximize the benefits of this powerful Aspect.
Tips and Strategies to Get Aspects
While acquiring the Aspect of Fortune may heavily rely on luck and chance, there are some strategies you can employ to increase your odds:
Trading with Other Players: Engage in the vibrant player-driven economy of Diablo 4 by trading with other players. Keep an eye on trading forums or community platforms where players might offer gear pieces with the Diablo 4 Aspect of Fortune. Negotiate fair trades and enhance your chances of obtaining this rare Aspect.
Completing Challenging Quests: Diablo 4 is known for its rewarding quests that test your skills and determination. Some of these quests may offer gear pieces with the Aspect of Fortune as a valuable reward. Take on challenging quests, face formidable enemies, and reap the benefits of your perseverance.
Exploring Hidden Areas: Diablo 4 is a vast world with secrets and hidden treasures. Explore every nook and cranny, venture into uncharted territories, and discover hidden areas that may contain gear pieces imbued with the Aspect of Fortune. Keep your eyes open for clues, hints, and suspicious locations that might lead you to this elusive Aspect.
Participating in Events: Keep track of in-game events and seasonal activities that Diablo 4 offers. These events often introduce special loot tables that may include gear pieces with the Aspect of Fortune. Participate actively in these events, complete event-specific challenges, and increase your chances of obtaining this highly desirable Aspect.
The Power of the Diablo 4 Aspect of Fortune
The Diablo 4 Aspect of Fortune is categorized as a Utility Aspect specifically designed for the Sorcerer class. This powerful Aspect can be bound to various pieces of equipment, including Helmets, Chest Armor, Gloves, Boots, Shields, and Amulets. When equipped, the Aspect of Fortune increases your chance of landing a lucky hit by 10-20% while you have an active barrier. If you choose to bind it to an Amulet, its potency is enhanced by an additional 50%. This Aspect is highly sought after by players who wish to maximize their luck and increase their chances of success in combat.
Gameplay
Conclusion
The Aspect of Fortune in Diablo 4 is a rare and powerful Utility Aspect that enhances your chances of landing lucky hits while you have a barrier active. Acquiring this Aspect requires finding a gear piece already imbued with it and extracting the Aspect through the occultist. Careful consideration should be given to the gear piece you choose to sacrifice for the Aspect.
Explore trading options, complete challenging quests, and explore hidden areas to increase your chances of obtaining this highly sought-after Aspect. With the Aspect of Fortune by your side, you can tip the scales of luck in your favor and attain greater success in your Diablo 4 adventures.
If you want to make the crystallized green potion then you must get the Disney Dreamlight Valley Green Potato as soon as possible.
Are you on a quest to obtain the Disney Dreamlight Valley Green Potato? Look no further! In this guide, we will walk you through the steps necessary to acquire this essential ingredient for brewing the Crystallized Green Potion. From unlocking a specific biome to completing mandatory quests and fostering friendships, we have you covered.
Gameplay
Where to Find the Disney Dreamlight Valley Green Potato
To begin your journey towards obtaining the Disney Dreamlight Valley Green Potato, you must first acquire the Green Seed. The Green Seed can be obtained from the crystal ball located in the Herbalist Room. However, before you can access the Herbalist Room, there are a few tasks you need to fulfill.
Obtain all 16 Emerald Bottles and craft the Jade Crystal.
Complete the Simba’s Dreamlight Tree quest.
Achieve friendship level seven with Simba, your furry companion in Disney Dreamlight Valley.
Once you have met these requirements, head to the Sunlit Plateau biome. In this enchanting realm, you will find the crystal ball in the secret Herbalist Room within Vitalys Mine. Interact with the crystal ball using the Jade Crystal to obtain the precious Green Seed.
Planting the Green Seed
With the Green Seed in hand, it’s time to find the ideal location to plant it and nurture the growth of your Green Potato. The designated biome for planting the Green Seed is the Forgotten Lands. Journey to this tranquil and mysterious realm, and prepare to witness the magic of nature unfold.
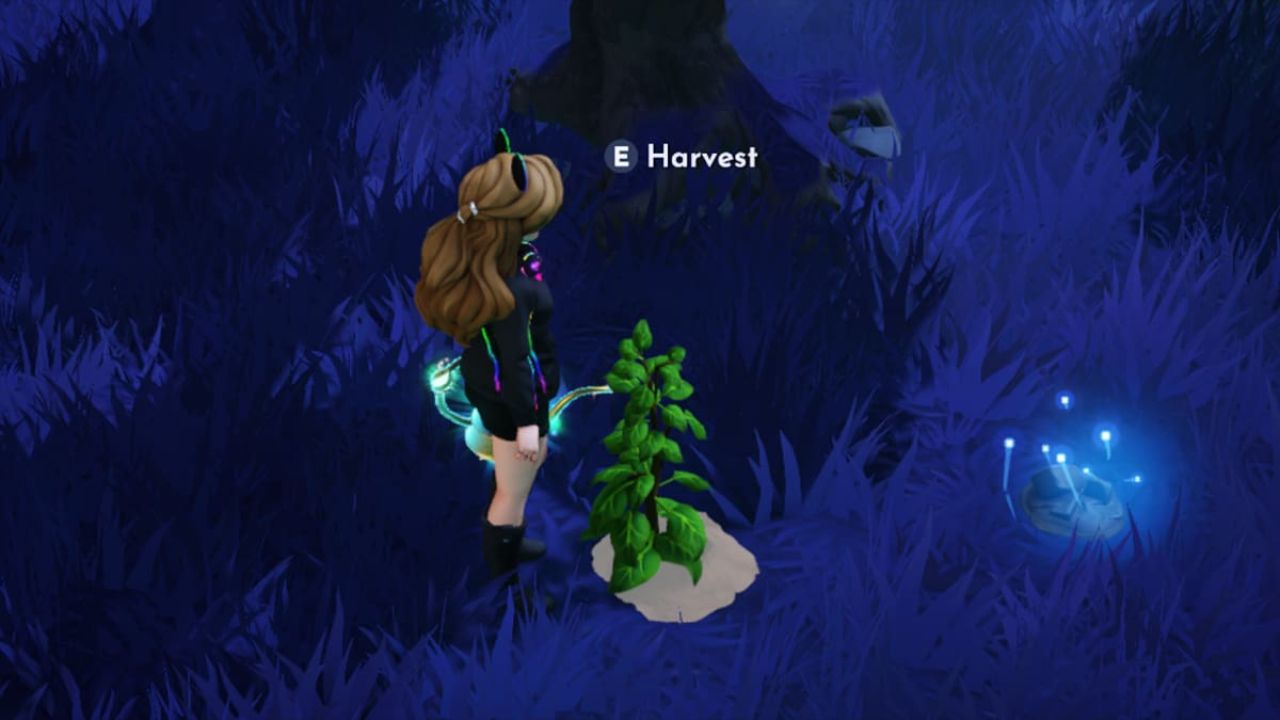
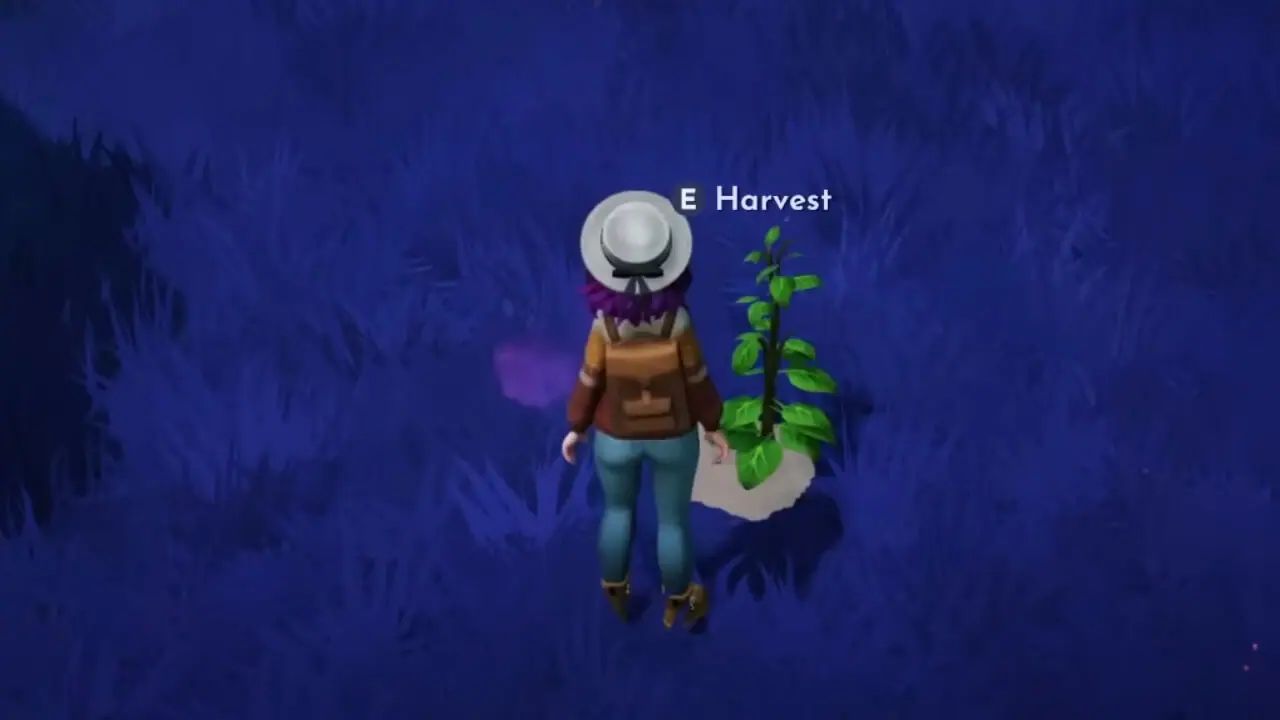
Growing the Green Potato
Find a suitable spot within the Forgotten Lands biome.
Carefully plant the Green Seed in the fertile soil.
Exercise patience as the Green Potato takes approximately 1-2 hours to grow.
Optionally, you can use the Miracle Growth Elixir to expedite the growth process. However, be aware that serums can sometimes introduce bugs and glitches that may interfere with quest-related seeds.
Brewing the Crystallized Green Potion
Once your Green Potato has fully matured, it’s time to unlock its potential by crafting the Crystallized Green Potion. This mystical potion holds immense power and can aid you in your adventures within Disney Dreamlight Valley.
To brew the Crystallized Green Potion, you will need the following ingredients:
Green Potato
Jade Crystal
Empty vial
Gather these items and find a suitable brewing station. Combine the Green Potato, Jade Crystal, and an empty vial, following the proper proportions and brewing techniques. Exercise caution and precision to ensure the successful concoction of the Crystallized Green Potion.
Gameplay
Conclusion
Congratulations on unlocking the secrets of acquiring the Disney Dreamlight Valley Green Potato. Through our guide, you have learned the necessary steps to obtain the Green Seed, plant it in the Forgotten Lands biome, and brew the Crystallized Green Potion.
In this Roblox Murder Mine walkthrough, we will see the perilous depths of the mine, deftly evading deadly traps, and unraveling intricate puzzles. We will guide you through both, good and bad endings.
The world of Roblox Murder Mine presents a hauntingly immersive gaming experience, casting you into a foreboding mine teeming with danger and concealed enigmas. This walkthrough guide will take you through each step of your journey, giving valuable tips and tricks to outwit the murderous enemy, amass rare artifacts, and ultimately emerge as the revered hero of Murder Mine.
Roblox Murder Mine Good Ending
To get a good ending in Roblox Murder Mine, diligently follow the step-by-step instructions provided below from the moment you initiate the game.
Step 1: Locating the Key
Upon entering the game, your first objective is to search your surroundings and acquire a key. This key will prove invaluable shortly when you encounter a padlocked area that requires unlocking. The key in Murder Mine Roblox can be discovered either upstairs in one of the houses or within the wooden seat of an abandoned bathroom. Once obtained, use the key to unlock the padlock on a nearby door.
Step 2: Journey to the Elevator
Since your primary goal in the Murder Mine Roblox walkthrough is to reach the mine itself, you must make your way to the elevator. Follow these precise steps to access the Mine’s elevator:
Upon entering the house and unlocking the padlock, you will encounter a puzzle consisting of wooden boards. Tread lightly on each board until all but one collapses. Repeat this process for the subsequent set of boards and navigate through the puzzle. Proceed until you stumble upon a fuse board adorned with switches on your left-hand side. To successfully solve the puzzle, flip the switches in the following order: right, left, right, right, left.
Exit the house and locate a conspicuous red button. Depress the button to raise the shutter guarding the entrance to the Mine’s elevator. Pass through the doors and ascend the stairs to remove the obstruction impeding the elevator’s mechanism. Descend back down and step into the Mine’s elevator, thereby entering the mine itself.
Step 3: Clearing the Path within the Mine
In the subsequent phase of the Murder Mine Roblox walkthrough, you must rectify the damaged rail tracks and eliminate any obstacles obstructing your path within the mine. To achieve this, attentively execute the following actions throughout the mine:
Collect any wooden planks you encounter.
Gather explosives or dynamite along your journey.
Retrieve missing rail tracks necessary for repairing the broken sections of the tracks.
Notice an axe lodged in the body of an ailing station master. Retrieve the axe from the floor.
Upon entering the mine, activate the lever near the trolley to set it in motion. Traverse the mine’s labyrinthine corridors until you reach a table adorned with various tools. Acquire the screwdriver from this table. Proceed to encounter several mesh doors that necessitate unscrewing, which can be accomplished using the recently acquired screwdriver.
Near the mesh door leading to Norman’s Domain, you will locate the trolley. Place the collected explosives inside the trolley, activate the lever, and initiate the explosion. Subsequently, navigate through the mine until you encounter a wooden maze resembling the following pattern:
Step 4: Go through the Maze
Go through the maze, and you will arrive at a doorway obscured by planks. Use the axe you acquired to break through the obstruction. Await the arrival of the bridge and cautiously traverse it. Shortly thereafter, you will confront a perilous puzzle equipped with swift blades. Go through the puzzle and ascend the wooden planks, leading you to a room containing a table replete with various tools. Acquire the blue drill from this table, as it will prove indispensable in your escape from the mine.
Once the drill is secured, retrace your steps through the treacherous puzzle and return across the bridge. Proceed through the mine’s corridor until you encounter a wall featuring an on-and-off switch. Activate the switch and utilize the drill to unscrew the door, thereby opening the mesh door leading to the wooden plank pathway. Utilize the wooden planks you have gathered to complete the path. Cross the path, and freedom from the mine shall be within your grasp.
Step 5: Overcoming Radioactive Spiders & Webs
Upon successfully going through the wooden planks, you shall find yourself immersed in the treacherous realm of radioactive spiders within the Roblox Murder Mine. Your mission now entails mending severed wires, eradicating intricate webs, and discovering an escape route from the spiders’ den. Perform the following actions to progress:
Repair any severed wires encountered throughout the cave.
Within the spider webs, locate containers of gasoline and petroleum gel.
Return to the starting point of the cave, where you will discover a table equipped with an on-and-off switch and a peculiar machine. Pour the contents of the containers into the designated receptacle. Activate the machine’s switch and subsequently collect the combustible mixture it generates.
Use this potent flammable mixture to incinerate all webs within the cave. Once this task is completed, ensure all severed wires have been properly repaired.
Locate a switch near a fleeing spider near a corpse clutching a pickaxe. Retrieve the pickaxe from the lifeless body. Progress through the cave until you encounter a wall obstructing your path. Use the recently acquired pickaxe to carve a route through the obstruction. Your next destination lies beyond the wall—venture forth.
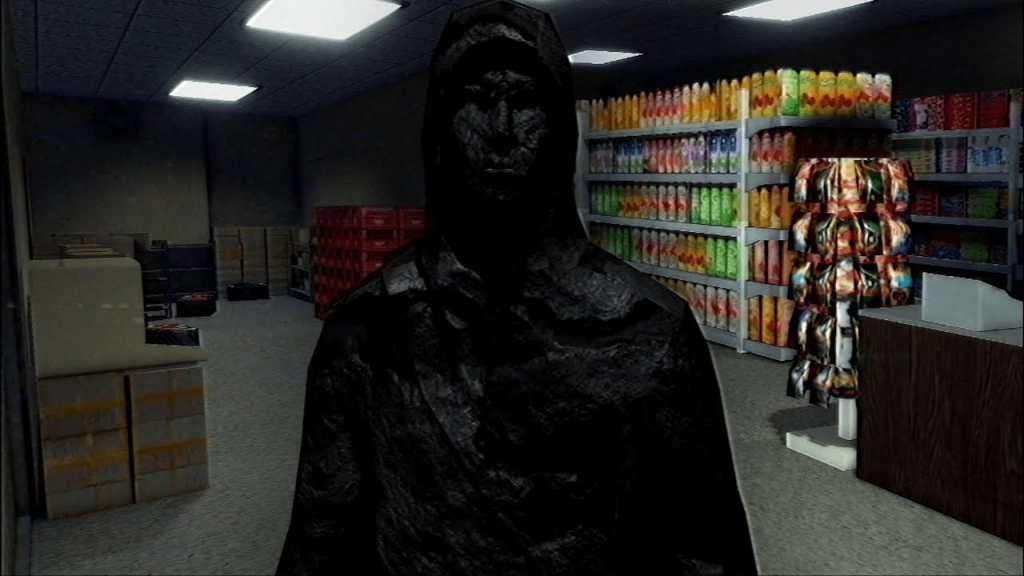
Roblox Murder Mine
Step 6: Discovering the Path to Freedom
To ultimately achieve the desired conclusion of the Roblox Murder Mine, you must go through a perilous gauntlet of tumbling boulders. Once you successfully evade these obstacles, a clear path shall materialize, leading you directly to the train that promises freedom. Board the train without hesitation to attain the long-awaited good ending within the Roblox Murder Mine.
Roblox Murder Mine Bad Ending
Within the alternate realm of the Roblox Murder Mine, the course of events is similar to that of the good ending. However, there is a little difference in the final moments. Regrettably, in the bad ending, the train departs without you, leaving you stranded and, ultimately, meeting an unfortunate demise.
Embark on your adventure with caution, and remain vigilant throughout your exploration of Roblox Murder Mine. By diligently following this walkthrough, you can achieve the good and bad endings.
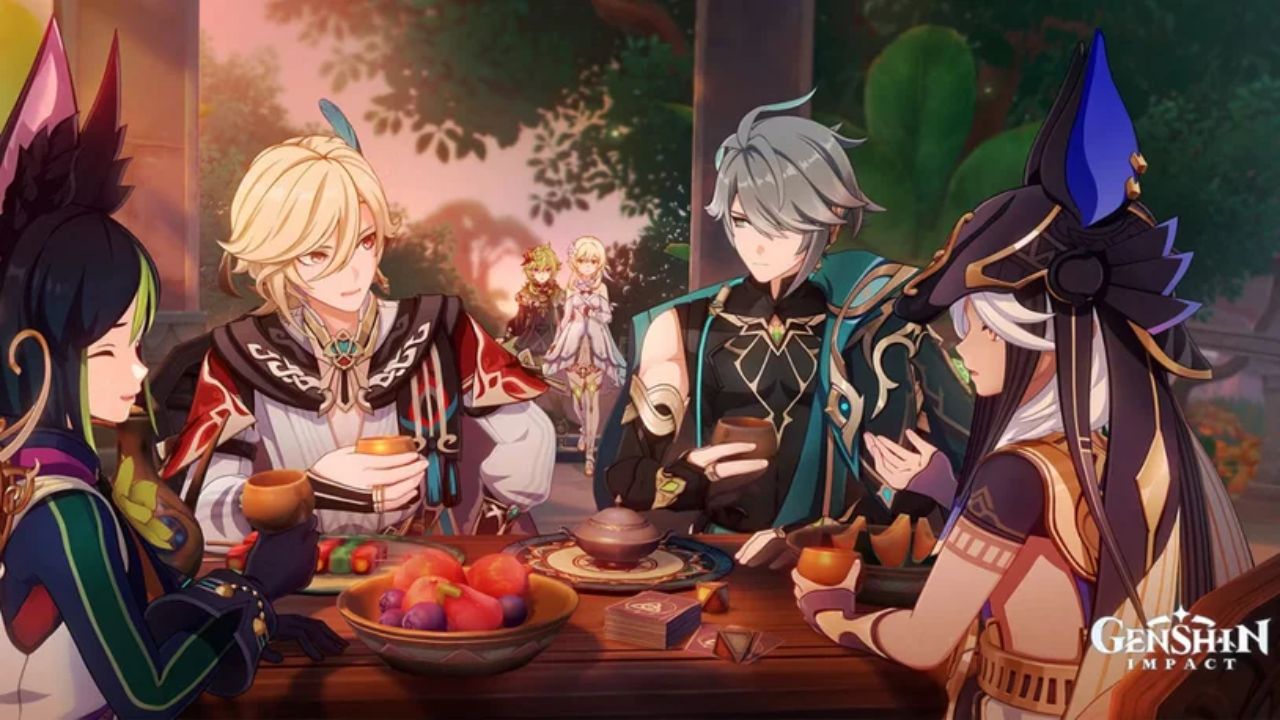
If you’re intrigued by Kaveh, the popular architect from Sumeru, this Genshin Impact Kaveh Hangout Event provides a perfect opportunity to delve deeper into his story.
Genshin Impact Kaveh Hangout Event offers an immersive and engaging experience, allowing you to uncover the various outcomes of Kaveh’s story through your choices. By following our guide, you can navigate the event with ease and unlock all the endings. Remember, the choices you make shape the story. In this article, we will walk you through the entire Genshin Impact Kaveh Hangout Event, ensuring you reach every ending and unlock all the rewards.
Genshin Impact Kaveh Hangout Event
To embark on the Kaveh Hangout Event, you’ll need two Story Keys, just like previous Hangout Events in Genshin Impact. You can acquire additional Story Keys by completing Daily Commissions. However, before you can begin your adventure with Kaveh, make sure you meet the following prerequisites:
Reach an Adventure Rank of 40 or higher.
Complete Archon Quest Chapter III, Act V: Akasha Pulses, the Kalpa Flame Rises.
Complete Alhaitham’s Story Quest.
Once you fulfill these requirements, you are ready to dive into the captivating world of Kaveh’s Hangout Event.
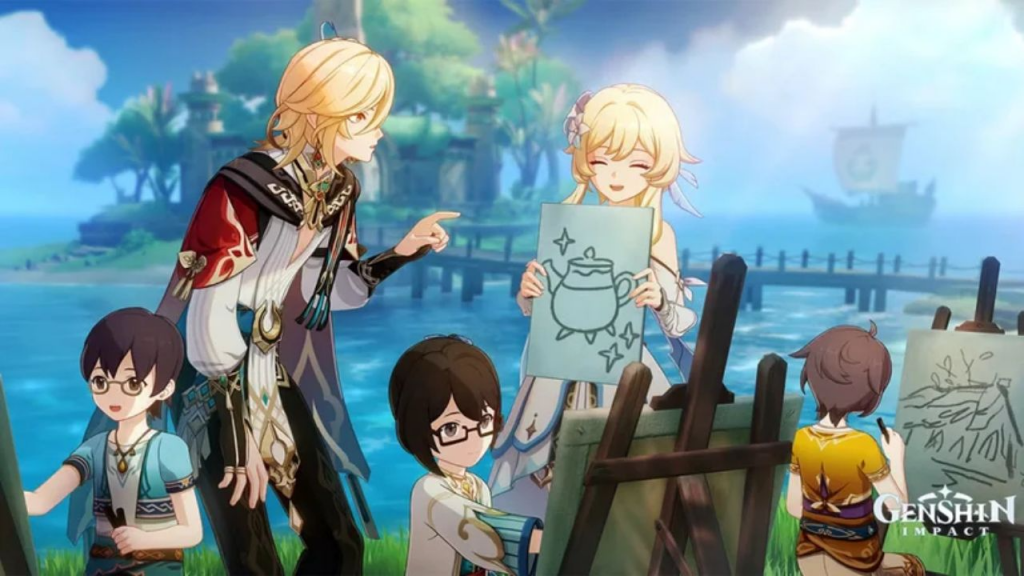
Exploring Every Genshin Impact Kaveh Hangout Event Ending
The Kaveh Hangout Event offers five distinct outcomes, each determined by the choices you make throughout the story. Don’t worry; you can replay the Hangout as many times as you desire to experience every ending and claim the associated rewards. In your Journal’s Hangout Event menu, you can review the branching storylines and easily skip to previously unlocked sections. Our comprehensive walkthrough below highlights the key choices influencing each ending. If a particular action or dialogue option isn’t explicitly mentioned, feel free to make your preferred selection.
Kaveh Hangout Event: Ending 1
Commissioner Quarrel: No key choices.
Tavern Heart-to-Heart: When the Traveler attempts to cheer up Kaveh, suggest, “I’ll help you convince the client to come to your side.”
Searching for the Commissioner: No key choices.
Concealed Circumstances: Upon reaching Port Ormos, when Kaveh asks for suggestions, propose, “Can we try a slightly different style?”
Field Study: No key choices.
Kaveh Hangout Event: Ending 2
Commissioner Quarrel: No key choices.
Tavern Heart-to-Heart: When the Traveler tries to cheer up Kaveh, suggest, “I’ll help you convince the client to come to your side.”
Searching for the Commissioner: No key choices.
Concealed Circumstances: After reaching Port Ormos, when Kaveh seeks advice, propose, “Would any other merchants be willing to sponsor the project?”
Attempted Persuasion: No key choices.
A Merchant Most Famous: No key choices.
Genshin Impact Kaveh Hangout Event: Ending 3
Commissioner Quarrel: No key choices.
Tavern Heart-to-Heart: When the Traveler tries to cheer up Kaveh, suggest, “Let’s do something else and clear your mind.”
Tavern Heart-to-Heart: When Kaveh asks what you want to do, inquire, “Why did you decide to become an architect?”
A Dear Memento: While discussing the locked notebook with Kaveh, choose, “We can try asking some of her old acquaintances…”
The Missive Locked Away: No key choices.
Companionship, the Sole Antidote: No key choices.
Kaveh Hangout Event: Ending 4
Commissioner Quarrel: No key choices.
Tavern Heart-to-Heart: When the Traveler tries to cheer up Kaveh, suggest, “Let’s do something else and clear your mind.”
Tavern Heart-to-Heart: When Kaveh asks what you want to do, inquire, “Why did you decide to become an architect?”
A Dear Memento: While discussing the locked notebook with Kaveh, suggest, “Then maybe we should put it aside for now.”
The Temple of Wisdom: After completing the ‘Go to the House of Daena’ quest objective, prior to following Kaveh to Port Ormos, you have an opportunity to unlock the hidden “School Days” achievement. Simply read the three nearby books on the library shelves.
Successes and Regrets: No key choices.
Desert Sanctum: No key choices.
Ending 5
Completing this ending automatically awards the “An Architect’s Romanticism” achievement.
Genshin Impact Kaveh Hangout Event: Ending 5
Commissioner Quarrel: No key choices.
Tavern Heart-to-Heart: When the Traveler tries to cheer up Kaveh, suggest, “Let’s do something else and clear your mind.”
Tavern Heart-to-Heart: When Kaveh asks what you want to do, propose, “How about looking into another career?”
Educational Organization: No key choices.
Arrested Development: No key choices.
The Best Building: No key choices.
By completing every Genshin Impact Kaveh Hangout Event ending, you will be rewarded with the “Art and Life” achievement.
Master II and III Flux Construct Tears Kingdom boss fights with our expert tips! Learn how to beat these challenging enemies and conquer the game.
In this guide, we will tell you how to conquer Flux Construct Tears Kingdom Boss. As powerful variants of the first Flux Construct miniboss, these powerful enemies require a strategic approach and careful execution to emerge victorious. Learn the specific tactics and techniques necessary to defeat both II III Flux Construct Tears Kingdom Boss. We will provide you with the knowledge and skills to overcome these challenging encounters.
Gameplay
Tips for Fighting II Flux Construct Tears Kingdom
Flux Construct II introduces a range of new abilities and behaviors, demanding adaptability from players. Here, we will outline effective strategies to counter each form of II Flux Construct Tears Kingdom.
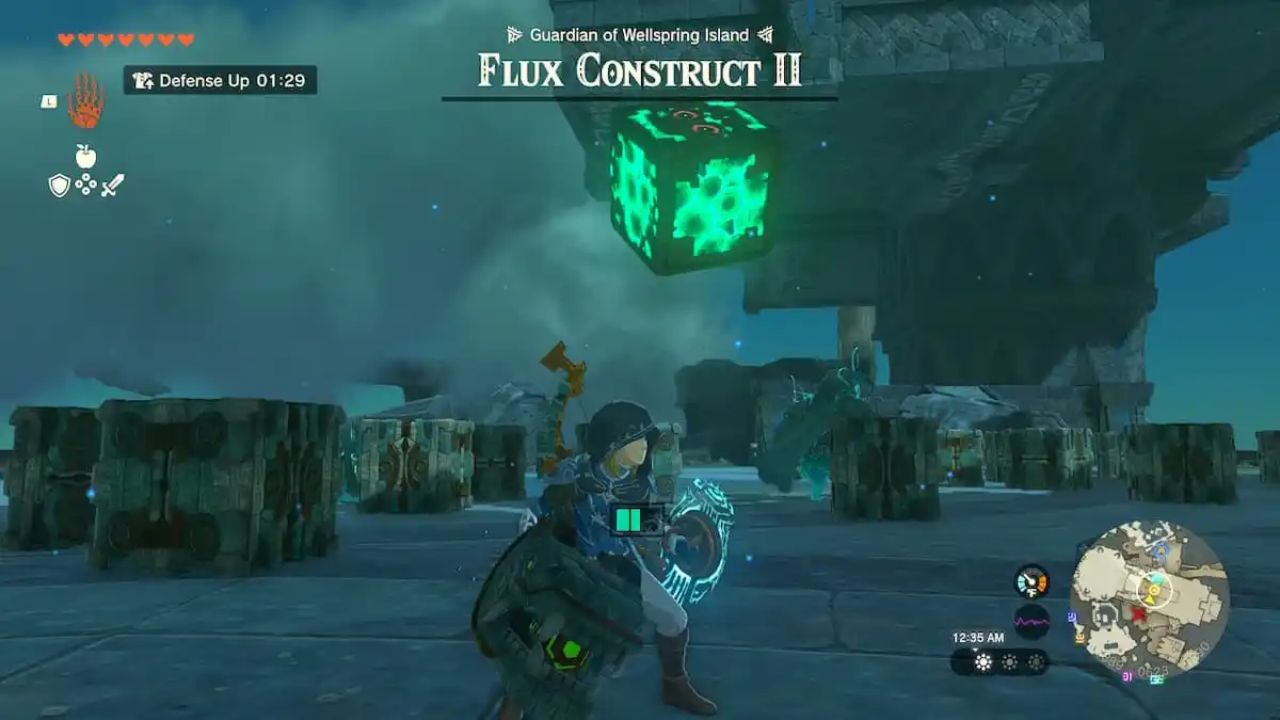
Humanoid Form
Flux Construct II initiates each battle in its humanoid form, which exhibits more erratic behavior compared to its predecessor. When preparing for its fist-slamming attack, the boss now warps closer to you, adding an element of surprise. However, retreating from this attack, as you would against Flux Construct I, remains a viable strategy.
The boss may also attempt to rush and trample you if you get too close. To avoid this, maintain a safe distance and promptly sprint away when it charges.
Utilizing the Ultrahand on the glowing green cube is even more crucial during encounters with Flux Construct II. The boss’s increased mobility and inclination to hide the green cube behind indestructible blocks necessitate the frequent use of the Ultrahand. By manipulating the surrounding blocks and targeting the weak point with precision, you can effectively exploit the boss’s vulnerabilities. Capitalize on the moments when the boss keeps its fists down after the slamming attack to employ this strategy.
Arrows can still be advantageous in stunning the boss when used on the green cube, creating a significant opening to dislodge the cube with the Ultrahand. However, the success of this tactic relies on the positioning of the green cube and the availability of higher vantage points to trigger bullet time.
Cube Form
While the cube form of Flux Construct I posed minimal challenges, Flux Construct II significantly intensifies the encounter. The cube form now tilts more rapidly, making it harder to aim accurately at the smaller green cube with the Ultrahand. Additionally, the boss gains the ability to fly up and slam down, creating a damaging shockwave. As a result, maintaining distance from the boss no longer guarantees safety, and you must be prepared to sprint away when it takes flight.
Although the slam attack theoretically presents an opportune moment to strike, the green cube often faces away from you upon landing. Complicating matters, the boss recovers swiftly, making it challenging to clear the surrounding blocks with the Ultrahand before it resumes its movement, obscuring the green cube from view.
However, removing the surrounding blocks remains beneficial as it facilitates targeting the green cube. Additionally, shooting the green cube to stun the boss proves even more effective in this form than in the humanoid form. When the boss is stunned, it often positions itself with the green block at the top, typically surrounded by other blocks. Despite the need for precise timing, this strategy serves as the most reliable method to temporarily immobilize the boss, granting you the opportunity to clear the way with the Ultrahand and seize the green block.
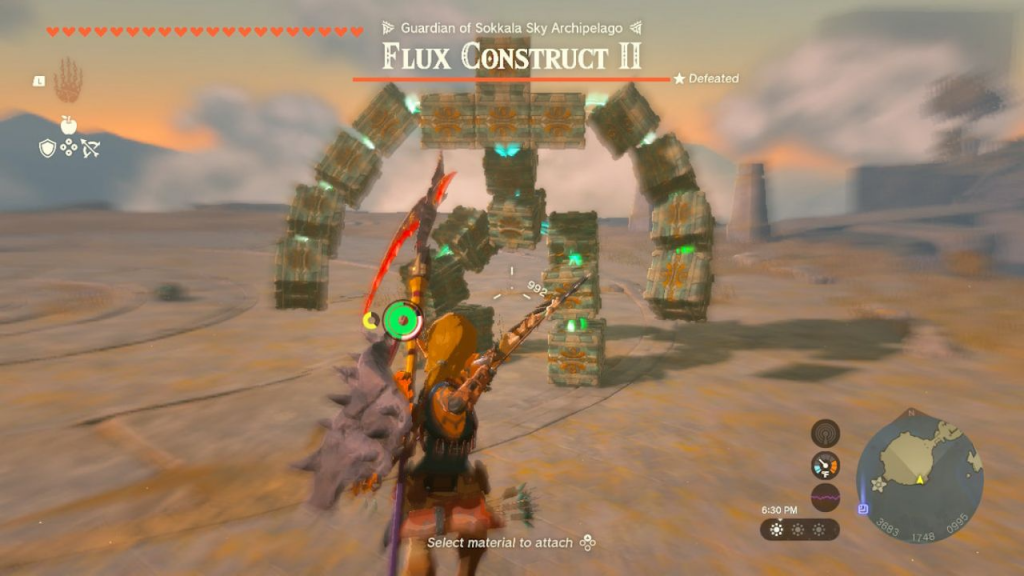
Flying Rectangular Form
The strategy for confronting the flying rectangular form of Flux Construct II differs significantly from its Flux Construct I counterpart. While the boss still launches blocks at you, it now remains airborne, reminiscent of the Gleeoks. Furthermore, the green cube is positioned at the top, rendering it unreachable even with long-range arrows.
This phase presents the most intricate puzzle in the fight, especially during your initial encounter. However, a simple solution exists. After the boss hurls its blocks, stand on one of them and employ Recall to transport yourself directly to the top of the boss. Seize this opportunity to unleash melee attacks on the green cube, scattering the blocks and leaving the weak point exposed for an extended period.
Tips for Fighting III Flux Construct Tears Kingdom
Gameplay
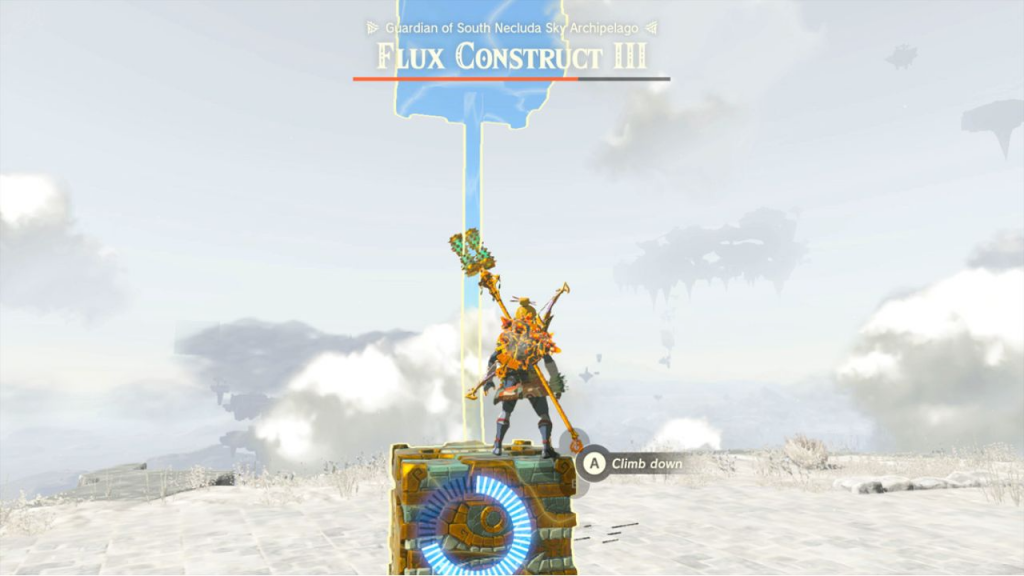
III Flux Construct Tears Kingdom enemy closely mirrors the behavior of Flux Construct II, with a few notable differences. Higher health and damage characterize this encounter, along with a crucial new addition. During the humanoid and cube phases, the green block periodically swaps places with one of the other blocks, demanding swift action to keep the weak point susceptible to the Ultrahand before it teleports out of reach. Additionally, the boss exhibits a faster recovery rate for removed blocks.
The overall strategies employed against Flux Construct II remain largely effective against Flux Construct III, albeit requiring greater efficiency. Once you successfully secure the green cube with the Ultrahand, your victory is virtually assured. Even if the green cube teleports, the Ultrahand retains its grip, enabling you to shake it loose without any interruptions.
Flux Construct Tears Kingdom Fight Rewards
Upon defeating either II or III Flux Construct Tears Kingdom enemies, they will drop more potent variations of the Flux Construct Core, which can be fused to enhance your weapons. In addition to the customary Zonai charges, you may occasionally acquire Zonai capsules, useful for crafting devious contraptions.
Engaging with Flux Constructs is often a prerequisite for shrine quests or obtaining Sage’s Wills to upgrade your sage’s attack power. Consequently, hunting down these formidable enemies will significantly facilitate your Tears of the Kingdom playthrough.
This guide will tell you how to complete the Warzone 2 DMZ All’s Fair mission with just three simple tasks. Follow the guide till the end.
If you’re a Call of Duty: Warzone 2 player, you know that completing missions in the game can earn you valuable rewards. You can get rewards such as XP, contraband, and unique in-game cosmetics. In this guide, we will walk you through the steps to complete the Warzone 2 DMZ All’s Fair Tier 5 mission. By following our detailed instructions, you’ll have a higher chance of successfully completing the mission. Then you can obtain the exclusive rewards it offers.
Gameplay
Warzone 2 DMZ All’s Fair Mission Overview
The “All’s Fair” mission is part of the Crown Faction in Warzone 2’s DMZ mode. To complete this mission, you need to accomplish three tasks on different maps. First is to kill the Bombmaker with a Claymore. The second is to kill the Chemist with the M13B. The final task is to kill the Helo Commander from a Helicopter. Let’s dive into the specifics of each task.
Task 1: Kill the Bombmaker with a Claymore
In order to successfully complete the Warzone 2 DMZ All’s Fair mission, your first objective is to eliminate the Bombmaker using a Claymore. It is crucial to equip a Claymore in the lethal equipment slot before heading to Ashika Island. It plays a vital role in completing this task. Once you have arrived on Ashika Island, your destination is Tsuki Castle, positioned at the center of the map.
Prepare yourself for a challenging encounter as you progress through the castle. You’ll face many enemies along the way. Engage in combat, defeating the Wheelson and overcoming any obstacles that stand in your path. Your goal is to hack the security systems, granting you access to the building through the main entrance. Make your way up to the top floor of the castle, where the Bombmaker awaits.
Instead of opting to directly eliminate the Bombmaker, a more strategic approach involves utilizing stun and flash grenades to disorient him. Take advantage of his momentary confusion and plant a Claymore close to him. The explosion triggered by the Claymore will quickly dispatch the Bombmaker. This will fulfill the requirements of the first task and bring it to a successful conclusion.
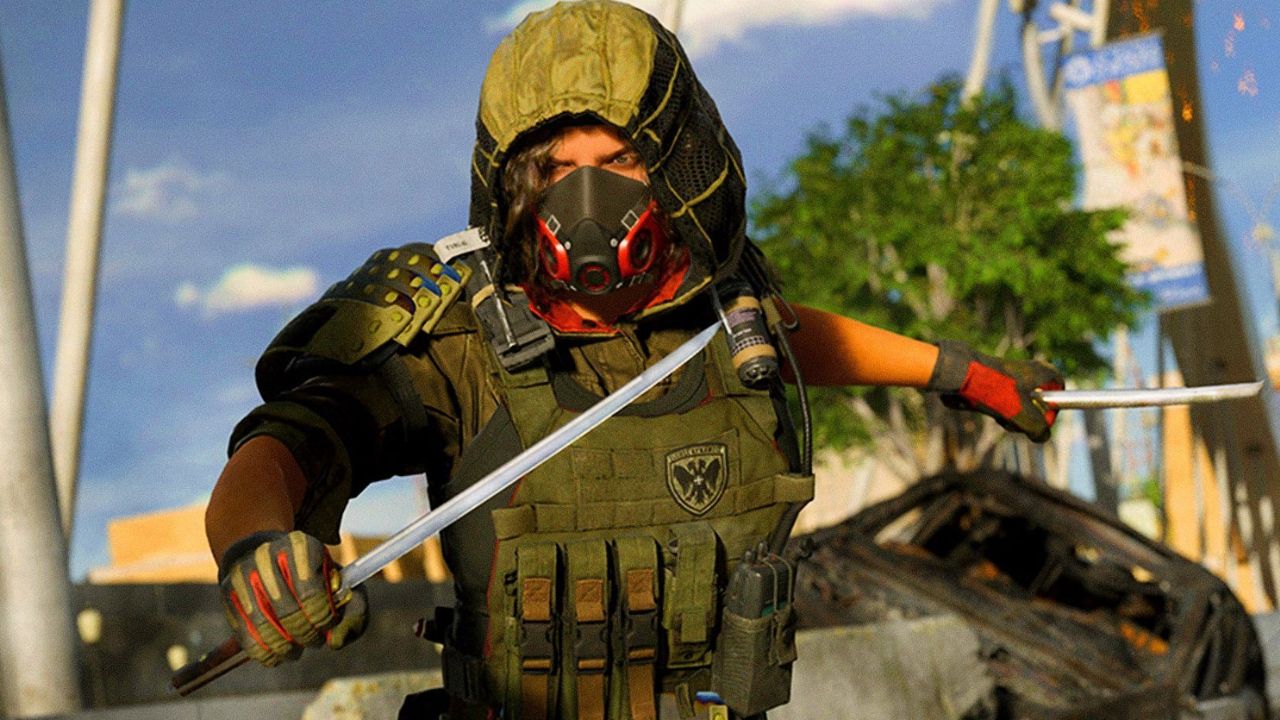
Task 2: Kill the Chemist with the M13B
In order to proceed with the second task of the Warzone 2 DMZ All’s Fair mission, your objective is to locate and eliminate the Chemist using the M13B. It is crucial to equip the M13B in the equipment slot prior to deploying into the Warzone 2 map. This will ensure that you are equipped with the required weapon.
As soon as you have spawned in the map, your priority is to swiftly identify the radiation zone marked on your tac-map. The Chemist can be found within this designated area, but be prepared for the possibility of encountering multiple AI enemies, which may prolong your search. Look out for a character donning a bright yellow hazmat suit, as this distinctive outfit will help you distinguish the Chemist from other entities. Engage in combat and eliminate him using the M13B.
However, if you are unable to locate the Chemist within the radiation zone, it is probable that other players in the match have already completed their own missions involving him. In such cases, you will need to join another DMZ match within Warzone 2 in order to encounter the Chemist and proceed with the mission. Remember to stay vigilant and adapt your approach accordingly in order to successfully fulfill this crucial task.
Task 3: Kill the Helo Commander from a Helicopter
In order to successfully complete the final task of the Warzone 2 DMZ All’s Fair mission, your objective is to take down the Helo Commander from a Helicopter. To initiate this process, re-enter the area of Al Mazrah and acquire an Intel Contract. By fulfilling this contract, you will obtain the precise location of any boss present on the map. It is important to note that you may need to complete several Intel Contracts before the exact location of the Helo Commander is revealed on your tac-map.
Once you have acquired the accurate location of the Helo Commander, your next step is to locate the nearest helicopter from your current position and take flight. Navigate towards the marked area indicated on your map and engage the Helo Commander’s helicopter. This particular task presents a significant challenge, as it necessitates sustained gunfire to bring down the boss’ formidable vehicle. During the encounter, you may find it necessary to land periodically in order to replenish your ammunition, as the battle is likely to be protracted.
The key point to bear in mind is that the final shot, which ultimately destroys the Helo Commander’s helicopter, must be fired from within another helicopter. This particular requirement is crucial to successfully completing the mission. Upon accomplishing this feat, you will not only fulfill the objective but you will also be rewarded with 20,000 XP and a unique emblem in Warzone 2. This serves as a testament to your skill and accomplishment within the game.
Approach this final task with precision and determination, and emerge victorious in your pursuit of completing the Warzone 2 DMZ All’s Fair mission.
Gameplay
Conclusion
The “All’s Fair” Tier 5 mission in Call of Duty: Warzone 2’s DMZ mode offers exciting challenges and exclusive rewards for skilled players. By following the step-by-step instructions provided in this guide, you can increase your chances of successfully completing the mission and obtaining the 20,000 XP and Battle Face emblem.
Remember to equip the necessary lethal equipment, such as the Claymore for the Bombmaker, and the insured weapon, like the M13B for the Chemist. Be prepared to face intense battles against AI enemies, strategically use stun and flash grenades, and unleash firepower upon the Helo Commander’s helicopter.
Take your skills to the next level and conquer the Warzone 2 DMZ All’s Fair mission. Show your prowess as a Crown Faction operator and secure the valuable rewards that await you in the Demilitarized Zone.
In this article, we will guide you through the process of unlocking System Shock Robot Maintenance. Just follow the steps and find out everything.
To progress further in the game and disable SHODAN’s robot production, you need to unlock Robot Maintenance. This area holds vital information, including the code required to gain access to the maintenance section. Follow the steps outlined below to successfully unlock Robot Maintenance and accomplish your objective.
By following these steps, you will gain access to the necessary code and information to disable SHODAN from producing more robots aboard the station. Whether you’re a seasoned player or new to the game, this comprehensive guide will help you overcome the challenges and progress in System Shock.
Gameplay
System Shock Maintenance Robot
The Maintenance Robots, also known as “Beavers,” are enemies in System Shock. They possess strong armor and wield an electrical spark welder that can cause significant harm to humans. However, their slow shots and lack of accuracy can be exploited, especially when engaging them from a long range. The most effective weapon against these bots is the Armor-Piercing Bullets.
The first encounter with a Maintenance Bot occurs at the end of the MedSci Deck. While they become more infrequent later in the game, they are still prevalent on the Engineering Deck. Make sure to search the destroyed Maintenance Bots for salvageable equipment, such as Disposable Maintenance Tools and Anti-Radiation Hypos.
Finding Robot Maintenance Location
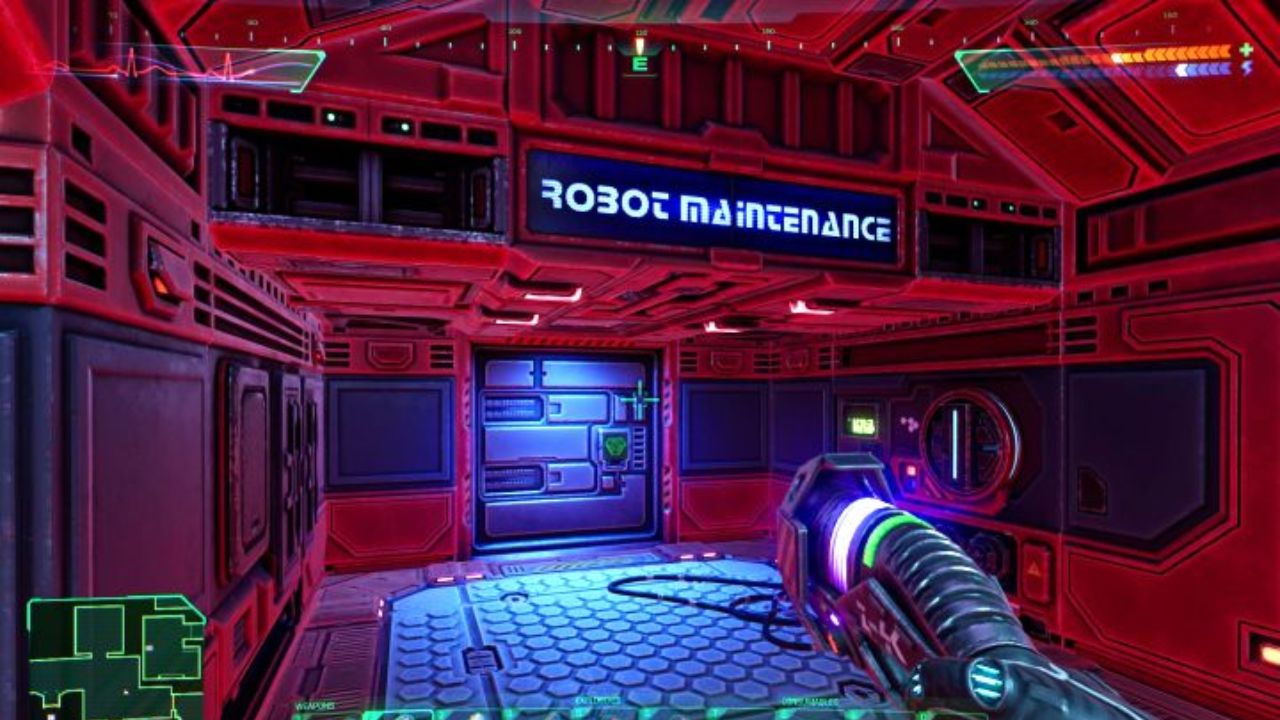
System Shock Robot Maintenance is in the Gamma Quadrant on Research Floor Two. To reach this area, you must first acquire the Science Access Keycard from the Beta Quadrant. Once you have the keycard, proceed to the door marked as ‘Robot Maintenance.’ Inside, you’ll come across a Junction Box puzzle and a locked door. Depending on your progress, you’ll need to either solve the puzzle or utilize the Group-3 Keycard to gain entry.
Within the Robot Maintenance room, you’ll also discover a Logic Probe. While it may seem tempting to use it to automatically solve the puzzle, it’s important to note that Logic Probes are limited resources. Therefore, save the probe for another occasion, as the keycard required for unlocking the door is in the adjacent room.
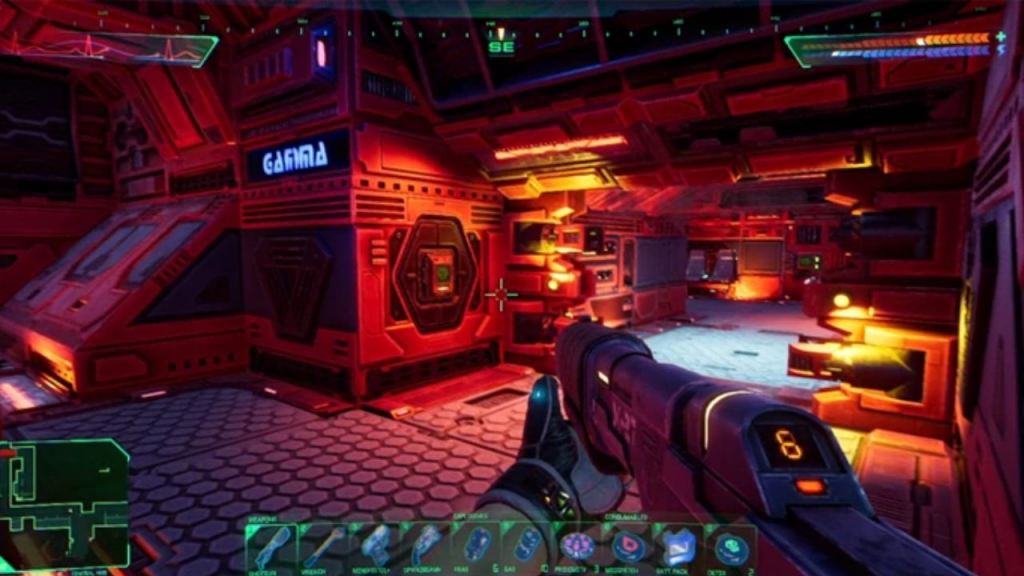
Acquiring the Group-3 Keycard
To obtain the Group-3 Keycard, you need to access the Computer Room in the Gamma Quadrant. This room houses the GPU Nodes crucial for your progression. Destroy the Nodes and take note of the number displayed on the red monitor. This information will prove valuable in later levels.
Upon exiting the Computer Room, turn left and enter the crawlspace. Inside, you’ll find a corpse. Search the corpse thoroughly, and you will discover the Group-3 Keycard among its belongings.
Unlocking System Shock Robot Maintenance
Return to the System Shock Robot Maintenance area and utilize the Group-3 Keycard to unlock the door. Once inside, you’ll encounter another locked door, this time requiring a keypad code for access. Enter the code “6-2-3” to gain entry to Robot Maintenance. Within this room, you will find the Junction Box puzzle that must be solved to deactivate robot production on the station.
Gameplay
Conclusion
By successfully unlocking System Shock Robot Maintenance, you have taken a significant step towards disabling SHODAN’s robot production on the space station. Remember to search defeated Maintenance Robots for valuable equipment and use Armor-Piercing Bullets to maximize your effectiveness against them. Utilize the detailed instructions provided in this guide to progress further in the game and accomplish your objectives.
Want to know how to respect your Zelda Tears Kingdom Health and Stamina? This guide will tell you all the steps to do it.
In The Legend of Zelda: Tears of the Kingdom, there are various gameplay mechanics that players need to uncover on their own. One such hidden feature is the ability to reallocate the upgrade points for Link’s health and stamina. Upgrading these stats is crucial for success in the game, as they directly impact Link’s survival and overall performance.
In this guide, we will walk you through the process to easily respec Zelda Tears Kingdom health and stamina. This will allow you to optimize your character’s build and adapt to different challenges.
Gameplay
Understanding the Importance of Tears Kingdom Health and Stamina
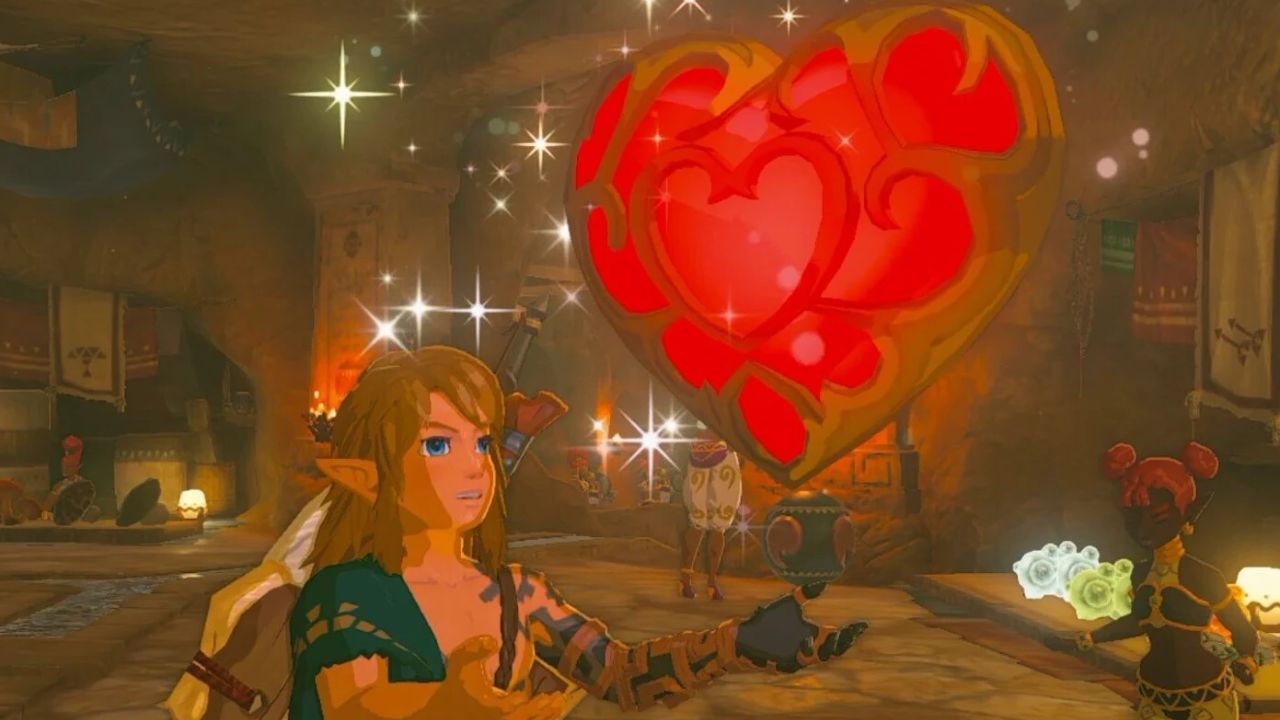
Health and stamina are vital statistics that play an important role in the gameplay of The Legend of Zelda: Tears of the Kingdom. Enhancing Link’s base health and stamina gauge is the main objective behind completing over 150 Shrines scattered throughout the game world. These Shrines provide “Blessing of Light” rewards that allow you to upgrade either your health or stamina.
Choosing between Zelda Tears Kingdom Health and Stamina
When faced with the decision of how to allocate your upgrade points, it can be a difficult choice to make. Both health and stamina offer unique advantages and are necessary for different aspects of the game. The resource required for upgrading these stats is the same, adding an element of uncertainty to the decision-making process.
Expanding Health Containers
Opting to increase your Health containers will boost your overall life force, allowing you to withstand more damage before dying to defeat. This is particularly valuable when facing powerful enemies and engaging in intense combat scenarios. By acquiring additional Tears Kingdom Health containers, you can push the boundaries of your survivability and explore the treacherous terrains of Hyrule with greater confidence.
Enlarging the Stamina Wheel
On the other hand, focusing on expanding your stamina wheel will unlock a wealth of mobility and endurance. This upgrade is particularly beneficial when engaging in physically demanding activities such as running, climbing, and swimming. A larger stamina wheel allows you to explore the vast world of The Legend of Zelda: Tears of the Kingdom more freely, scaling towering mountains and traversing vast bodies of water with ease.
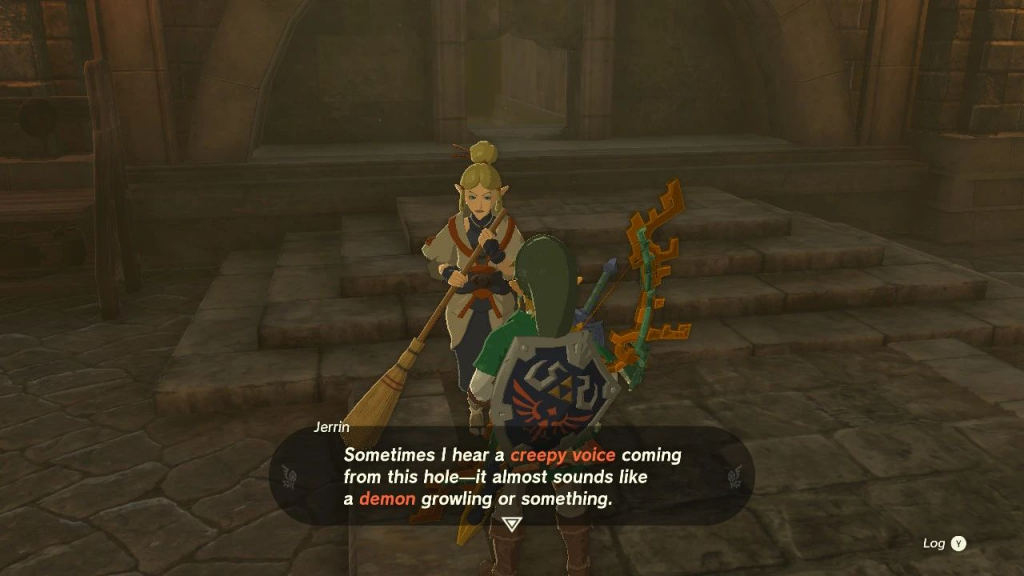
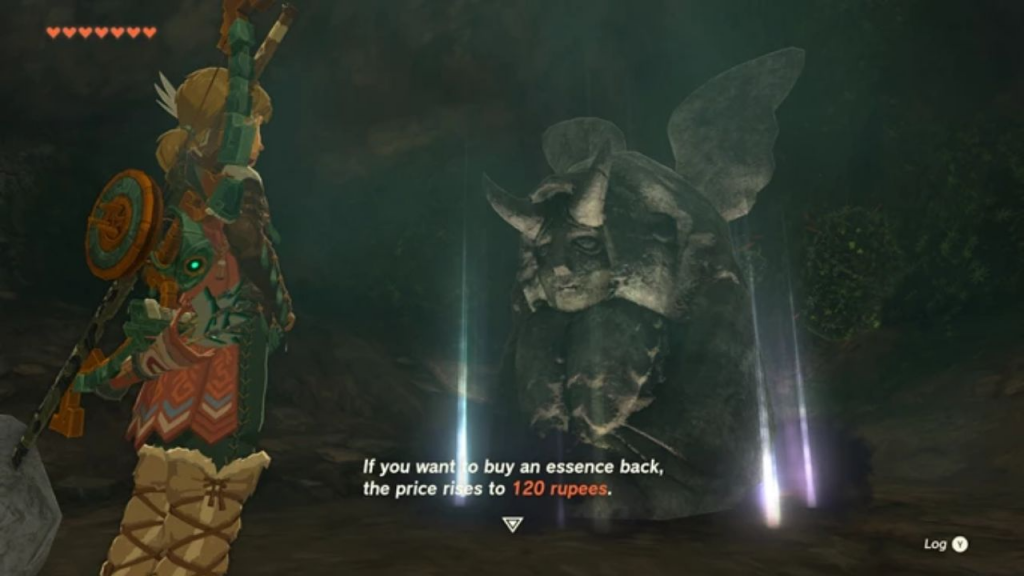
Thankfully, The Legend of Zelda: Tears of the Kingdom provides a solution to this conundrum by offering a way to reallocate your upgrade points. To initiate the respec process, you must locate the Cursed Statue. This can be accomplished during the “Who Goes There!” side quest.
To find the Cursed Statue, follow these steps:
Begin the “Who Goes There!” side quest.
Progress through the quest until you reach a tunnel.
Break the rocks obstructing your path.
Behind the rock on the right, you will discover the Cursed Statue.
How to Respec Stats
Now that you’ve found the Cursed Statue, let’s get into the process of respeccing your health and stamina stats. Although it may initially seem daunting, it is relatively straightforward once you become familiar with the steps involved.
Approach the Cursed Statue and engage in conversation.
Choose to sell your “Essence,” which represents either a Health container or a stamina vessel.
After selecting the Essence you wish to sacrifice, proceed to sell it to the Cursed Statue.
Selling your Essence will grant you 100 Rupees as compensation.
If you decide to reallocate your previously sold Essence, you have the option to repurchase it for 120 Rupees.
By repurchasing Essence, you gain the ability to select either health or stamina for your upgrades.
While the process of reallocating your stat points may initially appear lengthy, it becomes significantly easier with practice. The primary obstacle you must overcome is locating the Cursed Statue and completing the “Who Goes There!” side quest. Once you have accomplished this, you can seamlessly respec your Zelda Tears Kingdom health and stamina whenever you desire.
Gameplay
Conclusion
The ability to respec your Zelda Tears Kingdom health and stamina is a valuable feature that allows you to optimize your character’s build. By following the steps outlined in this guide, you can confidently reallocate your upgrade points and adapt your stats to suit different gameplay scenarios. Remember, mastering the art of respeccing will give you a competitive edge and enhance your overall gaming experience.
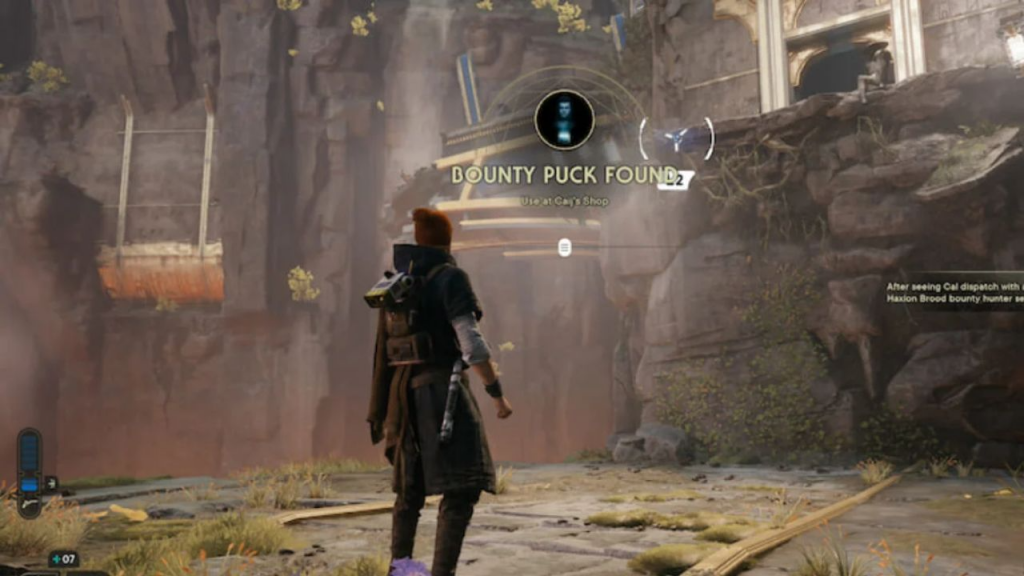
This guide will provide you with the exact Star Wars Jedi Survivor Bounty Pucks locations, along with some valuable tips to make your quest easier and more rewarding.
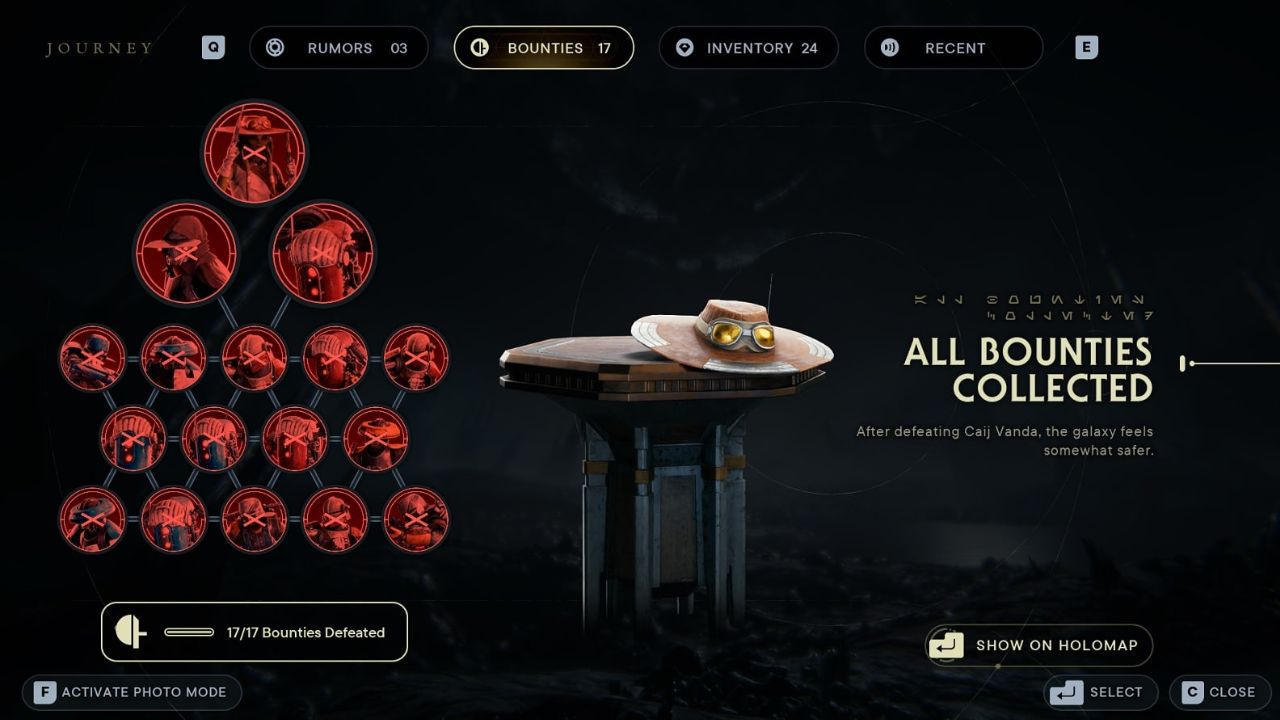
In Star Wars Jedi: Survivor, there is a side quest that involves collecting all Bounty Pucks. These Pucks are carried by various bounty hunters sent by the Syndicate to hunt down the protagonist, Cal, as retribution for his actions in the previous game.
The quest to collect the Star Wars Jedi Survivor Bounty Pucks is initiated by a mysterious character named Caij Vanda, who offers the quest during a cutscene tied to the main story. Each Bounty Puck can be exchanged with Caij for blaster perks and style cosmetics at Greez’s Cantina. By collecting all Bounty Pucks, not only will you be rewarded handsomely, but you will also unlock a special achievement.
Gameplay
Star Wars Jedi Survivor Bounty Pucks Locations
1. Defeat Korej Lim
Your journey to collect the Bounty Pucks begins when you arrive at the Devastated Settlement on the planet Koboh. Korej Lim, the first bounty hunter, awaits you in this area characterized by a giant lava pit. Engage in a fierce battle with Korej Lim, who is highly mobile and relies on a jetpack to stay airborne. Defeating him will trigger a cutscene in which Caij introduces the Bounty Puck system and rewards.
2. Defeat Meyen Corr
Right after your encounter with Korej Lim, you’ll stumble upon Meyen Corr. He spawns at the Boiling Bluff, which is adjacent to the Devastated Settlement area on Koboh. You can find Meyen Corr specifically on the walled path that connects Rambler’s Reach to the Boiling Bluff. Although relatively easy to defeat, be cautious of his stun grenades.
3. Defeat Kip Ostar
Proceed to the Derelict Dam on Koboh to find Kip Ostar. This bounty hunter lurks in the tunnel just before the open area where a giant creature resides. Remember the door in the nearby cave that taunts you with a Bedlam Raider behind it? Kip Ostar can be found in the tunnel leading to that door. Watch out for his shield rush attack, but don’t worry as he isn’t too difficult to defeat. You can also utilize Roller droids to your advantage by throwing them at him for extra damage.
4. Defeat Raz
Head to the Koboh Forest Array complex on Koboh, where you first encountered Dagan. Raz can be found near the area where the Mogu beast prowls. Specifically, he spawns at the left side of the complex underneath the spot where the giant bird was once restrained. While Raz fights with companions, similar to other brawler droids, he shouldn’t pose a significant challenge. If you prefer, you can lure him to fight the Mogu beast first, allowing them to weaken each other before you intervene.
5. Defeat Gatt Medo
Make your way to Coruscant and descend to the under-levels, specifically the factory Freight Handling Depot. In this location, there is a large room where conveyors transfer cargo. Gatt Medo, the next bounty hunter, awaits you here. Engage in battle with him and prove your skills. Gatt Medo should pose a similar level of challenge as the previous bounty hunters you have encountered.
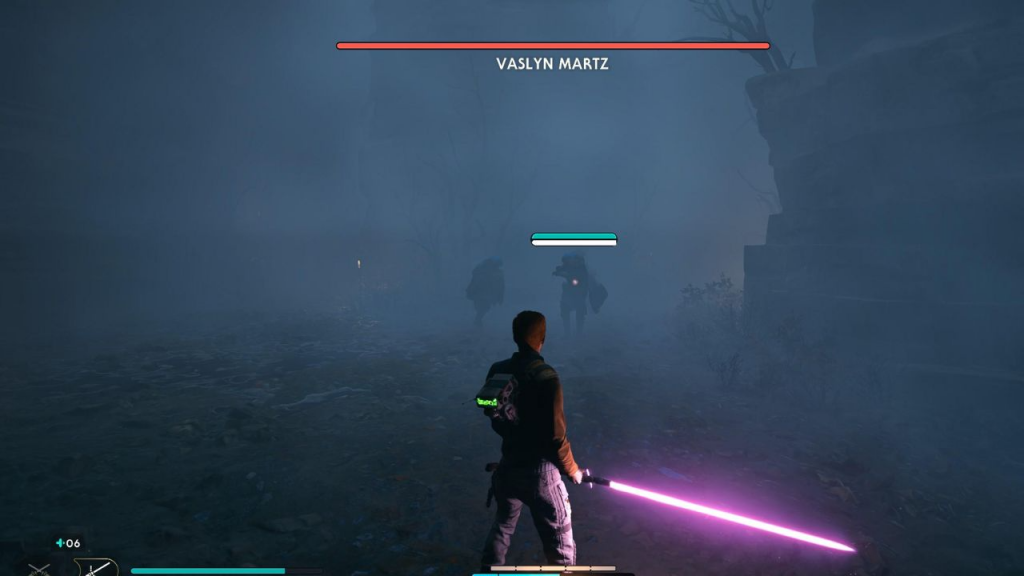
6. Defeat Vaslyn Martz
You can get this Bounty Puck by defeating Vaslyn Martz, a cunning bounty hunter who lurks in the Fogged Expanse. This treacherous area is located beyond the Mountain Ascent on Koboh. As you progress through the main story, you will encounter a section filled with dense fog, where the ambush takes place.
Look out for a crashed Imperial shuttle and a hidden Imperial outpost, as Vaslyn Martz and his two accomplices await you there. Stay vigilant, as his allies may knock you down if you are not careful. It is advisable to focus your attacks on Vaslyn while avoiding his companions. This is one of the most Star Wars Jedi Survivor Bounty Pucks tasks.
7. Selfin Jook
Find Selfin Jook on the lower levels of the Observatory Understructure on Koboh. After navigating through a platforming section in the open sky, you will reach the first point of interest. This location serves as Selfin Jook’s hideout. While relatively easy to defeat, Selfin Jook may pose a challenge on higher difficulty levels. Patience is key in this encounter. Block and dodge incoming blaster fire while gradually closing in on Selfin Jook and his associates. Taking them out one-by-one can give you a significant advantage.
8. Defeat Mash
Mash, a powerful enemy, guards Star Wars Jedi Survivor Bounty Pucks. This encounter proves particularly challenging, especially on higher difficulty settings. By the time you face Mash, you will have acquired more combat options. To locate Mash, return to the Shattered Moon base and descend via the lift from the landing pad.
Cross the chasm by ziplining and make sure to rest at the nearby Meditation Circle to ensure a respawn point. Proceed through the hallway with billowing steam, and Mash, accompanied by a nimble bounty hunter, will ambush you at the same spot where the first Bedlam Raider appeared during the main story mission. It is advisable to engage Mash from a distance whenever possible and swiftly dodge counterstrikes after delivering powerful blows.
9. Defeat Yuhong
Yuhong is a brawler droid near the Path of Restoration on Jedha. This encounter takes place in the valley and is associated with one of the wall puzzles related to the central tomb. Depart from the main base through the entrance that leads directly to the main valley, then follow the ridge to the left.
The path of Resistance lies atop the cliff, and Yuhong awaits you on the ground level. Yuhong is supported by two bounty hunters. Although the open terrain offers flexibility in targeting your foes, it is recommended to focus on Yuhong last. Utilize heavy strikes and maintain a safe distance to evade its counterattacks, as you did when facing Mash.
10. Defeat Corde the Half and PR-85T the Other Half
The final pair of bounty hunters, Corde the Half and PR-85T the Other Half, can be located in the Halls of Ranvell on Jedha. As you progress through the complex, which you initially explore with Merrin before venturing into a sandstorm, you will encounter a long scaffolding section. After clearing this area, climb up a landing just before descending into the Skriton lair.
It is essential to prioritize Corde, utilizing the Slow super force ability to gain an advantage. Facing the brawler droids alone is challenging enough, and minimizing the risk of interference from other enemies is crucial. Upon successfully defeating Corde, you will be rewarded with two Bounty Pucks.
Gameplay
11.Defeat KLE-0, Masi Finau, and Fenn Finau
The trio of KLE-0, Masi Finau, and Fenn Finau can be found at the Imperial ISB base on Nova Garon, specifically in the Hanger Bay section. These relentless bounty hunters await you at the end of a long, windowed hallway that connects the Hanger Bay to the main complex. If you have previously unlocked shortcuts leading to the Mantis, you can quickly reach this area. To provide additional context, the targeted apartment/barracks of your foes can be observed across the expanse, accompanied by a couple of conversing ISB agents near a control panel.
Prepare yourself for a challenging fight, particularly on higher difficulty levels. The optimal strategy involves prioritizing the elimination of the Finau siblings before focusing on the formidable brawler droid, KLE-0. Exploit KLE-0’s slower movement to create opportunities for individual attacks on the bounty hunters without interruptions. Your triumph in this battle will reward you with three Bounty Pucks.
12. Beat Caij at Holotactics
In a delightful twist, you will need to defeat Caij himself in a unique mini-game called Holotactics. Located at Greez’s cantina, known as Pyloon’s Saloon, on the planet Koboh, this challenge presents a medium difficulty level. However, overcoming Caij can prove to be quite frustrating. Fear not, for our detailed guide on defeating Caij at Holotactics will provide you with invaluable insights, enabling you to save time and effort on your path to victory.
13. Defeat Kili Oso
After successfully vanquishing most of the previous bounty hunters on your list, you will gain the opportunity to face Kili Oso. To initiate this encounter, speak to Caij at Pyloon’s Saloon. The confrontation with Kili Oso awaits you at Sepulcher Pass on the planet Jedha, along the route to the ancient temple ruins for the Hidden Path main story mission. As you progress past the large bridge, you will enter a circular chamber where Kili Oso can be found, accompanied by green ray shields on the side.
Prepare yourself for a more challenging battle, as Kili Oso uses various abilities reminiscent of the previous bounty hunters. The flashbang attacks can prove particularly troublesome, and you will also have to contend with other bounty hunters supporting Oso. Once you have depleted Oso’s health bar, she will attempt to escape via a zipline to another room. Utilize this momentary respite to heal before pursuing her and securing your victory. This is also one of the most difficult fights for Star Wars Jedi Survivor Bounty Pucks.
14. Defeat Jo the Cannibal
Your next adversary is Jo the Cannibal, the final member of the Haxion Brood bounty hunters you must defeat. Speak to Caij once again, and he will inform you that the Bedlam Raiders have partnered on this bounty, eagerly awaiting your arrival in the Lucrehulk ship on Koboh. Within the ship, you will find Jo the Cannibal at the Yurt Barracks, deep within the confines of the vessel. This specific location is where you previously encountered the Bedlam Raider Smasher wielding an electrifying hammer.
The arena you seek is situated beyond the Bedlam Raider huts, where CIS troop transports deploy droids as part of the main story. Prepare for a challenge as you must defeat the Bedlam Raider Smasher and a Commando droid before Jo the Cannibal emerges in the arena. Although Jo the Cannibal is another brawler droid, be aware that they possess greater aggression and resilience compared to their counterparts.
With multiple challenging opponents to overcome, this battle will test your skills and perseverance. Ensure you have an ample supply of health stims and maintain peak performance to emerge victorious.
15. Defeat Caij Vanda
Returning to Pyloon’s Saloon, you will receive a prompt regarding a new rumor associated with Caij. This leads you back to the Devastated Settlement on Koboh, where you previously encountered the first bounty hunter. At this location, you will find Caij, who will ultimately betray Cal, triggering a fierce battle. Rise to the challenge and emerge triumphant in defeating Caij. Your victory will unlock a surprise Easter egg event, the Bounty Puck achievement for acquiring all pucks, and Caij Vanda’s exclusive blaster components.
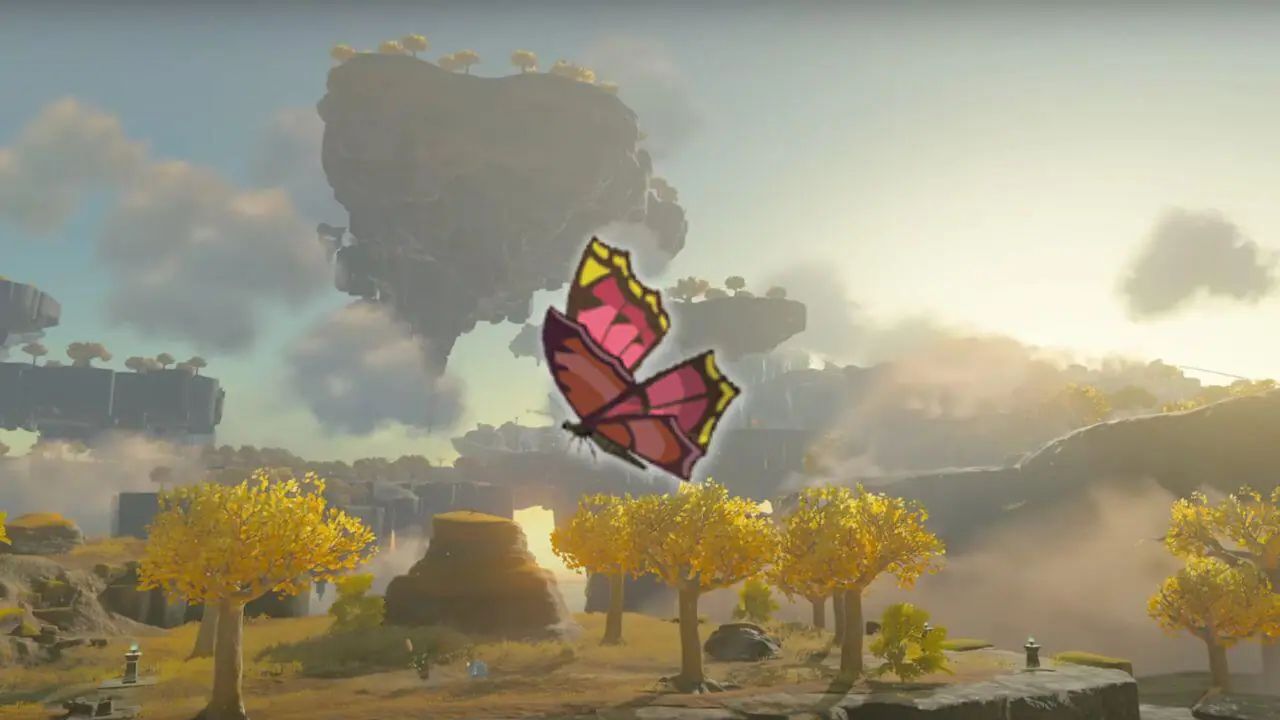
The Tears Kingdom Summerwing Butterfly holds significant value in the game, offering Cold Resistance when used in combination with monster parts in recipes.
In The Legend of Zelda: Tears of the Kingdom, discovering and capturing the Summerwing Butterfly is not only an exciting challenge but also a rewarding task. However, the importance extends beyond the cold resistance aspect. Acquiring the Tears Kingdom Summerwing Butterfly is crucial for upgrading your Ember armor set, granting you enhanced abilities and protection.
This guide will unveil the secrets of locating and acquiring the Tears Kingdom Summerwing Butterfly. It will provide you with the information you need to enhance your gameplay and unlock its invaluable benefits.
Map location
How to get the Tears Kingdom Summerwing Butterfly
To start on your quest for the Summerwing Butterfly, you must venture into warm climates within the game world. Specifically, the in-game information suggests searching in Eldin Canyon, a region situated in the northeastern part of Hyrule, close to Death Mountain and Deep Akkala.
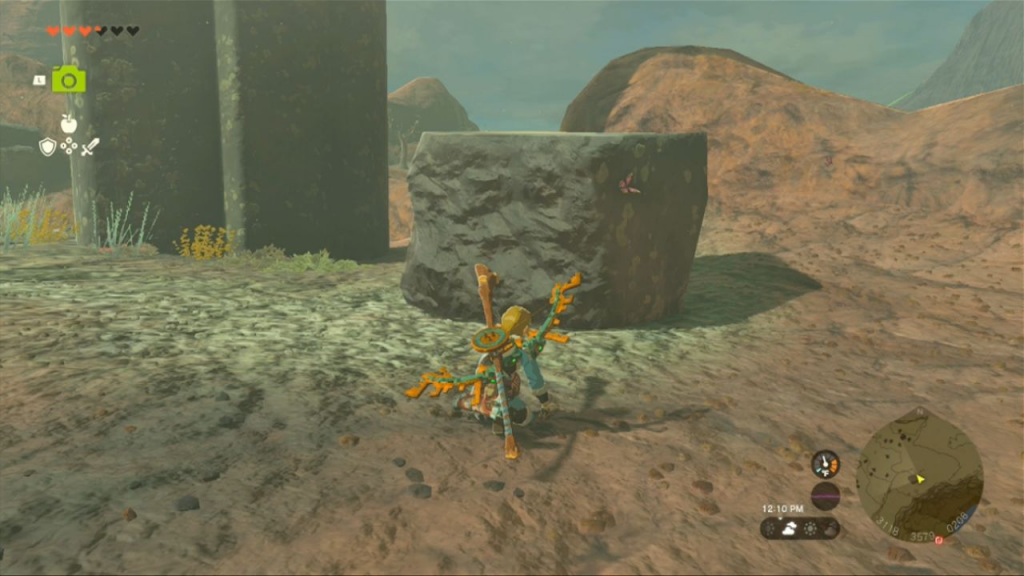
Eldin Canyon Location
The provided map illustrates one of the prime locations where the Summerwing Butterfly is commonly found. Look for this area looks like a substantial rock formation. Typically, players discover two Tears Kingdom Summerwing Butterflies in close proximity to the rock. Keep in mind that you might also encounter other insects, such as Warm Darners and Fireproof Lizards, in this vicinity.
Gerudo Highlands Exploration
Another promising location to scout for the Summerwing Butterfly is the Gerudo Highlands. As you venture into this region, be prepared to face extreme heat conditions. It is advisable to equip armor that provides resistance to extreme temperatures to ensure your safety during your search for the elusive butterfly. The Gerudo Highlands encompass the desert and hilly areas surrounding Gerudo Town.
Stealth is Key
Approaching the Tears Kingdom Summerwing Butterfly requires a stealthy approach. To prevent the butterfly from fluttering away before you can catch it, make sure to move in a crouched position. By doing so, you reduce the chances of startling the butterfly and increase your likelihood of successfully capturing it.
Alternative Methods to get Tears Kingdom Summerwing Butterfly
In case you are having difficulty finding the Summerwing Butterfly in the wild, there are alternative methods to obtain this prized insect. One such method involves purchasing the butterfly from Beedle, a traveling merchant who frequents various stables across the game world. Beedle offers the Summerwing Butterfly for sale at a price of 10 rupees. However, please note that Beedle’s inventory is limited to a maximum of three butterflies at a time.
Beedle’s Locations
Beedle’s locations vary, but two reliable spots to encounter him are near the Snowfield Stable and Tabantha Bridge Stable. It is important to remember that Beedle’s available stock may vary depending on his current location. Therefore, if you are specifically seeking the Summerwing Butterfly, it is advisable to visit him near the Snowfield Stable or the Tabantha Bridge Stable.
Additionally, while exploring the edge of Kara Kara Bazaar, you may chance upon Beedle once again. In this location, Beedle occasionally has up to five Summerwing Butterflies available for purchase.
Power of the Summerwing Butterfly
Once you have successfully obtained the Summerwing Butterfly, its potential can be fully harnessed. Incorporate it into your recipes along with monster parts to benefit from the Cold Resistance it provides. Moreover, acquiring the Summerwing Butterfly is an essential step towards upgrading your Ember armor set, unlocking new abilities and enhancing your character’s overall strength.
Gameplay
Note: The locations and availability of the Summerwing Butterfly may vary depending on game updates and individual gameplay experiences.