How to Increase Gear Inventory Space in Hogwarts Legacy

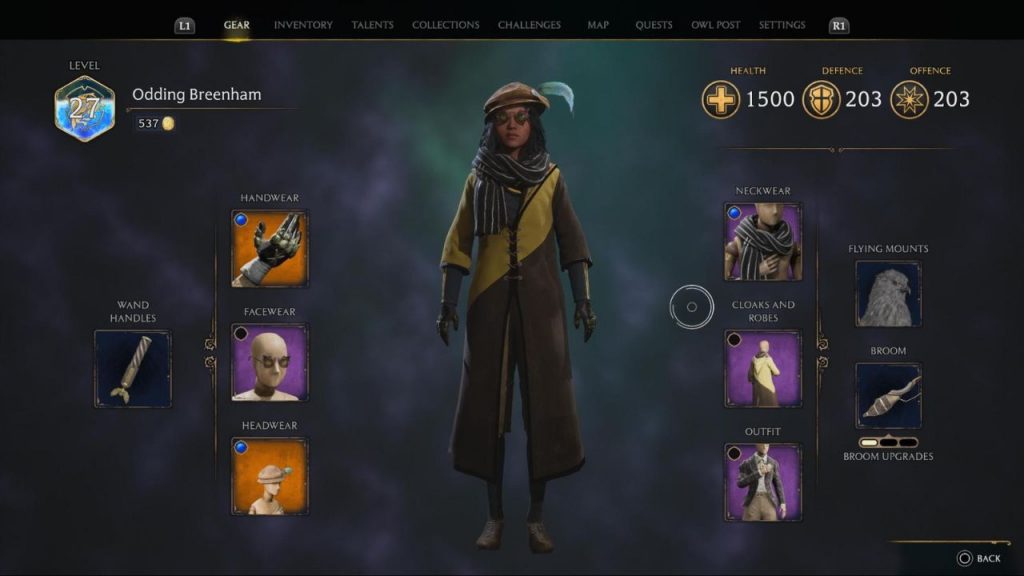
Are you finding yourself running out of Hogwarts Legacy gear inventory space? Don’t worry, there are ways to expand your storage capacity. 

To increase your Hogwarts Legacy gear inventory space, you will have to complete some trials that are left by the legendary wizard Merlin. Do not worry because we are here to guide you with that. In this guide, we’ll walk you through the steps to increase your gear inventory space. This will allow you to collect more valuable items during your magical adventures.

gears slots
Gears slots

Selling Unwanted Gear and Freeing Hogwarts Legacy gear inventory space

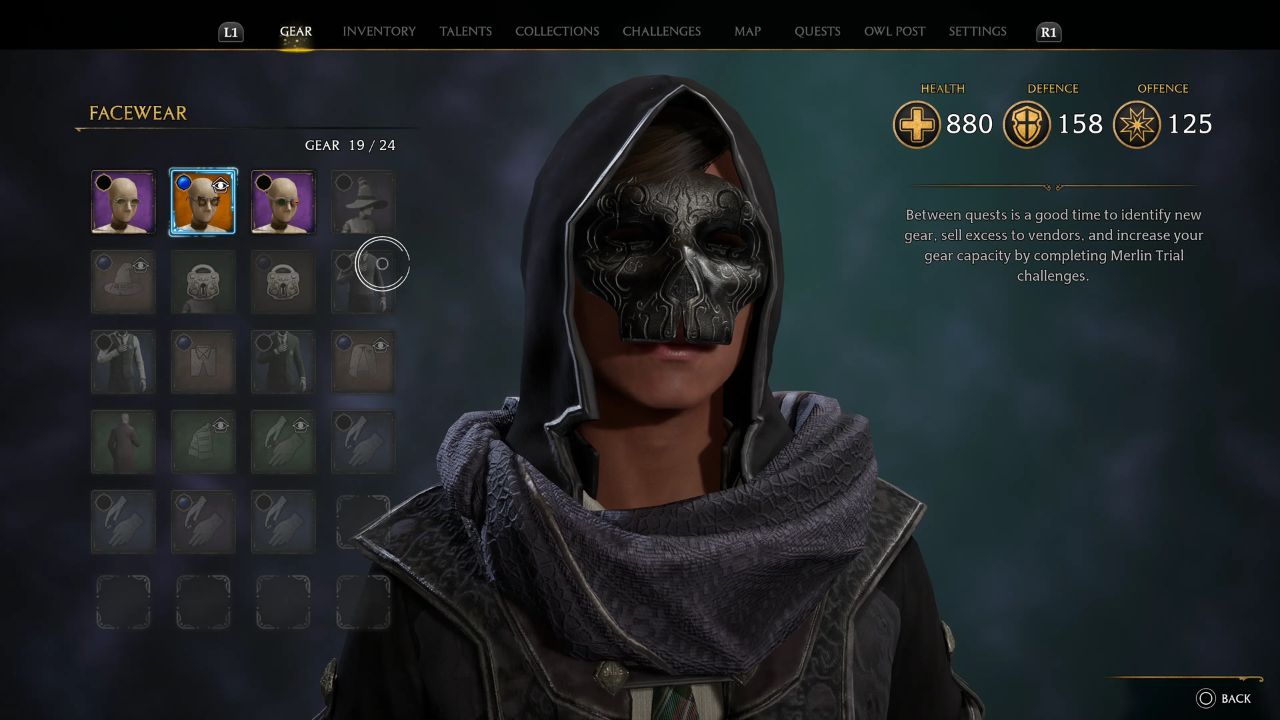
Before going into the methods of increasing your Hogwarts Legacy gear inventory space, it’s important to note that you can free up some room by selling unwanted gear. Hogwarts Legacy allows you to get rid of the items you no longer need. This provides you with extra Galleons in the process. This not only helps clear your inventory but also gives you the opportunity to earn some valuable currency.

Best Brooms in Hogwarts Legacy

Additionally, once you’ve obtained a particular gear item, you can use Hogwarts Legacy’s transmog feature. This feature allows you to change the appearance of your gear to match other items. You can do it even if you’ve sold or destroyed them. Therefore, you can focus on both functionality and fashion without worrying about sacrificing either.

While selling unwanted gear and using transmog are effective ways to manage your inventory, they may not be sufficient in the long run. As you gather more gear and unlock upgrades, having additional inventory space becomes increasingly advantageous.

Completing Exploration Challenges for Inventory Upgrades

To increase your Hogwarts Legacy gear inventory space, you’ll need to complete Exploration Challenges related to the Merlin Trials. These trials offer rewards in the form of inventory space upgrades. By undertaking a specific number of Merlin Trials, you’ll gradually unlock additional slots in your inventory, providing you with more room to store your valuable gear.

For instance, you’ll receive inventory space upgrades after completing 2, 6, 10, 14, and 18 Merlin Trials. To embark on these trials, you’ll need to explore the vast open world of Hogwarts Legacy, venturing into uncharted territories.

Unlocking Merlin Trials and their Mechanics

Merlin Trials can be found throughout the open world and can only be accessed once you’ve encountered Merlin researcher Nora Treadwell during the main story. Together with Nora, you’ll unveil the existence of stone circles left behind by Merlin, which can be activated using Mallowsweet leaves. These trials consist of various types, each presenting unique environmental puzzles such as lighting braziers with the Incendio spell or engaging in light platforming.

How To Unlock Avada Kedavra In Hogwarts Legacy

You can easily locate Merlin Trials on the world map as they are indicated by feather-shaped icons. This makes it convenient for you to identify and solve these challenges. However, it’s important to note that certain Merlin Trials may require you to learn specific spells. Most spells will be taught during the main story, but some, such as the Knockback Jinx Flipendo, can only be acquired through assignments in Hogwarts Legacy. Therefore, staying on top of your studies and completing your homework is crucial if you want to unlock extra inventory space.

inventory
inventory

Conclusion

Expanding your Hogwarts Legacy gear inventory space is essential for collectors and those seeking to carry a wide range of valuable items. By selling unwanted gear, using transmog, and completing Exploration Challenges tied to the Merlin Trials, you can gradually increase your inventory capacity. Don’t let limited space hold you back from acquiring powerful gear and enjoying the magical journey that awaits you at Hogwarts.

Remember, managing your inventory effectively allows you to optimize your gameplay experience and fully immerse yourself in the enchanting world of Hogwarts Legacy.

For more Guides, Tips, and Tricks

Check out our Video Games Guide Section for more dedicated guide

How To Complete Forgotten Memories in Disney Dreamlight Valley

Disney Dreamlight Valley Forgotten Memories quests can be very difficult to complete. This guide will help you in completing it easily.

Disney Dreamlight Valley is an attractive virtual world where players can go on various quests and adventures. One of the most interesting quest lines in the game is called “Forgotten Memories,” introduced by the beloved Fairy Godmother. In this guide, we will provide you with a walkthrough on how to complete the Disney Dreamlight Valley Forgotten Memories quest. You can then unlock their secrets and experience the storyline they offer.

Hideous Bouquet
Hideous Bouquet

How to Unlock the Disney Dreamlight Valley Forgotten Memories Quests

To begin the Disney Dreamlight Valley Forgotten Memories quests, players need to complete a quest. This quest is known as “Miracles Take Time,” given by the Fairy Godmother. This quest is not very long, but the time it takes to finish may vary depending on how many Night Shards are available in the game. Night Shards are important because they make Purified Night Shards. You need these to progress through the quests.

Once you successfully finish the Miracles Take Time quest, the Fairy Godmother will open the entrance to the Dreamscape. She will tell you about three memories that you can explore: Trust, Nurturing, and Friendship. Your job as a player is to embody The Forgotten character and experience those memories again by completing the quests associated with them.

Disney Dreamlight Valley Forgotten Memories: Friendship

The first quest in the Disney Dreamlight Valley Forgotten Memories is the Friendship quest. When you enter the memory portal, you will be transported to the peaceful and beautiful Peaceful Meadow. There, you will meet Mickey Mouse, who is waiting for you. Alongside Mickey, you will also be joined by Goofy and Minnie Mouse. Together, you will have different tasks to complete.

Mickey’s task is to gather dying flowers that are scattered all around the meadow. These flowers will be used to create a bouquet for Minnie Mouse. But, it might have a somewhat sad feeling to it. Goofy, on the other hand, needs your help in collecting ingredients for a dish that both of you will cook together. Minnie’s role is to keep an eye on you and make sure you are doing okay throughout the quest. She cares about your well-being.

Completing these tasks is not too difficult. However, it’s important to remember that The Forgotten character is feeling overwhelmed and sad, and these emotions are reflected in the Valley. So, expect the quest to have a somewhat melancholic tone, reflecting the state of The Forgotten’s memories.

Disney Dreamlight Valley Forgotten Memories: Trust

The Trust Forgotten Memory quest is the next part of the exciting adventure that awaits you. To start on this quest, you will enter the Glade of Trust through a portal, where you will meet Mother Gothel from Disney Dreamlight Valley. She needs your assistance in recovering a special mirror that has fallen into the lake.

Your task is to go fishing in the various ponds scattered throughout Disney Dreamlight Valley until you find the jewel-encrusted mirror. It may take some time and exploration, as the mirror’s location is different for each player. Once you successfully locate the mirror, bring it back to Mother Gothel to continue the quest. During your conversation with her, be aware that Mother Gothel may try to manipulate The Forgotten character by planting negative thoughts and emotions towards other characters.

Overcoming these manipulative tendencies is an important step in collecting the memory and progressing further in the Forgotten Memories quests. It signifies the resilience and strength of The Forgotten character, and it brings you closer to unraveling the secrets of Disney Dreamlight Valley.

By successfully completing the Trust Forgotten Memory quest, you move one step closer to discovering the truth. You will find out the truth behind The Forgotten and experience the thrilling conclusion of the Disney Dreamlight Valley Forgotten Memories storyline. 

Disney Dreamlight Valley Forgotten Memories: Nurturing

Prepare yourself for the final adventure within the Disney Dreamlight Valley Forgotten Memories questline as you get into the Nurturing memory. As with the previous quests, begin by speaking with Fairy Godmother, who will grant you access to the portal leading to this memory. Once through the portal, you will find yourself in the picturesque Sunlit Plateau, where an encounter with Scar awaits.

Scar will seek your aid in a two-part task. First, he will ask you to locate and crush eight flowers scattered throughout the area. Step on each flower to crush it and weaken a pillar nearby. This step should be completed swiftly and efficiently. Once all the flowers are crushed, return to Scar to receive the next part of the quest.

In the following stage, Scar will request that you plant Night Thorn seeds in specific locations: around the Dreamlight Fruit Tree, the Pillar of Nurturing, and the Mine entrance near the waterfall. Use the provided shovel to dig holes and carefully plant the seeds as instructed. To ensure their growth, remember to water all the seeds diligently.

Upon fulfilling these requirements, The Forgotten character will be rewarded with the Orb of Nurturing, symbolizing the completion of the Nurturing memory. Return to Scar once more to conclude the Forgotten Memories questline on a satisfying note.

By successfully navigating the Friendship, Trust, and Nurturing memories, you have started on a remarkable journey of self-discovery and resilience. The Forgotten Memories questline will forever hold a special place in your Disney Dreamlight Valley adventure, allowing you to unravel the engaging story and experience the true essence of the Forgotten character.

Conclusion and Next Steps

Talking to fairy Godmother

Upon completing all three Forgotten Memories quests, players will progress to the next portion of the main storyline in Disney Dreamlight Valley. The following quest, titled “What’s Left Behind,” is initiated by the Fairy Godmother and promises thrilling encounters with The Forgotten, offering an opportunity to engage directly with this mysterious character.

To experience the enthralling conclusion of the main storyline, continue diligently completing the main story quests in Disney Dreamlight Valley. Start on this unforgettable journey through the Forgotten Memories quests and witness the magic of Disney Dreamlight Valley. Discover the power of friendship, trust, and nurturing as you go through the memories of The Forgotten.

For more Guides, Tips, and Tricks

Check out our Video Games Guide Section for more dedicated guide

How To Siphon Gas In Warzone 2 Ashika Island

Want to do the Warzone 2 siphon gas task on Ashika Island? You might be doing it the wrong way. Here is how you can do it easily.

One of the exciting new features introduced in Season 4 of Call of Duty Warzone 2.0 is the ability for players to siphon gas on Ashika Island by filling Gas Canisters from vehicles. This feature adds a new layer of strategy and immersion to the game, allowing players to interact with the environment in unique ways. In this guide, we will tell you all the details about Warzone 2 Siphon Gas process. 

Gas can
Gas can

Warzone 2 Siphon Gas

In the Faction Missions of Call of Duty: Warzone 2.0, players have new objectives to complete, and one of them involves siphoning gas. One particular mission, called “Fuel Shortage,” is a Tier 1 mission in the White Lotus faction. In this mission, players face the challenge of completing two tasks: siphoning gas from a vehicle located on Ashika Island and using a Gas Can to refuel another vehicle. At first, these tasks may seem straightforward, but there are a few important steps that players need to follow in order to successfully accomplish them.

To complete the “Fuel Shortage” mission and fulfill the objectives, players must first locate a vehicle on Ashika Island that contains the gas they need to siphon. Once they have found a suitable vehicle, they can proceed to siphon the gas using the appropriate method. After siphoning the gas, players will need to take a Gas Can and use it to refuel a different vehicle. It is crucial to ensure that the Gas Can is properly utilized to complete the refueling process.

Finding Gas Canisters on Ashika Island

Before players can do Warzone 2 siphon gas, they need to locate a gas canister to fill. These canisters can be found at various random locations across the Ashika Island map. However, the most reliable place to find them is at gas stations, where multiple canisters are often available, typically inside buildings. For players specifically aiming to complete the Fuel Shortage mission, it is advisable to drop near a gas station to increase their chances of finding gas canisters quickly.

Siphoning Gas from Vehicles

Once you have successfully obtained a gas canister, the next step is to find a vehicle that contains the gas you want to siphon. In the exciting world of Warzone 2.0, you’ll come across a variety of vehicles such as cars and boats that serve this purpose. If you happen to be near a gas station, chances are you’ll find several vehicles in close proximity. 

Once you’ve hopped into a vehicle, you’ll be presented with three options: Refuel, Drop, or Siphon Gas. To proceed with gas siphoning, simply select the “Siphon Gas” option, and the transfer of fuel will begin. Keep in mind that this process may take some time, so it’s best to avoid siphoning gas in open areas where enemy players can easily spot you and launch an attack. Stay vigilant and make strategic decisions to ensure your safety while doing Warzone 2 siphon gas.

Refueling Considerations

It’s important for players to remember that they cannot do Warzone 2 siphon gas from a vehicle if the gas canister they’re using is already completely full, containing 100% gas. In situations like these, players need to use a different approach called the “Refuel” option. This option allows them to empty some gas from the vehicle before they can start the siphoning process. 

By using the “Refuel” option, players ensure that they make the most efficient use of their resources. This strategy allows them to complete their missions effectively by creating space within the gas canister for the newly siphoned gas. So, when encountering a full gas canister, remember to opt for the “Refuel” option first to empty some gas and pave the way for a successful siphoning process.

Using the gas can
Using the gas can

Season 4 of Call of Duty: Warzone 2.0 has introduced several exciting updates, including the ability to siphon gas. While siphoning gas may not be as straightforward as initially anticipated, players can enhance their gaming experience by strategically locating gas canisters at gas stations and effectively siphoning gas from various vehicles across Ashika Island.

For more Guides, Tips, and Tricks

Check out our Video Games Guide Section for more dedicated guide

How To Get the Reins of Ashava Horse Armor in Diablo 4

The Diablo 4 Ashava Horse Armor is very beneficial, but how to get it? You need to beat Ashava boss and here is how you can do it.

In Diablo IV, players strive to acquire powerful mounts and customize them with unique armor. One highly sought-after customization is the Reins of Ashava Horse Armor. This exceptional mount customization item can be obtained by defeating a powerful boss known as Ashava, The Pestilent. In this guide, we’ll look into the process of obtaining the Diablo 4 Ashava horse armor and provide you with the necessary strategies to conquer Ashava.

Ashava fight Gameplay

Finding Ashava, The Pestilent

Finding World Bosses in Diablo 4 can be a bit challenging since they are not easy to locate. Among them, Ashava is known to appear in different World Boss arenas, but the most dependable spot to find Ashava is The Crucible in the Fractured Peaks region. However, there’s a catch – Ashava can only spawn once every six hours, making it quite unpredictable.

Fortunately, there is a way to improve your chances. When you’re exploring Fractured Peaks, you’ll receive a notification 30 minutes before Ashava spawns. This advance notice gives you plenty of time to get ready and head to the arena. It’s important to take advantage of this alert and use the time wisely to gather your group, prepare your strategies, and equip yourself with the necessary tools and supplies.

By being proactive and making the most of the notification, you can significantly increase your odds of encountering Ashava and successfully acquiring the Reins of Ashava Horse Armor. So, keep an eye out for that notification and be prepared to face this formidable boss in Diablo 4’s world.

Defeating Ashava The Pestilent

To obtain the Diablo 4 Ashava Horse Armor, you must emerge victorious against Ashava in battle. Here are some key strategies to help you in defeating this boss:

Skill Tree Optimization

Before taking on Ashava, it is important to optimize your skill tree in Diablo 4. This means making sure that you have allocated your skill points wisely and efficiently. Take the time to carefully evaluate your choices and consider redistributing points if necessary to maximize your effectiveness in battle. By doing so, you ensure that you are well-equipped and prepared to face the difficult challenge that awaits.

In addition to skill optimization, it is crucial to reach at least level 25 before confronting Ashava. This ensures that you have gained enough experience and acquired sufficient abilities to stand a chance against this powerful adversary. Leveling up allows you to unlock new skills, increase your attributes, and improve your overall combat prowess.

By optimizing your skill tree and reaching an appropriate level, you enhance your chances of success in the battle against Ashava. Remember to carefully plan your character’s progression, strategize your skill choices, and train diligently to become a formidable force capable of taking on this challenging boss in Diablo 4.

Poison Resistance

Equipping gear that provides Poison Resistance is strongly advised when facing Ashava in Diablo 4. This boss relies heavily on poison attacks, which can pose a significant threat to your progress. By arming yourself with items that enhance your resistance to these toxic attacks, you greatly increase your chances of survival and overall success in the battle.

Poison attacks from Ashava can inflict damage over time, draining your health and impairing your ability to fight effectively. However, by strengthening yourself against these venomous strikes, you gain a vital advantage. Poison Resistance gear reduces the harmful effects of Ashava’s poison attacks. This allows you to withstand their damage for longer periods and maintain your combat efficiency.

Equipping items with Poison Resistance not only enhances your survivability but also provides a clearer path toward victory. It grants you the opportunity to focus on dealing damage and uisng your skills rather than constantly worrying about the debilitating effects of poison.

Cooperative Effort

To get the Diablo 4 Ashava Horse Armor, fighting alone is no easy feat. These encounters are not only challenging but also time-sensitive, requiring quick and decisive actions. As such, it is highly recommended to seek assistance from fellow adventurers to tackle this powerful boss. By taking the help of others and forming a full group of 12 players, using the cooperative capabilities of Diablo 4, you significantly enhance your chances of achieving victory.

Collaborating with other players brings numerous benefits. It allows for better coordination, pooling of resources, and the ability to strategize and execute plans effectively. Dividing the tasks and responsibilities among a team makes the fight more manageable, ensuring that each member can focus on their specific roles and contribute to the overall success.

In a group setting, players can support and assist one another during the intense battle with Ashava. By working together, you can combine your strengths, share knowledge and tactics, and overcome challenges that would be difficult to conquer alone. Furthermore, the cooperative nature of the fight fosters a sense of camaraderie and teamwork, creating a more enjoyable and rewarding experience for everyone involved.

Engaging the Boss

During the battle with Ashava in Diablo 4, it is crucial to be mindful of the boss’s poison-based attacks and melee strikes. To minimize the impact of direct hits, it is recommended to position yourself beneath Ashava whenever the opportunity arises. By staying underneath the boss, you can evade some of the incoming attacks and reduce the risk of sustaining heavy damage.

However, successfully defeating Ashava requires more than just avoiding hits. Coordinated teamwork is key to achieving victory efficiently. By working together with your fellow players, you can synchronize your efforts and maximize the effectiveness of your attacks. Coordinate your strategies, communicate effectively, and focus your combined firepower on Ashava.

By concentrating your attacks and unleashing a barrage of coordinated assaults, you can chip away at Ashava’s defenses and gradually bring the boss down. Remember, unity and cooperation are paramount in overcoming this fearsome opponent.

Gameplay
Gameplay

Obtaining the Diablo 4 Ashava Horse Armor

Upon defeating Ashava, the drop of the Diablo 4 Ashava Horse Armor is random. Some fortunate players may acquire this remarkable item on their initial attempt. However, if luck doesn’t favor you, you must face Ashava again during their designated availability window for another opportunity to obtain the armor. While this might require perseverance, it’s important to note that Diablo 4 World Bosses offer numerous other valuable rewards, ensuring that each encounter is worthwhile.

Conclusion

Securing the Diablo 4 Ashava Horse Armor is a challenging yet rewarding task. Defeating Ashava, The Pestilent, grants you the opportunity to customize your mount and showcase your achievements in the game. By following the strategies outlined in this guide, optimizing your skill tree, equipping poison-resistant gear, cooperating with fellow adventurers, and mastering the battle tactics, you can increase your chances of claiming the Diablo 4 Ashava Horse Armor. 

For more Guides, Tips, and Tricks

Check out our Video Games Guide Section for more dedicated guide

Clash Royale Card Level 15 Guide – Upgrade Costs, Card Evolution, and More

In this Clash Royale Card Level 15 guide, we will uncover the upgrade costs, Elite Wild Cards, and the Card Evolution. 

Clash Royale players, get ready for the ultimate game-changer. Supercell has finally shared details about the long-awaited Clash Royale Card Level 15. When it was first announced earlier this year, there was some negative feedback, mainly due to the rising costs of upgrading cards to higher levels. However, the developers have taken this feedback seriously and have made improvements to address these concerns.

Clash Royale Card Level 15 – Upgrade Costs

Upgrading your cards to Level 15 in Clash Royale brings an exciting change – you no longer need to spend any gold! Yes, you read that right. Moving from Card Level 14 to Card Level 15 won’t cost you a single piece of gold. 

Instead, there’s a new element called Elite Wild Cards that you’ll need to upgrade your cards to the elite level. This means you can now concentrate on improving your gameplay without the burden of gathering gold. It’s a refreshing update that lets you dive straight into the action and make your cards even more powerful, all without worrying about your gold stash.

Introducing the Elite Level

Get ready players, because the arrival of Clash Royale Card Level 15 brings forth a new era in the game. It’s a game-changer. Now, the highest level of card power is known as the Elite Level. Say goodbye to the old concept of “Max Level.” When your cards reach Level 14, something magical happens. Any extra cards you have of the same type become incredibly valuable Elite Wild Cards. These special cards hold immense power, and they can be used to upgrade any Level 14 card to the prestigious Elite Level.

Imagine the possibilities! Your cards can now ascend to new heights, unlocking their true potential. The Elite Level represents a whole new realm of strength and dominance. It’s a thrilling transformation that sets your cards apart from the rest. With Elite Wild Cards in your possession, you hold the key to unlocking unparalleled power.

Gone are the days of simply striving for the maximum level. Now, you have the chance to elevate your cards beyond the limits previously imagined. The Elite Level is a testament to your dedication and skill in the game. It’s an achievement that showcases your prowess as a Clash Royale player.

Gold Overflow and Enhanced Rewards

Supercell is on a mission to make Clash Royale an even more exciting and fulfilling game. To achieve this, they have made some important changes. One of the changes involves removing the concept of gold overflow. In the past, when you received duplicate cards, you would get extra gold. However, this won’t happen anymore.

But don’t worry! Supercell has a surprise in store to make up for it. Now, during regular gameplay, you will earn three times the amount of gold you used to receive. It’s a fantastic opportunity to grow your wealth and unlock new possibilities within the game. Get ready to see your gold reserves soar as you engage in battles, complete quests, and achieve victory. With this generous increase in gold rewards, you’ll have the chance to amass a fortune and take your gameplay to new heights.

Clash Royale Card Level 15 – Card Level Caps

With the introduction of Card Level 15, Path of Legends will implement a temporary cap at Level 14 for a duration of six months. This measure ensures a balanced and fair playing field during the initial phase of Elite Level integration. However, fear not, as Clan Wars and Trophy Road will embrace the power of Card Level 15 (Elite Level). Keep aiming for greatness and conquer your opponents with the might of elite cards. Please note that event card levels will continue to be capped at Level 11 to maintain the competitive spirit.

The Evolution Continues

Unlocking a card’s Evolution form is an exciting feature that exceeds the boundaries of Elite Levels. Unlike traditional practices, Card Evolution is not exclusive to Elite Level cards. You can unleash the full potential of your favorite cards without needing them to be at Elite Level. All it takes is six Evolution (Evo) Shards specific to the desired card, and a whole new world of possibilities awaits you.

Now that you have read the Clash Royale Card Level 15 guide, it’s time to take your gameplay to the next level. Hold the power of the Elite Level, strategize with Card Evolution, and dominate the arenas like never before. The game has evolved, and it’s your chance to shine. Remember that to unlock a card’s Evolution form, you will simply need six Evolution (Evo) Shards of that specific card.

For more Guides, Tips, and Tricks

Check out our Video Games Guide Section for more dedicated guide

Where to Find the Shadow Company laptop in Warzone 2 DMZ

Are you looking for the Warzone 2 DMZ Shadow Company Laptop? Well, you are at the right place because we are going to help you.

In Warzone 2 DMZ, completing missions successfully requires careful navigation and thorough exploration. Among the various missions, some involve finding specific items, which can be quite challenging due to their small size and hidden locations. One such mission is the “Shadow Company Intel,” where you are tasked with locating a laptop. This guide aims to provide detailed directions on where to find the Warzone 2 DMZ Shadow Company laptop. Getting this laptop will complete your mission.

Gameplay
Gameplay

Locating the Ashkia Science Center

To begin your quest, it’s crucial to familiarize yourself with the Ashkia Science Center’s whereabouts. Head towards the Town Center region, located on the western side of the island. Within this region, you will find the Ashkia Science Center in the eastern section. Upon examining the map, you’ll notice the building shaped like an “H,” making it relatively easy to spot.

Finding the Warzone 2 DMZ Shadow Company Laptop

Once you have reached the Ashkia Science Center, it’s time to search for the laptop. Similar to the challenges encountered while locating the Sniper Team’s Hideout in Season 3, the laptop can be easily overlooked. Proceed to the second floor of the Science Center. Once you reach the second level, head towards the middle section and keep an eye out for a receptionist desk. To your delight, the Shadow Company laptop will be waiting for you on this desk.

Acquiring the laptop marks only the initial phase of your mission. To successfully complete it, you must exfiltrate from the area. Locate an exfil point and make your way towards it, treating it like any other exit. By reaching the exfil point, you will have accomplished one of the more intricate missions in Season 4.

As you navigate through the complex, make sure to remain cautious and alert. Enemies may lurk in the shadows, seeking to stop your progress. Use your skills to outsmart and outmaneuver any obstacles that stand in your path. Each step taken towards the exfil point brings you closer to the completion of this mission.

Gameplay
Gameplay

Conclusion

With this comprehensive guide, you now have the knowledge required to find the Warzone 2 DMZ Shadow Company laptop. By following the instructions carefully, you will easily navigate through the Ashkia Science Center, locate the laptop on the receptionist’s desk, and successfully complete the mission. Remember, attention to detail and persistence are key to triumphing over complex challenges in Warzone 2 DMZ.

For more Guides, Tips, and Tricks

Check out our Video Games Guide Section for more dedicated guide

How to Beat Elias in Diablo 4

Elias Diablo 4 boss is difficult and without the right approach, it is very difficult for you to win. This guide has all the important tips and tricks.

Diablo 4 is an incredibly challenging game, especially when facing difficult bosses like Elias. Before diving into the boss fight, it’s crucial to understand Elias’s significance within the Diablo 4 storyline. Elias plays an important role in the story, being responsible for resurrecting Lilith and leading the effort to empower her as the ultimate evil, known as a Prime. Defeating Elias is not only essential for your character’s progression but also for the greater good of the game’s world.

In this guide, we will provide you with a detailed strategy to defeat Elias Diablo 4. By following these tips and tricks, you’ll have better knowledge to emerge victorious in your encounters with this boss.

Gameplay
Gameplay

How to Beat Elias Diablo 4: First Stage

Elias’s boss battle consists of two sections, and the initial part is relatively straightforward. During the first encounter, you will face Elias approximately four times. While this may seem difficult, using the right strategy will make the fight manageable.

1. Consistent Attacks and Dodging

To overcome Elias, maintain a relentless attack and prevent him from regaining his strength. Attack him consistently, denying him any breathing room. Be careful of his area-of-effect (AoE) attacks, as they can impede your progress. Quickly dodge these attacks to avoid getting slowed down.

2. Use Class Abilities

Depending on your character class and build, your approach to the fight may vary. For example, if you’re playing as a Necromancer with the Summoner Build, use your summoned skeletons to attack Elias Diablo 4 while you focus on dodging his attack. If your class lacks these summoned abilities, strike a balance between ranged and close-quarter attacks. Seize the brief moments of respite between his assaults to land effective blows and then quickly evade.

How to Beat Elias Diablo 4: Second Stage

The second and final stage of Elias’s boss fight presents a more significant challenge. Prior to engaging in this phase, we highly recommend equipping the Protecting Aspect. This aspect generates a large protective bubble around your character for 3 to 5 seconds, providing respite from Elias’s devastating attacks.

1. Dealing with Oppressors

Similar to the first encounter, Elias Diablo 4 will summon Oppressors, but expect a greater number this time. Engage from a distance to reduce the risk posed by these powerful enemies. Dodge Elias’s formidable AoE attacks while focusing on dispatching the summoned NPCs swiftly. Beware of healing NPCs, as they can prolong the battle. Prioritize eliminating them to minimize Elias’s sustainability.

2. Class-Specific Strategies

Different character classes have unique strengths against Elias Diablo 4. Sorcerers, for example, can use skills such as Blizzard and Hydra to immobilize and damage Elias. By freezing him with Blizzard and allowing the Hydras to inflict supplementary damage, Sorcerers can gain a significant advantage. On the other hand, Necromancers should employ their skeleton army to engage Elias, while maintaining focus on dealing with his summons and other NPCs.

3. Balancing Proximity and Ranged Attacks

To maximize your chances of success, alternate between close-quarters combat and long-range attacks. Move in for close combat during opportune moments, then quickly retreat to a safe distance. Use your character’s abilities and attacks effectively while avoiding Elias’s devastating strikes.

4. Potions: A Lifesaver in Battle

Never underestimate the importance of potions in your battle against Elias Diablo 4. Ensure you have an ample supply of high-quality potions that can restore a substantial amount of health. These potions can be invaluable during intense moments, providing a much-needed lifeline when your character’s health is running low.

Gameplay
Gameplay

Conclusion

By following this simple guide, you now have the knowledge and tricks required to defeat Elias Diablo 4. Remember to maintain a relentless attack, dodge his attacks effectively, and make optimal use of your character’s class-specific abilities. With perseverance and skill, you will emerge victorious and continue your journey through the dark and treacherous world of Diablo 4.

For more Guides, Tips, and Tricks

Check out our Video Games Guide Section for more dedicated guide

Fortnite Chapter 4 Season 3 All NPC Locations

The latest Fortnite NPC locations for Chapter 4 Season 3 are here and you should not miss them at any point. Take a look!

Fortnite is a dynamic game that constantly evolves with each new season, and Chapter 4 Season 3 is no exception. This season introduces exciting changes such as new weapons, map transformations, and engaging challenges. Among these alterations, the Fortnite NPC Locations in Chapter 4 Season 3 have also been refreshed. In this guide, we will explore the various Fortnite NPC Locations in Chapter 4 Season 3, and highlight the items they offer.

NPC locations
NPC locations

ALL Fortnite NPC Locations Chapter 4 Season 3 

Fortnite Chapter 4 Season 3 boasts a total of 16 NPCs scattered throughout the map. It’s important to note that these NPCs may not always be found in their designated spawn locations due to player interactions. Nonetheless, let’s get into the Fortnite NPC locations and discover the unique items they have available for you:

Fennix 

Fennix is near a tower situated by Royal Ruin. This resourceful character offers the Combat SMG and Firefly Jar, providing you with the tools to dominate your opponents.

Volpez 

Inside The Hall of Whispers, you’ll encounter Volpez. This intriguing NPC provides the Furniture Disguise and SMG, enabling you to blend into your surroundings and surprise your enemies.

Innovator Slone

In the list of Fortnite NPC locations, next is located in the forests northeast of Southern Ruin, Innovator Slone awaits. This inventive character offers the FlapJack Rifle and Grenade, ensuring you have the firepower necessary to overcome any obstacle.

Aura 

Aura can be found around Hitches and Ditches, in close proximity to Innovator Slone. By visiting this NPC, you’ll have access to the Thermal DMR and Key, granting you the enhanced vision and access to valuable areas.

Nia 

Go west of Neon Bay Bridge to find Nia, a skilled NPC offering the Heavy Sniper Rifle and Tactical Pistol. With these weapons at your disposal, you’ll have an edge in long-range combat situations.

Guardian Amara 

Located in Brutal Bastion, Guardian Amara stands ready to assist you. This formidable NPC provides the Kinetic Boomerang and Small Shield Potion, equipping you with defensive capabilities and a unique ranged weapon.

Trace 

Head over to The Apparatus, where Trace awaits. This resourceful NPC offers the Thermal DMR and Tactical Pistol, allowing you to engage your enemies with precision and versatility.

Peely 

Make your way near the horse-shoe river bend and forest north of Shady Stilts to find Peely. This playful NPC offers the Banana and Shadow Tracker, adding a fruity twist to your arsenal along with a helpful tracking device.

Purradise Meowscles 

North of the lake at Sunswoon Lagoon, you’ll discover Purradise Meowscles. This feline NPC provides the Havoc Pump Shotgun and Shield Potion, empowering you with close-quarters combat proficiency and defensive capabilities.

Meowscles
Meowscles

Remedy 

Located near a farmhouse in Frenzy Fields, Remedy is at your service. This caring NPC offers the Med-Mist and the opportunity to hire a medic specialist, ensuring you have access to healing resources during intense battles.

Triage Trooper 

Inside the Slurp Cafe at Slappy Shores, you’ll find Triage Trooper. This skilled NPC provides the Med Kit and the option to hire a medic specialist, granting you crucial health regeneration during challenging encounters.

Kitbash 

Climb the tower at Breakwater Bay to encounter Kitbash. This versatile NPC offers the Maven Auto Shotgun and the opportunity to hire a heavy specialist, bolstering your firepower when facing formidable opponents.

Beastmode 

In Drift Ridge, you’ll come across Beastmode. This powerful NPC offers the Drum Shotgun and the chance to hire a heavy specialist, ensuring you can unleash devastating attacks on your foes.

Insight 

Make your way to the roof of Rumble Ruins to meet Insight. This perceptive NPC provides Storm Circle hints and offers the option to hire a scout specialist, allowing you to stay one step ahead of the competition.

Longshot 

Perched atop the landmark at Eastern Watch, you’ll find Longshot. This sharpshooting NPC offers Storm Circle hints and the ability to hire a scout specialist, providing you with valuable information and tactical advantages.

Munitions Expert 

The final on our list of Fortnite NPC locations is in a garage. In a garage by Fallow Fuel, you’ll encounter Munitions Expert. This knowledgeable NPC offers upgrades and the chance to hire a supply specialist, ensuring you have a steady supply of essential resources during your adventures.

By familiarizing yourself with the various Fortnite NPC locations in Chapter 4 Season 3, you can strategically plan your encounters and acquire unique items that will aid you in your battles.

For more Guides, Tips, and Tricks

Check out our Video Games Guide Section for more dedicated guide

Clash Of Clans June 2023 Update: New Troops, Potions, Upgrades, and More

There are lots of things coming to the Clash Of Clans June update. You have new troops, potions, and a lot of stat changes.

The newest Clash of Clans update has arrived, and let us tell you, there’s a whole lot of cool stuff to discover. They’ve added new troops, tons of upgrade levels, and made some big changes to keep things balanced. Every part of the game has something fresh to offer. Let’s take a closer look at all the exciting features that came with the Clash Of Clans June update.

Apprentice Warden
Apprentice Warden

Clash Of Clans June Update: Apprentice Warden Troop

Say hello to the Apprentice Warden, a brand-new Dark Elixir troop! This little guy uses a slingshot to shoot magical damage at enemies from a distance. Although he can’t fly like the Grand Warden, he can jump over walls and boost the health of all ground troops with his special Life Aura.

Clash Of Clans June Update: Super Hog Rider!

The Hog Rider got an upgrade! Now there is a super troop called the Super Hog Rider, and it’s stronger than ever. With higher health and more damage per second, this troop is ready to take on any challenge. When the Super Hog Rider gets destroyed, it splits into two separate units—the Hog and the Rider. The Hog can jump over walls and attack defenses, while the Rider goes after the nearest enemy building.

Clash Of Clans June Update: Magical Potions and Builder Bonuses!

Two awesome new magic items have been added to Clash of Clans: the Pet Potion and the Builder Star Jar. The Pet Potion speeds up the upgrade time for Pets in the Pet House by a whopping 24 times for one hour. And the Builder Star Jar lets you skip the waiting time for your Builder Base Star Bonus instantly. How cool is that?

Exciting Upgrades for Everyone

The Clash Of Clans June update brings a ton of new upgrade levels for troops, super troops, buildings, traps, siege machines, heroes, and pets. You can make your favorite things even more powerful and unlock their true potential!

Balancing the Game

The Clash Of Clans June update also includes some changes to make the game fairer and more fun. Here are the important balance changes:

  • Level 9 Miner now has more health—1250 instead of 1200.
  • Level 9 Super Miner also gets a health boost—from 3200 to 3500.
  • Mountain Golem and Flying Fortress in Clan Capital will no longer randomly choose their attack positions.
  • Eagle Artillery will be less likely to target Healers.
  • The Grand Warden will be less likely to follow Archers and Barbarians.
  • Troops will now deploy faster from Siege Machines when there are lots of them inside.
  • The reload speed of the Rage Spell Tower is now 20 seconds faster.
  • The damage buff of the Rage Tower is slightly reduced from 100% to 90%.
  • Other Spell Towers (like Poison and Invisibility) will take 10 seconds longer to reload.

Super Troop Changes

Here’s a cool new feature: you can now cancel any active Super Troop. If you have a Super Troop active but want to switch things up, you can use the ‘Cancel’ button. Just keep in mind that you won’t get any Dark Elixir or Super Potions back after canceling a Super Troop.

So there you have it, the fantastic new additions in the Clash of Clans June 2023 update. Whether you’re excited about the new troops, powerful upgrades, or cool potions, there’s something for everyone to enjoy in this update. Get ready to have a blast in Clash of Clans!

For more Guides, Tips, and Tricks

Check out our Video Games Guide Section for more dedicated guide

Tower of Fantasy Mirroria Fastlane Event Guide 

You can get exciting rewards like a core control module, cluster, and much more in the Tower of Fantasy Mirroria Fastlane Event.

Tower of Fantasy has recently unveiled its highly anticipated Version 2.5 update. It brings forth a myriad of exciting new features and gameplay enhancements. Among the highlights of this update is the Tower of Fantasy Mirroria Fastlane Event.

It is a thrilling and competitive racing game that will put your piloting skills to the test. In this guide, we will walk you through the ins and outs of the Mirroria Fastlane Event. We will provide you with valuable tips and strategies to help you excel in this exhilarating race.

Tower of Fantasy Mirroria Fastlane Event

The Tower of Fantasy Mirroria Fastlane Event introduces a scenario where participants form teams of four and take control of special aircraft to traverse the scenic Mirroria area. While the flight path of the aircraft is predetermined, players have the freedom to control the view angle. This will allow them to observe their surroundings with precision. 

The speed of the aircraft is directly influenced by its energy level, meaning that the higher the energy, the faster the aircraft will traverse the racecourse. As such, it is imperative for participants to collect energy during the flight to boost their aircraft’s speed and gain an edge over their competitors.

During the flight through Mirroria, participants will come across energy locks scattered throughout the environment at regular intervals. These energy locks serve as power-ups for the aircraft and can significantly impact the outcome of the race. To benefit from these power-ups, players must successfully hit the energy locks. This will grant them additional energy for their aircraft. The amount of energy obtained from each lock directly correlates with the number of hits. In essence, the more energy a participant collects, the faster their aircraft will soar through the racecourse.

Energy Management

In addition to energy, the Tower of Fantasy Mirroria Fastlane Event introduces an interesting twist by equipping the aircraft with weapons. It is crucial for participants to understand that the use of weapons consumes energy over time. To optimize their energy usage, participants should strategically focus on identifying and targeting “easy marks.” 

These easy marks represent targets that are relatively simpler or easier to hit. By conserving bullets and intelligently using them on these targets, participants can ensure efficient energy management, allowing them to maintain a competitive advantage throughout the race.

Shooting energy blocks not only provide energy for the aircraft but also triggers the activation of various buffs. These buffs offer temporary enhancements to the aircraft’s performance, providing players with valuable advantages over their opponents. The buffs obtained from shooting energy blocks can range from increased maneuverability and improved weapon accuracy to defensive capabilities. It is crucial for participants to capitalize on these buffs strategically, as they can potentially tip the scales in their favor and pave the way to victory.

Throughout the race, participants may encounter missed targets hidden within their blind spots. These missed targets represent objects or entities that were not initially visible or noticed by the participants. By actively searching for and engaging with these missed targets, participants can unveil additional energy, buffs, or other rewards that can significantly boost their chances of success.

Maximizing Rewards and Ranking

At the end of the race, rewards will be distributed based on the order in which the teams reach the destination. The destination serves as the final goal of the competition, and reaching it swiftly is of utmost importance to secure a favorable position in the ranking. By aiming to reach the destination as quickly as possible, participants increase their chances of obtaining higher rankings and unlocking more lucrative rewards.

After completing the Tower of Fantasy Mirroria Fastlane Event challenges, players will have the opportunity to redeem their hard-earned rewards in the in-game Store. The Store offers a wide array of enticing items and upgrades that can be acquired using the Event-exclusive currency called Speed Coins. These coins can be obtained by successfully completing the challenges within the event. It’s worth noting that each player can earn a maximum of 800 Speed Coins per match, so be sure to utilize them wisely to obtain the most desirable rewards.

Gameplay
Gameplay

Tower of Fantasy Mirroria Fastlane Event Rewards

Let’s take a closer look at the enticing rewards that await you in the Mirroria Fastlane Event:

  • Red Nucleus
  • Spacetime Crystal Fragments x10
  • Core Control Module
  • Augmentation Factor
  • Mira x100
  • Joint Supply Chip I
  • Cluster
  • Weapon Augmentation Box II
  • Matrix Data Pack III
  • Weapon Battery III
  • Weapon Augmentation Box I
  • Elemental Ore Box
  • Gold x1000
  • Elemental Ore Shard Box
  • Fortress Tactics Eyepiece

Conclusion

The Tower of Fantasy Mirroria Fastlane Event in the Version 2.5 update brings an exhilarating racing experience that will push your piloting skills to their limits. By mastering the art of energy management, strategically targeting easy marks, remaining vigilant for missed targets, and aiming to reach the destination swiftly, you can outpace your competition and secure a prominent position in the event’s rankings. Remember to collect energy, unlock buffs, and utilize them strategically to gain the upper hand. 

For more Guides, Tips, and Tricks

Check out our Video Games Guide Section for more dedicated guide