Lost Ark Maykoko Fest – All Events and Rewards

Are you ready for the Lost Ark Maykoko Fest? If you don’t know about it then do not worry we have all the details for you.

Lost Ark players, get ready to participate in the Maykoko Fest, a month-long celebration of all things about Mokoko. This event has begun on May 1, 2023, and continues throughout the month. It features weekly activities and rewards that all players can enjoy. In this guide, we will tell you everything you need to know about the Lost Ark Maykoko Fest.

Mokoko
Mokoko

Unite the Lost Ark Community with Weekly Goals and Rewards

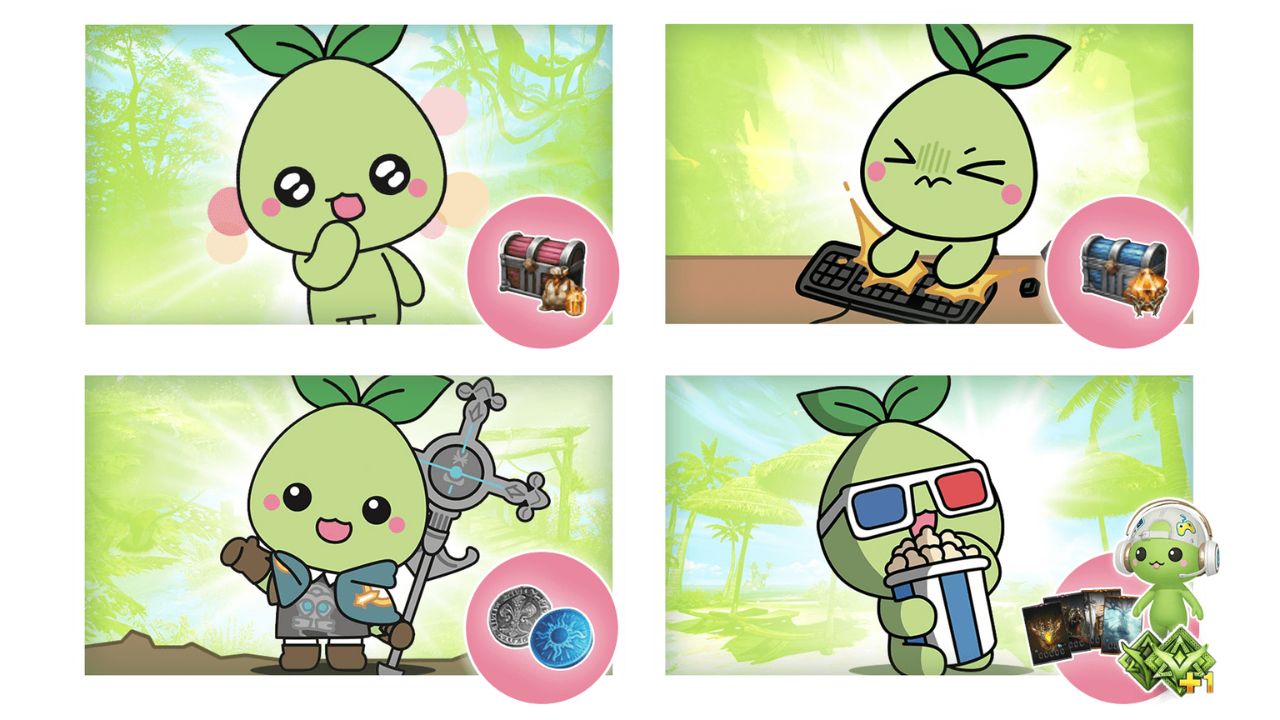
Lost Ark Maykoko Fest aims to unite the Lost Ark community by encouraging players to complete weekly goals and earn rewards. The first weekly goal is to use three million Mokoko emotes. Players can use up to 10 emotes per day, and if the community reaches this goal, they will receive x10 Honing Shard Selection Chests, each containing x8 T3 Large Honor Shard Bags.

Wear Mokoko Skin and Participate in Chaos Dungeon or Guardian Raid Clears

For the second week, players must complete one million Chaos Dungeon or Guardian Raid clears while wearing a Mokoko Skin. Each player who participates in the activity counts as one completion. If players achieve this goal, they will receive x10 Honor Leapstone Selection Chests, each containing x125 Honor Leapstones or x25 Great Honor Leapstones.

Complete Legion Raids and Earn Ancient Platinum Coins

In the third week, players must complete 250,000 Legion Raids while wearing a Mokoko Skin, with each player in the activity counting as one completion. Players who achieve this goal will be rewarded with x100 Ancient Platinum Coins, which include 2M Silver and x25 Pheons.

Create and Share Stronghold Feasts for Various Prizes

In the fourth and final week of the Lost Ark Maykoko Fest, players must create and share 150,000 Stronghold Feasts. Players who achieve this goal will be rewarded with various prizes, including Una’s Daily Task Completion, Una’s Extra Task, Legendary – Epic Card Packs, and The Gamer Moko Pet.

Track the Progress and Enjoy the Festivities

If the Lost Ark community succeeds in each of the weekly goals, rewards will be distributed three hours after the end of each week. Players can monitor the event’s progress by checking the Maykoko Fest event page.

Mokoko
Mokoko

Join the Fun-filled Celebration of All Things Mokoko

Lost Ark Maykoko Fest is a fun-filled celebration of all things Mokoko, with exciting rewards up for grabs. So don’t miss out on the festivities and join in on the fun. Good luck, Heroes of Arkesia!

For more Guides, Tips, and Tricks

Check out our Video Games Guide Section for more dedicated guide

Best Ways to Get Credits in Honkai Star Rail

Want to get lots of Honkai Star Rail credits? Well, in this guide, you will find some of the best ways to get the credits quickly.

If you are a Honkai Star Rail player, you know how essential Credits are in the game. These in-game resources play a crucial role in leveling up characters and upgrading relics, making them an integral part of the game’s progress. Therefore, it’s essential to get as many Credits as you can. Here are some of the best ways to earn Honkai Star Rail Credits.

Completing Main Quests and Side Missions

Honkai Star Rail Credits can be earned through various means in the game. However, one of the most straightforward ways to earn them is by completing main quests and side missions. When you defeat enemies during these missions, you are awarded Credits. Moreover, completing the entire mission itself rewards you with a significant amount of Credits.

Therefore, it is highly recommended that you complete as many missions as possible to maximize your Credit earnings. By doing so, you can get Credits more quickly and use them to enhance your gameplay experience. Additionally, completing missions can also unlock new content and features, making the game even more enjoyable. So, don’t miss out on the chance to earn Credits by completing as many missions as you can.

Opening Treasure Chests

Opening these chests is an excellent way to acquire upgrade resources and Credits, which can help you progress faster in the game. However, some chests may be guarded by Formidable Foes, which are enemies that are tougher than the usual ones you encounter.

While these enemies may pose a challenge, defeating them and opening the chests they guard is usually worth the effort. These chests usually contain more valuable loot, which can significantly benefit your gameplay. Therefore, it is highly recommended that you keep an eye out for treasure chests and Formidable Foes while exploring the game world. By doing so, you can acquire useful resources and Credits that can help you advance in the game.

Completing Events and Activities

Events and activities are a great way to earn Honkai Star Rail Credits. Completing them will provide you with many rewards, including Credits. However, events are live for a limited time and are subject to change based on real-life timetables. Be sure to check the event requirements and complete them to earn Credits.

Fulfilling Daily Training Missions

Increasing your Trailblazer Rank is an essential step towards improving your character’s abilities and unlocking new features. One of the benefits of increasing your Trailblazer Rank is the ability to access Daily Training.

Daily Training provides you with a list of missions that you must complete within 24 hours to earn Credits in the game. These missions can be anything from defeating a certain number of enemies to completing a specific objective within a mission. By completing these missions, you can earn a good amount of Credits, which can be used to purchase upgrades and improve your gameplay experience.

It is important to note that Daily Training missions reset every day, so it is crucial to complete them within the given 24-hour timeframe. By doing so, you can earn Credits consistently and steadily increase your wealth within the game. Moreover, completing these missions also helps you hone your skills and progress faster in the game.

Completing Daily Nameless Honor Tasks

As you progress through the game, you will unlock the Nameless Honor, which offers Daily, Weekly, and Periodic tasks. Completing these tasks will provide you with XP, which will help you progress further in the Nameless Honor. As you unlock more tiers, you will receive more rewards, including a fair amount of Honkai Star Rail Credits.

Completing Worlds in the Simulated Universe

In the Simulated Universe, players can earn points by completing different worlds within the game. These points are available over time, and as you gather more points, you can unlock various rewards, including Credits.

The progression system within the Simulated Universe is designed to encourage players to explore and complete as many worlds as possible. By doing so, you can earn points and unlock rewards that can help you progress further in the game. Additionally, completing worlds also provide you with valuable resources that can be used to upgrade your character and equipment.

It is important to note that the number of points you can earn from each world varies depending on its difficulty and complexity. Therefore, it is advisable to focus on completing the worlds that offer the most points to maximize your earnings. By doing so, you can get more points and unlock rewards faster, including Credits.

Gameplay
Gameplay

Conclusion

Earning Honkai Star Rail Credits is essential for the game’s progress, and the methods mentioned above are some of the best ways to do so. By completing main quests, opening treasure chests, fulfilling daily missions, and participating in events and activities, you can earn Credits consistently. Additionally, unlocking tiers in the Nameless Honor and completing worlds in the Simulated Universe can also help you get Credits quickly. Try these methods out and level up your game in Honkai Star Rail.

For more Guides, Tips, and Tricks

Check out our Video Games Guide Section for more dedicated guide

How to Make Whimsical Pie in Disney Dreamlight Valley

In this guide, we will tell you how to make the Disney Dreamlight Valley Whimsical Pie. Follow the guide till the end to learn.

Cooking Whimsical Pie in Disney Dreamlight Valley is a fun and exciting experience for players. The game’s update, Pride of the Valley, has brought new recipes and adventures to the game, making it even more enjoyable. In this guide, we’ll be sharing the step-by-step process of making Disney Dreamlight Valley Whimsical Pie and where to find the necessary ingredients. With our guide, you’ll be able to whip up this delicious dessert in no time.

Cooking Whimsical Pie

Ingredients Needed For Disney Dreamlight Valley Whimsical Pie

Disney Dreamlight Valley Whimsical Pie requires three ingredients; Butter, Wheat, and Dreamlight Fruit. While Butter and Wheat are easy to find, Dreamlight Fruit is a bit more challenging to obtain.

  • Butter – To find Butter, players must first have access to Remy from Ratatouille. It can be found and bought for 190 Star Coins at Chez Remy’s shop.
  • Wheat – To find Wheat, players should head over to Goofy’s Stall in Peaceful Meadow. It is also possible to grow your own Wheat by planting Wheat Seeds.
  • Dreamlight Fruit – Dreamlight Fruit can only be obtained once a player has unlocked Simba in Dreamlight Valley and reached Friendship Level 7 with him. Players must complete Simba’s Level 7 Seed of Memories Quest to gain access to Dreamlight Fruit.

How to Complete The Seed of Memories Quest for Dreamlight Fruit

To obtain Dreamlight Fruit, players must complete the Seed of Memories Quest. To do this, follow the steps below:

  • Befriend Simba to Level 7, then talk to Scar.
  • Head to the Vitalys Mines.
  • Head right until you come to a wall of rocks, interact with it, and then enter a hidden room.
  • Pick up items in the room, exit the mines, and talk to Merlin.
  • Make a Potion of Growth and Potion of Dust.
  • Go back to the room in the Vitalys Mines.
  • Put both potions on the table.
  • Pick up Dreamlight Tree Seed.
  • Return to Simba, then go to the Sunlit Plateau Pond.
  • Plant the Dreamlight Seed and use your Royal Watering Can.
  • Wait three days for it to grow, and then the seeds can be harvested.
  • Once you have all the necessary ingredients, head to the nearest cooking station and use one coal to begin.

Disney Dreamlight Valley Whimsical Pie Recipe

Ingredients:

  • 2 Butter
  • 1 Wheat
  • 1 Dreamlight Fruit

Instructions:

  • Combine the two Butter and one Wheat at the cooking station.
  • Wait for the mixture to cook.
  • Add the Dreamlight Fruit to the mixture.
  • Wait for the pie to cook.
  • Serve and enjoy your Whimsical Pie.
Cooking
Cooking

Where to Find More Recipes in Disney Dreamlight Valley

Disney Dreamlight Valley is full of delicious recipes waiting to be discovered. To find more recipes, players can visit various locations within the game, including:

  • Remy’s Kitchen: Chez Remy’s shop
  • Goofy’s Stall: Peaceful Meadow
  • Simba’s Den: Simba’s shop

Conclusion

Cooking Disney Dreamlight Valley Whimsical Pie is a fun and challenging adventure that requires players to gather different ingredients and complete quests. With our guide, you’ll be able to make this delicious dessert and impress your friends in no time. Remember to befriend Simba to Level 7, complete the Seed of Memories Quest, and gather all the necessary ingredients before starting.

For more Guides, Tips, and Tricks

Check out our Video Games Guide Section for more dedicated guide

How To Get Flint In Valheim

Looking for the Valheim Flint? This guide has all the ways that will help you quickly get your hands on this resource of the game.

Valheim is a survival game that has taken the gaming world by storm and for good reason. The game is full of challenges and adventures that keep players engaged for hours on end. One of the most important resources players need to progress in the game is Flint. In this guide, we will explore the best ways to gather Valheim Flint quickly.

Gameplay
Gameplay

What is Valheim Flint?

Flint is an early-game resource in Valheim that is used to craft better tools and weapons. It is commonly found near bodies of water, but it can be challenging to gather in large quantities. Flint is lighter and more rounded compared to ordinary Stone, making it easier to identify. It is a crucial resource that players need to advance in the game.

How to Find Valheim Flint?

Players can find Flint near bodies of water such as ponds, lakes, and oceans. It is most commonly found along shorelines. However, players can use more efficient methods to gather Flint quickly. Setting up secondary bases near large bodies of water is a good strategy to gather Valheim Flint as it respawns after some time. By building strong defenses, players can protect themselves from dangerous creatures and focus on gathering resources.

How to Gather Valheim Flint Quickly?

There are a few tips and tricks players can use to gather Flint quickly in Valheim. Here are some of them:

Explore new worlds

Players can create new worlds and explore locations where Flint can spawn. Valheim’s procedural generation means that players can sometimes find themselves starting in areas that lack certain resources. Hopping between worlds is a solid tactic when it comes to searching for Flint and many other resources.

Set up secondary bases

Setting up secondary bases near large bodies of water is a good strategy to gather Flint as it respawns after some time. By setting up bases, players can give themselves easy access to basic essentials such as storage chests, beds, and workbenches. Players will need to build one of Valheim’s indoor fires to be able to rest in a bed, but this is arguably well worth the resources, as resources will often respawn after players rest in bed.

Build strong defenses

There are quite a few dangerous creatures in Valheim, including Necks, which also spawn near water and can complicate the grind for Flint. Players should make sure that they have some basic weapons and gear before heading out. Building strong defenses is key to gathering resources safely.

Gameplay
Gameplay

Conclusion

Valheim Flint is an essential resource that players need to progress in the game. By following the tips and tricks outlined in this guide, players can gather Flint quickly and efficiently. Whether exploring new worlds or setting up secondary bases, there are many ways to gather this valuable resource. Remember to build strong defenses and protect yourself from dangerous creatures while gathering resources. With these strategies, players can gather as much Valheim Flint as they need.

For more Guides, Tips, and Tricks

Check out our Video Games Guide Section for more dedicated guide

Best Skills You Should Unlock First in Dead Island 2

Want to know which are the best Dead Island 2 skills that you should unlock first? This guide has information about all of them.

Dead Island 2 is a survival horror action role-playing game that was announced back in 2014 but has not yet been released. The game takes place in California, which is overrun by zombies, and players must fight their way through hordes of the undead to survive. Skills are a vital part of the game as they allow players to unlock new abilities and enhance gameplay. In this guide, we will discuss the best Dead Island 2 skills to unlock first.

Skills
Skills

Best Dead Island 2 Skills

Dodge

One of the first best Dead Island 2 skills that you should unlock is Dodge. This skill is a defensive ability that allows you to avoid incoming zombie attacks. It is better than the Block Skill as it provides added mobility. If timed correctly, it also regains stamina and stuns the zombie for a brief moment. Stunned zombies are open to counter-attacks, which means that this skill can turn your defense into more offense. So, it’s a no-brainer to have this skill in your arsenal.

Safety First

After unlocking Dodge, the next skills you should focus on are Safety First. It is great when you’re in a sticky situation. Safety First is an ability that allows you to regain a small amount of health when you perform a perfect dodge. This skill is perfect for when you are out of med kits and need to stay alive. 

Safe Space

Sape Space is also great when you are in a sticky situation. This skill adds a local explosion to med kits, draining the stability of nearby zombies and buying time for you to get back into the flow of combat. It’s a great way to create a safe space for yourself and fend off zombies. It is one of the best Dead Island 2 skills that you should unlock first.

War Cry

The final skill that you should unlock early in the game is War Cry. This skill is a Special Attack-type Ability that boosts the toughness of all nearby squad members, including yourself, and weakens zombies. The stacking effect of a combined buff and debuff cannot be overstated and lets your team mow through a horde of living dead when needed. War Cry doesn’t do much on its own, but it’s a game-changer when combined with other skills. This is one of the best Dead Island 2 skills.

Switch Up Skills

In Dead Island 2, players are rewarded for mixing and matching their skills, so don’t be afraid to experiment. You should try out different combinations of skills to see what works best for you. Also, Limb Ripper is a skill that you should grab when you unlock Slayer Skills midway through the game. It’s an amazing ability that allows you to rip off a zombie’s limbs and use them as weapons. This skill is great for taking down tough zombies and bosses.

Gameplay
Gameplay

Conclusion

In conclusion, skills are a vital part of Dead Island 2’s gameplay experience. Choosing the right skills early can massively impact the game’s difficulty level and your overall gameplay experience. The four skills we recommend unlocking early are Dodge, Safety First, Safe Space, and War Cry. 

These skills provide a solid foundation for any player and allow you to fend off zombies with ease. Don’t forget to experiment with different combinations of skills to find what works best for you. With the best Dead Island 2 skills, you’ll be able to survive the zombie apocalypse and come out on top.

For more Guides, Tips, and Tricks

Check out our Video Games Guide Section for more dedicated guide

How To Make Chocolate Bread in Tower of Fantasy

Who does not love chocolate bread? The Tower of Fantasy players can make this dish and this guide will tell you how.

Are you looking for a new recipe to cook up for the character that not only satisfies your hunger but also gives you a temporary HP boost? Look no further than the delectable Chocolate Bread recipe.

In this guide, we’ll take you through everything you need to know about cooking Chocolate Bread in Tower of Fantasy, including the recipe and how to find the necessary ingredients. By the end of this article, you’ll be able to whip up this tasty 2-Star meal in no time.

Chocolate bread
Chocolate bread

Cooking in Tower of Fantasy

Cooking is an essential aspect of Tower of Fantasy gameplay. Not only does it allow you to create dishes that restore your character’s health, but it also grants temporary boosts to stats such as ATK, DEF, and CRIT rate.

In order to cook in the Tower of Fantasy, you will need to have a cooking station. These can be obtained by completing certain quests, or by purchasing them from the in-game shop. Once you have a cooking station, you can interact with it to begin cooking a variety of dishes.

When cooking, it’s important to pay attention to the recipe and ingredients required. Each dish has a different set of ingredients, and using the wrong ones will result in a failed dish. Additionally, different dishes have different cooking times, so be sure to plan accordingly.

The Tower of Fantasy Chocolate Bread Recipe

First, let’s go over the ingredients you’ll need to make Chocolate Bread in Tower of Fantasy:

  • 2x Cocoa Beans
  • 2x Brown Rice

Once you have gathered these ingredients, head over to the cooking station and interact with the stove. From there, select the Chocolate Bread recipe from the top-left menu and drag the required ingredients into the pot. Now just hit the Start Cooking button to begin cooking your delicious Chocolate Bread.

The Benefits of Chocolate Bread in Tower of Fantasy

Aside from satisfying your character’s hunger, Chocolate Bread also grants a temporary HP boost. When consumed, Chocolate Bread will immediately restore (16% +34,000) HP in Tower of Fantasy. This can be incredibly useful during battles. This makes it an essential dish to have in your inventory.

Finding Tower of Fantasy Chocolate Bread Ingredients 

While the Tower of Fantasy Chocolate Bread recipe itself is simple, finding the necessary ingredients can be a tiring task. Here are some tips to help you gather the required ingredients:

  • Cocoa Beans: Players will need to head to the mountainous region of Navia, located north of the Aesperia’s map, to find Cocoa Beans. They can find them by exploring the area and defeating enemies.
  • Brown Rice: Brown Rice can commonly available in the Navia region underneath Cetus Island and the surrounding area. Be sure to search thoroughly and defeat any enemies in your way.
Tower of Fantasy chocolate bread

Final Thoughts

Cooking up delicious Chocolate Bread is a rewarding experience. Not only is it a tasty treat, but it also grants a temporary HP boost that can be incredibly useful during battles. By following the recipe and finding the necessary ingredients, you’ll be able to whip up this 2-Star meal in no time. We hope you found this guide helpful in your Tower of Fantasy cooking journey. 

For more Guides, Tips, and Tricks

Check out our Video Games Guide Section for more dedicated guide

Pantheon: Rise of the Fallen Guide – 5 Tips and Tricks

Follow the Pantheon Rise of the Fallen Guide carefully to become stronger. These tips and tricks are a must for you.

Pantheon: Rise of the Fallen is an exciting and challenging game that requires strategic thinking and careful planning to succeed. Death is an integral part of the game, and it can be a frustrating experience for players who are not prepared. In this Pantheon Rise of the Fallen guide, we will look at some of the best tips and tricks that you should follow. These tips and tricks will definitely give you an upper hand in the game so do not miss them.

Plan Your Bind Point Carefully

Your bind point is the location where you will respawn if you die. Choosing the right bind point can make a significant difference in your gameplay experience. Consider choosing a bind point that is close to where you will be spending most of your time. For example, if you are exploring a new area or dungeon, it might be a good idea to bind yourself nearby. This way, if you die, you will respawn close to where you left off, and you can quickly retrieve your items. Also, make sure to update your bind point frequently, especially when you are about to embark on a dangerous quest or fight a challenging boss.

Be Careful Who You Consent To

Consent is a powerful tool in Pantheon Rise of the Fallen, but it can also be a double-edged sword. When you consent to another player, you are giving them permission to move your corpse. This can be helpful if they are taking you to a Healer for resurrection or to a more accessible location. However, be careful who you consent to, as some players might have ulterior motives. They might move your corpse to an inaccessible area, making it harder for you to retrieve your items. Only consent to players you trust, and always revoke consent if you feel like it’s no longer necessary.

Take Advantage of Resurrection

Resurrection is a powerful mechanic in Pantheon Rise of the Fallen. When you die, you lose a portion of your experience points, making it harder to level up. However, if you are resurrected by a Healer, you can regain some of the experience you lost. Make sure to take advantage of this mechanic and seek out Healers when you die. 

Also, keep in mind that different Healer classes have different resurrection abilities. The Druid, for example, is a versatile class that can heal, buff, and resurrect players. The Dire Lord, on the other hand, is a tanky class that specializes in debuffing enemies and manipulating the essence of living things.

Always Retrieve Your Items

When you die, you lose all the items in your general inventory. However, you can retrieve them by returning to your corpse. Make sure to do this as soon as possible, as some items might be essential for your gameplay. For example, if you are a caster, you might need your mana potions or scrolls to continue fighting. Also, keep in mind that some items might be lost permanently if you don’t retrieve them quickly enough. Make retrieving your items a priority, but also be cautious, as some enemies might still be lurking nearby.

Gameplay
Gameplay

Stay Alert and Prepared

Death can come unexpectedly in Pantheon Rise of the Fallen. Always stay alert and be prepared for the worst-case scenario. Make sure to have enough potions, scrolls, and other consumables to help you in a tough fight. Also, try to avoid overextending yourself, especially if you are in an unfamiliar area. 

Always pay attention to your surroundings, and be ready to run if necessary. Finally, make sure to communicate with your party members, especially if you are about to engage in a challenging boss fight. Teamwork is essential in Pantheon Rise of the Fallen, and a well-coordinated team can make all the difference in a tough fight.

For more Guides, Tips, and Tricks

Check out our Video Games Guide Section for more dedicated guide

Ark 2 Guide – 5 Things You Need to Know

Here are the top tips in our Ark 2 Guide to get you started in Studio Wildcard’s upcoming game. Read them till the end.

Ark 2, an upcoming PC game highly anticipated by many, will have a console-exclusive window to consider. Xbox Series X users will have the privilege of playing Ark 2 at launch, as Studio Wildcard announced their partnership with Microsoft Gaming during the game’s reveal. Additionally, Ark 2 will be available on the Xbox Game Pass list from its release date.

The story of Ark 2 takes place on an unknown, extraterrestrial planet after the events of Genesis: Part 2, the fifth and final paid DLC expansion pack for ARK: Survival Evolved. Studio Wildcard has not disclosed many details about the Ark 2 story. However, some clues can be pieced together by examining the conclusion of Genesis: Part 2.

Genesis: Part 2 ends with the Genesis Ship, a massive colony vessel, being split in two. One half, Rockwell’s corrupted ringworld, crashes into a gas planet, while the other remains inactive in space. In the closing moments of Genesis: Part 2, one of the Santiago clones awakens from stasis, only to be hurled from the debris of the Genesis Ship toward an enigmatic planet similar to Earth. This planet is the most likely setting for Ark 2. Here are 5 things from our Ark 2 guide that you should know.

Souls-like Melee Combat

Melee combat in Ark 2 will be similar to that found in Souls-like games. This means that players will be able to conduct actions such as target-locking, blocking, dodging, performing combos, staggers, and special attacks. This new fighting system will offer an additional layer of depth and strategy to the game. Therefore, making the battles more thrilling and engaging for the player.

Emphasis on Primitive-Only Weaponry

Compared to its predecessor, Ark 2 will emphasize the use of weapons made only from basic materials. This means that players will have to rely on prehistoric weaponry such as spears and bows to survive in the new alien environment added to the game. The addition of this new priority on basic weapons will not only make the game more difficult but will also bring a higher level of realism to the action-packed gameplay.

Dynamic World Events

Ark 2 will have dynamic world events that happen independently of the player’s actions. These events will offer their own rewards and challenges, and players can choose whether to interact with them or not. This new feature will add an extra layer of unpredictability to the game, making each playthrough unique.

Cross-Platform Mod Support

One of the most exciting announcements for Ark 2 is that it will feature mod.io’s cross-platform mod and user-generated content support. This will enable mods and UGC to function across PC and Xbox platforms, allowing players to generate new creatures, items, and gameplay features. It also means that players can distribute their maps across all platforms, including onto Xbox, and support modded servers.

Vin Diesel as Santiago

Vin Diesel
Vin Diesel

Santiago, the main protagonist of Ark 2 will be played by Vin Diesel, who is well known for his part in the Fast & Furious franchise. The player persona Santiago da Costa from ARK: Survival Evolved was used as a template to create Santiago. 

For more Guides, Tips, and Tricks

Check out our Video Games Guide Section for more dedicated guide

Best Classes in Blue Protocol

Want to know which are the best Blue Protocol classes? This guide will tell you about them so that it will be easy for you to decide.

Blue Protocol is a massively multiplayer online role-playing game (MMORPG) that is taking the gaming industry by storm. In a massively multiplayer online role-playing game (MMORPG), picking the appropriate class can make all the difference. There is a wide variety of playstyles supported by Blue Protocol’s class system.

There are long-range mages to close-range tanks and everything in between. In this article, we are going to talk about some of the best Blue Protocol classes. We recommend that you put most of your attention into these classes.

Blue Protocol Classes

  • Aegis Fighter
  • Twin Striker
  • Blast Archer
  • Spellcaster
  • Heavy Smasher

Best Blue Protocol Classes

Spellcaster

The Spellcaster class in Blue Protocol is an excellent choice for those who prefer to play as a long-range character. With the ability to defeat enemies and heal and defend teammates from a safe distance, the Spellcaster is an invaluable asset to any party. However, it’s worth noting that this is one of the hardest classes to play in Blue Protocol. Therefore, it might not be the best choice for beginners.

The ability to cast spells that make use of elemental magic is one of the primary benefits associated with the Spellcaster class. The use of elemental magic grants players the ability to inflict tremendous quantities of damage on their enemies by focusing on their vulnerabilities. 

For example, dealing considerable damage against ice-based enemies with fire magic or fire magic against water-based enemies can be accomplished using water magic or fire magic respectively. The capacity of the Spellcaster to perform support spells, such as those that heal and shield allies, makes them an indispensable member of any team. This is why they are one of the best Blue Protocol classes.

Heavy Smasher

If you’re the type of player that enjoys being in the thick of the action during combat, the Heavy Smasher class might be just what you need. The Heavy Smasher class’s primary focus is on smiting enemies and obstacles with a powerful hammer, as suggested by the name of the class. Because this is a close-range tanking class, you will be expected to take the initiative in combat and defend your allies from the attacks of the other side.

One of the Heavy Smasher’s main advantages is its ability to deal massive amounts of damage. With a powerful hammer that can even be used at range, the Heavy Smasher can take down enemies quickly and efficiently. Additionally, the Heavy Smasher has a lot of health and defense, making them an excellent choice for players who want to soak up damage while their teammates deal damage from a distance.

Gameplay
Gameplay

Twin Striker

The Twin Striker is a close-range class that focuses on attack rather than defense due to its closeness to the enemy. This class wields two enormous axes and has the ability to chain attacks together in a series in order to increase its overall damage output. If you take pride in being an accurate and ferocious attacker, the Twin Striker might be the best class for you to play.

The Twin Striker has a great degree of mobility, which is one of the primary benefits that it offers. This class has the ability to move fast throughout the battlefield, allowing them to avoid opposing strikes and reposition themselves for optimum damage output. Additionally, the Twin Striker can inflict tremendous levels of damage on many enemies at the same time. This makes them a fantastic choice for quickly taking out groups of weaker enemies. This is why they are one of the best Blue Protocol classes that you should focus on.

Conclusion

Choosing the right class in Blue Protocol can make all the difference when it comes to enjoying the game. The Spellcaster, Heavy Smasher, and Twin Striker are three of the best Blue Protocol classes and cater to different playstyles. Whether you prefer to play as a long-range mage, a close-range tank, or an offensive attacker, there’s a class in Blue Protocol that will suit your playstyle. So, choose wisely and have fun exploring the world of Blue Protocol.

For more Guides, Tips, and Tricks

Check out our Video Games Guide Section for more dedicated guide

Thrones and Liberty Release Date, Story, Gameplay, and More

Want to know the Thrones and Liberty release date, story, gameplay, and more? This article has all the details for you.

Throne and Liberty is an upcoming MMORPG that promises to provide a new and immersive experience for players. Especially for those who are looking for a next-generation game. The game is being developed with the slogan “Play For All”. This indicates that it will be for a wide range of audiences. In this article, we will tell you about the Thrones and Liberty release date, story, gameplay, and other features.

Thrones and Liberty Release Date 

Throne and Liberty is set to be released in the second half of 2023. It will be available on PS5, Xbox Series X|S, and PC. The game will be published worldwide by Amazon, which has a vast selection of MMOs. The exact release date has not been announced yet. Players are expecting it to arrive sometime in the second half of 2023. Fans of the game have been eagerly waiting for its release, and it is expected to be one of the most highly anticipated games of the year.

Storyline

The role-playing video game Throne and Liberty takes place in a fantastical universe. Players have the opportunity to travel to a variety of locations and fight in battles and wars. The game features an innovative element in which players can transform into various creatures. They will have to navigate the depths of the ocean and the skies above. 

The reveal trailer for the game provides a look into the game’s universe in the past, as well as in the present and the future. This provides a hint at the game’s lore. The player will feel more connected to both the game’s universe and the characters within it. All this is thanks to the rich narrative of the game.

Thrones and Liberty Gameplay

Because Throne and Liberty is a massively multiplayer online game, it is necessary for players to work together with one another. This way, they can overcome both PvP and PvE challenges. Players can anticipate an expansive world to explore, replete with dungeons, spells, and equipment, despite the fact that there is not plenty of information currently available regarding the current status of the game. 

The game has a “Free Class” system, which gives players the ability to determine their own roles, as well as a player-versus-player combat system that gives players the option to partake in the war or not.

Other Features

The fact that Throne and Liberty’s living environment and dungeon system blend together so seamlessly is one of the game’s most appealing characteristics. The players will have the opportunity to participate in an adventure in which the dungeons’ characteristics will shift depending on the time of day, as well as the settings that surround them. 

Because of this, there will never be a repetition of a dungeon for a player to explore, guaranteeing that every single adventure will be different. In addition, the “Free Class” system that the game uses will provide players with the opportunity to personalize their gameplay experience and play the game in the manner in which they find most enjoyable.

In conclusion, Throne and Liberty is shaping up to be one of the most exciting MMORPGs of the year. The game’s immersive narrative, unique gameplay features, and the vast world make it an experience that players won’t soon forget. With a release date set for the second half of 2023, fans of the game can’t wait to dive into this next-generation title.

For more Guides, Tips, and Tricks

Check out our Video Games Guide Section for more dedicated guide