The Dead Ends Dungeon Guide of FFXIV Endwalker will help you to defeat every boss with ease.
Final Fantasy XIV Endwalker’s The Dead Ends is a level 90 dungeon. You’ll see faraway civilizations nearing the end of their lives here. In order to find Meteion, you must first defeat the adversaries of dying worlds. Expect a somewhat greater degree of difficulty from some monsters in The Dead Ends because it’s the first level 90 dungeon of Endwalker. Let’s take a look at each monster you’ll face, their attacks and mechanics, and how to defeat them.
The Dead Ends Dungeon Guide: Walkthrough
You will stroll across a hazardous wasteland in the initial section of this dungeon. Poisonous puddles surround the road, inflicting the debuff Toxicosis, which does severe damage over time to any player standing in the region of effect. As you go through the first section of The Dead Ends, stay on the route and avoid these harmful puddles.
Furthermore, getting struck by the majority of the boss’s strikes increases your susceptibility, causing you to suffer greater damage from all attacks. To have the best chance of surviving this dungeon, try to clear mechanics without getting hit.
The Dead Ends, like the other Endwalker dungeons, may be cleared with the help of Trust allies. This technique is recommended for the first time you tackle this dungeon, as it allows you to understand the mechanics of each fight while also allowing you to go at your own leisure.
The Dead Ends Dungeon Guide: How to unlock?
The Dead Ends is unlocked by completing the expansion’s last major story task. Accept the ‘Endwalker’ Main Scenario Quest.
Alphinaud – Ultima Thule NPC Location (x:21.5, y:21.5)
The Dead Ends Dungeon Guide: Caustic Grebuloff
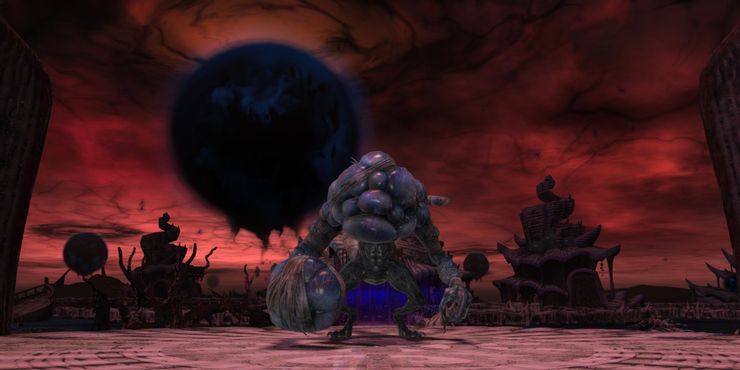
Caustic Grebuloff is the first boss of The Dead Ends. Prepare to clear several debuffs since this adversary will utilize toxic-based attacks. We are including Grebuloff’s attacks and mechanics for you.
Cough Up
Each player is targeted by a set of three puddles AoEs. Avoid overlapping these with other players by spreading out and keeping out of the puddles formed. All party members will be targeted with a red arrow shortly after; stack together to dispel this. You’ll lose control of your character if you don’t, and you’ll be susceptible to the boss’s next assault.
Misamata
Wind will begin to blow throughout the arena before Grebuloff unleashes his attack Miasmata. Then, at random throughout the arena, multiple AoEs will appear. They’ll proceed along with the arena in the direction of the wind after a brief pause, doing damage at predetermined intervals. To evade this attack, look for a safe space between the AoEs around the wind’s origin location.
Additionally, being hit by this strike will cause Necrosis, a serious debuff that can be deadly if not dealt with quickly. As quickly as feasible, the Healer should purge the afflicted players.
Blighted Water
A stack marker is placed on a random player; gang up on the affected person to spread out the damage.
Befoulment
AoE circle attack that targets all players; spread out to prevent overlapping these AoEs, and heal as needed afterward.
Nausea Wave
A massive AoE that encompasses the majority of the arena. To dodge Wave of Nausea, walk towards Grebuloff’s hitbox, which will be exactly beneath the monster.
Pox Flail
Inflicts a lot of damage on the Tank. Use defensive cooldowns as needed, and heal as needed.
Caustic Grebuloff will continue to assault in this manner until he is vanquished. Throughout the encounter, keep an eye on the direction of the wind and your debuffs. Enter the gateway to go to the second section of the dungeon after beating Caustic Grebuloff.
The Dead Ends Dungeon Guide: Peacekeeper
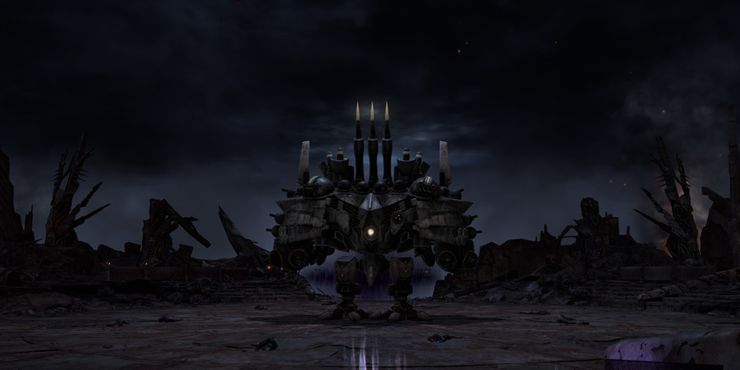
The Peacekeeper is The Dead Ends’ second boss. If you’re not prepared, this fight will give you a tough time; expect to avoid a lot of AoEs. Each of the Peacekeeper’s attacks and mechanics is listed here.
Peacefire
Splits the arena into two AoEs that circle around it. To avoid being caught by the AoEs as they move around the arena, move with them. This assault will also employ Electromagnetic Repellant and Order To Fire, so make sure to avoid the turrets’ beam attack while traveling.
Decimation
Inflicts damage on all party members and engulfs the arena in flames, inflicting damage on anybody who enters. To prevent receiving excessive damage, stay away from the arena’s edge.
Peacekeeper’s Electromagnetic Repellant creates an AoE within his hitbox, causing persistent damage over time effect in the region. While this strike is engaged, avoid standing directly beneath the boss.
Order To Fire
Creates a ring of turrets around the monster and gives them the order to fire. To avoid being struck by a turret that fires a beam in a straight line, stand between two of them. The boss will target people with AoE markers at the same time, so spread out to avoid overlapping these AoEs.
Eclipsing Exhaust
Peacekeeper will launch a knockback strike from the middle of the arena after creating AoEs all around it. Position yourself to avoid being caught in one of the AoEs.
Elimination
This Causes the Tank to take a lot of damage. As required, mitigate.
No Future
AoEs will be created in patterns around the arena by Peacekeeper. Because there will be many overlapping AoEs throughout this strike, keep an eye on these AoEs and avoid them appropriately.
These attacks will be repeated and overlapped until the Peacekeeper is defeated. In later stages of the fight, watch out for No Future, as its multiple AoE attacks can be overwhelming if you’re not careful.
The Dead Ends Dungeon Guide: Ra-La
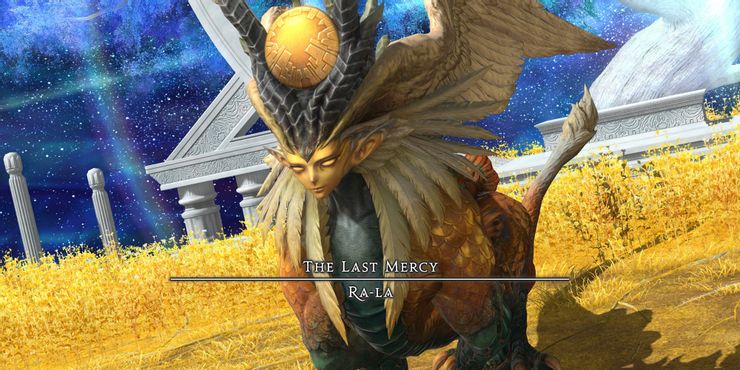
Ra-La is The Dead Ends’ last boss. Throughout the fight, this boss will have you pay attention to your location. The attacks and mechanics of Ra-La are outlined here.
Lifesbreath
Ra-La will charge this attack by jumping to one side of the arena. Damage is dealt in a straight line AoE with Lifesbreath. In addition, this strike will spawn a swarm of unforgettable butterfly adds. Each butterfly has a direction marker that indicates which way it will fire an AoE line attack in the near future. To avoid being attacked, position yourself behind any of the butterflies. You will be stricken with Doom if you are hit by this assault. To remove the Doom debuff, have the healer restore your health to 100%.
Warm Glow
Inflicts harm to all members of the group.
Benevolence
A stack marker will be placed on a random player by Ra-La. The damage from this area of effect should be spread out among all players.
Pity
It does a lot of damage to the Tank.
Prance
Ra-La will leap four times around the arena before landing in a massive AoE circle. Stay in the last AoE formed by following the boss as it hops. Move towards that region after the first one explodes to dodge the AoEs that follow.
Loving Embrace
One of Ra-wings La’s will glow, signaling that an AoE attack will be launched in that direction. To evade this strike, go to the boss’s opposite side. Lifesbreath will be paired with Loving Embrace the second time Ra-La uses it. While avoiding the butterfly’s assaults, make sure you’re on the right side to avoid Loving Embrace as well.
Still Embrace
An AoE marker is used to target all players. Avoid overlapping these AoEs with other players by spreading out.
Ra-La will continue to attack in this manner until it is defeated. Keep an eye out for future Lifesbreath uses, and make sure you’re on the right side during Loving Embrace. If you defeat Ra-La, you’ll be able to finish The Dead Ends.
For more Guides, Tips, and Tricks
- Valorant Killjoy Guide – Best setups for every map
- Best Technology in Icarus – A Complete Guide
- Minecraft reaches 1 trillion views on YouTube
Check out our Video Games Guide Section for more dedicated guides.