We have brought you a Shae Loya Shrine Guide, so you can complete the puzzle quickly without any problem.
Link may explore a large open environment in Breath of the Wild. The majority of Hyrule Kingdom’s landscape may be reached by walking, paragliding, or climbing. While there are still obstacles in the game (such as weather impacts, hostile locations, or strong foes), many of them may be handled by utilizing Food, effective weapons and armor, or discovering other paths. The environment also has a complex physics system that allows for innovative interactions.
With the exception of completing the initial duties on the Great Plateau, Breath of the Wild does not impose a certain order in which missions or dungeons must be completed, unlike many prior Zelda games. Although the game encourages exploration in order to solve Ancient Shrines (and so acquire more Hearts or Stamina).
Locate important and strong equipment, and face the game’s own version of dungeons, the Divine Beasts. It is possible to challenge Ganon straight after leaving the initial region. In addition, many of the game’s puzzles may be solved in a variety of ways, with Link being rewarded for innovative solutions.
The Legend of Zelda: Breath of the Wild features a massive open world to explore, with several areas of interest strewn throughout. Shrines are one of the most famous sorts of locales in Breath Of The Wild since each one has the challenge to complete and offers great rewards. There are shrines in every location of Hyrule, so even if you aren’t a completionist, you may find a number of them along your quest.
Shae Loya Shrine Guide
The Legend of Zelda: Breath of the Wild features 120 shrines in its base game. There are many of them that are nearly impossible to defeat. There are several shrines in Breath of the Wild, including Shae Loya Shrine located in the western part of the map.
While there are dozens of shrines to explore in the game, the Shae Loya shrine is one of the easier ones to complete. How to assemble the puzzle within the shrine and where to find it is revealed in this Shae Loya Shrine guide.
You might like Loop Hero Beginner’s Guide – Tips and Tricks you need to know, Remnant From the Ashes Guide – Everything you need to know
Shae Loya Shrine Guide: Location
The Shae Loya shrine is located in Hyrule’s western region, southwest of the Ridgeland Tower location. You may glide from the Ridgeland Tower to the shrine, and there are numerous nearby mountains that you can jump off of for more gliding height.
Because there are no adversaries within the Shae Loya shrine, you don’t need to carry any weapons. Arrows, on the other hand, are necessary for completing the riddle within the shrine. Armor, high health, and strong stamina are not necessary to complete the Shae Loya shrine.
Shae Loya Shrine Guide: Getting the first chest
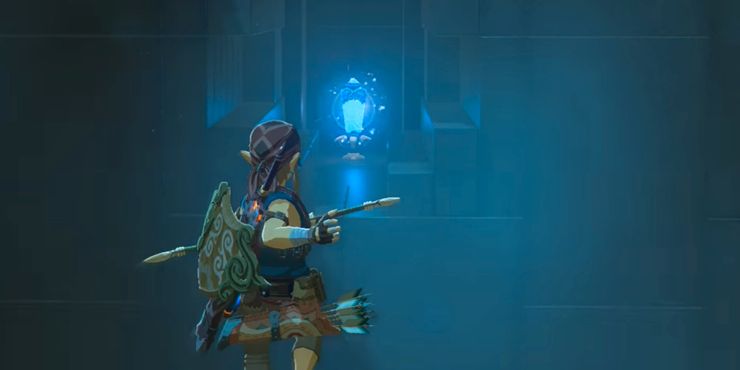
As soon as the player enters the Shrine, the first treasure chest in Shae Loya is positioned high up on the wall behind them. Look up along that wall until you reach a wooden shelf with the first of the treasure boxes. Regular, ice, or BotW’s shock arrows may be fired at each of the ropes keeping the shelf in place, or a fire or bomb arrow can be used to set fire to the shelf. A metal treasure box will fall to the ground if the ropes are severed or the shelf is burned. A Falcon Bow may be found within.
Head back
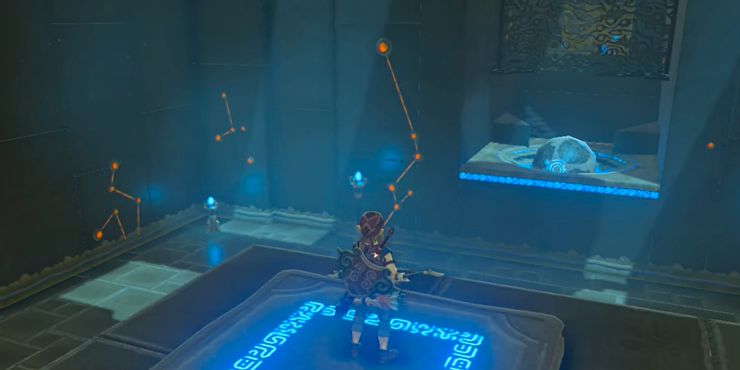
As soon as you return to the starting platform, look to the right of Link’s starting point. During the game, a ball should be thrown repeatedly into the air. It is necessary to get the ball to fall from the platform into the bowl below to solve the shrine.
If you want to do this, attempt to freeze the ball using Link’s Stasis rune, then use an arrow to push it off its normal trajectory. Additionally, well-placed bomb arrows may help dislodge the ball. However, the Breath of the Wild Rune power Stasis appears to be the quickest way to knock the ball into the bowl.
The platform underneath Link will begin to glow after the ball has dropped into the bowl. It’s now turned on, and it’ll fling Link into the air at random intervals. Link from Breath of the Wild should first move toward the ball, as there is a treasure box beyond the bouncing ball. A Topaz may be found within this chest, which can be used to improve Link’s armor or sold to harvest Rupees in Breath of the Wild.
Shae Loya Shrine Guide: Final Puzzle
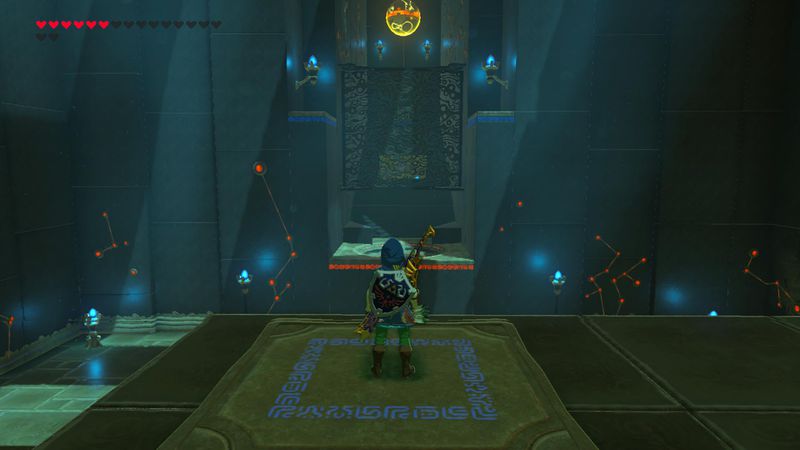
The ball will then lead players to the platform where the ball was unlocked. However, instead of looking at the ball this time, players will want to look at the wall to the left of the ball, facing the same way they did when they initially entered the shrine. There will be a crystal in a hidden nook in the wall once the platform launches them into the air.
Turn the orange crystal into blue by shooting an arrow while in bullet time, and the door to the shrine’s owner will open. Breath of the Wild players might think this is a difficult trick shot, but with the slowed bullet time when they pull out their bow, it is quite easy.
For more Guides, Tips, and Tricks
- How to beat Shiva in SMT V – A Complete Guide
- A Complete Smileton Dungeon Guide – FFXIV
- Pop it Trading Codes – December 2021
Check out our Video Games Guide Section for more dedicated guide