Hungry Shark World Guide – Best Tips and Tricks

This is your time to become a wild shark and eat whomever you want. But to do this, you would need our Hungry Shark World guide.

Hungry Shark World is the sequel to Ubisoft’s Hungry Shark Evolution. The game’s objective is straightforward: you are a shark that must eat to survive. There will be traps, opponents, rival sharks, and other obstacles in your way of enjoying this banquet for one. But with enough skill and experience, you will become the master of the sea, leaving every school of fish and gaggle of divers and swimmers shivering in your wake. This guide exists because it will be violent, cruel, and challenging.

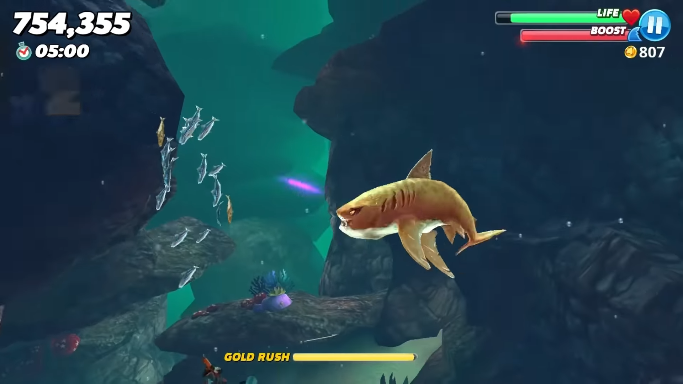
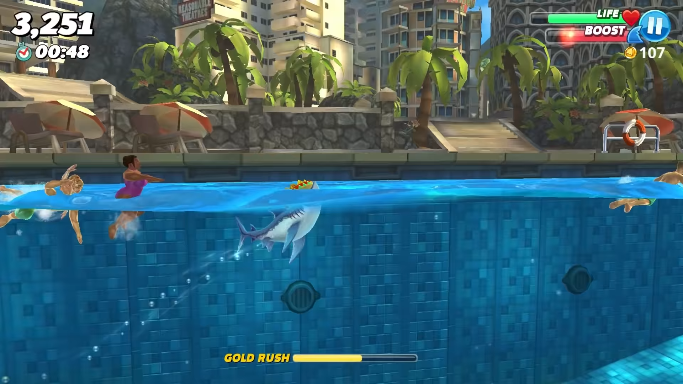
It’s all about living as long as you can and eating as much as you can before you die. Your hungry shark is continually losing HP as a result of its voracious appetite, and it must feed to stay alive. To succeed, you must be astute, since there are several dangers in the water, as well as hostile fish that will not just allow themselves to be eaten.

You might like World of Tanks Blitz Guide – Best Tips and Tricks.

Hungry Shark World Guide: Daily Quests And Challenges

Hungry Shark World, like every other mobile game out there, features a quest function. This function directs the player toward several goals with variable rewards. Prizes may include gems, money, or even event-specific goods. As previously said, gold is critical to your success in the game. 

Completing these tasks may assist you in obtaining the next upgrade to your shark’s stats or, better yet, a newer shark. Aside from that, these tasks protect your gaming experience from devolving into a mindless grind in which you just seek gold and nothing else.

Hungry Shark World Guide
Hungry Shark World (Image credit: Ubisoft)

Challenges, on the other hand, give your sharking abilities a unique twist. For example, in some areas, the game will ask you to complete certain challenges with a specific shark size. This complicates matters since, as we briefly discussed before, smaller sharks have a restricted prey base. Do you fancy yourself a dare-taker? Have a great day! Never pass up the opportunity to view an ad if death comes for your shark at any time.

Hungry Shark World Guide: Protect Yourself From Hazards

The very existence of your species is threatened by leaking toxic barrels, sea mines, jellyfish, pufferfish, ravenous seals, armed divers, military submarines, and other sharks. We must avoid each one of these things at all costs. As you can see, the previous bullet can come in handy if you need to squeeze through things where you can. 

There are hazards that pop up as long as you live, so your job is to keep your shark from dying out so quickly. You’d think that staying in one region would be profitable and safe. Truth be told, you are putting your life at risk by doing this.

Hungry Shark World Guide: Boosters

Hungry Shark World Guide
Hungry Shark World (Image credit: Ubisoft)

Boosters, not to be confused with the perks described above, are extremely valuable objects that you may activate and can greatly assist you in a variety of scenarios. Among these boosters are the following: 

  • Mega Rush: Brings you into the game with an instant gold rush. Every time you die you get another “Save Me” button.
  • Gold Magnet: Easily draws gold and other valuables into your mouth. Great for gold rushes.
  • Unstoppable: Unstoppable even by mines! Breakthrough any barrier with ease!
  • Hypnotize: Humans do not attempt to grab you and swim right to your mouth, giving you an easy kill.
  • Giant Pets: Increases the size of your pets, allowing them to consume whatever they desire.

Hungry Shark World Guide: Collect Letters (HUNGRY)

In Hungry Shark World, the HUNGRY bonus is also a significant source of points. When you use it, your shark will grow to huge proportions and be able to consume everything. Even the largest whales and the fiercest hostile sharks may be eaten by an XS shark with the HUNGRY boost. 

However, unlike Gold Rushes, the foes you consume in this mode do not offer more money because they do not transform into gold. Nonetheless, the HUNGRY mode is a great way to rack up some points while also exacting vengeance on annoying sharks who would otherwise kill you in a single bite. To enable this mode, just gather the many letters that spell H-U-N-G-R-Y that are scattered across the landscape. After it expires, you may re-pick up the letters to receive another bonus.

Don’t stay in one place too long

Hungry Shark World Guide
Hungry Shark World (Image credit: Ubisoft)

While it may seem logical to stay in one spot and claim it as your territory, doing so may harm your shark. As the game progresses and you live longer, you will find that aggressive sea life appears more frequently. Jellyfish, angler fish, barracudas, other sharks, divers, and military submarines might all be included. You could even come across additional items that your shark won’t be able to consume. This is why it is critical to be continually moving.

If you sense that your surroundings are changing, leave immediately. You might be able to locate smaller fish to eat and sharks your size to intimidate in different seas. On the surface, you should have no trouble finding someone to dig your teeth into. Just be cautious since some of them may be armed with firearms or fishing spears.

When you’re on the go, it’s ideal to keep your combo count high. Because the game rewards you for surviving longer, taking advantage of big supplies of food becomes increasingly vital as time passes.

Save Gold For Sharks

Save Gold For Sharks
Hungry Shark World (Image credit: Ubisoft)

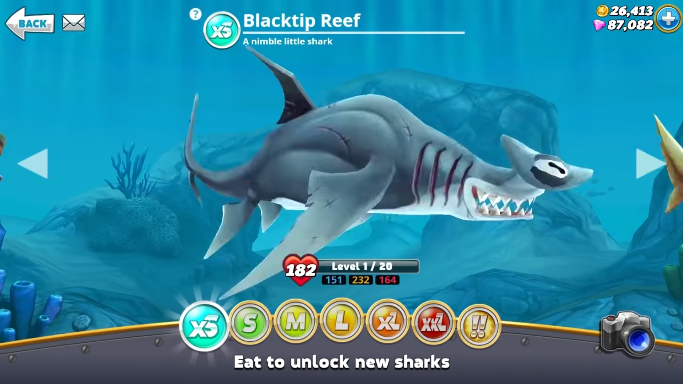
Larger sharks are frequently sought after in this game. They have a larger range of prey, and some of them can devour the unfathomable without the need for a Mega Gold Rush. Before acquiring a shark, make careful to look over its stats because each factor has a significant impact on how the shark acts. With a larger shark, you’ll be able to survive longer, eat more, and accomplish objectives faster than before. 

Trying to purchase these animals should be your top priority because many of them may go for a long time without having any of their stats upgraded. In other words, the significant quantity of money spent on purchasing a shark is always a fantastic investment. However, if the grind becomes too difficult, especially later in the game, you may opt to increase the shark’s stats.

For more Guides, Tips, and Tricks

You can also check our dedicated Video Games Guides section.

Best Strikers in FIFA 22 for Career Mode

You can not always buy the legends for your team. So to help you, we have made a list of the best strikers in FIFA 22 for Career Mode.

When you’re scoring goals, FIFA is at its best. To make that process as easy as possible, you’ll need to fill your squad with some of FIFA 22’s best strikers. Whether you’re relying on the big man upfront or executing intricate triangles with technical wingers, if your personnel aren’t up to the task, your game plan will fail.

FIFA 22 Career Mode is as concerned with players who will shine for you in the future as it is with those who can light up your team right away. And when it comes to signing advice, it’s difficult not to get carried away with future gems and players who will develop into bigger stars years in advance.

Everyone will tell you about Lionel Messi, Cristiano Ronaldo, Robert Lewandowski, Neymar, and other players. We all know who the best players are. And if you have the opportunity, you will undoubtedly purchase them. But buying these players is not easy. So we’re here to assist you in buying the players who will help you in your career mode and help you grow.

Before going for strikers, you might need midfielders. Read The Best Midfielders in FIFA 22.

Best Strikers in FIFA 22: Youssoufa Moukoko

Best Strikers in FIFA 22
Youssoufa Moukoko (Image credit: Fifplay)

Youssoufa Moukoko is a 17-year-old German footballer who was born on November 20, 2004. He is now a striker for Borussia Dortmund (ST). This card has a 69 overall rating in FIFA 22. He has a 4-star skill movements rating and is left-footed. Youssoufa Moukoko is 179 cm tall. 

Moukoko, the Bundesliga’s youngest ever player who made his debut barely 24 hours after becoming eligible, has been crowned the new king of the ridiculous signing. He is certified career mode gold, with astronomical potential and extremely usable speed, finishing, and dribbling right out of the gate.

Best Strikers in FIFA 22: Ansu Fati 

Best Strikers in FIFA 22
Ansu Fati (Image credit: Fifplay)

Anssumane Fati is an 18-year-old Spaniard who was born on October 31, 2002. As a left-winger, he presently represents FC Barcelona (LW). For this card, he has a 76 overall FIFA 22 rating. He has a 4-star skill move rating and is right-footed. The height of Anssumane Fati is 178 cm.

Following returning from injury and inheriting Messi’s number 10 shirt, Barcelona appears to be creating a long-term plan around Ansu Fati, but after the club’s financial troubles this summer, can any player leaving the club be considered realistic? Fati is one of the greatest talents in international football, with 90 pace, 80 finishing, and 90 potential at just 18 years old. He may be snatched up by any of Europe’s elite teams.

Best Strikers in FIFA 22: Dane Scarlett

Best Strikers in FIFA 22
Dane Scarlett (Image credit: Fifplay)

Dane Scarlett is 51 years old (born January 1, 1970) and represents England in FIFA. He is now a striker for Tottenham Hotspur (ST). He has a 3-star skill movements rating and is right-footed.

Dane Scarlett, one of Tottenham Hotspur’s most promising young players, is just 17 at the start of FIFA 22’s Career Mode and ready to be molded into the next Harry Kane. The child starts out as a 63-rated child and progresses to an 86-rated child over time. He fits in at any team, being quick, technical, and having a high ceiling – but beware, Spurs will not let him leave on the cheap.

Best Strikers in FIFA 22: Moise Kean

Moise Kean, a former Everton wonderkid who now plays for Juventus, is still just 21 years old. The striker is not just incredibly seasoned for his age, but you can put him in your starting lineup right now and he won’t let you down. There’s even more motivation to play him now that he’s ranked 87 in FIFA 22. He’s had a few false starts in his career, but for Paris Saint-Germain, he looked fantastic.

Read How to complete Showdown Luis Muriel SBC in FIFA 22.

Best Strikers in FIFA 22: Anthony Martial 

Best Strikers in FIFA 22
Anthony Martial (Image credit: Fifplay)

Anthony Martial is a 25-year-old French footballer who was born on December 5, 1995. He is now a striker for Manchester United (ST). This card has an overall rating of 81 in FIFA 22. He has a 4-star skill movements rating and is right-footed. Anthony Martial stands at a height of 184 cm.

Anthony Martial appears to be surplus to needs in the red half of Manchester, with two excellent experienced attackers in the center and two hometown heroes on the flanks. However, in FIFA 22, his overall numbers make him a strong signing for Europe’s elite teams. With over 90 pace and dribbling, strength, shooting, and passing stats all-around 80, his 84 potential still has space to develop.

Best Strikers in FIFA 22: Darwin Nunez

Uruguayan footballer
Darwin Nunez (Image credit: Fifplay)

Darwin Nunez is a 22-year-old Uruguayan footballer who was born on June 24, 1999. He is now a striker with SL Benfica (ST). This card has a 76 overall rating in FIFA 22. He has a 3-star skill movements rating and is right-footed. Darwin Nez is 187 cm tall and weighs 79 kg.

Darwin Nunez, a physical rock with +9 potential growth to round out his decidedly raw shooting stats, will be looking to break through this season in Portugal. Last season he managed only six goals in 29 appearances, but he almost equaled that number in the first five matches of the 21-22 season – not to mention scoring a brace against Barcelona in the Champions League. Providing Haaland’s level of power and the promise of similar finishes in the future, Nunez is a great option for a team in the middle of the Premier League.

Best Strikers in FIFA 22: Erling Haaland 

Norwegian footballer
Erling Haaland  (Image credit: Fifplay)

Erling Haaland is a 21-year-old Norwegian footballer who was born on July 21, 2000. He is now a striker for Borussia Dortmund (ST). This card has an overall rating of 88 in FIFA 22. He has a 3-star skill movements rating and is left-footed. Haaland stands 194 cm tall and weighs 94 kg.

At all costs, sign him. He’s lightning fast and has an uncanny ability to finish. He’s a blast to play with. Over the course of his career, he advances by another five points and becomes even better. The Defenders aren’t prepared.

For more Guides, Tips, and Tricks

You can also check our dedicated Video Games Guides section.

World of Tanks Blitz Guide – Best Tips and Tricks

In the world of tanks, you might face difficulties. Do not worry because we have brought you a World of Tanks Blitz Guide with tips and tricks.

The player is given command of a single armored tank or self-propelled artillery vehicle and thrown into a conflict on a randomly generated terrain. The user has control over the vehicle’s movement and firing, as well as the ability to communicate with other players via written or voice chat. A basic random match is won by either destroying all the other team’s vehicles or by staying in the enemy team’s base for long enough without being hit by another tank.

In May 2013, Wargaming released World of Tanks Blitz, a mobile version of World of Tanks for tablets and smartphones. The game allows for 7v7 combat as opposed to 15v15 battles on the PC. We have a guide for you with all the tips and tricks to conquer the world of tanks.

If you like action games, then read Assassin’s Creed Valhalla Guide – Best Tips and Tricks.

World of Tanks Blitz Guide: How to start?

When you initially join World of Tanks Blitz, you will have three tanks available to you. They all have light armor, which makes them vulnerable but quick. You may feel helpless against bigger tanks, but every member of the squad has a function to play, and for new members, that task is frequently scouting. You may also assist by attempting to remove the treads on larger tanks. It’s crucial to know what part you’ll be playing throughout the preparation process, so you know what sort of ammunition to bring with you.

You’ll be more focused on scouting and using your agility to get around the larger tanks while employing the starter tanks. Bring lots of AP rounds and a few HE bullets in case of an emergency. 50 AP bullets and 5 to 10 rounds of HE ammunition should be more than enough for one round. As you progress to bigger tanks, you’ll want to pack extra ammo because you’ll be spending more time in the thick of things.

Two types of experience points

As you play, you’ll get many forms of experience. The first type is unrestricted, meaning you may use it on any tank, whilst the second type can only be used on the tank that earned it. This means you’ll have to buy pretty much every tank in the line you want to go down because you’ll need to gain experience with the one before it in order to progress. If you’ve maxed out a tank but still want to use it, you can convert its experience points to free experience at a disadvantageous exchange rate.

World of Tanks Blitz Guide: Use Speed

World of Tanks Blitz Guide
World of Tanks Blitz (Image credit: WOTBlitz Official site)

While it may seem obvious to always pick tanks with the maximum armor and HP, this toughness comes at the expense of their speed. Heavy and medium tanks are big and slow, while small tanks can easily outpace them most of the time. This is very crucial to understand at the start because your first few vehicles will be light tanks, and you will be easily destroyed if you are not cautious.

Fortunately, light tanks’ speed is useful for more than simply getting from point A to point B faster than the competition; in the proper hands, it can also be used as a fighting weapon. Light tanks, in particular, are so fast that they can run circles around heavy tanks so quickly that their turrets can’t keep up, thereby making them defenseless. 

As a result, when playing with light tanks, a smart battle tip is to constantly utilize your speed to your advantage and to NEVER remain in one area, unless you’re sitting behind cover. Also, when outrunning the attacker, attempt to go perpendicular to them, so they have a tougher time firing at you.

World of Tanks Blitz Guide: Tank Types

Light Tanks

Light tanks are quick and easy to damage, making them ideal for reconnaissance. On the HUD, they’re represented as a solid diamond. This is the sort of tank that all three of the beginning vehicles are, and the best method to help out if you’re driving one of them is to look for opposing tanks. When you find one, it adds the tank to the map for all of your teammates, which is a useful feature. 

The agility of a light tank is another benefit. You may simply loop around bigger tanks and attack them from the back, where their armor is weaker. You won’t see many more light tanks after you get over a certain point in the tech tree, thus they’re largely for beginners.

Medium Tanks

In every way, medium tanks are in the center, and they can fulfill a variety of duties in a hurry. On the HUD, they’re represented by a diamond with one slice across it. You’ll get at least one of them relatively quickly after starting and depending on your playstyle, this might end up being your favorite type of tank due to its flexibility. You must be cautious since light tanks can outmaneuver you and huge tanks can outgun you, but that is the essence of the jack-of-all-trades.

If you want a guide on a similar game, then read Rocket League Sideswipe Beginner’s Guide – Tips and Tricks for all the new players.

Heavy Tanks

Heavy tanks can absorb a lot of damage, but they move like a mule in molasses. A diamond with two cuts in it is their HUD icon. It takes a long time to unlock your first heavy tank, which is probably a good thing considering they are notoriously difficult to master. The goal of a heavy tank is to shield its allies from hostile fire by drawing enemy fire. This tank moves slowly, and if your treads are taken out, it won’t be long until they loop around to your vulnerable spots, so be cautious.

World of Tanks Blitz Guide: Do not shoot at the front armor

World of Tanks Blitz Guide
World of Tanks Blitz (Image credit: WOTBlitz Official site)

In the front, where the armor is thickest, almost every tank is difficult to hit. Don’t try to do a justice shot by shooting their gun because the turret is generally well-armored. The sides, particularly the back, are usually highly susceptible. To observe which areas of the tank are weak, use the zoom option. 

If a component is solid red, you won’t be able to use your shots to pierce it. Make use of your agility if you’re in a light tank. On the other hand, keep an eye on your back and flanks. Even when withdrawing, keep your back to the front.

World of Tanks Blitz Guide: Position matters

If you shoot from an unusual angle, your rounds can bounce off the opposing tanks. When it comes to AP rounds, an impact angle of fewer than 70 degrees will ALWAYS result in your projectiles bouncing off and causing limited damage. While HE bullets can mitigate this cost, they have limited penetration and deal minimal damage when bursting against the hull.

Always aim to position oneself in a straight line directly toward an enemy’s rear or flanks while shooting at them. Shooting diagonally at your adversary increases the likelihood of your bullets bouncing off.

For more Guides, Tips, and Tricks

You can also check our dedicated Video Games Guides section.

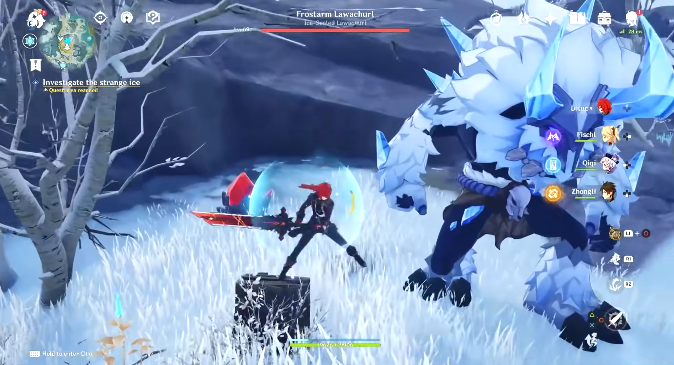
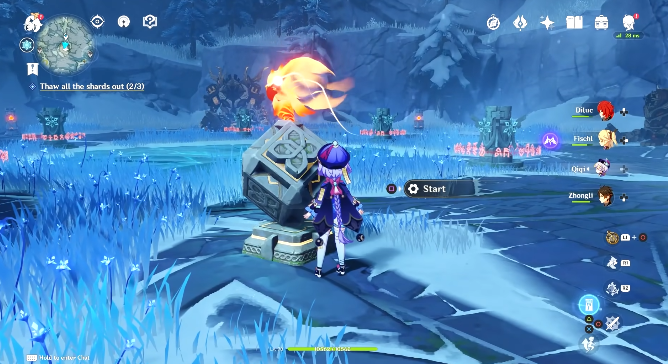
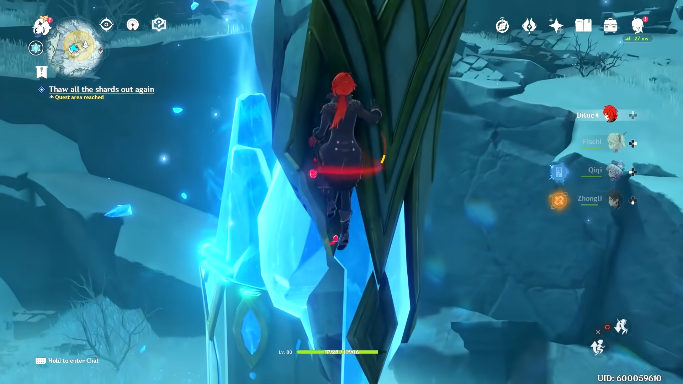
Genshin Impact In the Mountains Guide – Ice Shard Locations, puzzle, and more

We have brought you the Genshin Impact In the Mountains Guide and also the ice shard locations.

Dragonspine Mountain is a major landmark in the universe of Genshin Impact. This frigid zone, located in southern Mondstat, stares out over the present game world and may be seen from various points on the globe. The mountain looms on the horizon, teeming with new treasures to be discovered and creatures to be slain. There are even a few quests that take place there that players looking for mora and primogems should check into.

Players investigate Dragonspine Mountain in the “In the Mountains questline”, which was included in the 1.2 release. To begin the quest, speak with Iris in the Adventurer’s Camp, which is located just outside Dragonspine. She will inform the player about some strange ice. The next step is to investigate the strange ice in the mountains, which has already caused several players issues. The rewards for finishing this quest, fortunately, are definitely worth the effort.

Genshin Impact in the Mountains Guide
Genshin Impact in the Mountains (Image credit: YouTube)

More Genshin Impact Guides:

Genshin Impact in the Mountains Guide: Strange Ice

The first step is for players to locate the Strange Ice by following the quest marker. There’s a teleport waypoint right next to it, so activate it as well. Players will quickly realize that attacking the ice does not break it, and it cannot even be melted with fire, so they will have to think outside the box to find a solution. There are four Scarlet Quartzes in the surrounding area, which are red mining points that resemble Cor Lapis.

To break the ice, players must collect the Scarlet Quartz one at a time and return to the strange ice. When equipped with one of these items, players can deal damage to the ice. Breaking it will allow players to access the Frostbearing Tree, which is yet another great way for them to earn rewards.

In the Mountains Guide
Genshin Impact in the Mountains (Image credit: YouTube)

Paimon will instruct the player to pursue the object that flew away up the mountain, but they will soon be stopped by a frigid wind. As the Traveler returns down the mountain, Iris will notify him that there are two additional chunks of strange ice on the mountain that he must locate and thaw in the same manner as the first. “Thaw all the Shards Out” is the next quest objective. Below are the three locations where you’ll find the shards.

The Snow-Covered Path

The first ice mountain that players must defrost is quite straightforward to locate. Cross the damaged bridge and follow the route through the Snow-Covered Path after heading Dragonspine from base camp. Adventurers will eventually see a massive ice spike on the left. Only characters that have been boosted by Scarlet Quarts shards can make a dent in the spire in the center. 

The bonus will be removed after each hit while under the influence of the shard, therefore players will need to shatter the shards and pound the spire numerous times. There are a few Scarlet Quartz ores in the area to mine, so break them one by one or wait for them to revive. Just keep an eye out on the left for Frostram Lawachurl!

The Entombed City Outskirts

Genshin Impact in the Mountains Guide
Genshin Impact (Image credit: YouTube)

After then, players must either follow the river they crossed earlier or continue east through the mountain to reach Wyrmrest Valley. A pass in the mountain leads to a circular structure on the left side of the enemy encampment in that region, on the route to the Entombed City Outskirts; it’s impossible to miss on the map. 

Players that are wary of big robots will notice three of them resting in the area but don’t be concerned (yet). A warming seelie, a flame spirit, stands in the center of the area, passing over 5 Cryo totems in a certain order as the player approaches them.

Remember this arrangement, since the Cryo element must now activate those totems in the same order that they were flown over: southwest, northeast, southeast, northwest, then north. A treasure box will appear if you do it correctly, but discerning explorers will notice the eerie glow emanating from it. 

Third is more powerful

The first two automatons will activate when the chest is opened, but the third, more powerful automaton will activate after the others have been defeated. This is a challenging encounter, therefore make plenty of food ahead of time and prepare the party before activating the chest.

Following the victory over the robots, a hole in the center of the arena will open, revealing a cave beneath. Enter to discover the second ice cluster that needs to be thawed. Scarlet Quarts are waiting for them, but keep in mind that they won’t respawn until the core cluster is eliminated.

That means the player won’t be able to remove the central ice if they use their shards on other rime. If this occurs, a Scarlet Quartz can be found in the cliffs on the right side of the fight arena, just outside the battle arena.

Starglow Cavern

Starglow Cavern
Genshin Impact Starglow Cavern (Image credit: YouTube)

Deep within Starglow Cavern, the final shard can be found. Adventurers can reach the third shard, which is located adjacent to a frozen lake, by going all the way to the bottom. Isn’t it simple? Its mystical barrier, on the other hand, would disagree. Players must battle a wave of hilichurls in a neighboring challenge quest to bring it down. The adversaries aren’t particularly difficult, but the chilly weather can make the mission difficult.

Fortunately, if players can locate the seelies buried in the cave, they can light up three warming seelie statues. One of these is right beyond the frozen lake, at the bottom exit. The other two are hidden behind the massive ice shard, one at the end of a winding route and the other behind a breakable wall. It can be broken without the use of bombs or elemental abilities; simply smash it with a claymore. The mob conflict can begin after the heat source is secured!

Picking up Scarlet Quartz is required to break the ice, just as the first two ice shards. The seelie statues lead to two of them, while the tunnels behind the sealed shard lead to the other. By scaling to the summit of Dragonspine after releasing it from its icy prison, the player can continue the In the Mountains quest.

Genshin Impact in the Mountains Guide: Thaw all Shards again

Genshin Impact in the Mountains Guide
Genshin Impact (Image credit: YouTube)

After all of that effort, the wind has calmed down, allowing players to reach the summit. They’ll have to melt all the shards out again, but this time it’ll be a lot faster. There are three crystals on the mountain’s summit, but each one can only be broken once. 

Players must gather a Scarlet Quartz, perform some acrobatics to reach the crystal, break it, and then climb back up the mountain. Rep till a cutscene appears three times. Here, freezing can be a big problem, but Scarlet Quartz manages to keep the Sheer Cold at bay.

Genshin Impact in the Mountains Guide: Rewards

Finally, players can talk to Iris by warping back to the Adventurer’s Camp. She will reward players with 3 Hero’s Wit, 60 Primogems, 3 Mystic Enhancement Ore, and 30,000 Mora for finishing the mission. Players now have full access to the peak and can explore it without being hindered by the wind. 

With that out of the way, it’s probably better to concentrate on the limited-time event, where you can earn Glimmering Essence to develop Festering Desire and obtain exclusive event goodies. This will also grant access to the Peak of Vindagnyr, a new domain that rewards players with powerful artifacts.

For more Guides, Tips, and Tricks

You can also check our dedicated Video Games Guides section.

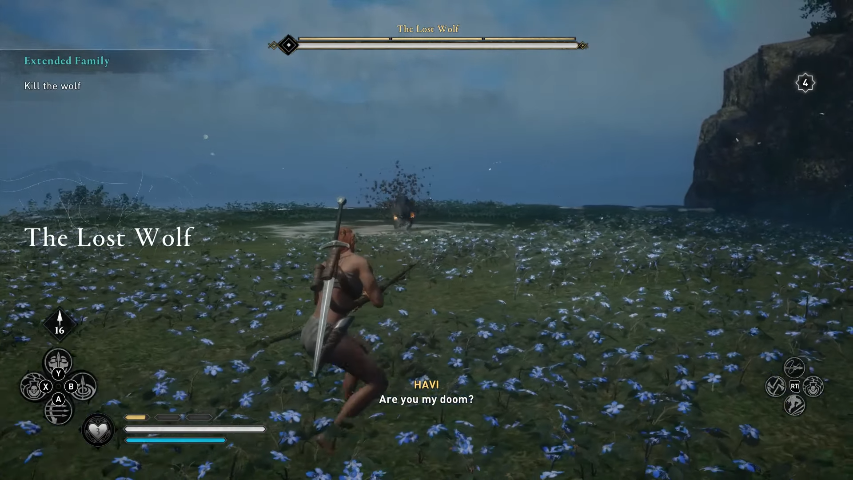
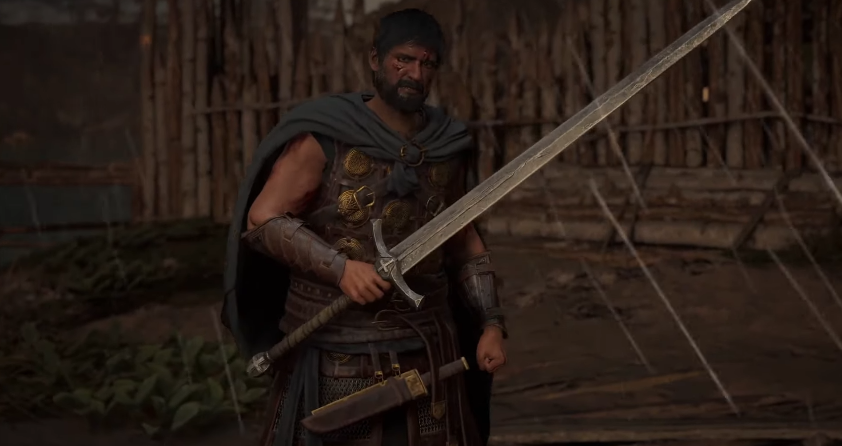
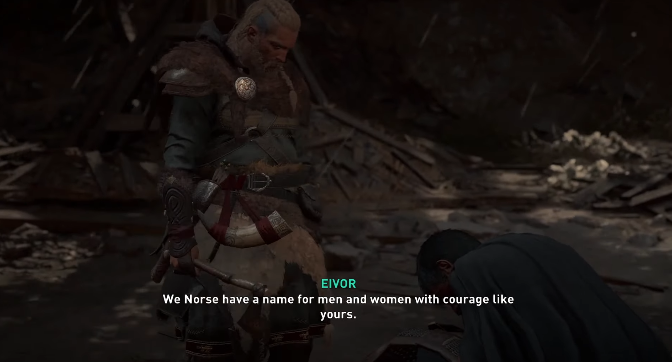
How to Beat the Lost Wolf in Assassin’s Creed Valhalla – Guide

We have brought you the Assassin’s Creed Valhalla guide on how to beat the Lost Wolf. Follow the steps and take the victory with you.

The world of Asgard is awe-inspiring. Strange animals roam the land, and great warriors walk alongside the Mighty Thor. Yggdrasil stands tall over the people. A wolf cub is one of the creatures Eivor (or in this realm, Havi) encounters. However, if you’re playing the game, you already know how important the wolf is in Eivor/lives. 

During the “Extended Family” mission, Havi captures and cages the pup, only to learn that it has grown to the size of a full-fledged wolf. When the wolf ultimately gets free, making a commotion among the Asgardians, Havi lets down his guard to debate options with his fellow Asgardians. Havi then pursues the wolf to a tiny area where the boss fight begins. The adventure begins here.

Assassin's Creed Valhalla
Assassin’s Creed Valhalla (Image credit: Youtube)

Asgard’s Extended Family quest will bring you into contact with The Lost Wolf. This will be a tough boss fight if you do not know the weak points of its attacks and how to counter them. Here’s how to beat the Lost Wolf in Assassin’s Creed Valhalla through this boss battle survival guide. You can emerge victorious by following these tips.

More Assassin’s Creed Valhalla Guides

How to Beat the Lost Wolf

The Lost Wolf is one of the first bosses encounters you’ll encounter in the Asgard universe. It’s just standing toe-to-toe with the beast, therefore no outside intervention is allowed. He’s larger than the normal wolf, and pebbles appear to fly and follow him. The essential thing to remember (as with practically every combat in Assassin’s Creed Valhalla) is that you must have full rations and an arrow quiver.

They are critical to victory because battling with only a weapon will not be enough. Another thing to bear in mind is that the skill tree functions like a pick-and-choose system, with some powers and upgrades only applicable to one player or another. So, I’ll try to keep the ability suggestions to a minimum, but some will come in handy when you face the Lost Wolf.

How to Beat the Lost Wolf: Attack Patterns

How to Beat the Lost Wolf
Assassin’s Creed Valhalla (Image credit: Youtube)
  • A typical lunge attack that can only be avoided.
  • The Lost Wolf boss’s most powerful attack is the Underground Attack. This assault will be signaled by a red rune and a red flash on the wolf’s head. The wolf will then dig underground and attack you from your current location. So, if you notice the red move forming, start sprinting so that the wolf doesn’t appear out of nowhere right at you.
  • When the Lost Wolf’s health drops below 50%, he begins performing the special attack. The wolf will jump up and toss three rocks at you in this assault. So, whenever this happens, avoid all three of them.

How to Beat the Lost Wolf: The battle begins

How to Beat the Lost Wolf
Assassin’s Creed Valhalla (Image credit: Youtube)

When the fight begins, take a few moments to observe the wolf’s quick moves. You’ll note that his lunges aren’t very long. If you go too close to him, he’ll execute a one-two mouth assault, but this is where you’ll have to dance with the beast. That second bite might come out of nowhere, so juke him until he tires out for a second. You can target his weak places here.

They won’t cause much damage, but the less there is, the better for his health. Continue avoiding and hitting to deplete his health bar; eventually, he’ll just crawl into the earth and start moving around swiftly. Keep an eye out for his approaching track, as it has the potential to knock Havi off his feet.

In addition, the wolf (who is roughly two-thirds of the way through his health) will throw a series of stones at you. When one strikes you, it’s easy to become entangled and stuck, so you must avoid them and begin going for his head. Unfortunately, this boss battle necessitates a lot of dodging and striking. It does take some time to defeat the beast, so don’t overburden yourself with hasty combinations.

Take your time

Take your time
Assassin’s Creed Valhalla (Image credit: Youtube)

If you want to finish this section, you’ll need to take your time with him. It’s only a matter of being patient and hitting at the perfect moment like it is in the Dark Souls series. It’s hardly a difficult boss fight; at most, it’s a tiresome one. Havi will be ready to kill the wolf once the conflict is over.

For more Guides, Tips, and Tricks

You can also check our dedicated Video Games Guides section.

Sheh Rata Shrine Quest Guide in Zelda: Breath of the Wild

We have brought you a Sheh Rata Shrine Quest Guide in Zelda: Breath of the Wild. Follow the process and complete the puzzle with ease.

Breath of the Wild: The Legend of Zelda is a fantastic game. Fans of the Zelda franchise will appreciate the creators’ decision to create a big open world with a plethora of characters to meet, monsters to combat, and regions to explore in Breath of the Wild. 

The Shrines scattered around Hyrule are one of the most noticeable features of Breath of the Wild. While the four Divine Beasts and Hyrule Castle are the game’s main dungeons, these mini-dungeons provide a range of jobs to perform, puzzles to solve, and combat challenges of varying severity. The enigmatic monk Sheh Rata’s shrine is one of the most popular among gamers. The monk challenges Link to compete in a game called “Speed of Light.”

Sheh Rata Shrine Guide
Sheh Rata Shrine Guide (Image credit: Youtube)

More Zelda: Breath of the Wild guides:

Sheh Rata Shrine Guide: Location

The Lanayru area is home to the Sheh Reta Shrine. Link may view the shrine on top of a hill sticking out of the ocean if he looks west from the top of the Lanayru Tower. It’s preferable to use one of the colored pins from the Sheikah Slate’s Scope to mark it for future reference. The player may then have Link use the paraglider to soar towards the shrine from the top of the tower, and then make his way over the lake to the shrine.

Sheh Rata Shrine Guide: How to enter

When Link arrives at the little island/hill where the shrine is located, he will be confronted by multiple Lizalfos strewn throughout the area. Many gamers choose to wear the Sheikah armor and just slip past them.

After clearing the area of foes, the player will discover that the Shrine is encircled by thorny vines that must be burnt away in order to get access to it. This mission may be completed with ease with a Fire Arrow, a campfire, or a fire-based weapon. Simply light a fire at the shrine’s entrance and allow it to spread. 

After a while, there will be enough of them left, and Link will be able to enter the Shrine. All of the above can be omitted if Link has previously obtained Revali’s Gale by fighting the Divine Beast Vah Medoh. To get to the shrine’s entrance, simply use Revali’s Gale to gain height and then glide over the foes and thorns.

Sheh Rata Shrine Puzzle

Sheh Rata Shrine Puzzle
Sheh Rata Shrine Guide (Image credit: Youtube)

Look around once Link has entered the Shrine. The gamer should be aware of three major components right immediately. A spinning switch is positioned on the left, a laser generator is located in the middle of the area, above some Breath of the Wild water, and a crystal switch is located on the right. Experimenting with the spinning switch reveals that depending on how much Link rotates it, it pushes the laser generator into various places. The laser will hit the crystal switch at some positions, causing the switch to adjust the Shrine’s water level.

The first thing Link should do is walk to the right of the elevator and tumble onto a ledge with an Opal-filled treasure box. The player can then use an arrow, a laser, or toss a weapon to activate the crystal switch. The water level in the Shrine will increase as a result of this.

Sheh Rata Shrine Guide: Use Cryonis

Use Cryonis
Sheh Rata Shrine Guide (Image credit: Youtube)

Link can now utilize the Cryonis rune to go to the crystal switch since the water level has been increased. Link may just press the switch to activate it once he’s arrived. For delayed triggering, simply place one of the square bombs next to it and the switch will be triggered when it detonates. It’s advisable to put a bomb next to the switch right now so that it can be detonated later.

Link may now swim to the opposite side of the Shrine or use Cryonis to get to the other side. The player will see an area with a huge pool of water and a metal barrel on this side of the Shrine. A pressure floor switch may be seen submerged in the water by looking into it.

Create an ice pillar on the lake using the Cryonis Rune, which Link may climb up and stand on. Link will have a better view of the crystal switch and will be able to trigger it more easily as a result. Shoot the switch with an arrow from here to cause it to drop the water.

Sheh Rata Shrine Guide: Placing the metal barrel

Take the metal barrel with the Magnesis rune or Link himself and place it on the pressure switch once the water has returned to its original condition. Sheh Reta, the Shrine’s monk, will be able to enter after this. A hole with some shallow water, a ladder, and a ledge with a chest that can’t presently be accessed immediately above them are all to the monk’s right. Now is the time to blast the bomb near the crystal switch, which will activate it and raise the water once more.

Sheh Rata Shrine Quest Guide
Sheh Rata Shrine Guide (Image credit: Youtube)

This allows Link to utilize Cryonis to reach the treasure across the now wider pool of water. The chest contains a Giant Boomerang, a two-handed Zelda weapon that deals 25 damage each strike and, as its name indicates, can be thrown and caught several times with proper timing. Link can talk to Sheh Reta and collect his Spirit Orb after opening this treasure, completing the Shrine.

For more Guides, Tips, and Tricks

You can also check our dedicated Video Games Guides section.

God of War PC Guide – Tips and Tricks for Your Journey

PC gamers have no need to worry now as God of War has finally arrived for PC. We have brought you the God of War PC Guide with all the tips and tricks.

God of War, a popular PlayStation game created by Santa Monica Studios, was published on PC in India on January 14, 2022. Kratos, the Greek God of War, returns to the next installment of the renowned action-adventure franchise. Kratos and his son, Atreus, conquered the Gods of Olympus and now reside in Norse Mythology’s Nine Realms. God of War has initially launched for the PlayStation 4 over four years ago to critical and commercial acclaim, receiving a slew of accolades, including numerous Game of the Year nominations in 2018.

The current installment differed significantly from the previous trilogy, which premiered in 2005, with the character’s distinctive double-chained sword being replaced by a fighting axe. Furthermore, compared to the cinematic camera utilized in the previous trilogy, the creators at Santa Monica Studios took a big risk by switching to an over-the-shoulder-free camera. While changing the franchise’s essential aspects was a huge risk at the time, it paid off handsomely as fans adored God of War’s harsh and fast-paced gameplay.

God of War PC, produced by Jetpack Interactive, includes a slew of additional features that desktop gamers will like. NVIDIA’s Deep Learning Super Sampling (DLSS) and Reflex software have also been included. With increased Ground Truth Ambient Occlusion (GTAO) and Screen Space Directional Occlusion (SSDO) effects, the graphics will improve dramatically.

Players who buy the PC version of God of War will also get some special cosmetics. Buckler of the Forge Shield Skin, Shining Elven Soul Shield Skin, Death’s Vow Armor Sets, Exile’s Guardian Shield Skin, and Dökkenshieldr Shield Skin are among the skins available. Below are a few tips that will help you on your journey.

God of War PC Guide: Explore

While it’s tempting to rush through the tale, if you want to discover all of God of War’s mysteries, you’ll need to explore every side route and area properly. Chests, ravens, and other items are strewn throughout the map. You’ll need to continuously equip better gear if you want to reach the finish line, but you won’t find the greatest items if you rush. Take your time because you’ve been waiting so long for a PC version.

You might also like PUBG PC Guide 2022 – Now Free to Play!

God of War PC Guide: Gear stats

God of War PC Guide
God of War (Image credit: Steam)

The gear you wear may make a big difference in your combat style. There will be gearsets that assist you to flourish in the sort of gaming you enjoy once you’ve figured out what you prefer. Understanding your gear stats can help you determine which pieces to invest in, whether you want to focus on conventional attacks, runic abilities, or a combination of both. Gearsets will also be better suited to certain playstyles, so find the one that suits you.

  • Strength: Increases the damage done by standard attacks.
  • Runic: Both Elemental Damage and Runic Attack will increase.
  • Defense: Reduces damage that is taken.
  • Vitality: Improves maximum health and decreases the severity of damage reactions from enemy attacks.
  • Luck: Increases the chances of activating Perks. Gains XP and Hacksilver.
  • Cooldown: Reduces the time it takes for Runic Attacks, Runic Summons, and Talismans to recharge.

God of War PC Guide: Weak Walls

Keep an eye out for artificial walls and other breakable items; your axe can smash them. Alternatively, you may pitch an adversary into a wall, boot them off a ledge, throw one at the other, and chuck them both down a cliff. whatever suits your fancy! You’ll also discover secrets, health, and treasure in smashable things, as well as the locations of puzzles and chests.

God of War PC Guide: Axe and Arrows

God of War PC Guide
God of War (Image credit: Steam)

During both mild and major attacks, your Leviathan Axe can be thrown. This maneuver is critical for survival in the early hours of God of War since it allows you to do significant damage before closing the space and completing the kill. A huge throw can also lock select foes in place, which might be beneficial for crowd control as you wale on some unfortunate Draugr (a Norse undead monster). Upgrades for Leviathan Axe Throws are one of the most useful early-game advantages, and they’re well worth the XP expenditure.

Atreus possesses an endless supply of arrows, but they renew slowly. As you take on additional adversaries, get into the habit of pushing Square to shoot at them, while also striking them with your Leviathan Axe or fists or distracting them with arrows. The ability of the arrows to add Stun damage makes an adversary susceptible before you’ve even touched them is one of their most valuable features.

God of War PC Guide: Dodging and Parrying

In God of War, Kratos is capable of annihilating creatures, but timing your dodges and parries becomes a matter of fighting rhythm. This method isn’t quite as harsh as that of Dark Souls. You should still become used to understanding when to weave in and out of enemy range. In addition, the precision of timed blocks aids in the defense against attackers. It’s crucial to learn the tactics early in the game since later on, mini-bosses might be nearly hard to defeat without knowing when to dodge and parry.

God of War PC Guide: Runic Attacks

God of War PC Guide
God of War (Image credit: Steam)

First and foremost, keep in mind that XP may be used to improve runic attacks. Because they’re in a separate portion of the menu than your talents, it’s easy to overlook that benefit. Second, think about how you can use these effective movements in diverse scenarios. Some moves, for example, are superior for crowd management, while others may focus assaults on a single opponent. Consider whether the fighting maneuver reduces the space between you and your opponent.

For more Guides, Tips, and Tricks

You can also check our dedicated Video Games Guides section.

The Best Midfielders in FIFA 22

Want to strike with a midfielder on the ground? Here are the best midfielders in FIFA 22.

When it comes to creating your Ultimate Team in FIFA 22, having a solid center midfield is crucial. It might be difficult to fuel your attack and appropriately react to your opponent’s activities if you don’t have the right players and good communication.

When it comes to the middle of the pitch, players frequently question themselves what the greatest possibilities are to pick from. With three of the finest footballers for each position, here’s a list of the top central midfielders, central attacking midfielders, and central defending midfielders in FIFA 22. By the end of the piece, we’ve given an overall ranking of the top 15 players.

Read What is the Hero Upgrade Pack in FIFA 22?

Best Midfielders in FIFA 22: Central defensive midfield (CDM)

N’Golo Kante 

Best Midfielders in FIFA 22
Kante (Image credit: Fifplay)

N’Golo Kante is a 30-year-old French footballer who was born on March 29, 1991. He is now a central defensive midfielder for Chelsea (CDM). This card has a 90 overall rating in FIFA 22. He has a 2-star skill movements rating and is right-footed. N’Golo Kante stands 168 cm tall and weighs 70 kg. His FIFA 22 Rare gold card can be found in FIFA 22 Packs.

It’s difficult to resist mentioning N’Golo Kante, FIFA 22’s finest player in the position while discussing the top central defensive midfielders. During the most recent Champions League final, the Frenchman was named Player of the Match, and his previous season was nothing short of incredible. Kante is the greatest at the position, with an astounding 87 points in defending and 90 overall. He is a must-have in every squad.

Casemiro 

Best Midfielders in FIFA 22
Casemiro (Image credit: Fifplay)

Casemiro is a 29-year-old Brazilian footballer who was born on February 23, 1992. He is presently a central defensive midfielder for Real Madrid (CDM). This card has an overall rating of 89 in FIFA 22. He has a 2-star skill movements rating and is right-footed. Casemiro is 185 cm tall and weighs 84 kg. His FIFA 22 Rare gold card can be found in FIFA 22 Packs.

The Brazilian is another important member of the Spanish squad, frequently posing a difficult challenge for opponents to overcome. While he has the same overall score as Kimmich and is somewhat weaker in certain areas like passing and dribbling, he excels in defense and physicality, which are crucial for defending midfielders (86 and 90, respectively).

Joshua Kimmich

Best Midfielders in FIFA 22
Joshua Kimmich (Image credit: Fifplay)

Joshua Kimmich is a 26-year-old German footballer who was born on February 8, 1995. He is presently a Central Defensive Midfielder for FC Bayern München (CDM). This card has an overall rating of 89 in FIFA 22. He has a 3-star skill movements rating and is right-footed. Joshua Kimmich is 176 cm tall and weighs 75 kg. His FIFA 22 Rare gold card can be found in FIFA 22 Packs.

When discussing soccer’s future chances, Joshua Kimmich comes to mind. The German central defender has already won the Champions League and is one of the best defenders on the planet despite just being 26 years old. With an overall rating of 89 and a Playing Characteristic rating of 86, he is ranked third in FIFA 22 in that position.

Best Midfielders in FIFA 22: Central midfield (CM)

Kevin De Bruyne

Best Midfielders in FIFA 22
Kevin De Bruyne (Image credit: Fifplay)

Kevin De Bruyne is a 30-year-old Belgian footballer who was born on June 28, 1991. He is now a central midfielder for Manchester City (CM). This card has a 91 overall rating in FIFA 22. He has a 4-star skill movement rating and is right-footed. Kevin De Bruyne stands 181 cm tall and weighs 70 kg. His FIFA 22 Rare gold card can be found in FIFA 22 Packs.

There’s no question that Kevin de Bruyne is FIFA 22’s best central midfielder. Many people thought he was Manchester City’s finest player last season, and EA Sports awarded him 86, 88, and 93 in the shooting, dribbling, and passing categories. In that position, De Bruyne has a total score of 91, the highest in the game. You would perform better right away if you began him in your Ultimate Team.

Toni Kroos

Best Midfielders in FIFA 22
Toni Kroos (Image credit: Fifplay)

Toni Kroos is a 31-year-old German footballer who was born on January 4, 1990. He is now a central midfielder with Real Madrid (CM). This card has an overall rating of 88 in FIFA 22. He has a 3-star skill movements rating and is right-footed. Toni Kroos is 183 cm tall and weighs 76 kg. His FIFA 22 Rare gold card can be found in FIFA 22 Packs.

Toni Kroos has also played a key role in Real Madrid’s recent success. The German appears to age like great wine, as he is still the second-best central midfielder in FIFA 22 despite being 31 years old. His 88 overall score and 91 passing scores make him an ideal addition to many clubs, particularly if the goal is to have a player who can rapidly move the ball across the field while also stabilizing the game.

Luca Modric

Luka Modric is a 36-year-old Croatian footballer who was born on September 9, 1985. He is now a central midfielder with Real Madrid (CM). Modric has a 4-star skill movement rating and is right-footed. Luka Modric stands at a height of 172 cm.

The first side in history to achieve this feat three times in a row is Real Madrid, which won the Champions League four times in the last decade. Without a faultless middle, none of this would be conceivable. Luka Modric, who is still a driving force behind Real Madrid’s success, was a significant member of Los Blancos’ team. It’s no surprise that he’s the game’s third-best center midfielder. The Croatian, who has an overall score of 87, will fit into practically any squad.

Best Midfielders in FIFA 22: Central attacking midfield

Bruno Fernandes

Bruno Fernandes
Bruno Fernandes (Image credit: Fifplay)

Bruno Miguel Borges Fernandes is a 27-year-old Portuguese footballer who was born on September 8, 1994. He is presently a central attacking midfielder for Manchester United (CAM). This card has an overall rating of 88 in FIFA 22. He has a 4-star skill movements rating and is right-footed. Bruno Fernandes stands 179 centimeters tall and weighs 69 kg. His FIFA 22 Rare gold card can be found in FIFA 22 Packs.

Mentioning fantastic offensive midfielders without mentioning Bruno Fernandes is practically impossible. Last season, the 27-year-old upped Manchester United’s game by scoring 18 Premier League goals and assisting on another 11 goals.

Many people are impressed by his abilities, and EA Sports recognizes them. His card is the greatest in FIFA 22, according to the game’s producers. Bruno Fernandes had 84, 86, and 89 points for dribbling, shooting and passing, respectively, for an overall score of 88.

Marco Verratti

Marco Verratti
Marco Verratti (Image credit: Fifplay)

Marco Verratti is a 28-year-old Italian footballer who was born on November 5, 1992. He is now a Central Midfielder for Paris Saint-Germain (CM). This card has an overall rating of 87 in FIFA 22. He has a 4-star skill movements rating and is right-footed. Marco Verratti is 165 cm tall and weighs 60 kg. His FIFA 22 Rare gold card can be found in FIFA 22 Packs.

It’s like seeing an orchestra while you’re watching Verratti because he never panics and is always in command. He has incredible self-confidence and the vision to punish any squad. Verratti is so brilliant that he could have easily fit in with Xavi, Andreas Iniesta, and Sergio Busquets on Pep Guardiola’s legendary Barcelona team.

Thomas Müller

Thomas Müller
Thomas Muller (Image credit: Fifplay)

Thomas Müller is a 32-year-old German footballer who was born on September 13, 1989. He is presently a central attacking midfielder for FC Bayern München (CAM). This card has an overall rating of 87 in FIFA 22. He has a 3-star skill movement rating and is right-footed. Thomas Müller is 186 cm tall and weighs 76 kg.

There are several reasons why Bayern Munich and the German national team are so successful. One of the blueprints for both teams is Thomas Müller. He’s been demonstrating his intellect for years, and it doesn’t appear like he’s about to stop. He finishes up with an 88 Overall score in FIFA 22, thanks to outstanding Passing, Dribbling, and Shooting (all far over 80), making him a devastating player with the ball at his feet, especially in front of the opponent’s penalty area.

For more Guides, Tips, and Tricks

You can also check our dedicated Video Games Guides section.

How to beat Leofrith in Assassin’s Creed Valhalla – Guide

Facing difficulty to beat Leofrith? Do not worry as we have brought you a guide on how to beat Leofrith in Assassin’s Creed Valhalla.

There are many difficult foes and bosses to face in Assassin’s Creed Valhalla. Fighting like a genuine Drengr entails taking on the greatest of the best in order to choose who will get to Valhalla. Assassin’s Creed Valhalla will put any would-be Viking’s talents to the test, from mythological animals to twisted cults.

Leofrith is one of the difficult one-on-one battles in Assassin’s Creed Valhalla, and it will put the player’s ability to handle Eivor in combat to the test. Players should gather any resources in the vicinity, such as arrows and food, to ensure they are prepared for this combat. Players will benefit most if they enter the encounter with full health and arrows. The combat will commence as players enter Leofrith’s ring.

Before starting, read Assassin’s Creed Valhalla Guide – Best Tips and Tricks.

How to start?

To go to this duel, you must first complete the Ledecestrescire objective “Heavy Is The Head.” Proceed only if your strength level is more than 20, as Leofrith may appear invincible otherwise. To have a clear advantage, you should aim to have a power level above the specified figure. When you get to the marker, you can battle the monsters in the area, but it’s best to just keep moving forward because this location is irrelevant and you need to go to Ceolbert. Before the boss fight, a cutscene occurs as you approach Ceolbert and Leofrith.

How to beat Leofrith: Leofrith’s Strategy

Because of the range of his long weapons, Leofrith uses his speed for the entirety of this fight, which is astonishingly quick and efficient. To do so, he prowls around Eivor for a few moments before slamming into you. The blue sign that emerges over his head is extremely important to remember. 

When this happens, do not assault Leofrith in any manner, as he will jump forward for a quick attack that is typically impossible to dodge. The blue symbol move is nothing more than a ruse to get the player to strike in a method that Leofrith would almost certainly avoid.

Also, read Assassin’s Creed Valhalla – How to Beat the Walloper.

How to beat Leofrith: First Phase

How to beat Leofrith in Assassin's Creed Valhalla
Leofrith (Image credit: Youtube)

Before going into the small arena surrounded by wooden stakes, gather all the plants and rations in the area on the Isle of Waifs. Leofrith will be a tough fight, so you will need all the rations you can possibly carry for this boss fight.

When dealing with Leofrith, we suggest going on the defensive for the first phase. Parrying Leofrith’s attacks is the first stage of the fight, which isn’t as difficult as I’ve made it seem. Despite his apparent slowness, Leofrith is very fast, and all his attacks are accompanied by an orange glowing symbol. Simply hit the button to employ your shield during these assaults to parry his strike, lowering Leofrith’s total stamina meter over his life bar.

Watch out, for Leofrith still has a few tricks up his sleeve, even at this debut period. The elite soldier may launch a massive glowing red blast that Eivor’s shield can’t block, therefore it’s important to constantly duck backward to escape this blow, otherwise, you’ll lose a lot of life.

Leofrith can also assume a posture in which a blue symbol appears over his head. This is Leofrith attempting to get you to strike him, but you must keep far away from him during this phase since he will attack you if you run in and strike him. Back away from Leofrith and strike him with a couple of bows blows to entice him back into his normal assaults. If you have a light bow, we recommend using it to strike Leofrith as fast as possible.

How to beat Leofrith: Second Phase

How to beat Leofrith
Assassin’s Creed Valhalla (Image credit: Youtube)

During the second phase of the fight versus Leofrith, the tempo really picks up. His strikes get faster and more deadly, and he becomes much more difficult to hit. Staying on the defense during this phase is also pointless because Leofrith’s stamina meter is completely depleted. Instead, you should go on the offensive. As soon as you’ve parried one of Leofrith’s assaults, be ready to strike. He’ll probably avoid your blow, but if you’re quick enough, you can land a clean hit in before he retreats a few yards to safety.

If you have a particularly powerful ranged ability, prepare ready to utilize it. Use your ranged ability when Leofrith enters the defensive position with the blue sign over his head. Because you may dash in and score a few additional strikes on Leofrith once he’s thrown to the ground, we found the Harpoon Impalement ability to be extremely useful during this phase.

Whenever you acquire an Adrenaline Point during the second phase of this fight, you should employ a powerful fighting ability. Make careful to deflect Leofrith’s assaults and keep out of his blue phase, and you’ll be OK in this battle with the elite soldier.

The final decision

How to beat Leofrith
Assassin’s Creed Valhalla (Image credit: Youtube)

However, there remains a choice to be made following the battle. Odin, the great god himself, stands by Eivor and tells them that they must either spare Leofrith or send him on his path to Valhalla. You’ll give Leofrith the noble death that every Viking warrior desires if you kill him. However, we recommend that you spare Leofrith and inform him that King Burgred has abandoned him and his people in order to sail to Rome. 

Leofrith expresses his gratitude for this information by revealing that Zealots of the Order of the Ancients possess a scroll with Eivor’s name. This is the start of Eivor’s Hunted quest. You will no longer be sought by Zealots on sight if you make it to Venonis in the south of Ledecestrescire and just burn the scroll with Eivor’s name inscribed on it. The Zealots are elite fighters that you’ll want to kill at some point if you want to defeat the Order of the Ancients, but they won’t fight you.

For more Guides, Tips, and Tricks

You can also check our dedicated Video Games Guides section.

Minecraft SMP Guide – Tips and Tricks

We have brought you the Minecraft SMP Guide with all the tips that are necessary for you.

Playing Minecraft can be done in a variety of ways. You can either train to be a committed speedrunner and compete against the clock, or you can design your own universe. The sky is the limit when it comes to the multiplayer component of the game. You’ll never be bored in Minecraft, with endless minigames and community servers to choose from.

“SMP” is an abbreviation for “Survival Multiplayer.” SMP servers enable players to enjoy a Minecraft survival world as a group. Players on SMP servers can explore the world, farm resources, and build towns together.

SMP servers have few plugins and are very similar to vanilla Minecraft survival. The SMP servers are fun to play on because they have a close-knit community feel to them. These Minecraft servers have grown in popularity in recent years. This is primarily due to the fact that they have been featured by a number of popular YouTubers, including Dream and his top-rated DreamSMP series.

Read Minecraft reaches 1 trillion views on YouTube.

Minecraft SMP Guide: Different types of servers

Peaceful

Not every Minecraft player prioritizes the game’s PvP aspect. PvP can even be a drag for creative-focused players at times, as there may be players attempting to grief your process. PvP is disabled on peaceful SMP servers, allowing players to progress and communicate in a more relaxed but less eventful environment.

Skyblock

Skyblock SMP servers could be viewed as a race against the clock. When you join one, you’ll be transported to a floating island. Your sole objective will be to find a way to maximize all the resources you have in order to ensure your survival on the island while also expanding it.

Anarchy

Most SMPs have rules, and breaking them might result in you being blacklisted. Look no farther than Anarchy SMP servers if you want to jump right into the action without having to perform any prep work.

Anarchy SMP servers have no restrictions, which means that players can do whatever they want on them. The rule less life may appear pleasant at first, but owing to the toxic environment of these servers, it can quickly become tedious.

Factions

Factions are the most closely related server type to the SMP experience you’ll encounter on YouTube. You can join a group and claim territory, plunder, or even fight against other factions on Factions SMP servers.

Factions SMP servers tend to emphasize the PvP feature of Minecraft, as you’ll need to handle faction conflicts in some way if diplomacy isn’t an option.

Vanilla

Even if you’re a seasoned veteran, the untouched Minecraft experiences can be refreshing. It’s even more enjoyable with friends, which is where the Vanilla SMP servers come in.

Vanilla SMP servers will allow you and your friends to relive the core Minecraft experience. While no content will be lost, you will not have access to the quality-of-life features that some modes bring to the table.

Semi-vanilla

Even if you want to go to Vanilla, you may not want to go all the way. After acclimating to the meta, the Vanilla experience may begin to feel sluggish or simply a grind. Semi-Vanilla servers attempt to address this by allowing plugins that enhance the core gameplay without significantly altering it.

Modded

Every day, many gamers are drawn in by the basic Minecraft gameplay experience. However, when players become more immersed in the game, they begin to discover all of the mods that make Minecraft even more enjoyable.

Modded SMP servers will require users to download a set of mods before they can join the server. These are required in order to fully utilize the server’s capabilities. The requirements will vary for each server, thus you may need a whole different set of mods to play on another. This includes everything from aesthetics to gameplay.

For those of you who spend most of your time in modded SMP servers, it might be a good idea to create separate mod folders that you can drag on drop depending on what server you’ll be playing on.

Minecraft SMP Guide: How to join

Minecraft SMP Guide
Minecraft (Image credit: Minecraft)

Joining an SMP server in Minecraft is usually no different from joining any other server. To join a server, look for one near you on a server list and enter its IP address into Minecraft. When you initially enter a server, you may be greeted with a set of rules. Taking notice of such regulations can save your life later if you want to stay on that server.

There are additional SMP servers that are based on invitations or reviews and are more focused on role-playing. These servers normally have their own website where they accept and review applicants one by one. These request forms may ask you to construct your character ahead of time, as well as compose a backstory that you’ll stick to once you’re on the server.

Although a roleplaying SMP server may sound like a lot of work, it can be a great experience for many Minecraft players, since roleplayers take the game very seriously. The more involved you become with a server, the more you’ll learn about the narrative, and you may end up as one of the most important characters.

Minecraft SMP Guide: Use Mods

Minecraft SMP Guide
Minecraft (Image credit: Minecraft)

In your realm, don’t be scared to employ modifications or custom worlds. On their SMPs, people make a variety of amusing and humorous modifications. A horror mod that darkens the environment and makes mobs frightening. SMP never needs to be in a vanilla Minecraft world thanks to a new dimension custom world, a middle earth mod that broadens the landscape and modifies the terrain entirely. Mods may be used to a fair level to allow everyone on your server to enjoy it and have even more fun than before.

Minecraft SMP Guide: Invite friends

Only invite close friends. Once you begin inviting strangers and giving access to your server to completely random people your lively SMP will start to become much less of an SMP and much more of an anarchy server. Because they don’t respect you or know you and you probably don’t want that unless you’re crazy about places. That isn’t how you make an exactly functional SMP so yes do only invite close friends. 

Minecraft SMP Guide: Set Communication Platform

Set up a communication hub for your SMP’s members to communicate. This might be a Google Hangouts chat or a Discord server, but you must have a mechanism to connect with your other players other than the in-game chat. You can build a community and a group of individuals that like playing the game together this way.

Minecraft SMP Guide: Automatic Farms

Minecraft SMP Guide
Minecraft (Image credit: Minecraft)

Keep the number of automated farms as low as feasible. Players cease struggling with autonomous farms, and everyone gets all they need at the flick of a lover’s switch or after a few seconds of being AFK. You’re basically in the creative mode once you’ve got a gunpowder farm, a villagers’ breeding farm, and an iron farm.

This is because you can get anything without having to work hard for it, and if you’re on creative mode, you’re completely defeating the point of a survival multiplayer. Set a restriction on which automated farms are permitted or have as few automatic farms as feasible on your server, but don’t fully ban them.

For more Guides, Tips and Tricks

You can also check our dedicated Video Games Guides section.