For all the fans of Forza Horizon, we have brought you a guide on how to complete the ultimate off-roader challenge in the game.
In an open-world environment, Forza Horizon 5 is a racing video game set in a fictitious portrayal of Mexico. The game not only boasts the largest area in the Forza Horizon series, but it also has the highest point, with the highest point being 50% larger than the previous release.
When players visit one side of the game, they may observe a storm on one side of the map. The game would offer numerous climates at the same time because Mexico has such a large geographical mass with a variety of heights. Despite the fact that the four seasons are still there, the four seasons would affect the eleven biomes on the map.
Forza Horizon 5 (Image credit: Youtube)
Forza Horizon 5 gives a lot of challenges to the players, be it the weekly challenge or the Series 3 – winter. Keeping this in mind, we have brought you a guide on how to complete ultimate off-roader challenge in Forza.
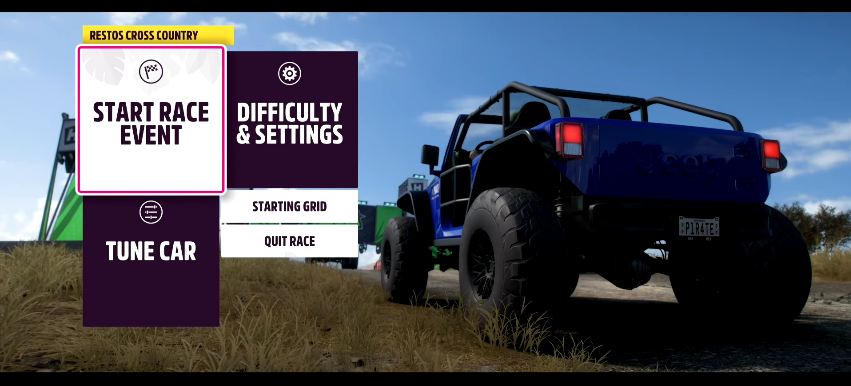
How to complete the Ultimate Off-Roader Challenge?
Weekly challenges are one of the key objectives that players must fulfill in order to complete the season in Forza Horizon 5. The players are presently participating in Series 3 – Winter, commonly known as the Dry Season, which will begin on January 27, 2022.
Forza players will receive a total of 65 points for accomplishing the festival goals, and the same amount is necessary to complete the season. The Ultimate Off-Roader Challenge is the season’s most thrilling weekly task. Players will need the 2016 Jeep Trailcat to complete the challenge and earn all 65 points, as well as several skill and event points.
How to Complete the Ultimate Off-Roader Challenge: Jeep Trailcat
Forza Horizon 5 (Image credit: Youtube)
The vehicle is a 2016 Jeep Trailcat, which is a returnee from Forza Horizon 4 and a strong off-roader. And it’s not a slow one, as this week’s Fun Fact shows: Jeep designed the Trailcat by cramming a Hellcat engine into a normal Jeep, which necessitated extending the frame by 12 inches. That’s 707bhp in factory form in an offroad vehicle! So, what are our responsibilities in relation to this monster?
Fortunately, nothing is too difficult. For step one, we must own and drive one, and then win three Dirt Racing trail events, or point-to-point races. For 75,000 points, players will have to purchase the 2016 Jeep Trailcat at the Auction house. The 2016 Jeep Trailcat is the only vehicle capable of completing all chapters of the challenge.
Moab Jeep Safari’s 50th anniversary is celebrated in Chapter 1, also known as the Safari Concept, by driving the Trailcat. In Forza Horizon 5, players must complete all the objectives in Chapter 2, also called Hellcat Power, after obtaining the Trailcat. As well as winning three Dirt Trail events, Chapter 2 offered chances for players to use them later in the game.
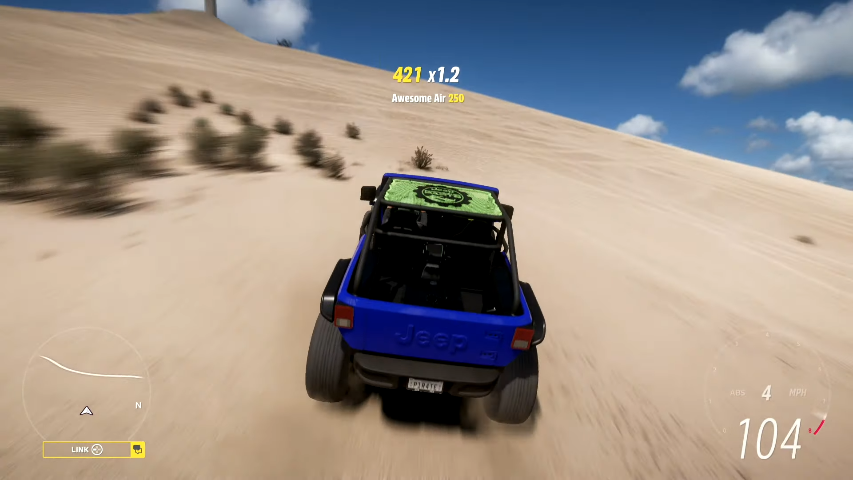
After that, we must earn 15 air skills, which can be obtained in one of two ways:
Flying over the dunes in the desert on the left side of the map,
Participating in a Horizon Arcade “Air” event.
This may allow you to kill two foes with a single arrow while also earning some nice rewards. After that, you must win three cross-country competitions to advance to the final stage.
The latest boss is here. To help you, we have a full Genshin Impact Bathysmal Vishap herd guide. This guide will help you defeat the boss easily.
The newest update for Genshin Impact brought with it a number of exciting changes and additions. Inazuma’s Watatsumi Island, which lies below the ancient ruins of Enkanomiya, is the star of this update.
The players should be well acquainted with many fearsome foes in Enkanomiya by now, but it introduces two new types of enemies: Rimebiter (Cryo) Bathysmal Vishaps and Bolteater (Electro) Bathysmal Vishaps. Geovishaps are found roaming around many sites in Enkanomiya as common enemies as cave-dwelling cousins of Geovishaps. Enkanomiya’s new farmable boss is formed by two special Bathysmal Vishaps.
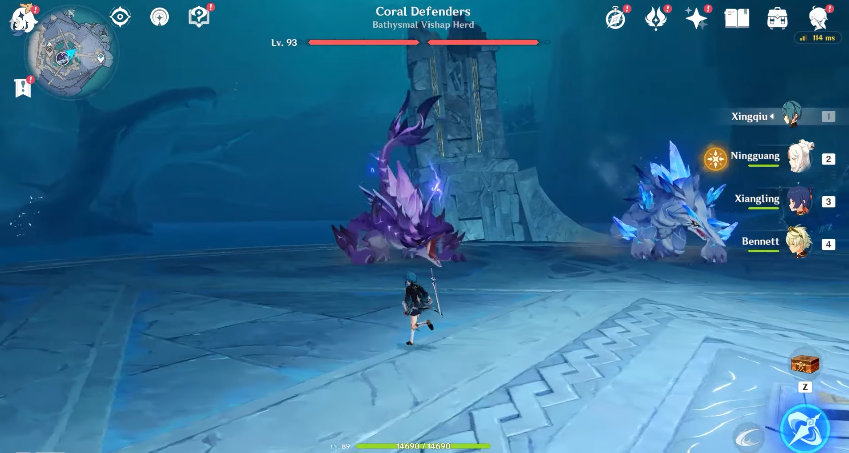
Players must first finish the global quest From Dusk to Dawn in Byakuyakoku before encountering the herd. Players may find the boss at Dainichi Mikoshi, Enkanomiya’s artificial sun, if they’ve completed the criteria. In addition, the player’s regional map will display the boss symbol.
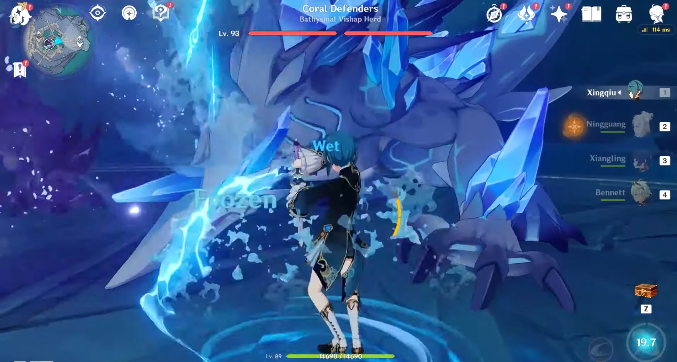
In combat, the herd will employ a strong cleaning shower assault, which will be predicted by a purple orb. If this strike hits, a portion of the player’s Elemental Energy will be depleted. If the player does not have enough Elemental Energy, they will instead lose their health.
Genshin Impact Bathysmal Vishap herd Guide: How to defeat
In order to destroy the Bathysmal Vishap Herd in combat, players should form a team that includes Pyro and Geo characters from Genshin Impact such as Hu Tao and Zhongli, as well as a healer and an energy-generating character. When the boss fight begins, players must avoid the herd’s Cryo and Electro attacks, which will drive them to leap to the opposite end of the fighting field.
Genshin Impact (Image credit: Youtube)
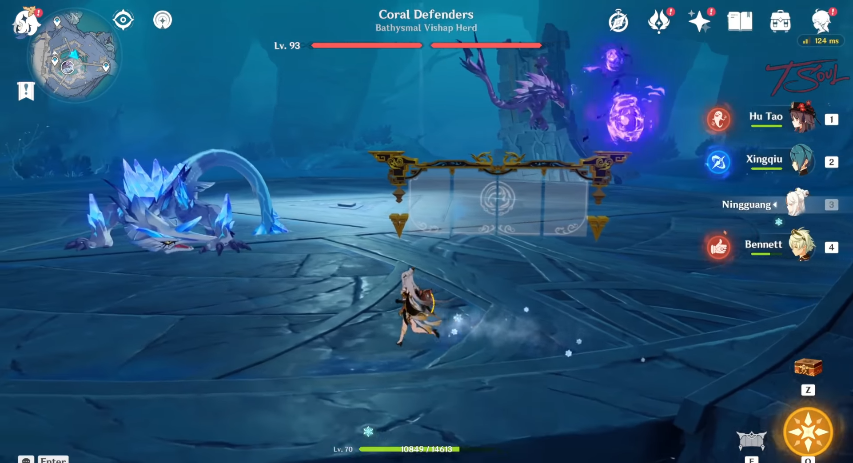
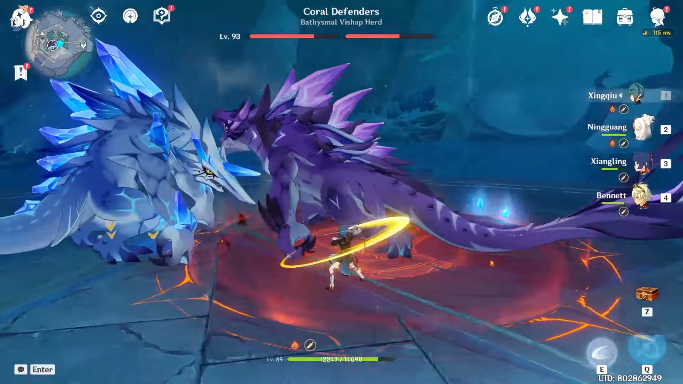
Another assault that players may readily avoid by sprinting around the arena is Spike Field. One of the enemies will bury his tail in the ground, forming a Spike Field, which should signal the player to begin running. Meanwhile, the Bathysmal Vishap Herd boss’s Spinning Sweep attack does AoE Cryo or AoE Electro damage.
The Bathysmal Vishap Herd will sometimes stop attacking the player as the conflict in Genshin Impact develops. Players should take advantage of this pause to strike with a variety of attacks. When the battle proceeds, one of the creatures will leap onto one of the arena’s stone pillars and begin firing Electro missiles.
After then, players should demolish the pillars in order to weaken the adversary before striking directly. It’s worth noting that after one of the two foes is beaten, the other will leap into the water and unleash a Critical Assist attack. This move summons three homing shards that, if landed, do Cryo or Electro damage. This assault can be dodged or shielded by the player.
Eat food
In addition, players can eat food in Genshin Impact to boost their attack before entering the combat and better their chances of defeating the boss Bathysmal Vishap Herd. Players will be awarded Dragonheir’s False Fin ascension material if they defeat the boss. The player does not receive an accomplishment for beating the Bathysmal Vishap Herd, unlike other bosses.
Genshin Impact Bathysmal Vishap herd Guide: Best Characters
Genshin Impact (Image credit: Youtube)
Your team’s health will be kept topped up by Jean and Kokomi, who are both excellent healers. While Jean depends heavily on her Burst to heal (which can be risky if her Energy is constantly depleted), using her Burst even once often is usually enough to heal a team to full health. However, Kokomi doesn’t suffer from this problem at all, and her Skill as well as her Burst can provide immense healing.
Bringing Raiden to this fight is a great idea. In addition to having high Energy Recharge, she can also help your other team members charge up their Bursts. Despite its resistance to Electro, the Bolteater Vishap is still vulnerable to Raiden’s burst, so he should not be used instead of the Cryo Vishap.
Barbara’s sole flaw is that she has a low Energy Recharge, which might be an issue if you don’t have any other healers. She may also utilize her Skill to give your character the Wet condition, rendering you vulnerable to the Rimebiter Vishap’s Frozen or Bolteater Vishap’s Electro-Charging. You must be particularly cautious if you want to get the advantages of Barbara’s treatment. If this seems untrustworthy to you, you might want to choose Diona, Sayu, or Bennett as Four Star healers instead.
In this guide, we are here to help you learn how to get Silk Touch in Minecraft. Read carefully and get your own Silk Touch easily.
Instead of acquiring the typical fallen things, the Silk Touch enchantment lets you mine the blocks themselves. You can use this enchantment to acquire delicate and breakable objects like glass or ice. Furthermore, you can also mine the block itself, such as diamond ore or coal ore, and harvest it (instead of getting diamond and coal drops).
Using an enchanting table, anvil, or a game command, you may add the Silk Touch enchantment on any pickaxe, shovel, axe, or shears. Then use the enchanted tool to mine and see how quickly you can fill your inventory with those rare and delicate things.
You may get your hands on a silk touch enchantment in a few different ways. Also, you may try rolling the dice in an enchantment table and finding it by chance with a level 30 enchantment; you could also get it through chest loot or fishing, like with most other enchantments; and lastly, you can obtain it by trading with a library villager. Trading is the most dependable method of obtaining what you want.
You’ll need to find a new villager in order for this strategy to function. “Fresh” refers to a villager who has not yet locked down their career. Check a villager’s trade inventory to see whether they are locked in. They will never change their profession or update their trade inventory if they have level 2 unlocked. As long as you haven’t traded with them, most folks who produce in villages will be compatible with this approach.
Minecraft (Image credit: Youtube)
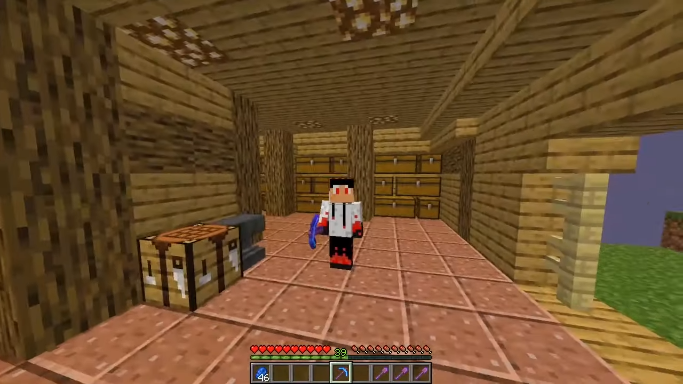
If there are any extra job site blocks nearby, you may need to remove them so this will work. Obtaining a lectern is also necessary. You can find a lectern generated in the home of the librarian in a village that has a librarian. A bookshelf and four wooden slabs can also be used to construct one. It doesn’t matter what type of wooden slab you use for this recipe. Find a villager that can be kept isolated after you have set up your lectern. To prevent him from wandering, you should enclose mine with fences.
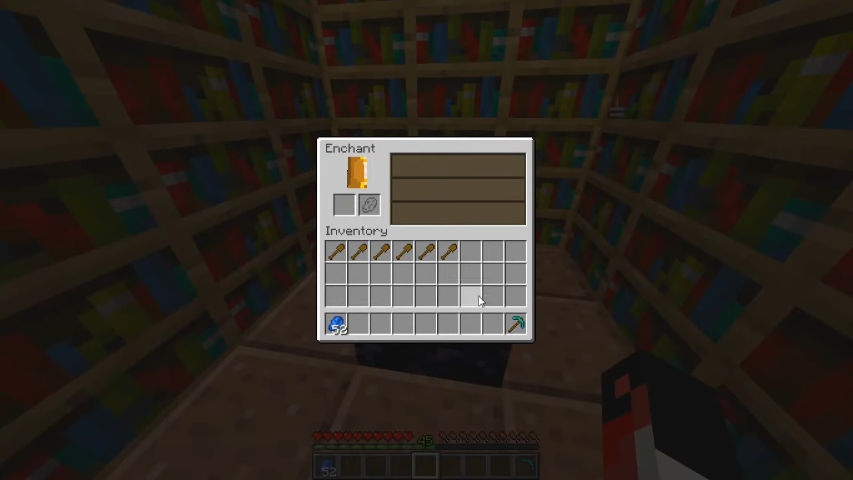
How to Get Silk Touch in Minecraft: Librarian’s inventory
Look through the librarian’s trade inventory to discover what he has to offer. This strategy requires simply his level 1 trade. To replenish the librarian’s collection, you can shatter and replace the lectern. There will be storm clouds around the villager, suggesting his rage, however, this is due to his loss of occupation. When the villager is transferred to his occupation, this value is reset.
The librarian’s inventory will be refreshed by breaking and replacing the lectern. If you trade with this villager, you will become locked in their profession and cannot refresh their inventory if you buy enchanted books from them in the level 2 trades. If you don’t find the book you want, keep replacing the lectern until you do.
Minecraft (Image credit: Microsoft)
After a few inventory refreshes, the librarian may provide a silk touch. This will be an almost limitless supply of this magical book (as long as you can supply the emeralds and books). If the trade is locked out, you can either trade with other things or wait for the librarian’s stock to replenish for a few days.
If you’re having trouble finding enough emeralds to meet your enchanting needs, explore nearby towns and try trading basic resources for emeralds. Leatherworkers will purchase leather in exchange for emeralds, farmers will purchase crops in exchange for emeralds, fletchers will purchase sticks in exchange for emeralds, and so on. Make use of whatever villagers trade is most convenient for you.
Craft your book
Make a book using three pieces of paper and a piece of leather if you have enough emeralds. You can trade with the librarian for your enchanted book after you have your book ready and your emeralds acquired. With your book in hand, you can use an anvil to enchant whatever tool you wish. You’ll need 31 total iron ingots to create an anvil. Make three iron blocks with 27 iron ingots, then arrange three iron blocks in an upside-down “T” configuration on the top row of your crafting table.
To enchant your tool, set your anvil down and place your desired tool in the anvil’s leftmost slot and the enchanted book in the anvil’s rightmost slot. That’s all you need to do in Minecraft to get a silky touch on your products.
The votes so far have got us wondering what questions you would "axe" if the creeper could answer with anything other than a hiss? 🪓 https://t.co/eiCZADA54U
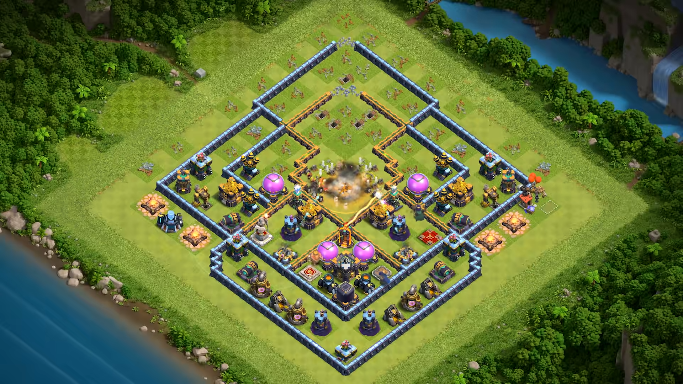
Do you have difficulties winning the battle? Do not worry, as we have brought you the top 5 attack strategies in Clash of Clans.
Players participate in the online game by creating clans, training troops, and attacking each other to earn resources. In the game, four different currencies or resources are available. With gold and elixir, players can build and upgrade defenses and traps that protect their villages from attacks by other players, and they can also upgrade buildings. Dark elixirs and elixirs are also used for training troops and upgrading spells. The gem is the premium currency. Attacks are rated on a scale of three stars and are limited to three minutes in length.
Players form clans when they join together to support each other, either physically or verbally. As soon as players rebuild the Clan Castle early in the game, they can join clans. There are clan wars in Clash of Clans, which are an integral part of the game’s gameplay. Clan leaders and other members of their clans can declare war on other clans. After this, each clan gets a “preparation day” and a “war day.” We have brought you the top 5 attack strategies in Clash of Clans so that you can win the games easily.
Ensure that you have a firm push from one end of the base to the other. The main attack should come straight through the middle, followed by a left and a right attack. With your king and queen and with all the spells, this is where you use your wall wrecker, your seed machine. When your war record pops the ridge, be sure to have jump spells to provide access through the base.
Heal spells will be your greatest buddies. It’s a good idea to have bowlers in there when the war record goes off, so they can simply demolish that area. The benefit of having your Queen pass in the middle is that she can assist you in dealing with clan castle forces. She is also in charge of assembling soldiers.
As a result, you should be allowed to keep that skill. Make certain you do so since it will be important when you get to the bottom of it. However, as long as you have the core out, the bowlers and witches will come around on each side to aid. If you can acquire access to the multi-target infernos via the middle push, they will be able to reach the backside defenses.
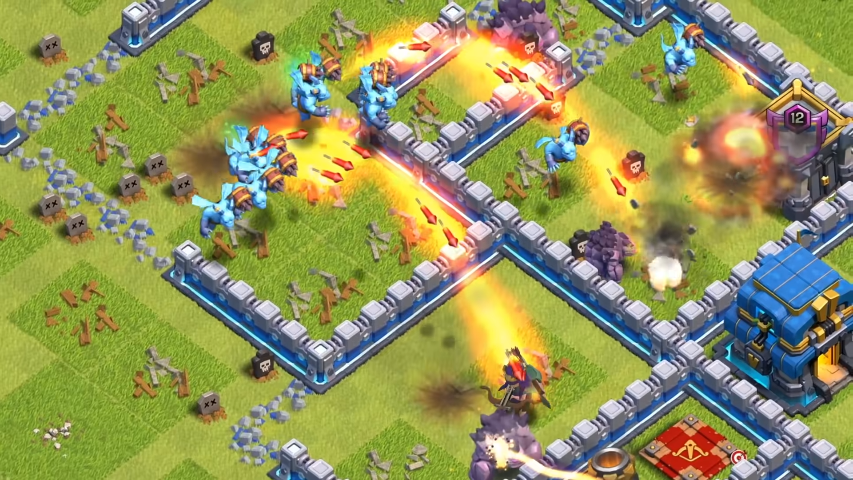
Mass balloons and minions
Clash of Clans (Image credit: COC)
Balloons
Minions
Rage spell
It’s a little tough to employ because it requires a knowledge of which side can demolish the most fortifications, but it’s a dark elixir farming army. Simply scatter balloons from one side of the base, then use the rage spell to increase Enrage damage and speed.
Rather than overlapping fury spells, deploy two on the outside wall side and two in the center of the base. You may easily demolish one side of the fortifications this way. Simultaneously, employ the minions in the background to demolish the building and any remaining defenses. If your troops are maxed out in town hall 9 and you execute the plan correctly, you can receive three stars; otherwise, you’ll just get one star and black elixir.
Among the Clash of Clans’ offensive methods, Mass Dragon is the best-known. Multiplayer battles and clan wars can benefit from this method in Town Hall 10. It is most effective against air defenses with low levels and bases with fewer air sweepers.
Miners are good too
At town hall 10, the miners have always been dependable. There are just better techniques out there, but it’s always wise to have a variety in your back pocket. Because you know what’s in the clan castle if you have scout attacks, miners may be the greatest option for you.
The majority of the time, you want to have a queen charge, but you don’t have to if you break down the foundation on both sides. So choose the narrow spot where the miners may pass through easily. You can’t merely use your queen on one side and your king on the other to make the way for the miners to arrive through the base straight.
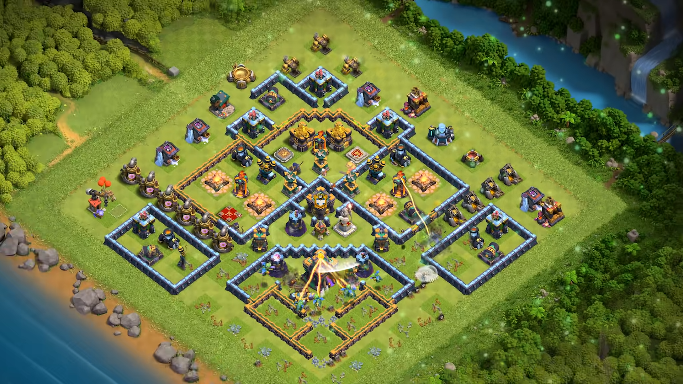
Clash of Clans (Image credit: COC)
However, if your queen is planning to come down and assist in the creation of that funnel, you might want to utilize the healers. It’s an excellent way to heal spells that will be your primary troops among the miners while also ensuring that you can deploy them over the base to cover most of the defenses. Try to keep your queen out of the path for as long as possible, whether that means deploying her without healers and ensuring she can pass through the base, or enticing the lava hound inside a couple of archers.
However, again it goes down the Queen can deal with it. The miners continue through the middle portion and just keep them on track onto the defenses. If you do have access to siege machines try and use one of them to help path things of the miners. The miners carry on to the defenses after passing through the intermediate section. If you have siege machines, attempt to employ one of them to assist the miners in their pathing.
Lavaloon Troops
Clash of Clans (Image credit: COC)
Balloons
Minions
Lava Hound
Rage spell
Haste spell
Poison spell
It’s one of COC’s most popular town hall 9 battle strategies. It’s an air-based offensive style in which spell placement dictates your chances of winning. The first and most important thing to do is send out one hog to bring the clan castle soldiers out.
Then, from one of the corner sides, deploy a minion and wait for CC to emerge from the base. When CC emerges, use poison and hand over control to your queen. Then, when they get close to the fortifications, deploy your lava hound in a sprinkling style. Where lava and balloons are deployed is determined by the presence of air defense.
Use your wrath and haste spells on your balloon as a lava hound to smash defenses. Clean the building using a minion. If the scheme is well-executed and the spells are properly placed. In every town hall 9 bases, it’s a 3 star.
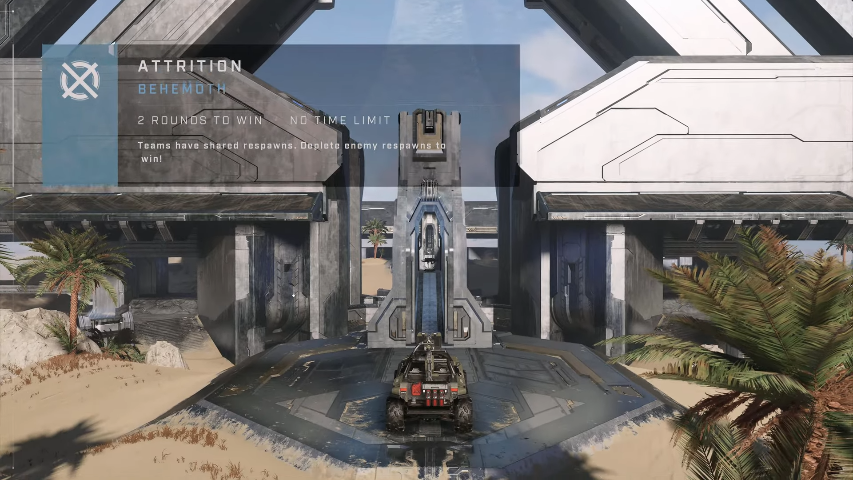
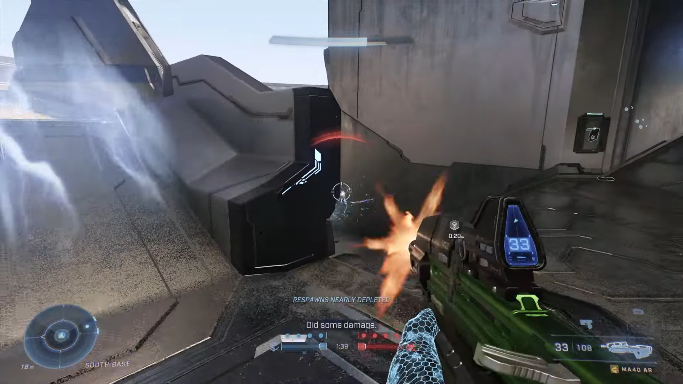
The latest game mode of Halo Infinite is here, and we have covered all about it in our Halo Infinite Attrition Guide with the best tips and tricks.
Attrition, the game’s newest game mode, is currently featured in the Halo Infinite Cyber Showdown Event. Halo Infinite players can play the event’s game mode and receive a free event pass for a limited time, but only while the event is happening. Completing tasks and winning Attrition matches is one of the fastest ways to advance in the Cyber Showdown Event Pass.
Attrition is identical to the Slayer game mode in Halo Infinite. It starts out as a conventional 4 against 4 games with the goal of eliminating the other team. Where Attrition differs from other games is that each side has a limited number of lives to share. Both teams are given eight lives at the start of the game, with one being consumed each time a team member respawns.
The goal of the game mode is for one side to deplete the rival team’s life pool and remove them in order to win the round. The team that wins two out of three rounds in Attrition is declared the winner. Instead of respawning after exhausting their pool of life, Halo Infinite fireteam members would leave luminous orbs where they died. To know more information about Attrition, we have a guide with all the tips and tricks.
Under the “Multiplayer” option in the main menu, Attrition may be found at the top of the playlists. You may go to the menu and pick the mode just like any other option during the Cyber Showdown event. From January 18 through January 31, the Cyber Showdown will take place. For at least a week, Attrition will be the featured mode in Halo Infinite, with the possibility of the addition of other game types.
Halo Infinite Attrition Guide: Lives
Halo infinite (Image credit: YouTube)
Players may still resurrect their pals by finding the light orbs and engaging with them by clicking the reload button. Even if they have no more lives to respawn with, it is still possible for one player to resuscitate their whole fireteam and continue the fight.
However, once all reserve lives have been drained, there is a built-in timer. If the round does not end before the timer runs out, a red circle of energy appears on the map and gradually diminishes. This circle, similar to the Storm in Fortnite Battle Royale, drains the health of individuals stuck in it and is intended to draw opposing teams closer together for sudden death.
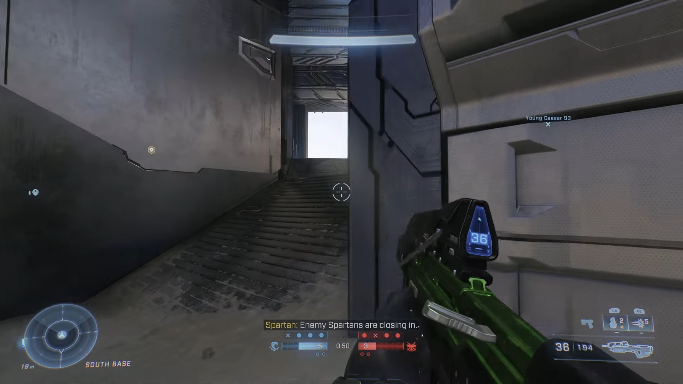
With only eight lives available to each squad, a well-placed rocket launcher may be a game-changer. Similarly, if someone on the other team has one, back up and try to bring them down as quickly as possible with allies. Players who go about the map in search of Power Weapons will earn a huge edge over the opposing team. Even if Power Weapons have not yet spawned, dominating the region where they do will assure that players obtain them. This also keeps the firearms out of the hands of the enemy.
Halo Infinite Attrition Guide: Teamwork is important
Halo infinite (Image credit: YouTube)
Each squad in Attrition is limited to a specific amount of respawns. Sticking together with teammates and avoiding getting caught out in the open will boost the team’s life pool. Not so close that one grenade might kill you all, but those who did well tended to coordinate and maneuver as a group. It’s simple math: two players have half the probability of being killed and double the possibility of killing an opponent as one player.
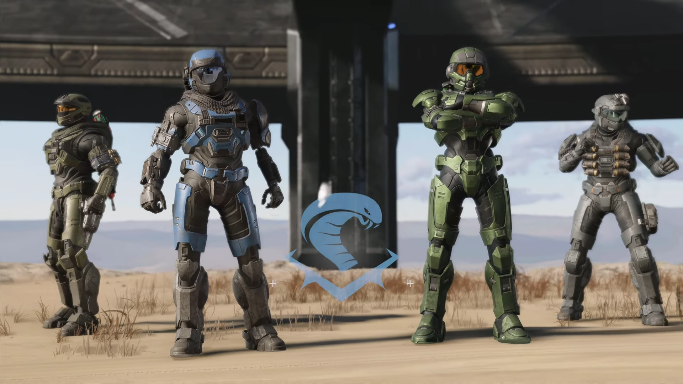
Halo Infinite Attrition Guide: Reviving your mates
When a player’s life pool is depleted, they should prioritize restoring their teammates. This will pull teammates back into action as quickly as possible, reducing the enemy team’s advantage. However, take in mind that players who have recently been revived are extremely susceptible. When they arrive, they can’t move for a split second, providing adversaries an ideal opportunity to prepare a shot or stand behind them for a melee kill. As a result, attempting to resurrect them in plain sight seldom works. Respawn to individuals in secret or undercover, and never sacrifice yourself for the sake of restoration.
Be careful not to get killed over a revive
The ability to resurrect is a potent one. It conjures up images in your mind of rescuing a downed buddy and changing the fight in your favor. That is possible, but it is also possible to fall into a trap mentality. Don’t try it if your colleague died in an area where the opposition team could have an angle on it.
Your life is priceless at this point in the battle. Put your faith in yourself. Rather than dying without firing a shot, try to win. Don’t strive to be a good teammate out in the open. It won’t make a difference if you all lose.
You can rush when you are more in number
Halo infinite (Image credit: YouTube)
A winning mindset necessitates this. Attrition is a numbers game, and you need to push your squad when you have the upper hand. If your team obtains a kill while the opposition team is still intact, keep pressing until everyone is dead. Getting all of them will cut their lives in half. This is especially true once a player has been eliminated. Use your advantage and end the game if you have more players on the field than they do.
The latest Yu Gi Oh game, “Master Duel” has arrived. Read our Yu Gi Oh Master Duel Review as there are a few disappointments.
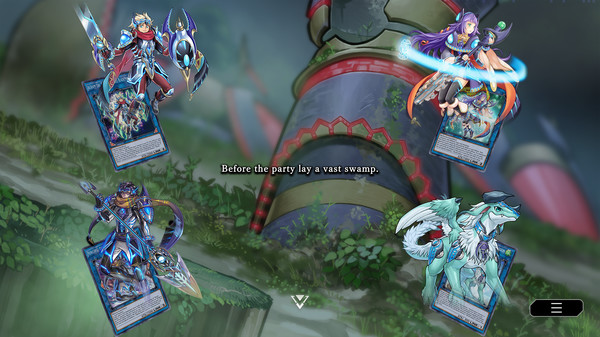
This game is a better representation of Yu-Gi-actual Oh’s cards in recent years. Unlike Duel Links, which focuses on fast-paced battle and nostalgia for anime narratives, the game’s duel rules are the traditional ocg-rules, which are one of the most intricate rules in card games.
The major pleasures of Yu-Gi-Oh are the enormous number of cards, the wide range of rules, all flowers are in bloom decks, unexpected scenarios, and the reversal of life after death. Currently, the game’s soundtrack, setting design, and animation effects are all satisfactory. At the same time, new players may create their own deck for a relatively minimal cost, which is critical for a card game’s player experience.
The main drawback at the moment is that the expense of adding a second deck after the first is quite significant (except for some general-purpose cards). Tiered decks are likewise condemned to exist due to the game’s nature. The mainstream decks’ hold over the environment remains unshakeable at the moment. Let us anticipate how Konami will balance and cooperate in the future.
Yu Gi Oh Master Duel Review: What should be improved?
The learning cost of ocg-rules is very high for novice players. A lengthy adjustment time may be required for new players. Duel Link is still a good choice for fans of Yu-Gi-Oh’s animation who wish to play a simple duel. One concern that many gamers have is that the adversary they are up against is often quite powerful. While playing duels at the beginning of the game, the foes you fight do not match your skill levels. It’s fair to claim that the duel system is currently unbalanced.
If you’ve been following YuGiOh for all these years, some of you might accept this game. People will execute 50 card combinations on you during turn 1 after spending 5 minutes or more building up their board. The timer never seems to run out. The game’s solo mode is enjoyable and teaches you certain combinations and decks. You earn a lot of pay currency by completing solitary work, which is also wonderful. In the most competitive duelists, a combination of persistence and stoicism should bring out the best in them.
Yu Gi Oh Master Duel (image credit Konami)
More flexible customization needs to be introduced to private lobbies or “deck rooms.” This is needed so that players have complete choice over how the lobby is set up and those browsing the lobbies have more information on what/who the lobby is for.
You can add banned cards, but you won’t be able to play them in lobbies that don’t allow them. Right now, the only way you’re ever doing it is in private lobbies with your pals. Make sure they aren’t filtered out in the deck editor if they aren’t showing up. By default, it filters out all banned cards.
Yu Gi Oh Master Duel Review: Conclusion
Yu Gi Oh Master Duel (Image credit: Konami)
The time constraints are quite strict. It takes a long time for the turns to finish. Most opponents’ turns seem to go on for an eternity. The timer is set too long. Still, the music is banging, and it’s a lot of fun if you have a lot of pals to play with. When you’re drawing cards, the game looks really professional, and your dopamine levels are sky-high.
To survive, this series requires a constrained format. Duel Links was a smash hit since it was simpler, lacked all the crazy combinations, and didn’t have a large card pool. When you want to play an archtype that isn’t in the harsh top tier, the game encourages you to play ranked, yet rated feels horrible.
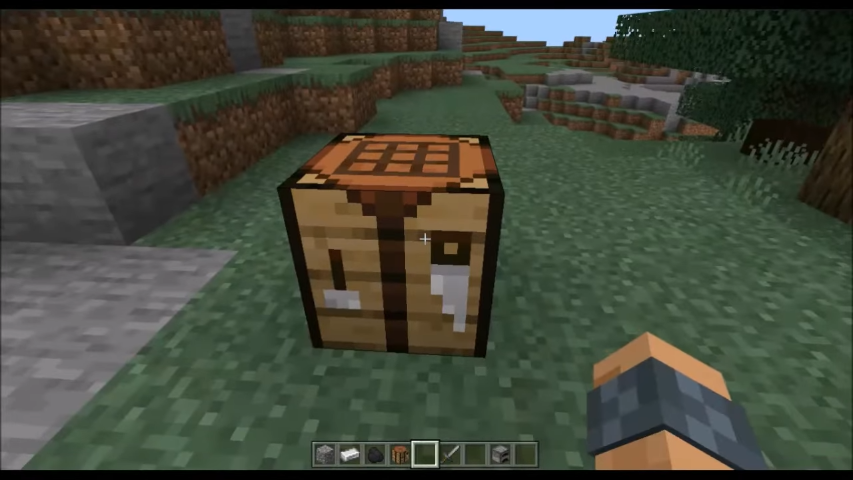
We have brought you the Minecraft Blast Furnace Guide which includes how to craft and how to use it in detail.
The sole way to cook or smelt objects in Minecraft used to be by using a furnace. The village and pillage updates were introduced in early 2019. The smoker and the blast furnace were among the many new items included.
The smoker and the blast furnace have a lot in common, although they serve quite distinct purposes. To begin with, a standard furnace can both smelt food and ores. Only food can be smelted in a smoker, but only ores may be smelted in a blast furnace. Below is a Minecraft Blast Furnace Guide that tells you how to craft and use it.
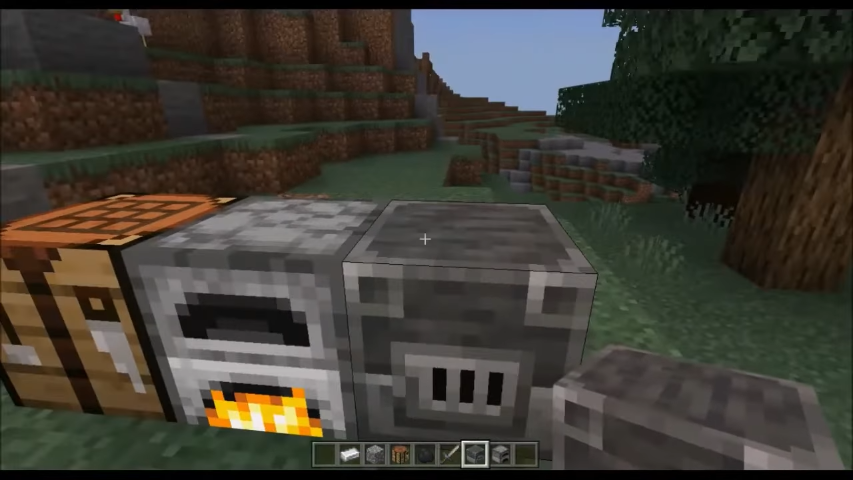
You’ll need a Furnace, 5 Iron Ingots, and 3 Smooth Stone to create a furnace. Making a blast furnace isn’t as difficult as you would imagine. First and foremost, you must construct a furnace. You’ll need eight pieces of cobblestone to make a furnace. The first step in mining cobblestone is to obtain a wooden pickaxe. Three wooden planks and two sticks are required to make a wooden pickaxe. You can place those resources on your crafting table once you’ve got them.
Because caverns are lined with stone, getting stone shouldn’t be too difficult. A cave will contain any grey stone you see below. All you have to do now is lay eight cobblestones along the boundaries of a crafting table. Using the furnace you built, you may get a smooth stone. Simply smelt cobblestone twice in a furnace to obtain the smooth stone.
Minecraft Blast Furnace (Image credit: YouTube)
Cobblestone will transform into stone the first time you smelt it in your furnace. A smooth stone is produced when the stone is smelted in a furnace. Remember that you’ll need three more pieces of cobblestone to complete the project.
It’s time to collect the five iron ingots you’ll need now that you have your smooth stone and furnace. You’ll need to make a stone pickaxe for this. After that, you must enter a mine. Five blocks of iron ore are what you’re looking for. Only a stone pickaxe or any pick above a stone pickaxe may mine iron ore. You must smelt your iron ore into an iron ingot after you have mined it. You’ll need to put it in a furnace to do this.
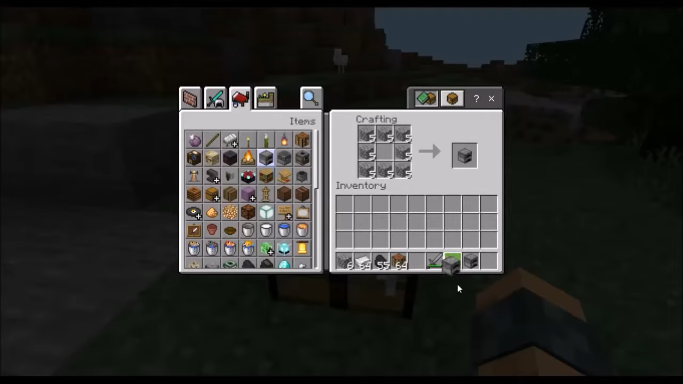
Mine your furnace
You’ll need to mine your furnace once you’ve collected five iron ore and three smooth stone blocks. The crafting recipe necessitates the furnace. Simply position your blast furnace in the crafting table’s middle. The three smooth stones will be placed in the bottom row, while the iron ingots will be placed in the top column and two side squares.
You should add them to your foundation now that you’ve successfully developed your first blast furnace. They will smelt ores twice as fast, but they will also use fuel twice as fast. Make sure you have enough coal on hand since you’ll need it.
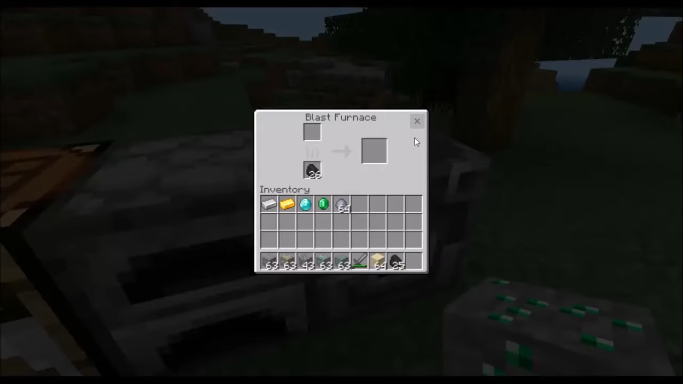
It is similar to using a regular furnace to use a Blast Furnace. Simply place some fuel in the bottom-left section, and then add the smeltable item to the top-left section. The Blast Furnace can only smelt things. However, while they do this twice as fast, they also use twice as much fuel.
In addition to smelting ore into ingots, you can also use the Blast Furnace to fabricate armor, weapons, and tools. All other materials must go through a furnace. As well as being the block associated with the armorer profession, the Blast Furnace is associated with the armorer profession within a village.
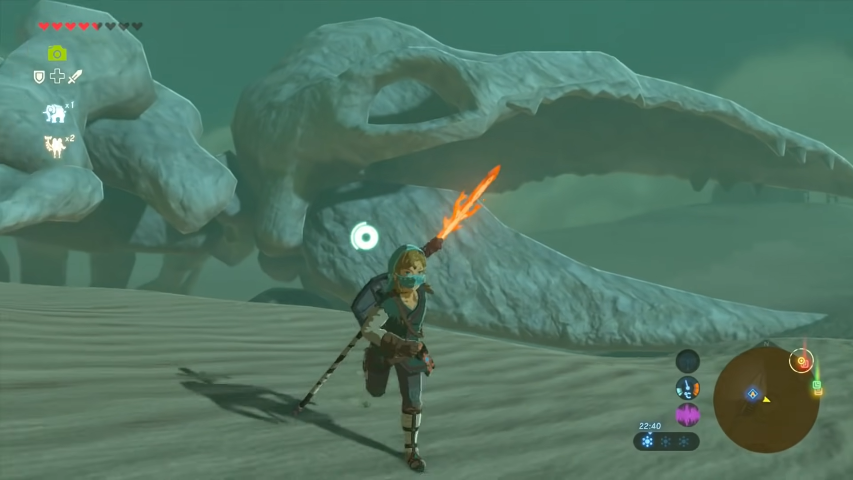
In this Zelda Breath of the Wild guide, we will tell you how to find Leviathan Bones easily and where they are located.
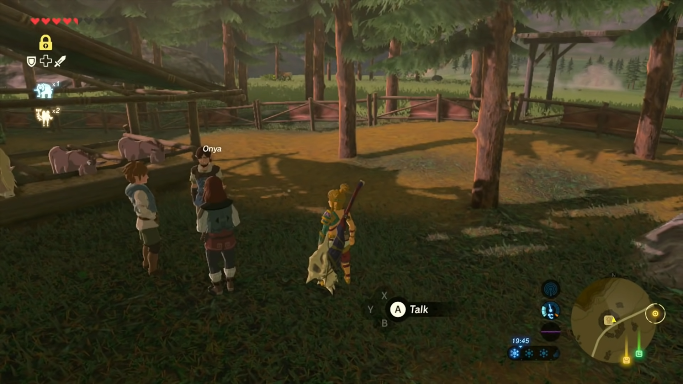
“The Leviathan Bones” is one of the numerous side missions in The Legend of Zelda: Breath of the Wild that necessitates some investigation. Three brothers are debating their beliefs about the ancient Leviathans and how they may have been extinct at the Serenne Stable. Onya believes it was due to an ice age, whereas Akhrah believes it was due to a volcanic explosion, and Garshon believes it was due to a great drought.
Unfortunately, they haven’t been able to discover any Leviathan remains, so their investigation is still incomplete, and they’ll ask Link to send them images of the bones. The brothers, on the other hand, have a good idea where the bones are and guide Link in the direction of the Eldin Mountains, Hebra area, and Gerudo region to get him moving in the correct way.
Zelda: Breath of the Wild (Image credit: Youtube)
Although the Leviathan bones in Breath of the Wild are gigantic and difficult to capture entirely on the Sheikah Slate’s camera, the brothers will accept images as long as the Leviathan’s head is seen. Garshon offers Link 300 Rupees as a prize, making this one of the greatest side tasks to perform if you’re short on cash.
How To Find Leviathan Bones
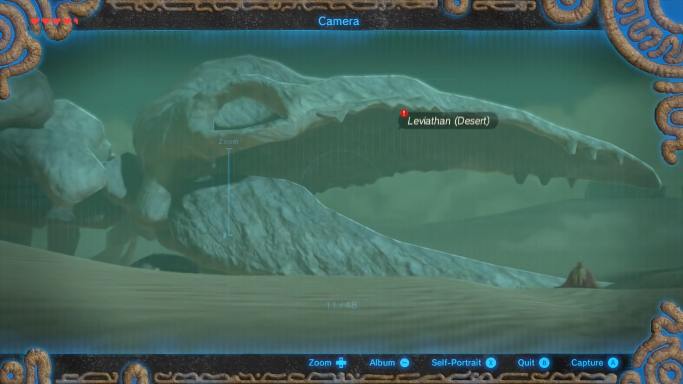
If players arrive at these areas before accepting the quest, each Leviathan’s position will be noted on the map as a “Great Skeleton,” making it very easy to find them again. If players haven’t located the skeletons yet, they may still see them on the map of Hyrule in Breath of the Wild, and they can zoom in and scan the three zones to find their whereabouts. Unfortunately, one of the Leviathan skeletons is concealed in a cave and cannot be seen from above, so Link will have to do some exploration to collect all three Leviathan bones.
The Leviathan skeleton can be found in the Gerudo area, deep in the Gerudo desert, near the bottom left corner of the map. The Gerudo Desert is difficult to cross due to its fluctuating temperature and thick sands, but Link may capture or rent a Sand Seal in Gerudo Town to make the journey much faster and simpler. After taking a snapshot of the Leviathan’s bones, players will discover a Shrine and a Great Fairy Fountain inside its ribcage in Breath of the Wild.
How To Find Leviathan Bones: East Deplian bones
Zelda: Breath of the Wild (Image credit: Youtube)
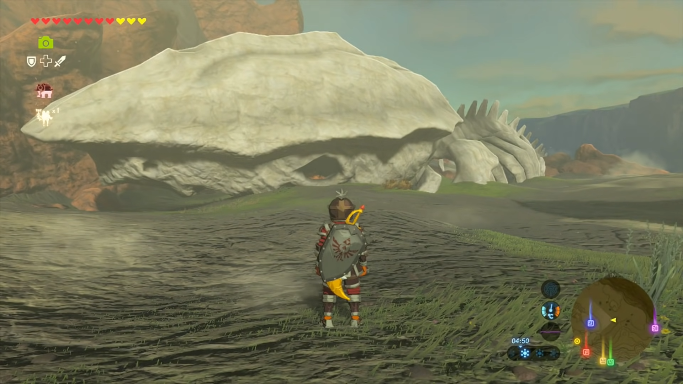
Your next destination is the East Deplian Badlands. An area of barren ground lies on the very northern edge of the map. You can see a prominent outline of a giant skeleton to the northwest of Death Mountain if you zoom in. Here is the next set of Leviathan bones. You should head over there and take a photo of the skull.
How To Find Leviathan Bones: Hebra bones
Zelda: Breath of the Wild (Image credit: Youtube)
By far the most difficult set of bones to find and photograph is the third set. However, once you know how to go about it, it’s not too difficult. Near the northeastern edge of the map, you’ll find Hebra North Summit. Zoom in and you’ll see a small patch of water on the east side of the map. This is the direction you want to take.
Two massive, impenetrable doors are located down the hill from this little pond. There are a handful of snowballs at the top of the slope that you may roll down the hill. You may have a good idea of what’s going to happen here. Cryonis can be used to fill the hole with the pond and make a passage for the snowball.
Roll a snowball down the hill after that, and it’ll build up enough size and velocity to bring down the doors. Inside, you’ll find the final set of leviathan bones as well as a shrine to your sufferings.
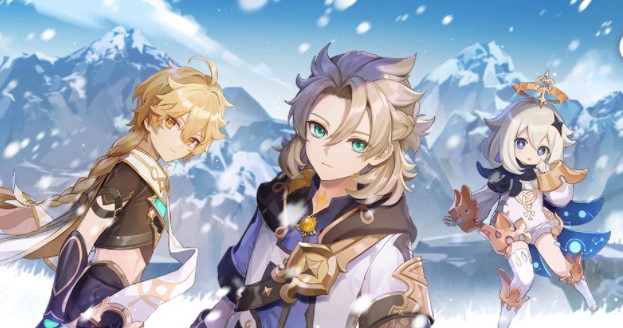
Get lots of Cor Lapis, Calla Lily, and more with our guide on how to get regional specialties in Genshin Impact.
Local Specialties are unique materials that can only be obtained in their particular areas. Character Ascensions make use of these things. Materials that are peculiar to a certain locality in Teyvat are known as local specialties. There are many specialties in different regions. Do not worry if you find it difficult to find any item in different regions. In this guide, we will show you how to get regional specialties in Genshin Impact.
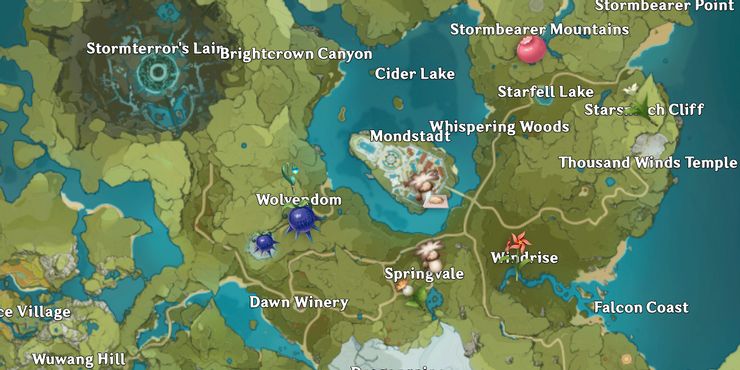
How to get regional specialties in Genshin Impact: Mondstadt
Mondstadt (Image credit: Genshin Impact Fandom)
Mondstadt is one of Teyvat’s seven nations, and it is here that the Traveler begins their search for their missing sister. Barbatos, the Anemo Archon, is worshipped by the city-state. Mondstadt has had a festival called the Ludi Harpastum every year since the beginning, featuring 15 days of games for the youngsters to enjoy. Only a limited portion of Starfell Valley, Galesong Hill, and Windwail Highland are accessible before finishing Archon Quest Prologue: Act I – The Outlander Who Caught the Wind. Below are the Items found in Mondstadt. Click here to get items from the Mondstadt Interactive Map.
Calla Lily
Calla Lilies are a Mondstadt specialty that may be seen growing wild around the city. It may be found growing around water bodies all across Mondstadt, but particularly near the Teleport Waypoint south of Springvale.
Cecilia
Cecilias is a Mondstadt specialty that may be found growing wild on Starsnatch Cliff. It can only be found on Starsnatch Cliff.
Dandelion Seed
Dandelion Seeds are a Mondstadt specialty that may be seen growing wild around the city. These Seeds may be obtained by using an Anemo ability on Dandelions, which can be found all throughout Mondstadt; several can be found at the City of Mondstadt’s front entrance and near Stone Gate, Mondstadt’s boundary with Liyue.
Philanemo Mushroom
Philanemo Mushrooms are a Mondstadt local specialty. In the cities of Mondstadt, Springvale, and Dawn Winery, Philanemo mushrooms grow on building walls and rooftops, and more infrequently on tree trunks.
Small Lamp Grass
Small Lamp Grasses are a Mondstadt specialty that may be seen growing wild around the city. Modest Lamp Grasses may be found largely in forested regions and some Mondstadt ruins, and generate a small light blue glow at night (19:00–06:00); several can be found in the Whispering Woods.
Valberry
Valberries are a Mondstadt specialty that may be found growing wild in the Stormbearer Mountains and Stormbearer Point. Valberries are a kind of berry that grows in clusters of four on a single stalk. Stormbearer Mountains and Stormbearer Point are the only places in the wild where they may be found.
Windwheel Aster
Windwheel Asters can be found in places of Mondstadt when there is a light breeze. With the exception of a few groups at the Statues of The Seven of Dawn Winery and Starfell Lake, they are only seen in Stormterror’s Lair and Windrise.
Wolfhook
Wolfhooks are a Mondstadt specialty that may be found in the wild throughout Wolvendom. These are the berries that grow on the ground among trees and plants.
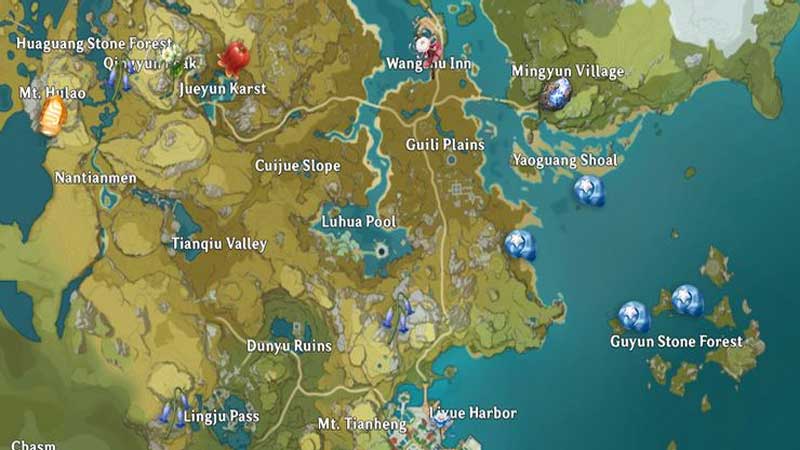
How to get regional specialties in Genshin Impact: Liyue
Liyue (Image credit: Genshin Impact Fandom)
Liyue is one of Teyvat’s seven countries. Morax, the Geo Archon, is worshipped by the city-state. After finishing the Archon Quest Prologue, you’ll get access to Liyue: The Outlander Who Caught the Wind is the first act. This nation is where Archon Quest Chapter I: Farewell, Archaic Lord takes place. There are eight Liyue specialties. Click here to get items from the Liyue Interactive Map.
Cor Lapis
Cor Lapis are a Liyue specialty that may be found in the wild all across the island. It is obtained by cracking the outer shell of Cor Lapis nodes, which may be found at the base of cliffs, in caves and mines across Liyue, with the majority of them concentrated on Mt. Hulao and Cuijue Slope. Cor Lapis nodes, like all other ores, are best harmed by Blunt Attacks or Geo DMG.
Glaze Lily
Liyue’s Glaze Lilies may be found at Liyue Harbor and Qingce Village as a local specialty. It only grows in Qingce Village’s terraced fields and a few locations around Liyue Harbor. It is usually found at Yujing Terrace, although not solely; a small group may be found near the Chihu Rock Teleport Waypoint, and a lone one can be found on Mt. Tianheng, overlooking the city.
Jueyun Chili
On a single stalk, Jueyun Chilis grow in groups of three. Minlin, Qingce Village, and Stone Gate are the only places where they can be found in the wild.
Noctilucous Jade
The Noctilucous Jade nodes that are found in caves and mines all over Liyue drop Noctilucous Jade. Mingyun Village is home to many of them. Blunt attacks and Geo DMG are the best ways to damage Noctilucous Jade nodes. When broken, Noctilucous Jades may be dropped from each node.
Qingxin
Mountaintops and peaks in Liyue are covered with Qingxin; many can be found at Minlin and Wuwang Hill. Specific locations can be found in the gallery or on the Teyvat Interactive Map.
Silk Flower
On little red bushes, Silk Flowers grow in pairs. They can only be found near the base of Wangshu Inn and in the flowerbeds of Liyue Harbor’s higher residential neighborhood, Yujing Terrace. Silk Flowers, like any other local delicacy, will respawn 48 hours after being harvested.
Starconch
Many starconches may be seen on Liyue’s beaches, particularly in Guyun Stone Forest, on Yaoguang Shoal, and on the beach south of it.
Violetgrass
Mountainous regions throughout Liyue are covered with violet grass.
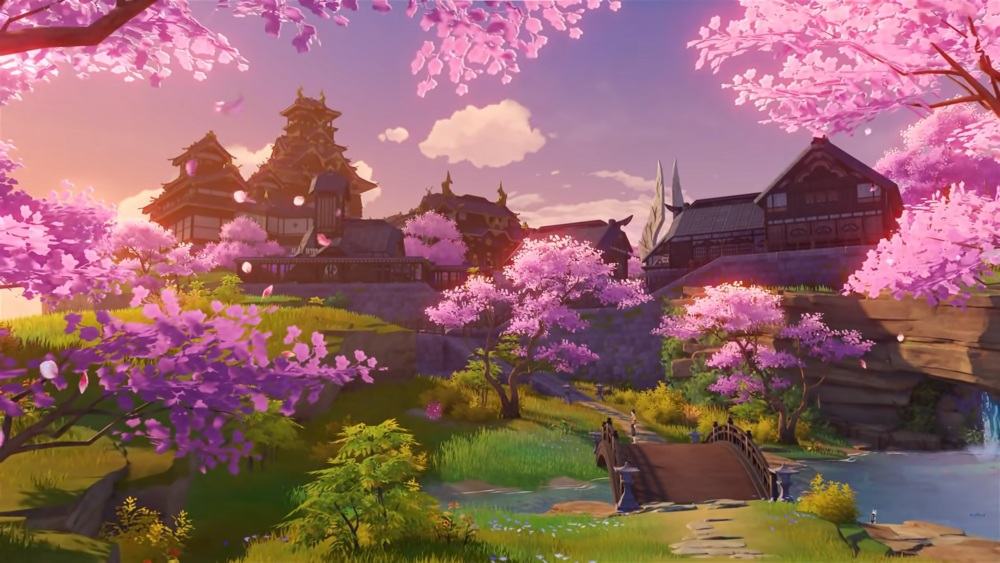
How to get regional specialties in Genshin Impact: Inazuma
Inazuma (Image credit: Genshin Impact Fandom)
Teyvat is home to seven nations, including Inazuma. Raiden Shogun, the Electro Archon that leads the nation’s governing body, the Inazuma Shogunate, worships the nation’s archipelago nation. Liyue Harbor is approximately 4 km southwest of Inazuma.
As of recent events in the game, the situation in Inazuma has taken a drastic turn towards isolationism, which has been enforced by the Sakoku Decree. Currently, there are nine local specialties in Inazuma. Click here to get items from Inazuma Interactive map
Amakumo Fruit
Inazuma’s local specialty, Amakumo Fruits, may be found in the wild on Seirai Island. On a single stem, it grows in pairs. They can only be seen in the wild on Seirai Island, primarily around Amakumo Peak, which bears their name.
Crystal Marrow
On Yashiori Island, Crystal Marrow may be discovered on Orobashi’s bones, while a few can also be found at sea level west of Mikage Furnace on Tatarasuna. Crystal Marrow, unlike other ores, does not require breaking and may be harvested immediately.
Dendrobium
Dendrobiums grow solely around Kannazuka and Yashiori Island’s battlefields and arenas; several can be found on Nazuchi Beach, while a few more can be found northwest of Kujou Encampment along the way to and near the Pyro Hypostasis’ arena.
Fluorescent Fungus
On Tsurumi Island, fluorescent fungi are found on tree roots, often in pairs. The player will get lost in the fog before completing the World Quest series Through the Mists. You can access the areas of the island where they grow by following these steps:
Launch the first quest of Through the Mists World Quests, A Particularly Particular Author.
After traveling with Kama to Tsurumi Island, the quest will be complete.
Naku Weed
In inazuma, Naku Weeds grow in areas where there is a high concentration of Electro. Among the most notable are those on Seirai Island, around Mikage Furnace, and around Mt. Yougou.
Onikabuto
In areas with high electro concentrations, such as Narukami, Kannazuka, Yashiori, and Seirai Island, Onikabuto can be found lounging on trees and rocks. You have to reach the Onikabuto on trees, hitting it won’t cause it to fall.
Sakura Bloom
Initially, Sakura Blooms look like floating petals that are scattered around Narukami Island. There are especially many on Mount Yougou and at the Grand Narukami Shrine. It is necessary to approach them with an Electro approach in order to assemble them and harvest them. You can attack them with Electro, but you can also walk past them with Electro energy and harvest Sakura Blooms.
Sango Pearl
On Watatsumi Island and Enkanomiya, Tango Pearls can be found among seashells and corals. In addition to those found in the reefs under the Sangonomiya Shrine, some can also be found in The Serpent’s Bowels and Suigetsu Pool.
Sea Ganoderma
Inazuma has sea Ganoderma growing on beaches and tidal flats. They are particularly abundant around Kannazuka and Seirai Island.
Note: Talents allow certain characters to spot local specialties by displaying them on the mini-map as a hand icon.
We have brought you the latest New World PvP War Guide with the best tips and tricks. Follow these tips and win the battles easily.
On September 28, 2021, Amazon Games Orange County released New World, a massively multiplayer online role-playing game (MMORPG). You will have to have your wits about you and be able to handle yourself when taking on other players.
There are 5 groups for players to choose from, 3 factions, node resources, crafting items, controlling settlements, questing, exploring the world, or fighting other players or monsters. In New World, war plays a huge role in the game’s endgame content. Large, 50v50 matchups are fought across the map as either offensive or defensive battles.
New World PvP War Guide: Starting a War
You must have completed enough PvP missions to put the area into a conflict state before declaring war. These PvP objectives are a grind to complete. One of the objectives in Cutlass Keys, for example, demands you to sprint the whole length of the region and return.
During these tasks, you must be PvP marked. Running as a huge zerg is a fantastic idea. If you die, you will lose Influence points and the PvP mission will be terminated immediately. Players contribute to the total conflict influence by completing PvP missions. A Company can declare war if it lands 100 percent in enemy territory.
In PvP, the Company with the most completed PvP missions will be deemed the “Vanguard,” which means that they will choose who will go to battle.
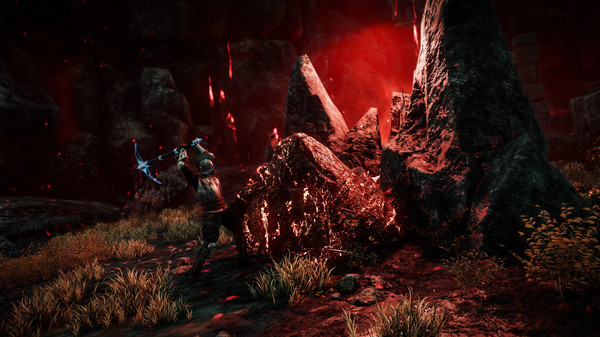
New World PvP War (Image credit: Amazon Games)
As a result, there are certain issues: the largest corporations frequently control the declaration of war for crucial regions. Many players may be unable to participate in these battles. Any Company, on the other hand, can declare on any region and choose who fights.
On the conflict territory’s war board, you can sign up for a war. This does not ensure a place in the war, but it does put you on the war leader’s or Vanguard company’s list for selection. Upon selection, a pop-up notification will appear, and you will be placed into a group with other players.
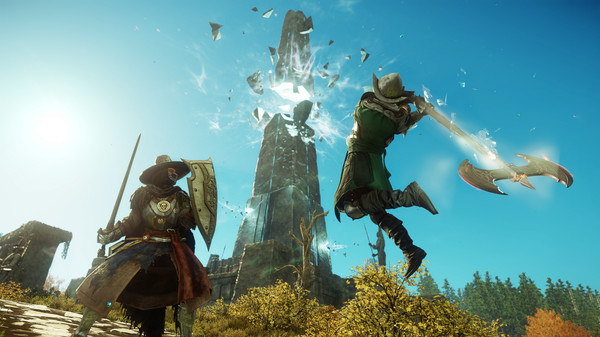
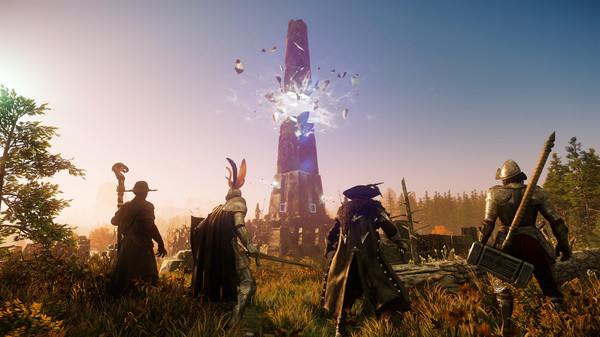
New World PvP War Guide: Faction wars
New World PvP War (Image credit: Amazon Games)
In addition to open-world PvP, you may participate in Sieges by joining up at a settlement’s War Board. This is something you can do as soon as you join a faction, however you won’t be assured a spot in the combat.
When a group attempts to seize control of a province by overthrowing the current ruler, sieges occur. Once you’ve accomplished enough faction tasks in the territory you intend to take over, any opposing faction’s company (guild) can declare war.
You will not be able to participate in the siege if your company is large enough to offer all of the fighters. Smaller companies, on the other hand, may seek outside assistance, therefore it’s worth joining up on War Boards if you’re interested. If you’ve been chosen to fight, you’ll receive a message and be transferred to the battleground when it begins.
New World PvP War Guide: Output Rush
New World PvP War (Image credit: Amazon Games)
Outpost Rush is available after you reach level 60. A 20 vs. 20 instanced combat will take place on Nauthynos Island. To win this game, you’ll need to strike a balance between accumulating resources, seizing objectives, and defeating your opponents. Outpost Rush can be queued by conversing with an NPC in a settlement.
You can join as a solitary player or as part of a group of up to five other players, and you’ll be transported to the island once the requisite number is met. Points are awarded for defending outposts and killing players, and the first team to reach 1000 points wins the match. Outpost Rush provides a variety of things, including uncommon drops of unusual armor and weaponry.
New World PvP War Guide: Consumables are important
Consumables, as well as healing, mana, and rejuvenation potions, are essential and don’t forget your trip rations. These quickly refill a specific amount of health and then continue to heal a minor quantity over the course of 20 minutes. While they will not prevent you from dying if someone is whaling on you, the initial impact will end after you take damage. If you can keep the opponent player in sight for a few seconds behind a structure or wall, it may make all the difference.
Go prone to hide — the adversary won’t be able to see the PvP flag over your head if you’re prone. This may be utilized to set up ambushes in PvP in the open world, which is a fantastic sensation till it happens to you.
Your character will automatically pause for a time after dodge rolling (needs light armor), however, you may interrupt this animation by holstering or changing your weapon, or using an ability. This implies your momentum will not be disrupted. You can chain three dodge rolls in a row if you wait until you reach 50 stamina before rolling a second time.
You can escape the Great Axe’s gravity well if you have a mobility skill, but you can’t escape it with a dodge. If you become stuck in the well, remember that you can stop a single enemy’s assault.
You may also cancel your attack animation by switching weapons or utilizing a skill, and your skill animation can be canceled by switching weapons.