How to Beat Kyurem in Pokemon GO – Best Counters, Strategies, and more

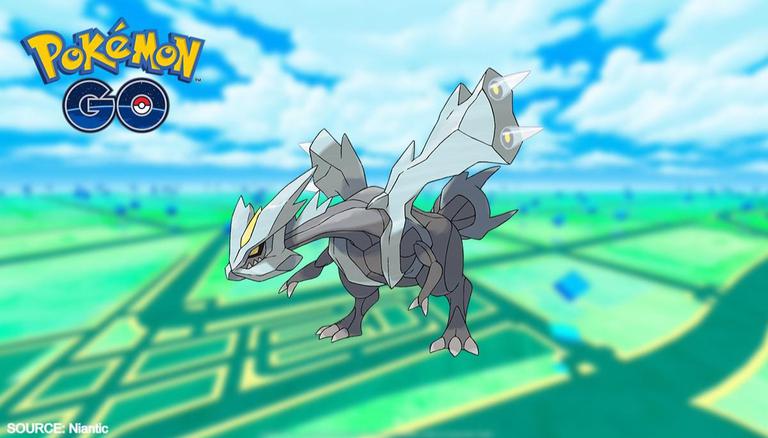
How to Beat Kyurem in Pokemon Go? This question might have come to many of your minds. Don’t Worry, we are here to help you.

Kyurem is a Legendary Pokemon of the Dragon and Ice types that was first found in the Unova area. Kyurem develops a strong, freezing energy within itself, but the energy seeps out, causing its body to freeze. Learn which Pokemon are most successful against Kyurem in Raid Battles, how to catch Kyurem after a Raid Battle, and how to best employ the Boundary Pokemon after you’ve caught it.

How to Beat Kyurem: Which Pokemon to use

Kyurem is a Dragon-type and an Ice-type Pokemon, making it weak to Fighting, Rock, Dragon, Steel, and Fairy attacks. Choose six Pokemon with Fast Attack and Charged Attack from the Fighting, Rock, Dragon, Steel, and Fairy types to do the most damage in the Kyurem Raid Battle.

If a Pokemon has the same type as these attacks, its attacks will do 20% more damage due to the same-type bonus. Kyurem has weak attacks against most Dragon-type Pokemon because of its Dragon-type, so keep this in mind while selecting your Pokemon. Select the Pokemon with the highest CP and the best overall stats if you have multiple Fighting, Rock, Dragon, Steel, and Fairy types. After winning a Raid Battle, you will receive a number of Premier Balls depending on the speed of your victory. So bring your most powerful Pokemon and beat Kyurem as soon as possible.

You might be looking for Pokemon Unite Tsareena’s guide. Click here

How to Beat Kyurem: Best Counters

How to Beat Kyurem
Pokemon Go (Image credit: Ninatic)

Fairy-type Pokemon

Gardevoir

Fast Attack: Charm 

Charged Attack: Dazzling Gleam 

Zacian 

Fast Attack: Metal Claw

Charged Attack: Close Combat, Iron Head, Play Rough 

Granbull

Fast Attack: Charm

Charged Attack: Close Combat, Play Rough

Rock-type Pokemon

Tyranitar

Fast Attack: Iron Tail, SmackDown 

Charged Attack: Stone Edge

Rhyperior 

Fast Attack: SmackDown 

Charged Attack: Rock Wrecker, Stone Edge, Superpower

Terrakion 

Fast Attack: SmackDown

Charged Attack: Close Combat, Rock Slide

Dragon-type Pokemon

Zekrom 

Fast Attack: Dragon Breath 

Charged Attack: Flash Cannon, Outrage

Salamence

Fast Attack: Dragon Tail 

Charged Attack: Draco Meteor, Outrage 

Dragonite

Fast Attack: Dragon Breath, Dragon Tail, Steel Wing 

Charged Attack: Draco Claw, Draco Meteor, Draco Pulse, Outrage

Fighting-type Pokemon

Machamp

Fast Attack: Bullet Punch, Counter, Karate Chop

Charged Attack: Close Comba, Cross Chop, Dynamic Punch, Submission

Conkeldurr

Fast Attack: Counter

Charged Attack: Dynamic Punch, Focus Blast, Stone Edge

Hariyama

Fast Attack: Bullet Punch, Counter

Charged Attack: Close Combat, Dynamic Punch, Heavy Slam, Superpower

Lucario 

Fast Attack: Bullet Punch, Counter

Charged Attack: Aura Sphere, Close Combat, Flash Cannon, Power-Up Punch

Steel-type Pokemon

Dialga 

Fast Attack: Dragon Breath, Metal Claw 

Charged Attack: Draco Meteor, Iron Head 

Scizor

Fast Attack: Bullet Punch

Charged Attack: Iron Head 

Metagross

Fast Attack: Bullet Punch 

Charged Attack: Flash Cannon, Meteor Mash

How to Beat Kyurem: Best Moves

You should teach Reshiram the Fast Attack Fire Fang and the Charged Attack Overheat if you want to take advantage of its fire type, which offers it an edge over insects, grass, steel, and ice Pokemon. To utilize against other dragon Pokemon, you can teach the legendary Pokemon the dragon-type moves Dragon Breath and Draco Meteor. Keep a mind, though, that if the opposing Pokemon also knows dragon attacks, it will receive super-effective damage in return.

If you play Pokemon BDSP, we have Pokemon Brilliant Diamond & Shining Pearl Tips and Tricks for you.

How to Beat Kyurem: Premier Balls

 Kyurem
Pokemon Go (Image credit: Ninatic)

You’ll only have a limited amount of Premier Balls to catch Kyurem after a successful Kyurem raid, so use them wisely. By competing with friends and defeating Kyurem faster, you may win more Premier Balls.

When fighting Kyurem, you have the best chance of catching it if the target ring is small enough for you to earn Excellent Throws. Curveballs can help you increase your odds even more. However, work within your capabilities; if you don’t believe you can consistently execute Excellent Curveball Throws, strive for Nice or Great Throws instead of entirely missing the target ring.

Kyurem isn’t going to make it easy for you by remaining still while you try to catch it. Throwing when the Premier Ball is going about is a waste of Premier Balls. Watch Kyurem to gain a sense of its movement cycle and the pauses between cycles. Wait for the target ring to resurface during one of these pauses, then throw as it begins to shrink to boost your chances of making a Great or Excellent Throw.

How to Beat Kyurem: Berry

Berries can aid in the capture of Kyurem. Kyurem will be easy to capture with a Razz Berry, and a Golden Razz Berry will be even easier. If you’re having trouble landing throws, a Nanab Berry can calm Kyurem and make its motions less chaotic, letting you make more precise throws. If you need more Kyurem Candy, utilizing a Silver Pinap Berry will make it simpler to catch Kyurem and give you more Candy after you do.

The Catch Assist Perk is available to Buddy Pokémon with a Buddy Level of Great Buddy or above. If a Pokémon, even a Legendary Pokémon, deflects a Poké Ball, your Buddy may be able to bounce it back for another chance to catch it! Kyurem, like other Legendary Pokémon, is difficult to catch, so don’t give up if it escapes. Try again after loading up on useful things such as Max Potions, Max Revives, and Golden Razz Berries.

What to do with Kyurem?

Pokémon of the Dragon- and Ice-types have a type advantage over Pokémon of the Water-, Grass-, and Electric types. Kyurem is therefore useful against many Raid Bosses, such as Palkia, Reshiram, and Zekrom. Kyurem’s Dragon-type Fast and Charged Attacks, which are often used against Raid Bosses, will benefit from a same-type attack bonus, which makes them more effective. 

CP should be increased, and a second Charged Attack should be taught to Kyurem before bringing it into raid battles. Kyurem’s CP will reach its maximum with a lot of Stardust and Kyurem Candy, so don’t forget the Pinap Berries if you want to get there faster.

For more Guides, Tips, and Tricks

Check out our Video Games Guide Section for more dedicated guides.

Mortus Horn in Warframe – A Complete Guide

Our Mortus Horn Guide is here to help you if you’re having trouble obtaining the Mortus Horn in Warframe.

There’s more to Warframe than slicing and dicing your way through armies of faceless goons and logging in just for your Daily Tribute. Try violently spearing some innocent fish in a lake instead of killing senselessly. You get rewards from fishing for making new weapons in Warframe, one of the few non-combat activities in the game. Investing some free time into fishing is always worth it since it’s one of the fastest ways to gain standing.

There are only two places on Cetus where you can fish: Eidolon Plains and Orb Vallis. You can gain standing and rewards from the fish in both locations for building items for Warframe. Cetus and Venus operate in different ways when it comes to fishing. We’ll get into that later, but just be aware that the gear you’d use in one is not appropriate in the other. Below is a complete Mortus Horn guide for you.

Mortus Horn Guide: What is it?

By grinding down the horn of Mortus Lungfish into a powder, the Ostrons use it in herbal remedies. Freshwater fish commonly found in Cetus ponds such as Mortus Lungfish are the source of Mortus Horns.

Annectens Protopterus African lungfish may be found in West and South Africa’s freshwater wetlands, backwaters, and small rivers. These prehistoric animals are frequently referred to as “living fossils” since they have remained unmodified for approximately 400 million years. They aren’t naturally hostile, but they are very predatory and will attack any fish that they believe may be food. Although other large fish may be able to coexist in the tank with them. There is always the possibility that they may attack or be attacked by another fish.

Want a Warframe waverider quest guide? Read Warframe Waverider Quest Guide – How to Farm Yareli

Mortus Horn Guide: Acquisition

Mortus Horn Guide

By cutting up Mortus Lungfish, you can acquire Mortus Horns. You can extract the various components by going to Fisher Hai-Luk in Cetus, selecting the desired amount of Mortus Lungfish, and then selecting “Cut Fish.”. A Mortus Horn can be extracted from each Mortus Lungfish cut. Alternatively, Fisher Hai-Luk can offer Mortus Horns for Platinum by buying them in bundles of 10. Mortus Horns appear at night in the pond.

Mortus Horn Guide: Blueprints Requiring Mortus Horn

  • Ceno Greaves Blueprint: 20 Cosmetic types.
  • Ekwana II Jai Link Blueprint: 5 Zaw type.
  • Murkray Bait x20 Blueprint: 5 Gear type.
  • Vargeet II Jai Link Blueprint: 5 Zaw type.
  • There are a total of 35 Blueprints required.

Mortus Horn Guide: How to fish

Fisher Hai-Luk, an NPC on Cetus, is where you’ll get your first Fishing Spear. Your credits won’t work here, so you’ll have to earn some Standing first. Fortunately, it’s not expensive — just 500 Standing – so all you have to do is finish one bounty mission to get your hands on the spear.

Mortus Horn Guide
Warframe (Image credit: Steam community)

To discover a body of water, equip the Fishing Spear and travel to the Plains of Eidolon. By holding the weapon switch button and selecting it, you may now get your Fishing Spear. You toss your spear like a rifle, aiming down the sights and firing away. The spear should fly straight towards your crosshairs and (hopefully) right into a fish. You’ll need to make some quick adjustments when fishing for both travel time and height loss associated with Fishing Spears the farther they travel.

Fish are most easily caught when you aim slightly above them and lead them by a few pixels. Upon successfully landing a fish, the game will display your Warframe holding the catch and briefly listing information about its species, weight, and size in the lower right corner of the screen.

Keep an eye on what’s going on around you

You’ll notice that the amount of surrounding noise is substantially reduced while you have your spear out. This aids in locating fish since they often generate a splashing sound followed by some bubbling. To help locate their position simpler, you might wish to put on headphones. Fish will create this noise a few seconds before they come near the surface, so keep your spear ready and monitor the water around you if you hear bubbling.

Remember that while you have your Fishing Spear out, you are still vulnerable to assaults from nearby foes, and your weapons and abilities are disabled. Throwing the spear at adversaries isn’t a good idea because it barely deals any harm.

Make use of the powers of your Warframe and Sentinel

When you’re fishing, keep in mind that numerous Warframe abilities might come in handy. Dashwire by Ivara is a zipline that may be placed above bodies of water. This allows you to search the surface for fish from a greater viewing point. It also aids aiming since while firing spears from above, you don’t have to correct for gravity as much. The silhouette of the surrounding fish is highlighted briefly by Banshee’s Sonar. They do not, however, display on your minimap, nor are their weak areas exposed.

The Sentinel Oxylus has an ability called Scan Aquatic Lifeforms that appears to be tailor-made for this task. Others are less visible, but when employed correctly, they can help you improve your ability to find and catch fish. The ability is identical to Luminous Dye in terms of functionality. It illuminates fish both in the water and on your minimap, greatly accelerating the fishing procedure.

For more Guides, Tips, and Tricks

Check out our Video Games Guide Section for more dedicated guides.

GTA: Definitive Edition Switch Guide – Cheats, Tips, and Tricks

We have brought you a GTA Definitive Edition Switch Guide with all the cheats, tips, and tricks. You will need this to go further in the game.

The games industry has been dominated by GTA 3, Vice City, and San Andreas for decades. These classic games have been enjoyed by millions and millions of players over the years. New fans of the open-world trilogy will dive into the remasters once again, while those who are (relatively) new to the franchise will experience them for the first time. 

As such, we’ll go over a few basic tips that you should keep in mind when you get ready to play the remasters, especially if it’s your first time playing them. We have created a Definitive Edition Switch Guide which contains all the necessary tips and tricks with a few cheat codes that will help you in the game.

Definitive Edition Switch Guide: Side missions for Vice City

Players may do side quests in Vice City that provide valuable prizes. Vigilante missions and pizza delivery missions are the ones you should concentrate on first. Completing a level 12 Vigilante assignment raises your maximum health. While completing a level 10 mission of pizza delivery raises your maximum armor—both of which are important improvements, as you might expect.

Definitive Edition Switch Guide: Side missions for San Andreas

San Andreas gives you a lot of options for customizing your play style and improving your abilities and qualities. However, you will still receive vital prizes for completing side missions, such as increased maximum health for completing paramedic missions. Firefighter quests are especially beneficial because you gain resistance to fire damage after you reach level 12 in that questline.

Definitive Edition Switch Guide: Side missions for GTA 3

GTA 3 (Image credit: Rockstar Games)

In GTA3, there are numerous side missions, which may tempt players to ignore them and just focus on the main storyline, but these side missions often have fantastic rewards. As you progress through paramedic missions, for example, you will earn three levels of rewards. Health pick-ups are available at all safe houses. Adrenaline pick-ups are available at all safe houses, as well as unlimited sprints if you complete the entire set. In the meantime, complete 20 Firefighter jobs and unlock a flamethrower in each Safehouse.

Definitive Edition Switch Guide: Malibu Club

One of the most costly residences in Vice City is the Malibu Club. However, the usefulness of the benefits it delivers makes it worthwhile to work toward. The first benefit is a daily income of $10,000, which is a substantial sum. Once you buy the Malibu Club, you may acquire the strongest weaponry in the game, including a machine gun and a rocket launcher, from Phil’s gun store.

Definitive Edition Switch Guide: Armor

Unlike the later games in the series, GTA3, Vice City, and San Andreas have the ability to push players with challenging firefights. As a result, in combat, you’re more likely to need even the slightest advantage. Wearing an armor suit at all times is one of the best things you can do to protect yourself from damage. 

You need to equip your armor at all times, whether you buy it or find it in the open world if you want to have the best chance of success. Vice City has a body armor set that respawns on the top floor of the Ocean Beach Parking Garage, so that’s an area you can visit frequently to get free armor.

Definitive Edition Switch Guide: Hidden Packages

There are Hidden Packages scattered about in all three of the GTAs in question here, as you’d expect from a game with an open world. You should keep an eye out for them, even though they are completely optional. Although they count towards 100% completion, they also offer material gameplay advantages from time to time, even if you don’t care about that. In addition, you can unlock different types of body armor and weapons permanently.

Definitive Edition Switch Guide: Befriend

Definitive Edition Switch Guide
GTA San Andreas (Image credit: Rockstar Games)

A GTA game respawns you in the hospital each time you die – however, you lose all your money and weapons. It is possible to circumvent this in San Andreas. Find an NPC named Katie Zhan at Avispa Country Club. Once you reach the necessary body stats, you can befriend her, unlocking key perks like free hospital visits and keeping all your weapons when you die.

Definitive Edition Switch Guide: Shooting range in Vice City

Vice City allows players to improve their attributes in some ways, though its upgrade mechanics aren’t as robust as those in San Andreas. Ammu-Nation stores have shooting ranges, for instance, which are pretty useful. If you earn 30 points in the shooting range, you get a $500 reward, and if you earn 45 or more points, you gain a permanent increase in reload speed.

Definitive Edition Switch Guide: Weapon skill

In San Andreas, improving your weapon performance is far more sophisticated than in its predecessors. CJ has a competence skill for each weapon in the game, which improves in three tiers depending on how much time he spends with it. One simple method to improve is to place a car in your garage and fire at it. Then, just before the car is going to be wrecked, close the garage door. Continue firing at the completely restored car after that, then rinse and repeat.

Switch cheats for GTA 3

  • Destroy all cars:  ZL, ZR, L, R, ZL, ZR, X, Y, A, X, ZL, L
  • Flying vehicles: Right, ZR, A, R, ZL, Down, L, R
  • All weapons: ZR, ZR, L, ZR, Left, Down, Right, Up, Left, Down, Right, Up
  • Raise wanted level: ZR, ZR, L, ZR, Left, Right, Left, Right, Left
  • Lower wanted level: ZR, ZR, L, ZR, Up, Down, Up, Down, Up, Down
  • Infinite money ($250,000): ZR, ZR, L, L, Left, Down, Right, Up, Left, Down, Right, Up
  • Full health: ZR, ZR, L, R, Left, Down, Right, Up, Left, Down, Right, Up
  • Full armor: ZR, ZR, L, ZL, Left, Down, Right, Up, Left, Down, Right, Up
  • Improve vehicle driving handling: R, L, ZR, L, Left, R, R, X
  • Spawn Rhino tank: A, A, A, A, A, A, R, ZL, L, X, A, X
  • Change outfits: Right, Down, Left, Up, L, ZL, Up, Left, Down, Right
  • Bighead mode: Up, Up, Down, Down, Left, Right, Left, Right, A, B
  • Slow-motion gameplay: X, Up, Right, Down, Y, R, ZR
  • Fast motion gameplay: X, Up, Right, Down, Y, L, ZL

Switch cheats for GTA Vice City

  • Full armor: R, ZR, L, B, Left, Down, Right, Up, Left, Down, Right, Up
  • Full health: R, ZR, L, A, Left, Down, Right, Up, Left, Down, Right, Up
  • Lower wanted level: R, R, A, ZR, Up, Down, Up, Down, Up, Down
  • Raise wanted level: R, R, A, ZR, Left, Right, Left, Right, Left, Right
  • Weapon set #1: R, ZR, L, ZR, Left, Down, Right, Up, Left, Down, Right, Up
  • Weapon set #2: R, ZR, L, ZR, Left, Down, Right, Up, Left, Down, Down, Left
  • Weapon set #3: R, ZR, L, ZR, Left, Down, Right, Up, Left, Down, Down, Down
  • Change outfit: Right, Right, Left, Up, L, ZL, Left, Up, Down, Right
  • Instant death: Right, ZL, Down, R, Left, Left, R, L, ZL, L
  • Faster gameplay: A, A, L, Y, L, Y, Y, Y, L, X, A, X
  • Slower gameplay: X, Up, Right, Down, Y, ZR, R
  • Flying cars: Right, ZR, A, R, ZL, Down, L, R
  • Improved handling: X, R, R, Left, R, L, ZR, L
  • Spawn hotring racer: ZR, L, A, Right, L, R, Right, Up, A, ZR
  • Spawn love fist limo: ZR, Up, ZL, Left, Left, R, L, A, Right
  • Spawn rhino: A, A, L, A, A, A, L, ZL, R, X, A, X
  • Spawn romero: Down, ZR, Down, R, ZL, Left, R, L, Left, Right
  • Spawn sabre turbo: Right, ZL, Down, ZL, ZL, B, R, L, A, Left
  • Spawn trashmaster: A, R, A, R, Left, Left, R, L, A, Right
  • Play as Dick: Down, L, Down, ZL, Left, B, R, L, B, B
  • Play as Hilary King: R, A, ZR, L, Right, R, L, B, ZR
  • Play as Jezz Torrent: R, ZL, ZR, L, Right, ZR, Left, B, Y, L
  • Play as Ken Rosenberg: Right, L, Up, ZL, L, Right, R, L, B, R
  • Play as Sonny Forelli: A, L, A, ZL, Left, B, R, L, B, B

Switch cheats for GTA San Andreas

  • Get $250,000, full health, and full armour: R, ZR, L, B, Left, Down, Right, Up, Left, Down, Right, Up
  • Weapon set #1: R, ZR, L, ZR, Left, Down, Right, Up, Left, Down, Right, Up
  • Weapon set #2: R, ZR, L, ZR, Left, Down, Right, Up, Left, Down, Down, Left
  • Weapon set #3: R, ZR, L, ZR, Left, Down, Right, Up, Left, Down, Down, Down
  • Increase wanted level: R, R, A, ZR, Left, Right, Left, Right, Left, Right
  • Decrease wanted level: R, R, A, ZR, Up, Down, Up, Down, Up, Down
  • Lower wanted level: R, R, A, ZR, Up, Down, Up, Down, Up, Down
  • Six-star wanted level: A, Right, A, Right, Left, Y, B, Down
  • Infinite ammo: L, R, Y, R, Left, ZR, R, Left, Y, Down, L, L
  • Jetpack: Left, Right, L, ZL, R, ZR, Up, Down, Left, Right
  • Parachute: Left, Right, L, ZL, R, ZR, ZR, Up, Down, Right, L
  • Hitman-level weapons: Down, Y, B, Left, R, ZR, Left, Down, Down, L, L, L
  • Infinite lung capacity: Down, Left, L, Down, Down, ZR, Down, ZL, Down
  • Instant death: Right, ZL, Down, R, Left, Left, R, L, ZL, L
  • Maximum muscle: X, Up, Up, Left, Right, Y, A, Left
  • Maximum respect: L, R, X, Down, ZR, B, L, Up, ZL, ZL, L, L
  • Super jump: Up, Up, X, X, Up, Up, Left, Right, Y, ZR, ZR
  • Super punch: Up, Left, B, X, R, A, A, A, ZL
  • Big head mode: Up, Up, Down, Down, Left, Right, Left, Right, A, B
  • Maximum sex appeal: A, X, X, Up, A, R, ZL, Up, X, L, L, L
  • All cars have nitrous: Left, X, R, L, Up, Y, X, Down, A, ZL, L, L
  • Drive on water: Right, ZR, A, R, ZL, Y, R, ZR
  • Flying boats: ZR, A, Up, L, Right, R, Right, Up, Y, X
  • Flying cars: Y, Down, ZL, Up, L, A, Up, B, Left
  • Improved handling: X, R, R, Left, R, L, ZR, L
  • Increase car speed: Right, R, Up, ZL, ZL, Left, R, L, R, R
  • Spawn bloodring banger: Down, R, A, ZL, ZL, B, R, L, Left, Left
  • Spawn caddy: A, L, Up, R, ZL, B, R, L, A, B
  • Spawn dozer: ZR, L, L, Right, Right, Up, Up, B, L, Left

For more Guides, Tips, and Tricks

Check out our Video Games Guide Section for more dedicated guides.

The Dead Ends Dungeon Guide – FFXIV Endwalker

The Dead Ends Dungeon Guide of FFXIV Endwalker will help you to defeat every boss with ease. 

Final Fantasy XIV Endwalker’s The Dead Ends is a level 90 dungeon. You’ll see faraway civilizations nearing the end of their lives here. In order to find Meteion, you must first defeat the adversaries of dying worlds. Expect a somewhat greater degree of difficulty from some monsters in The Dead Ends because it’s the first level 90 dungeon of Endwalker. Let’s take a look at each monster you’ll face, their attacks and mechanics, and how to defeat them.

The Dead Ends Dungeon Guide: Walkthrough

You will stroll across a hazardous wasteland in the initial section of this dungeon. Poisonous puddles surround the road, inflicting the debuff Toxicosis, which does severe damage over time to any player standing in the region of effect. As you go through the first section of The Dead Ends, stay on the route and avoid these harmful puddles.

Furthermore, getting struck by the majority of the boss’s strikes increases your susceptibility, causing you to suffer greater damage from all attacks. To have the best chance of surviving this dungeon, try to clear mechanics without getting hit.

The Dead Ends, like the other Endwalker dungeons, may be cleared with the help of Trust allies. This technique is recommended for the first time you tackle this dungeon, as it allows you to understand the mechanics of each fight while also allowing you to go at your own leisure.

The Dead Ends Dungeon Guide: How to unlock?

The Dead Ends is unlocked by completing the expansion’s last major story task. Accept the ‘Endwalker’ Main Scenario Quest.

Alphinaud – Ultima Thule NPC Location (x:21.5, y:21.5)

The Dead Ends Dungeon Guide: Caustic Grebuloff

Final fantasy
Caustic Grebuloff (Image credit Final Fantasy)

Caustic Grebuloff is the first boss of The Dead Ends. Prepare to clear several debuffs since this adversary will utilize toxic-based attacks. We are including Grebuloff’s attacks and mechanics for you. 

Cough Up

Each player is targeted by a set of three puddles AoEs. Avoid overlapping these with other players by spreading out and keeping out of the puddles formed. All party members will be targeted with a red arrow shortly after; stack together to dispel this. You’ll lose control of your character if you don’t, and you’ll be susceptible to the boss’s next assault.

Misamata

Wind will begin to blow throughout the arena before Grebuloff unleashes his attack Miasmata. Then, at random throughout the arena, multiple AoEs will appear. They’ll proceed along with the arena in the direction of the wind after a brief pause, doing damage at predetermined intervals. To evade this attack, look for a safe space between the AoEs around the wind’s origin location.

Additionally, being hit by this strike will cause Necrosis, a serious debuff that can be deadly if not dealt with quickly. As quickly as feasible, the Healer should purge the afflicted players.

Blighted Water

A stack marker is placed on a random player; gang up on the affected person to spread out the damage.

Befoulment

AoE circle attack that targets all players; spread out to prevent overlapping these AoEs, and heal as needed afterward.

Nausea Wave

A massive AoE that encompasses the majority of the arena. To dodge Wave of Nausea, walk towards Grebuloff’s hitbox, which will be exactly beneath the monster.

Pox Flail

Inflicts a lot of damage on the Tank. Use defensive cooldowns as needed, and heal as needed.

Caustic Grebuloff will continue to assault in this manner until he is vanquished. Throughout the encounter, keep an eye on the direction of the wind and your debuffs. Enter the gateway to go to the second section of the dungeon after beating Caustic Grebuloff.

The Dead Ends Dungeon Guide: Peacekeeper

Dead Ends Dungeon Guide
Peacekeeper (Image credit Final Fantasy)

The Peacekeeper is The Dead Ends’ second boss. If you’re not prepared, this fight will give you a tough time; expect to avoid a lot of AoEs. Each of the Peacekeeper’s attacks and mechanics is listed here.

Peacefire

Splits the arena into two AoEs that circle around it. To avoid being caught by the AoEs as they move around the arena, move with them. This assault will also employ Electromagnetic Repellant and Order To Fire, so make sure to avoid the turrets’ beam attack while traveling.

Decimation

Inflicts damage on all party members and engulfs the arena in flames, inflicting damage on anybody who enters. To prevent receiving excessive damage, stay away from the arena’s edge.

Peacekeeper’s Electromagnetic Repellant creates an AoE within his hitbox, causing persistent damage over time effect in the region. While this strike is engaged, avoid standing directly beneath the boss.

Order To Fire

Creates a ring of turrets around the monster and gives them the order to fire. To avoid being struck by a turret that fires a beam in a straight line, stand between two of them. The boss will target people with AoE markers at the same time, so spread out to avoid overlapping these AoEs.

Eclipsing Exhaust

Peacekeeper will launch a knockback strike from the middle of the arena after creating AoEs all around it. Position yourself to avoid being caught in one of the AoEs.

Elimination

This Causes the Tank to take a lot of damage. As required, mitigate.

No Future

AoEs will be created in patterns around the arena by Peacekeeper. Because there will be many overlapping AoEs throughout this strike, keep an eye on these AoEs and avoid them appropriately.

These attacks will be repeated and overlapped until the Peacekeeper is defeated. In later stages of the fight, watch out for No Future, as its multiple AoE attacks can be overwhelming if you’re not careful.

The Dead Ends Dungeon Guide: Ra-La

Dead Ends Dungeon Guide
Ra-La (Image credit Final Fantasy)

Ra-La is The Dead Ends’ last boss. Throughout the fight, this boss will have you pay attention to your location. The attacks and mechanics of Ra-La are outlined here.

Lifesbreath

Ra-La will charge this attack by jumping to one side of the arena. Damage is dealt in a straight line AoE with Lifesbreath. In addition, this strike will spawn a swarm of unforgettable butterfly adds. Each butterfly has a direction marker that indicates which way it will fire an AoE line attack in the near future. To avoid being attacked, position yourself behind any of the butterflies. You will be stricken with Doom if you are hit by this assault. To remove the Doom debuff, have the healer restore your health to 100%.

Warm Glow

Inflicts harm to all members of the group.

Benevolence

A stack marker will be placed on a random player by Ra-La. The damage from this area of effect should be spread out among all players.

Pity

It does a lot of damage to the Tank.

Prance

Ra-La will leap four times around the arena before landing in a massive AoE circle. Stay in the last AoE formed by following the boss as it hops. Move towards that region after the first one explodes to dodge the AoEs that follow.

Loving Embrace

One of Ra-wings La’s will glow, signaling that an AoE attack will be launched in that direction. To evade this strike, go to the boss’s opposite side. Lifesbreath will be paired with Loving Embrace the second time Ra-La uses it. While avoiding the butterfly’s assaults, make sure you’re on the right side to avoid Loving Embrace as well.

Still Embrace

An AoE marker is used to target all players. Avoid overlapping these AoEs with other players by spreading out.

Ra-La will continue to attack in this manner until it is defeated. Keep an eye out for future Lifesbreath uses, and make sure you’re on the right side during Loving Embrace. If you defeat Ra-La, you’ll be able to finish The Dead Ends.

For more Guides, Tips, and Tricks

Check out our Video Games Guide Section for more dedicated guides.

Minecraft reaches 1 trillion views on YouTube

Minecraft reaches 1 trillion views on YouTube in a record-breaking performance.

With 35,000 active creator channels spread in 150 different countries, Block Building Sim is the most-watched video game on the platform. Minecraft, the block-building sim that has been purchased over 200 million times and is still one of the most played video games in the world after ten years, has reached yet another milestone: YouTube videos of Minecraft have surpassed 1 trillion views, making it the most-watched game on the platform.

Minecraft has long been popular on the video-sharing site, because of its open and very creative character. It was first published in 2009. In the blocky landscape, players may construct whatever they want, and creative modelers have taken to YouTube to show off their most astounding creations, which range from scale replicas of Hogwarts and the Starship Enterprise to working computers.

Minecraft History

Minecraft was created by a small Stockholm-based team led by programmer Markus Persson. That group became Mojang, a game development firm that published an early version of the game in 2009 before launching the full version two years later. Persson departed the firm in 2014 when Microsoft purchased it for $2.5 billion (£1.9 billion).

Since then, Mojang has continued to update Minecraft, adding new characters, stories, and construction blocks to the world as well as improving the game’s signature visual aesthetic. Meanwhile, the Xbox Minecraft Marketplace allows users to sell the goods, models, and minigames they’ve produced to other players, creating a functional economy for the world.

YouTube’s celebrity influencers also helped Minecraft to reach 1 trillion views

The game was also extremely popular among the initial generation of YouTube celebrity influencers. Stampy Cat, DanTDM, and PewDiePie gained large followings by playing Minecraft and developing their own tales, events, and challenges because to the game’s open architecture. According to Microsoft, there are currently over 35,000 active Minecraft creator channels on YouTube, with creators from 150 countries.

YouTube has published an animated movie highlighting Minecraft’s history on the site, as well as altering the logo on the YouTube homepage for 24 hours to commemorate the one trillionth view. There will also be curated playlists with videos and creators from all around the world.

It’s fascinating to watch how different Minecraft video genres evolve over time as they gain and lose popularity. Music video parodies by Minecraft popular names like CaptainSparklez were multi-million view smashes in Minecraft’s early years. Dream (who just received a Game Award for content creator of the year) is currently dominating the charts with his Minecraft manhunt series, in which his pals attempt to stop Dream from completing the game by any means possible.

Minecraft is the most-watched video game on YouTube. It has almost 200 billion views as of 2020. Surprisingly, another sandbox game, Roblox, came in second. It only made around a quarter of that amount. Minecraft’s nature accounts for some of its apparently insurmountable appeals. In a manner that no other video game can match, it’s an open canvas ripe for all types of invention and iteration on that creation. Pettie also mentions the community as a factor.

For more stories

Check out the Entertainment section for more stories.

Best Technology in Icarus – A Complete Guide

We have brought you a guide to the best technology in Icarus. The right technology can provide many benefits.

In Icarus, there are four tiers filled with countless technologies that you can unlock. You can unlock additional blueprints as you progress in the game, which will allow you to craft items that will help you survive on such a harsh planet. You will learn about some of the best technologies in Icarus in this guide. Furthermore, you can survive and complete prospects with the technologies mentioned. In time, you will probably have unlocked many blueprints, so this guide is for those who just started and aren’t sure yet which blueprints to unlock.

Before going further, we recommend you to read Icarus Beginner’s Guide – 10 Tips to help you Survive if you are new to the game.

Tech Tree in Icarus

The tech tree determines what you can do with practically all the game’s content. It’s how new weapons, armor, and tools are unlocked. You gain access to prefabs and material kinds for construction. Basically, the tech tree unlocks practically everything you can create or produce in the game. It’s crucial to achieving the greatest progress in the game, therefore understanding how it works is essential.

How the Tech Tree works

Icarus
Icarus (Image credit: Icarus on Steam)

To continue through the tech tree, you must raise your character’s level by gaining experience from almost any activity in the game. When you level up, you get three points that you may use to upgrade your tech tree. Each point may be used to unlock a node on the tech tree, giving you access to a specific item. There are branches in the tech tree that function as requirements for other goods.

For example, before you can spend points unlocking wood construction prefabs, you must first spend a point unlocking the carpentry bench. In addition to having access to the tier and meeting all the conditions, some nodes need the unlocking of certain skills or levels. Each tier has its tech tree, which is determined by the character’s level. The structure isn’t dissimilar to a tech tree found in other video games, but it’s important to properly comprehend it. You’ll observe that, because of the tech tree’s branching, it’s best to specialize within your group. 

Multiple individuals putting points into wood building prefabs, for example, isn’t a good idea because each copy may be used for anything else. This is very significant because once you achieve higher tiers, you may keep your tech points and use them to unlock higher levels. You might, for example, have one of your party members not spend any points on tier 1 until they’ve unlocked tier 2. They’d be able to access a significant quantity of tier 2 technology right away, allowing your squad to advance more quickly.

Best Technology in Icarus: Healing Items

Icarus health
Icarus (Image credit: Icarus on Steam)

Basic Bandage

  • 40 Fiber

Heat Bandage

  • 40 Fiber
  • 10 Charcoal
  • 4 Oxite Ore

Suture Kit

  • 10 Fiber
  • 5 Bone
  • 2 Leather

Splint

  • 8 Sticks
  • 6 Rope
  • 2 Wood

During a prospect, it is impossible to stay away from deadly creatures. Whether you fight or escape, you may sustain some damage as a result of the encounter. Bandages, as well as other healing items, should be unlocked as a result of this. You might suffer anything from a tiny quantity of blood loss to a fractured limb as a result of your injuries. Damage-based status effects, on the other hand, are remedied. It’s recommended to unlock these blueprints ahead of time so you don’t run out of healing supplies if you are hit.

Best Technology in Icarus: Tools And Weapons

Best Technologies in Icarus
Icarus (Image credit: Icarus on Steam)

Tier One

  • Stone
  • Wood
  • Bone

Tier Two

  • Iron
  • Steel

Tier Three

  • Platinum
  • Aluminum
  • Carbon

Tier Four

  • Titanium

Tools and weapons are crucial in Icarus. Any tier should prioritize tools and weapons as the first blueprints. The more tiers you unlock, the stronger the materials you can use to craft tools. By crafting these items at the beginning of a new prospect, you will greatly increase your chance of survival. Axe, Pickaxe, Knife, Repair Hammer, Sickle, Fire Whacker, and Bow and Arrows are among the most essential tool types to have on hand.

Best Technology in Icarus: Bedroll

Icarus house
Icarus (Image credit: Icarus on Steam)

Tier: One

  • 20 Fur
  • 20 Fiber
  • 10 Sticks
  • 10 Leather

In addition to serving as respawn points, bedrolls also serve as places to sleep to skip the night. Icarus players are aware of the importance of respawn points if they die. Having a respawn point always ready is important. You never know when you’ll die. You can respawn in your own house by setting up a bedroll instead of traveling to a random location on the map.

Best Technology in Icarus: Campfire

Icarus bonfire
Icarus (Image credit: Icarus on Steam)

Tier: One

  • 24 Stone
  • 8 Fiber
  • 8 Sticks

Camping fires provide heat and a way to prepare raw food, such as meat and fish. Cooked food provides additional benefits to your status, though you can just eat berries. The importance of having a source of heat cannot be overstated. By using heat, you can prevent cold-based status effects that slow down the regeneration of health and stamina. Heating your surroundings will also make you more comfortable in bed. If you have a bedroll and do not have a nearby heat source, you will not be able to sleep through the night.

Best Technology in Icarus: Wood Construction 

Best Technologies in Icarus
Icarus (Image credit: Icarus on Steam)

Throughout the four stages, several sorts of construction materials are accessible. You can build thatch and wood structures at the first tier, but you should focus on unlocking the wood variety.

Thatch is extremely brittle, and it will quickly shatter in a storm. Although wood might catch fire, it is more durable than thatch and can be used to construct a shelter. You may also build stone and concrete constructions as you reach higher stages; both of these materials are extremely robust and can withstand a storm.

Best Technology in Icarus: Water skins

Best Technologies in Icarus
Icarus (Image credit: Icarus on Steam)

Tier: Two

  • 12 Leather
  • 10 Fiber
  • 4 Bone

Water skins let you gather water and transfer it to locations where there isn’t any, such as the desert and cold biomes. Water skins leak easily, but you may also get schematics for more modern water-carrying containers like the thermos.

Best Technology in Icarus: Oxidizer

Best Technologies in Icarus
Icarus (Image credit: Icarus on Steam)

Tier: One

  • 12 Fiber
  • 20 Leather
  • 8 Sticks
  • 10 Bone

The importance of oxygen cannot be overstated. If you’ve just made a new character and are in the middle of your first prospect, you’ll need to replace your oxygen supply using oxite ore.

You’ll have the opportunity to unlock the oxidizer as you advance. This is a device that allows you to insert oxite and convert it into oxygen. Oxygen-producing and storage gadgets are extremely helpful since they allow you to swiftly refresh your air supply without having to rely on mined materials.

Best Technology in Icarus: Rain Reservoir

Best Technologies in Icarus: Rain Reservoir
Icarus (Image credit: Icarus on Steam)

Tier: Two

  • 24 Wood
  • 80 Stone
  • 8 Sticks
  • 8 Leather

This is a rainwater collection and storage device. You can get dysentery from drinking water from a river or stream, despite how easy it is to do so. Rainwater, on the other hand, is a safer source of water since it does not cause diarrhea. Rain reservoirs are also beneficial if you live in a location where there is little to no access to water. It’s worth noting that these reservoirs will only fill if it’s raining heavily.

You should now be aware of the most crucial blueprints to get into Icarus! Overall, the most important things to look into are those that will help you survive. If you come across a design that seems cool but isn’t practical, look into other blueprints first. They could come in handy.

For more Guides, Tips, and Tricks

Check out our Video Games Guide Section for more dedicated guides.

Animal Crossing New Horizons Snowboy Guide

Winter is here, and we have brought you an Animal Crossing New Horizons Snowboy Guide, which will help you to make a perfect Snowboy.

Players who have previously played Animal Crossing will be pleased to witness the return of a beloved in-game activity: building Snowboys. You’ll be able to make snowmen (or Snowboys, as they’re known in-game) throughout December and long into 2021. These tiny creatures are difficult to construct, but they reward you with additional DIYs and crafting resources, allowing you to truly transform your island into a winter paradise.

If you are new to the game, we recommend you to read Animal Crossing New Horizons Guide – Top things to do in the 2.0 Update

New Horizons Snowboy Guide: Where to find the snow?

Snowboy
Animal Crossing New Horizons (Image credit: Nintendo)

By the time it has snowed completely, you’ll see snowballs roll into Snowboys. For Northern Hemisphere players, this occurs around the middle of December, while for Southern Hemisphere players, it occurs around the middle of June. Snowballs are in open places on your island. You’ll have to push the snowballs around to make them expand to build a Snowboy. When rolled on top of the grass, they just grow. The snowball will shrink if it is rolled on top of patterns or trails.

When the snowballs reach a specific size, you can roll them into each other to form a Snowboy. You may revive a snowball if you shatter it inadvertently by saving and reloading your island. If your airport gate is open, no snowballs will spawn on your island.

Snowboys are in a variety of sizes, but only a well-constructed Snowboy will provide a seasonal DIY recipe. Every day until the Snowboy melts, Perfect Snowboys will additionally gift you a Large Snowflake. You’ll need these to produce the homemade recipes he gives you as a prize. Before melting into oblivion, a Snowboy will linger around for four days.

New Horizons Snowboy Guide: How to make a perfect Snowboy?

New Horizons
Animal Crossing New Horizons (Image credit: Nintendo)

Only once your island has been entirely blanketed in snow can you construct Snowboys. This often occurs in the Northern Hemisphere around the middle of December and lasts until mid-to-late February. This occurs in the Southern Hemisphere around the middle of June and lasts until mid-to-late August. The snow is completely covering the ground on your island, now you have to discover two snowballs.

A snowball and a snowflake are sitting together somewhere on your island. You’ll need to move the snowballs around and make them bigger to build the Snowboy. To produce the perfect Snowboy, you’ll need to make them the precise appropriate size. If you shatter a snowball by mistake, it will revive after you enter and depart a building.

The snowball may take a few moments to reappear, but it will. It is not uncommon to find snowballs adjacent to one another and on the same layer. So, if you locate one snowball on your island’s second layer, there’s a strong probability the other one is close on the second tier. Also keep in mind that if your gate is open, snowballs will not generate.

It’s a lot of fun to make Snowboys. You may build them in whatever size you choose. You’ll have to construct the perfect Snowboy if you’re hunting for those crafting supplies and DIYs. Furthermore, you can only build one Snowboy every day, so be cautious while sizing up your snowballs. Making the ideal Snowboy is difficult, but it is also gratifying. Perfect Snowboys will give you a fresh frozen DIY as a reward. In addition, until he melts, which takes around four days, the ideal Snowboy will offer you a huge snowflake every day.

The trick for Perfect Snowboy

New Horizons Snowboy Guide
Animal Crossing New Horizons (Image credit: Nintendo)

It might be difficult to create perfect Snowboys, but there is a method to it. To begin, you’ll want to bring the snowballs to a safe place after you’ve located them. The large space allows you to roll the snowballs to the right size without them breaking. If your island lacks a reasonable amount of open space, now is the time to explore and figure out where one may be found. Keep in mind that some of the game’s “open” places aren’t actually all that open or ideal for making Snowboys.

Roll the snowball back and forth until it reaches the height of the character’s eye. Move this snowball to where you want your Snowboy after it’s the size you desire. Make sure there’s enough space around him, so you can engage with him after he wakes up.

Return to the second snowball and roll it till it’s roughly the same height as the character’s ear, or right at the character’s chin if it’s easier to measure. Even if the ones we produced were a little, they nevertheless resulted in a Snowboy. Even though he wasn’t the perfect Snowboy, he was still a Snowboy.

To make a Snowboy, roll the smaller ball onto the larger snowball after it is the right size. If you made the Snowboy precisely, he will instantly congratulate you. If he doesn’t, you most likely miscalculated the sizes and will have to start over. If your Snowboy isn’t flawless, you can hard quit right away and try again. When you hard quit, make sure your game isn’t auto-saving.

Keep in mind

There are a few pointers to remember. The first is to roll your snowball over un-snowed land if it becomes too enormous. The snowball will shrink in size as a result of this. Also, while rolling snowballs over bridges and inclines, use caution. Like a real snowball, you cannot control where your snowball rolls. A colliding snowball may break. Observe dung beetles as well. 

Players in the Northern Hemisphere haven’t gotten a chance to engage with them yet, but they are attempting to move the snowballs about. The obnoxious beetles smash snowballs into objects, smash them over cliffs, and toss them into rivers. They may break your Snowboy if you’re not careful!

We have an art guide for the game that you must read.

New Horizons Snowboy Guide: Snowboy DIY recipes

New Horizons Snowboy Guide
Snowboy DIY recipes (Image credit: Nintendo)

Obtaining the Snowboy DIYs is well worth the time and effort required. Through Toy Day and beyond, the frozen products may help create the perfect winter atmosphere! They’re ideal for establishing a frozen café or even a welcoming stop for Santa. It also helps because you are awarded Nook Miles for each flawless Snowboy you build.

One of the best aspects about Animal Crossing New Horizons is that it is quite tolerant of inexperienced players. You can count on a frozen DIY the first time you make a snowboy. You’ll be rewarded merely for attempting, even if your Snowboy isn’t flawless. After that, make sure to get the Snowboy as perfect as possible to get the DIYs.

  • Frozen chair: 3 snowflakes, 1 large snowflake
  • Frozen counter: 5 snowflakes, 1 large snowflake
  • Frozen partition: 6 snowflakes, 1 large snowflake
  • Frozen pillar: 3 snowflakes, 1 large snowflake
  • Frozen sculpture: 4 snowflakes, 1 large snowflake
  • Frozen arch: 10 snowflakes, 1 large snowflake
  • Frozen bed: 10 snowflakes, 1 large snowflake
  • Frozen table: 8 snowflakes, 1 large snowflake
  • Frozen treat set: 1 snowflake, 1 large snowflake
  • Frozen tree: 8 snowflakes, 1 large snowflake
  • Snowperson head: 5 snowflakes, 1 large snowflake
  • Three-tiered snowperson: 2 tree branches, 1 large snowflake, 6 snowflakes
  • Ice flooring: 8 snowflakes, 1 large snowflake
  • Ice wall: 8 snowflakes, 1 large snowflake
  • Ice wand: 3 star fragments, 1 large snowflake

For more Guides, Tips, and Tricks

Check out our Video Games Guide Section for more dedicated guides.

Pokemon Unite Tsareena Guide – How to win games easily

We have brought you a Pokemon Unite Tsareena Guide so that you can win the games easily without any problem.

Tsareena is the most recent Pokemon to be added to the Pokemon Unite roster. In Pokemon Unite, Tsareena is a solid S-tier grass-type all-arounder Pokemon. It is primarily a melee, physical damage-dealing Pokemon with Expert difficulty. Tsareena may be scary to play because it is not a beginner Pokemon and needs some practice to land its combinations. To bring out the most of it, this must be appropriately timed with its passive ability. 

However, we have covered our readers’ bases with this guidance. This Pokemon Unite Tsareena Guide will teach you all you need to know about Tsareena, his powers, and how to simply win games.

Pokemon fan? Read How to get every Eevee Evolution in Pokemon BDSP

Pokemon Unite Tsareena Guide: Best moves

Tsareena is an All-Rounder Pokemon that kicks her opponents into submission with physical melee strikes. This character thrives in any lane, but particularly in the middle lane, where they completely mature at Lv. 6.

The finest Tsareena build in Pokemon Unite relies on applying consistent pressure to foes while preserving mobility and damage. Close in on your adversaries with moves like Triple Axel and Grassy Glide, while Tsareena’s passive ability, Queenly Majesty, allows you to reset the cooldowns on those abilities.

The Pokemon’s next basic attack does a minimum of (10/15/20) damage after it utilizes a move. This damage rises as the Pokemon’s Attack grows. When a melee Pokemon uses a Razor Claw, the opponent Pokemon’s movement speed is reduced for a brief period of time.

Pokemon Unite Tsareena Guide: Abilities

Pokemon Unite Tsareena Guide
Tsareena (Image credit: The Pokemon Company)

Grassy Glide

It causes the user to slide in the specified direction, doing damage to opposing Pokemon and slowing their mobility for a brief period of time. This is followed by an attack that delivers damage to and shoves the opponent’s Pokemon in the opposite direction.

Triple Axel

It requires the user to spin-kick three times in the specified direction, causing damage to the opponent’s Pokemon in the process. Each time a kick lands, the damage caused increases, and basic attack speed is boosted for a brief period after this move finishes by an amount proportional to the number of kicks landed.

Tsareena’s Triple Axel is her unquestionably strongest damage-dealing move. It also aids with endurance, which is extremely useful while fighting an opponent Pokemon. Tsareena’s major crowd control technique, on the other hand, is Grassy Glide, which allows it to slow down an opponent’s Pokemon’s progress while forcing them back. When Queenly Majesty is active, it also provides a shield, which aids Tsareena’s survival. Tsareena is one of the most formidable duelist Pokemon because of the combination of these two moves!

Pokemon Unite Tsareena Guide: Items

Start with Focus Band for Tsareena’s Held Items. This item increases your Defense and Special Defense. Because this Pokemon is a close-ranged fighter, they’ll be right in the middle of the action, and their better defense means they’ll be able to stay in the fight for longer. Muscle Band improves the strength and quickness of your attacks. The more hits you get, the more damage you do. Finally, add Buddy Barrier to Tsareena’s survival. The increased health will keep the Pokemon alive and is compatible with the Focus Band.

If you want a Pokemon Go guide, then read Swinub, Mamoswine, Piloswine in Pokemon Go — A Complete Guide

Pokemon Unite Tsareena Guide: Unite Move

After Tsareena utilizes their Unite Move, Queenly Ascendant, you can see how all of these attacks, equipment, and abilities come into play. Tsareena will dive toward a single target once activated. As soon as the attack starts, your Pokemon will launch an adversary into the air, knocking it out of the fight and delivering a significant amount of damage. Tsareena’s will acquire a burst of HP, as well as improved attack and movement speed after the assault is completed. This is when her powers and equipment show the brightest.

Pokemon Unite
Pokemon unite (Imgae credit: Pokemon Unite twitter)

After Tsareena uses their Unite Move, Buddy Barrier’s second ability will activate, providing a shield to them and adjacent Pokemon. With the post-Unite Move speed boost, Muscle Band’s attack speed boost will be considerably more effective. Not only that, but the benefits of Tsareena’s passive ability, Queenly Majesty, will be simpler to trigger thanks to Tsareena’s increased attack speed following the Unified Move.

Tsareena will be able to quickly finish out a single adversary after using Unite Move on them, as well as any other Pokemon in the vicinity. After unleashing your Unite Move, it’s not unusual for you to take out numerous adversaries in a row. After a Unite Move, Tsareena’s increased mobility and attack speed allow her to mow through adversaries. Tsareena will be able to employ their skills at a considerably faster cadence because of Queenly Majesty’s effect’s enhanced speed. Finally, if any Pokemon manage to escape your grasp, press the Eject Button to track them down and eliminate them.

Want Pokemon BDSP tips and tricks? Read Pokemon Brilliant Diamond & Shining Pearl Tips and Tricks

Overall

Tsareena is now a powerful All-Rounder champion. Along with Lucario, it can easily be found in the S-Tier among other All-Rounder Pokemon. Its early evolutions offer it a significant advantage in the early stages of the game. It also has strong crowd control abilities, which it may use to disable opponent champions. It features a lot of survival mechanisms while being fairly squishy and not as durable as other all-rounders. Tsareena will very certainly be able to rule the meta for the foreseeable future.

https://twitter.com/PokemonUnite/status/1468842346515255296?s=20

For more Guides, Tips, and Tricks

Check out our Video Games Guide Section for more dedicated guides.

Rite of Dawning Quest Guide for Destiny 2

We have brought you a Rite of Dawning Quest Guide for Destiny 2 that will help you to understand the quest and its details more easily.

The Dawning, Destiny 2‘s winter holiday event, has arrived. Guardians can convert their adversaries’ corpses into tasty delicacies to get resources and new weaponry. This year’s celebrations included a new Stasis Sword and cosmetics for players to hunt. It provides both new and returning Guardians an incentive to attend.

The Dawning hasn’t changed much in comparison to past years. Snowballs have reappeared, imbued with Stasis’ power to freeze and shatter your adversaries. Eva’s new enhancements make target-farming for loot a lot simpler. This guide will cover every facet of the Dawning event in 2021, from treat recipes to the greatest Dawning weapon rolls available this year.

Dawning Quest Guide: How it works?

The Dawning is a seasonal occurrence that takes place between December 14th and January 4th. Eva Levante, everyone’s favorite loot-giving grandmother, wants Guardians to make festive sweets. The sweets are for other NPCs to spread Christmas happiness. You may turn resources dropped by fallen opponents into sweets using Eva’s Holiday Oven. This allows you to gain presents such as Masterwork materials, planetary resources, and even new weaponry.

The Dawning is one of Destiny’s most generous events when compared to other events. Almost every monster you defeat will drop an ingredient that you may use in Eva’s Holiday Oven to gain prizes. Making treats is quite simple, and the benefits are ideal for beginner Guardians or seasoned Guardians seeking to accumulate resources for The Witch Queen expansion.

Do you want a Gjallarhorn guide? Then read How to get the Destiny 2 Gjallarhorn and the Gjallarhorn catalyst – Guide

Dawning Quest Guide: What is new?

Dawning Quest Guide

Snowballs are back 

Snowballs have returned from the very first Dawning event, and you may discover them everywhere across Europa, as well as in the weekly Nightfall attack (excluding Grandmaster Nightfalls).

On impact, they discharge a burst of Stasis, destroying adversaries and freezing adjacent foes.

Snowballs improvements may be purchased from Eva Levante.

Two new missions added

After completing her introductory quest, Eva will give you two further objectives, allowing you to gain a Dawning-themed shader and the new Zephyr Sword.

New Sword

Zephyr, a new Stasis Sword that can roll with Cold Steel and inflict Stasis with powerful Sword strikes, is now available. This sword has a slight chance of being dropped by Dawning Gifts.

Before you may use the weapon, you must first finish a Dawning Quest.

The perk pools for dawning weapons have been revised

New benefits have been added to Glacioclasm, Cold Front, and Avalanche.

In Eva’s Holiday Oven, two new recipes have been added

You can craft Ascendant Apple Tart and Timeless Starwort Thins.

Dawning Quest Guide: Recipes, Holiday Oven, and Essence Of Dawning

Dawning Quest Guide
Eva’s Holiday Owen

Holiday Oven

When you initially enter the Tower, Eva Levante will assign you the chore of making a batch of Gjallardoodles for Zavala. Eva’s Holiday Oven, an inventory item akin to the Splicer Gauntlet or Hammer of Proving, may be used to do this. The oven may be found under the Quests menu. To start the menu, inspect the oven.

You may mix different materials in this menu to make snacks for sellers around Destiny 2’s numerous locations. Every recipe calls for three things: an ingredient, a rare ingredient, and Dawning Essence. Ingredients can drop from fallen foes, with the type of ingredient varying depending on the adversary and how they were killed. The Essence of Dawning may be obtained through a variety of activities. In a moment, we’ll go through both resource kinds in further detail. For the time being, bake one set of Gjallardoodles with the ingredients Eva supplied you.

Recipes

After you’ve made a treat for the Dawning, you’ll be able to see the recipe for that treat. You may see a list of every dish you’ve discovered by hovering over the recipes area of the Holiday Oven. You may manufacture duplicate goodies fast by crafting treats straight from this menu. Once the recipe has been discovered, there’s no need to manually input all of the components.

Essence Of Dawning

You’ll need Essence of Dawning no matter what kind of treatment you’re planning to make. The Essence of Dawning appears to have vanished from Lost Sectors. Wrathborn Hunts is perhaps the finest farm for this resource, dropping 15 Essence each clear. Each quest takes little more than a minute to complete, so this is a simple method to collect enough Essence to produce a few sweets. Wrathborn Hunts also generate snowballs, which are ideal for completing one of Eva’s weekly bounties.

Dawning Quest Guide: How To Farm Dawning Ingredients

Destiny 2
Destiny 2 (Image credit: Bungie)

Dawning ingredients are dropped by almost every dead opponent, albeit the sort of ingredient varies depending on the enemy type and the weapon you’re using. Jump into dense Lost Sectors like the Tangled Shore’s Kingship Dock or Europa’s Perdition if you need a boost of ingredients. Popular kill farms, such as the Thrall corridor in the Shattered Throne dungeon or the Shuro Chi encounter in the Last Wish raid, are also excellent sources of materials.

Complete bounties from Eva Levante if you don’t want to expressly forage for materials. Each prize comes with a different sort of ingredient and a Dawning Spirit. In the end, ingredients shouldn’t be an issue as long as you’re actively playing Destiny 2.

Dawning Quest Guide: Rewards

Destiny 2
Destiny 2 (Image credit: Destiny 2 on Steam)

Dawning Gifts, packages containing Dawning-themed weaponry, Masterwork ingredients, and planetary resources, may be obtained by turning in goodies and completing activities. The Dawning is linked to four weapons, three of which are returning from prior years with updated perk pools.

In addition, by completing this year’s Dawning tasks, players can obtain an Exotic Ship. Moments of Triumph, a Triumphs-themed event that debuted at the Dawning, also offers the chance to obtain a Sparrow and Ghost Shell. Eva Levante can also offer packages that allow you to target-farm various Dawning weaponry. Eva sells upgrades that boost your chances of getting the weapon and rolls you want.

For more Guides, Tips, and Tricks

Check out our Video Games Guide Section for more dedicated guides.

Valorant Killjoy Guide – Best setups for every map

Below is a Valorant Killjoy Guide that will help you to learn more about Killjoy. The guide will also show you the best setups for every map.

Valorant is a tactical first-person shooting game featuring a variety of agents, each with their own set of skills. It heavily relies on planning ahead of time before engaging in gunfights. Killjoy belongs to the Sentinel category of agents. It is one of Valorant’s greatest agents.

Killjoy has been playable in Valorant for quite some time, providing players plenty of opportunities to experiment with her many devices and skills. However, because of the complexity of each instrument, it might be tough to figure out how to best position each of her devices to get the most value out of them.

If you want a chamber guide, then read Valorant Chamber Guide — Tips and Tricks

Valorant Killjoy Guide: The abilities of Killjoy

Nanoswarm 

Valorant Killjoy Guide
Nanoswarm (image credit: Official Valorant site)

Like Cypher’s cages, a grenade that goes invisible and is detonated remotely. It causes a lot of damage and may kill adversaries swiftly if they don’t get out of their way immediately. The damage is done over time, like a strong molly, rather than in a rush of damage when it explodes.

Nanoswarm, like Alarmbot, can detect and eliminate enemies when they are close to it. It cannot be recalled, unlike Alarmbot and Turret, so be careful where you put it. Nanoswarm will have a location indication on its map, but it will not send an alarm if it is destroyed; instead, it will just vanish.

Alarmbot 

Valorant Killjoy Guide
Alarmbot (image credit: Official Valorant site)

Equips and launches an invisible bot that behaves like a proximity mine, jumping to an adversary within range and exploding. A red visual alert will appear on the map when the mine is set off or destroyed. It doesn’t deliver damage on its own, but it does provide a debuff that causes the victim to take double damage for a short period (similar to Viper’s “Fragile” feature).

This debuff lasts roughly four seconds, so you may either peek for a kill or utilize Alarmbot to enhance your Turret or Nanoswarm to obtain a kill from across the battlefield. Killjoy can utilize this ability similar to how a Cypher uses his Trapwires, gaining intelligence and deterring foes from accessing critical regions like chokepoints. If an adversary comes close enough to the Alarmbot, it can be discovered and eliminated before it is activated.

To give you an idea, while it’s invisible, it takes one Classic shot to kill it, and when it’s moving, it needs two Classic bullets to kill it. Alarmbot, like Turret, may be recalled to Killjoy from anywhere on the map and planted again, although there is a 20-second cooldown before you can do so.

Turret 

Valorant Killjoy Guide
Turret (image credit: Official Valorant site)

A turret is deployed that shoots at adversaries within a 180-degree cone.

Her Turret will be facing outwards by default, but you may rotate it to face you by pressing E. The Turret, unlike Sage’s wall, cannot be manually spun around. The Turret has 125 HP and shoots in three-shot bursts after a brief 0.75-second delay. Its harm is proportional to distance. 

Although her Turret doesn’t deliver a huge amount of damage, it does enough to get foes’ attention and may cause havoc if you and your squad are also firing at enemies when the Turret is blazing. Killjoy will be able to use it to single hold sites, stall pushes, set up crossfire scenarios, shield her squad from flanking on the attack, and just gather intel. Once a 45-second cooldown, she can reposition her Turret after it has been destroyed.

Lockdown

Valorant Killjoy Guide
Lockdown (image credit: Official Valorant site)

Her ultimate, which sets a gadget that creates a bubble dome in a vast radius, is most likely the basis of this agent’s name. It will explode after 13 seconds. For 8 seconds, all foes struck will be greatly hindered and unable to use their firearms or abilities. The gadget may be destroyed (150HP), however, its function does not need a line of sight. 

Therefore, Killjoy will be able to conceal it, such as beneath Ascent’s A Site Hell or behind Ascent’s B Site’s arches. It has a huge range, giving her a lot of map control and zoning options.

Valorant Killjoy Guide: Killjoy setup for Fracture

Valorant Killjoy Guide
Fracture map (Image credit Valorant wiki fandom)

Players can put up two Mollies and one Alarm bot in Site A-Main to aid them to obtain an early kill. Even if opponents manage to dodge the Alarm Bot, the Turret will still display their location. The Molly can then be activated. Players can take up positions beneath the Site A platform and battle once the enemy has been defeated. The Valorant Sentinel’s next configuration will include an Alarm Bot in A-Main, however, the player must be on dish due to the exposure. 

Molly should be placed in the little space near the spacecraft, beside the pebbles. Place another Molly in the general vicinity, as well as the Alarm Bot outside the main entrance. Players must take up a corner position with the Turret adjacent to them.

On Site A, Fracture is an excellent map for Killjoy setups. On Site B, one can generate a plethora of options using her ability. Players must place themselves near the wall behind the green boxes for this layout. Place a Molly and a Turret at the intersections of the walkway that connects the Tower and the Arcade. The Turret can assist in identifying the opponents’ direction.

Valorant Killjoy Guide: Killjoy setup for Split

Killjoy setup for Split
Split map (Image credit Valorant wiki fandom)

In the case of A Tower, you’ll want to position your turrets in various locations to keep an eye on Ramps. Knowing they’re in Ramps is vital, as it aids your team’s decision to push that position (just make sure you’re passing the information on to your teammates). The alarmbot and swarm grenade are set up in a typical arrangement to gain time if the adversary decides to attack A Tower.

Killjoy’s B Site is a little more fun to set up because it has a lot more possibilities. With several turret positions and a stealthy alarmbot placement, the entrance to the site is exceptionally accurate. You could use a swarm grenade on the opposite side if you want, but as you’ll see in a minute, it’s not worth much in comparison to other spots. The back of the site offers a few more difficult placement opportunities, including many fantastic swarm grenade locations.

Are you curious about the top streamers of Valorant? Read Top 5 Valorant Streamers of 2021

Valorant Killjoy Guide: Killjoy setup for Bind

Killjoy setup for Split
Bind map (Image credit Valorant wiki fandom)

A Site of Bind has many turret positions, which might be useful for catching the opponent off guard. The areas to the left of showers might provide valuable information to opponents committing to the site as well as individuals exiting the showers. You’ll have a lot of luck on the truck’s turrets, in heaven, or the nook near the lighting. The alarm bot locations are quite conventional, being near shower entrances and in conjunction with swarm grenades. All of them are capable of wreaking havoc.

When you go to site B, your selections are far more limited. Regardless, right beneath the window lies one of the most effective alarm bot installations in the game. This is especially useful because adversaries have no means of knowing about it until they’ve already leaped out due to the lack of an audible signal. The swarm grenades are meant to melt those who get caught up in the chaos. 

The other alarm bot and swarm grenade locations are excellent for protecting default plant sites and the tube. Aside from that, the four turret locations listed below are your greatest option for free damage. On pistol round, the one immediately behind the tube may be sneaky because it’s hard to hit and can do a lot of chip damage for your squad.

Valorant Killjoy Guide: Killjoy setup for Ascent

Killjoy setup for Split
Ascent map (Image credit Valorant wiki fandom)

Place this turret outside A-Main, behind the boxes, since it will provide cover for adversaries in A-Main. Any adversaries going out of A-Main or entering A-Tree will be detected by it. You may now take a far more passive position on A-Site as a result of this. The alarmbot, which can both provide you information about where adversaries are and slow them down, is the next stage of a Killjoy setup. 

Neighbors will have a difficult time detecting this at first, allowing you to gather some crucial information for your team. Keep in mind that if you regularly place your abilities in the same position, adversaries will ultimately begin to play around them.

When using a Killjoy setup for B-site, the turret on top of the barrels in CT is the most common. Position the turret atop the barrels, with B-Main in the backdrop. This turret is useful for gathering intelligence on enemies who may be hiding within B-Main and attempting to push out. It’s worth noting that this turret may be smoked off or swiftly disassembled, so don’t put too much faith in it.

The alarmbot is the first component of a very effective Killjoy setup capable of preventing rapid B pushes. It also prohibits opponents from walking up the lane and entering B-site without alerting you first. When activated as part of a swarm, nanoswarms may successfully stop a rapid B-Push by covering the whole B-Lane. When using all three, don’t forget to activate the alarmbot in the lane to do extra damage and gain free kills.

For more Guides, Tips, and Tricks

Check out our Video Games Guide Section for more dedicated guides.