Vampyr Guide – Best Tips and Tricks for beginners

Our Vampyr Guide will help you to do the right things in the game. With this, you can make your gameplay better.

DONTNOD Entertainment’s Vampyr is a PlayStation 4 game that was published in June 2018. This is a new IP that has just joined PS Plus as one of the free PS4 titles for October 2020. It is best known for the Life Is Strange series. It is a game with a ton of interesting concepts, an engaging universe, and a wonderful cast of characters.

Your problems don’t end when you die in Vampyr. It is important to have difficult conversations, to make tough decisions about how to eat, and to make tough choices about what skills and powers to unlock with XP. In this Vampyr guide, we’ll reveal our beginner’s tips and methods for sucking the most blood out of 1918 London.

Vampyr Guide: Collect everything

Collect goods from boxes, cabinets, and even rubbish bins in communities while wandering the streets – whenever possible. Allow this habit to permeate your veins – items of this sort can be utilized for crafting. Furthermore, the boxes and other lockers are renewable, so if you return to the spot in the future, you will be able to obtain the stuff again.

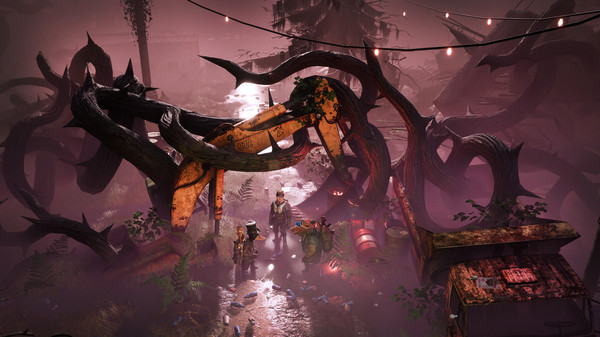
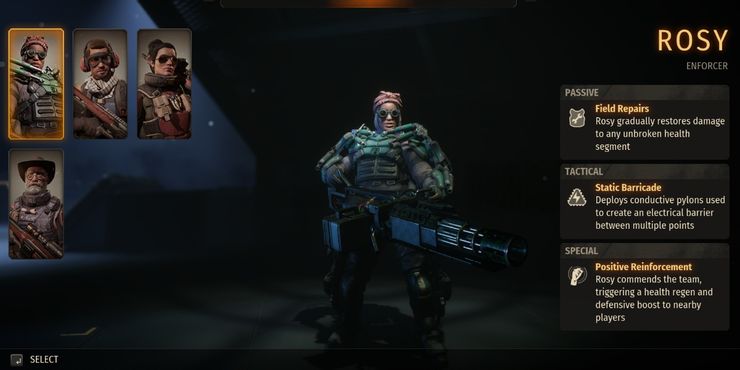
You might also like Mutant Year Zero: Road to Eden – The Ultimate Guide for a Beginner.

Vampyr Guide: Avoid eating anyone right away

Vampyr Guide
Vampyr (Image credit: Vampyr on Steam)

We understand how tempting it is to gnaw necks and kill people at random – you’re a vampire, that’s what you’re supposed to do. Just don’t rush into anything since it’s not always evident how significant a person is, who they know, or whether they’re good or terrible. The more you chat with individuals in your neighborhood, the more you’ll discover about them and their relationships. 

At most, you could accidentally kill someone’s buddy and lose any discussion subjects or hints they may have provided you with. At worst, you may assassinate an area’s “pillar,” a vital member of the community whose death can have disastrous consequences.

Don’t rush, you have opportunities to visit places again

The tempo is one of Vampyr’s major flaws. When you find a new place after the first chapter, there is normally approximately an hour of optional dialogue that you might choose to plow through right away. Don’t get too caught up in finishing everything right away; Vampyr’s semi-open world isn’t huge, and you’ll have plenty of opportunities to revisit most regions numerous times.

You don’t have to suffer through it all in one sitting if you’re the type of person who bounces off talky interludes with a heap of text and conversation. However, try to talk to everyone about everything at some point because this is how you unlock side missions, which are vital if you want to earn the greatest weapons and collectibles in the game.

Vampyr Guide: Hints

When you arrive at Pembroke Hospital, you will have the opportunity to speak with the staff and learn about their history. This is critical since a character who has solved all the problems will offer you a lot more experience when sucking blood. Maintain vigilance while discussing the dialogues you’ve uncovered with others; the dialogues might occasionally prevent you from receiving fresh insights.

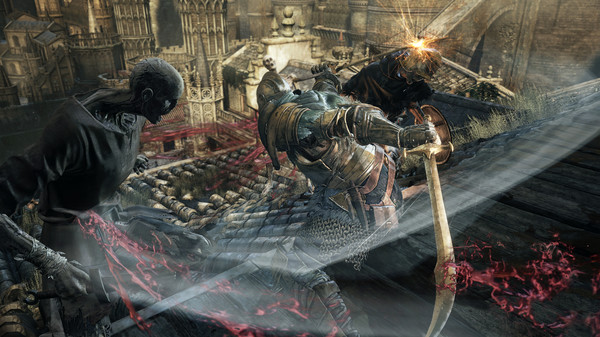
Vampyr Guide: Defense

Vampyr Guide
Vampyr (Image credit: Vampyr on Steam)

You’ll learn about the dodge skill (tap O/B) and the run skill (hold O/B) early on in Vampyr. The dodge skill is described as a mobility option that allows you to evade opponent strikes. However, consistently avoiding is a faster technique to go and will get you from point A to point B as quickly as the game permits!

While you may be ready to put your newfound talents to use and rush into a fight, keep in mind that defense is at least half of the game. Learning how to dodge successfully and when to employ Blood Barrier and Coagulation, as well as stamina management, will be critical to success in Vampyr. That being said, don’t invest too much XP on your offensive abilities. Instead, divide your XP evenly between offensive and defense to improve your chances of surviving on your quest!

Vampyr Guide: Health and Stamina

Regardless of whether you murder or go vegetarian during your playing, Jonathon will do significantly better in the fight if he can survive longer without tiring. Improving his stamina will improve your ability to chain attacks together before needing to halt, as well as allow you to avoid opposing assaults for longer periods without having to regroup.

Strengthening your health implies you’ll be able to resist more strikes before you’re “dead” in the sense of an immortal vampire. More health is essential for winning group bouts and lengthier boss encounters if your opponent’s HP bar is likewise longer than usual.

Talking is the key

Talking is the key
Vampyr (Image credit: Vampyr on Steam)

In Vampyr, there’s a lot of chatting. It’s probably around 60% of what you’ll be doing most of the time, but it’s critical. Very few individuals are what they appear to be: wicked characters are frequently revealed to be not quite so bad, while some nice men are revealed to be not so good. The problem is that some tips and options you’ll need to find are only available by conversing with other individuals and exploring. Before you judge or trust someone, be sure you know them.

Enemies will respawn

Enemies, like loot, will reappear after a specified length of time. This implies that you must be vigilant since a formerly enemy-free zone may now be brimming with life or the undead. On the good side, this means you’ll be able to farm for treasure and experience by returning to locations you’ve already visited. Taking on side missions generally entails retracing your steps in familiar locales for more EXP and goods.

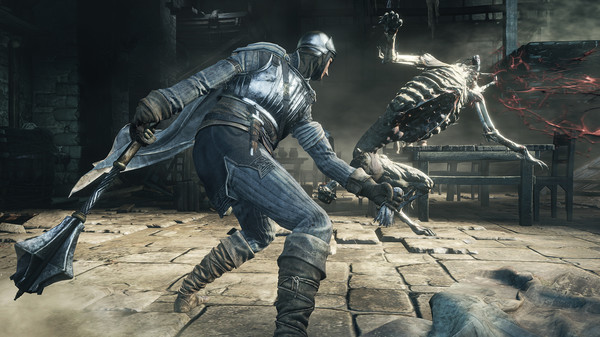
Vampyr Guide: Combat

Combat in vampyr
Vampyr (Image credit: Vampyr on Steam)

It’s easy to overlook your secondary stun attack because it doesn’t deal much damage and only knocks foes back. Using it, however, depletes their stamina, allowing you to bite them to replenish your blood and unleash vampire skills. Continue to clock folks with your offhand weapon and bite anytime you see teeth. 

That way, you’ll always be able to heal and use any clever undead skills you have at your disposal. Some two-handed weapons also allow you to parry, which has a stunning effect and may be quite beneficial against tougher opponents and bosses.

Vampyr Guide: XP

Vampyr continually tells you that eating people will make the game easier because of the delicious XP in their blood, but you don’t have to worry about it too much at first. Okay, so the normal mortal will give you at least 1500-3000 XP per neck in one bite, which would take you around an hour to gain in-game. 

However, you may earn it through conducting missions to get XP more slowly at the beginning if you don’t want to slaughter indiscriminately right once. Investigating, investigating, or speaking with individuals to learn more is a fantastic method to improve this. Later in the game, improvements might get costly, so you may have to make some judgments about whom to gnaw on, but don’t worry about doing so right away.

For more Guides, Tips, and Tricks

Check out our Video Games Guide Section for more dedicated guide

Dark Souls 3 – A guide for this nightmarish hellscape

We have brought you the Dark Souls 3 guide. Whether you are a pro or a beginner, this guide will surely help you. 

Dark Souls 3 has undoubtedly been played the most by players all around the world of all the games made by the famed developer FromSoftware. This is because the third game in the series is the series’ climactic conclusion, complete with properly world-shattering mythology disclosures, a large arsenal of weaponry, a veritable library of spells, and the most spectacular boss encounters to date.

With so many distinct construction possibilities, there is the possibility for an unlimited amount of playthroughs, since each run will be diverse, unique, and tough in its way. It is ideal to explore, learn, and invent in whichever way one wishes to get the most out of one’s Dark Souls 3 experiences. 

Nothing is simple in the world of Dark Souls 3, and although exploring and experimenting will help you figure out the myriad mechanisms that create the game, it will also lead to many untimely deaths. Whether you’re a Dark Souls veteran or a beginner to the series, read on for helpful tips on how to get started in the latest installment.

Dark Souls 3 Guide: Souls

When you beat foes, they may occasionally drop Soul items, which you can utilize to obtain more Souls by activating them from your inventory. These vary from a meager 50 Souls from a Fading Soul or 200 Souls from a Deserted Corpse Soul to big objects providing thousands of Souls. Unlike Souls obtained by fighting opponents, these objects remain with you after death. So you can’t lose them until you activate them, so wait until you’re back at Firelink Shrine and ready to spend them before adding them to your Soul count.

You’ll get Boss Soul items from bosses after you start defeating them. Even though they will award many Souls. Instead, store them since you’ll be able to exchange them for rare boss weapons and equipment later.

You might like Second Extinction Beginner’s Guide – Top 10 Tips and Tricks.

Do not fear dying

Dark Souls 3 Guide
Dark Souls 3 (Image credit: Steam)

In Dark Souls III, you will perish. Maybe it’s because you ran into something you weren’t expecting. It might be that your abilities aren’t up to grade. Other times, it’ll be because an opponent sneaked up behind you or his blade pierced a wall in an unexpected method. These things happen in Dark Souls, and they’re a part of the game. When you resurrect after a death, you begin at your last bonfire, which serves as a safe haven in Dark Souls. 

Consider these to be your home grounds, and each moves away from them as a stride into the unknown. You may immediately move between bonfires or replenish your health-restoring Estus Flasks if you return and rest, but bear in mind that most opponents you’ve slain will respawn anytime you do.

You will lose your souls if you die

When you locate a new campfire and go out to see what’s beyond it for the first time, you’re not necessarily aiming to make progress; instead, you’re trying to fill in the map in your brain and learn about what you’ll encounter. Yes, if you die, you lose all the souls you’ve earned through fighting foes, which serve as both cash and a method to improve your character’s stats. 

You will, however, always be able to gather more. Because there are an infinite amount of foes and souls, even if you drop them all and subsequently lose them after dying once, you may return to the same area and reclaim them; however, if you die again, the souls are lost permanently. However, you’ll be acquiring more in the near future. Don’t get too worked up over the defeat. Concentrate on what you can take away from the event.

Dark Souls 3 Guide: Estus

Dark Souls 3 Guide
Dark Souls 3 (Image credit: Steam)

Your character now gets two flasks that may be used for recovery for the first time in the Dark Souls series. The new Ashen Estus Flask recovers FP for special skills and spells, while the Estus Flask restores HP for your health. The Ashen Estus Flask may be located by the fountain immediately at the start of the game, and if you don’t pick it up, you won’t be able to recover. 

You won’t be able to improve either sort of flask, so make sure you have one on hand. Visit Blacksmith Andre once you’ve arrived at Firelink Shrine, and you’ll be offered the choice to Allot Estus. You can redistribute your total number of flask uses between Estus and Ashen Estus here, allowing you to tailor their distribution to your preferred play style. Bring any Estus Shards you discover on your travels to Andre and choose the Reinforce Estus Flask option to get extra flask usage.

Dark Souls 3 Guide: Healing

You may purchase a Talisman and the Heal Aid Miracle from the Shrine Handmaid at Firelink Shrine, then equip it using the Attune Spell option at any bonfire. To utilize the Talisman, you’ll need a minimum Faith level of 10, so collect the appropriate upgrades from the Fire Keeper to meet this requirement. 

Once you’ve satisfied all the requirements, you can equip the Talisman as a weapon and use it to restore a portion of your HP for the cost of FP. You should be able to use the Talisman at least three times before needing to replenish your FP, making it more effective at restoring HP than the Estus Flask – albeit not as easy to use during the fight! To acquire the most HP between bonfire rests, strike a balance between utilizing the Talisman and the Estus Flask.

Dark Souls 3 Guide: Rolling is very helpful

rolling helps
Dark Souls 3 (Image credit: Steam)

You may use the right stick to lock on to the adversary in front of you during the action, and flick the stick left and right to switch between adversaries if there are more than one. Try to combine this lock with sidesteps or rolls to get behind your opponent as they strike, then conduct a regular attack from behind to complete a backstab for significantly more damage. All adversaries have typical attack patterns, so wait and observe their movements to determine the optimal time to strike.

You have a brief period of invulnerability when doing a roll, so practice this skill in combat and improve your timing, since this is especially beneficial during boss fights. Remember that if your Weight Ratio is less than 70%, you’ll roll quicker and further. Any weapons equipped in the 1-3 slots of each hand count towards this weight, but goods held in your inventory do not. To lower this ratio, equip only the weapons you need right now. You’ll be considerably more maneuverable.

Surroundings can be helpful in combat

Surroundings in game
Dark Souls 3 (Image credit: Steam)

You’ll very certainly come up against adversaries far more strong than you are capable of dealing with, and engaging them in straight combat will almost always result in your untimely demise. In certain instances, you may occasionally utilize the surroundings to your advantage and avoid fighting entirely. Once you’ve grabbed the enemy’s attention, maintain a safe distance and lead them to the brink of a steep drop.

If they get close to the precipice, stand between them and it before attacking in your direction, then roll out of the way at the last moment. They would be doomed with a whack to the head if they haven’t already fallen. You may either claim the reward immediately after an enemy has died, or you may return to the area and search for the reward at the bonfire.

Dark Souls 3 Guide: Levelling up

It’s wonderful to improve your numbers. A little more Endurance can allow you to make a last-second dodge, while a health increase might allow you to resist an extra strike or two at a crucial time. But don’t brood over it. Level increases in Dark Souls III are rather gradual, so utilize levels to get the stats required to equip the gear you choose.

Keep in mind that the more you level up, the more expensive each successive level will be. For example, our Dark Souls III character is level 193, which means that level 194 takes 280,785 souls. Visit Rosaria, Mother of Rebirth in Cathedral of the Deep to “re-spec” or reallocate characteristics.

For more Guides, Tips, and Tricks

Check out our Video Games Guide Section for more dedicated guide

Skyrim Survival Mode Guide for Skyrim Anniversary Edition

Skyrim Anniversary Edition new players can use this Skyrim Survival Mode guide to conquer and survive the game.

The Elder Scrolls V: Skyrim’s Anniversary Upgrade includes all previously published Creation Club features, including survival mode, in a new version of the game. Survival mode is particularly appealing to players who have invested hundreds or even thousands of hours in Skyrim throughout the game’s ten-year lifespan and are seeking a fresh challenge. It’s also suitable for fans of Conan Exiles, Rust, Don’t Starve, and other survival games.

Survival mode introduces several new mechanisms to Skyrim that players will need to keep an eye on. Not only that, but it also emphasizes the importance of prior game mechanics like cooking, potion-making, and selecting appropriate attire for the weather. Players are likely to visit inns more frequently than usual, and they may want to reconsider swimming in very cold water.

For some gamers, having a survival option in Skyrim is a welcome addition. Exploring all of Skyrim’s complexities has always been thrilling. Despite its intricacy, the game seldom gets genuinely tough. Problematic challenges make warfare even more difficult. Survival mode seeks to change that by making everything in Skyrim more difficult. Now, the entire planet is an adversary to be defeated. It’s also great that this is an optional choice, so individuals who aren’t interested in the survival aspects don’t have to turn it on.

Skyrim Survival Mode Guide: Carrying food

Skyrim Survival Mode Guide
Skyrim (Image credit: Skyrim on Steam)

In Survival Mode, it’s critical to have some food on you at all times, since it’s to your best advantage to avoid going hungry. If you do, your stamina and weapon abilities will suffer as a result. Because you don’t have much room to work with, it’s advisable to devote roughly 10% of your carry weight to food. 

Players’ stamina and ability to use most weapons are affected by hunger. Characters’ stamina bars shrink as they become more hungry, as shown by a black area on the stamina bar. This part is restored by consuming food, thus eating is more crucial than ever. Characters that eat sufficiently will be rewarded with a well-fed bonus. However, players should avoid eating raw meat because food sickness is a risk.

Survival Mode also has no health regeneration. Food, potions, and restoration spells are the only ways to heal, so if you want to learn some of the greatest healing spells, you’ll need to level up your restoration stat. It’s well worth the effort.

Skyrim Survival Mode Guide: Choosing Character Race

The first selection gamers must make is the race their character will be. All races have racial passives in vanilla Skyrim, which provide them a modest benefit. Things take an intriguing turn in Survival Mode. Not only do the races retain their passive abilities from the vanilla edition, but they also now have drawbacks. Argonians, for example, retain their Disease resistance and Waterbreathing passives, but they may now consume raw food without fear of food poisoning, and they cool down 25% faster than other races.

Because various races have varied benefits and disadvantages, the player must carefully choose the race they wish to be. This might make the travel either a bit easier or a little more difficult.

Skyrim Survival Mode Guide: Do not freeze to death

Skyrim Survival Mode Guide
Skyrim (Image credit: Skyrim on Steam)

Survival Mode recognizes that the province of Skyrim is notorious for being harsh and cruel to those who aren’t prepared. In the coldest places, it will be quite simple to freeze to death. Winterhold is essentially a death sentence for unprepared gamers. The keep is completely engulfed in snow, and the sunlight is scarce.

Players must keep their characters warm in order to allow them to move about more freely and avoid freezing to death. This is also determined by the character’s race. In the cold, Nords, Orcs, and Khajiits will fare significantly better than the other races. However, if the player picks a Dark Elf, Breton, or High Elf mage build, they can utilize Flame Cloak to remain warm. Using a torch is another technique to keep warm. It will offer some heat, but not a lot.

Get as close to a fire as you can if you find yourself getting dangerously cold while playing Survival Mode. You can warm up your character by simply taking out a torch. Warm yourself up by standing near a fire or eating a hot stew. Ancestor’s Wrath, a racial ability of the Dark Elf, helps keep you warm since it surrounds you with fire. You just have to get creative in Skyrim to deal with the cold – as you can see, you have plenty of choices.

Skyrim Survival Mode Guide: Keep enough Arrow with your Bow

Hunting game is the greatest method to gain meat in Survival Mode, so make sure you have a bow and plenty of arrows before you leave Helgen. It shouldn’t be too difficult because most adversaries carry arrows at first, and you’ll most likely have a bow by the time you face the bear as you flee Helgen.

In Survival Mode, you must learn to be self-sufficient, therefore acquiring your own meat is necessary. The ultimate aim is to have one of the greatest bows in the game, and you’ll get there in the end.

Healing is important

Skyrim special edition
Skyrim (Image credit: Skyrim on Steam)

In Survival Mode, health recovery has been severely hampered. If the player simply stands about after combat, their health will no longer regenerate. To acquire a burst heal, players will need to use restoration spells or potions. Eating meals or drinking a regeneration potion is suggested for long-term recovery.

Players may also enhance their armor to assist them in recovering their health. Learning the enchantment and leveling up the enchantment skill line might take some time.

Vegetable Soup is very helpful

Most prepared dishes require a lot of salt, as you’ll immediately realize. While buying as many salt heaps from merchants as possible is a good idea, another alternative is to forego salt entirely and consume just vegetable soup.

Sure, it’s hardly the healthiest diet, but in Survival Mode, veggie soup is all you need. It requires no salt, recovers 300 health, and provides five minutes of passive health regeneration. Its components can even be found early on since there are lots of leeks, potatoes, and cabbage in Riverwood and the surrounding fields.

Skyrim Survival Mode Guide: Armor

Skyrim special edition
Skyrim (Image credit: Skyrim on Steam)

Because of its small weight, light armor will be your greatest buddy in Survival Mode. You’ll be overburdened in no time if you wear heavy gear, thus you’ll virtually have no option but to wear light armor.

Make sure you work your way up to the Unhindered perk, which reduces the weight of light armor to zero. It’s one of the most useful advantages in the entire game of Survival Mode. You shouldn’t be concerned about your armor rating. Light armor is a good choice because you can quickly reach the 567 armor limit thanks to several smithing benefits.

Make sure to get some fur armor if you’re worried about staying warm in Skyrim’s chilly and windswept region. The armor can’t be made, but it’s worn by bandits and Hold Guards, so you’ll acquire all four pieces in no time. Fur armor is ideal for keeping warm in Skyrim’s colder regions like the Pale, Winterhold, and Eastmarch. Just keep in mind that, while fur armor may be enhanced, smithing bonuses do not affect it. This indicates that without raising the smithing skill over 100, it can’t be upgraded any further than perfect.

Stay safe from diseases

In Skyrim, it’s usually not a huge issue if you become sick. You may cure sickness by praying at a Talos shrine or with a potion to cure disease. That hasn’t altered in Survival Mode, although infections are far more incapacitating this time.

Diseases in Survival can become severe and even disabling if left untreated, amplifying their harmful consequences. It’s critical to monitor your active effects regularly to ensure you aren’t suffering from a sickness. Disease resistance is 50% for Argonians and Wood Elves, making them ideal for Survival Mode.

For more Guides, Tips, and Tricks

Check out our Video Games Guide Section for more dedicated guide

Mutant Year Zero: Road to Eden – The Ultimate Guide for a Beginner

We have brought you a Mutant Year Zero guide so that you can reach the end of the game easily and quickly.

Mutant Year Zero has a few introduction stages before the adversaries get extremely difficult, but for some players, this may not be enough time to find out how to balance the game’s two dynamic methods. Even with suggestions enabled in settings, certain approaches may not be immediately apparent. Due to the lack of complete descriptions of strategies, some trial, and error may be required in the early stages of difficulty spikes.

The game combines real-time stealth with a challenging and robust combat system, making for a learning curve that is relatively steep. Mutant Year Zero offers something new to veterans of the turn-based genre and may take a little getting used to before the player hits their stride.

Mutant Year Zero Guide: Map

Time freezes in Mutant Year Zero while moving between locations on the map or when you’re on the map screen. There will be no chance contacts at that time. Use this and return to The Ark as frequently as possible. Weapons can be stocked or upgraded at the base. The maps in the game are not produced at random. Every place in Mutant Year Zero is the same. 

As a result, planning your actions throughout subsequent playthroughs should be easy. In theory, you can avoid some adversaries along the road, but you should never do so. This might lead to encounters with opponents that are of a higher level than you, making it tough to beat them. Try to clear every area you’ve been to. Remember the optional places highlighted with the skull and the suggested level on the map. Return to them after your crew has been leveled up.

More games like these: Read Second Extinction Beginner’s Guide – Top 10 Tips and Tricks, Loop Hero Beginner’s Guide – Tips and Tricks you need to know.

Kill enemies to recharge your abilities

Mutant Year Zero is distinguished by a novel method of replenishing the protagonists’ active powers (mutations). They do not recharge by waiting for a number of rounds after you use them (regardless of whether the action was successful or not). Instead, you must eliminate adversaries (usually two or three kills is enough). Remember this strategy and look for easy-to-kill targets. It’s worth noting that on regular difficulty, the cooldown timer is refreshed after each encounter.

Use stealth technique

Mutant Year Zero (Image credit: Steam)

Players go through the Mutant Year Zero level in real-time, and the game switches to turn-based combat when the adversary detects them or when the player decides to ambush. It’s critical to use the spotlights on the characters sparingly. When they are activated, the characters move quicker and can locate concealed riches much more quickly; but, the enemy’s radar is much larger. When the spotlights are turned out, the characters move in stealth, which is always preferable when opponents are around.

When the player detects a bunch of adversaries, they should plan their approach. Thinking about which side flank is best and which regions give excellent cover is critical to securing an easy victory. The opponent will not have a turn to strike until the heroes are unveiled; take advantage of this. 

Even after selecting ambush, there is still a buffer time before assaulting, therefore employing turn-based only abilities before an encounter can assist supply players with the edge they require. It’s also vital to note that even if an adversary appears to be alone, reinforcements are frequently nearby. So, even if it appears that you are winning the numbers game, the tide of the war may shift in an instant. Always use a subtle approach.

You can use only three characters in your team

At first, the only characters accessible are Dux the mutated duck, and Bormin the boar. After completing portions of the main tale, you will be able to find new party members. Because only three characters may participate in a conflict, it’s best to be properly prepared and ensure that all party members use a variety of weapons and skills. Fortunately, you may alter your party at any time between encounters. It’s especially handy when confronted with adversaries who may be readily dispatched by an inactive team member.

Mutant Year Zero Guide: Explore

Mutant Year Zero (Image credit: Steam)

Taking a break from battle, it’s important to remember that the only method to collect goods in Mutant Year Zero: Road to Eden is to explore. Because the levels aren’t very large, it never takes up too much time, but it’s always necessary. Players will come across rubbish that can be traded in for weapon upgrades as well as more valuable garbage that can be utilized to improve team skills. 

Furthermore, the world is packed with medkits and grenades, both of which you can never have too many of, as well as unique helmets and armor. These latter-mentioned rarer goods grant stat bonuses and benefits, so if feasible, have one for each member in your group.

Because the level cap is too high, Mutant Year Zero levels are sometimes locked. Players should be careful to retrace their ways and return to these regions after they’ve leveled up. There will undoubtedly be treasure and maybe rarer stuff. Using the map to expedite travel makes what may be a tiresome task short and enjoyable.

Mutant Year Zero Guide: Combat

Mutant Year Zero (Image credit: Steam)

It is advantageous to be as stealthy as possible for the duration of the conflict. Dux is armed with a silent crossbow from the start, allowing him to take down adversaries in range without alerting other enemies. Players can attack after a scavenger has traveled far away from his companion and is no longer on their radar. Picking out foes one at a time with quiet weapons makes battling the entire group much simpler. 

When compared to a 3v5, a 3v3 is a piece of cake. Selma also carries a quiet weapon (a handgun), so keep her and Dux apart for optimal stealth. Because all characters may change their armed weapons, it’s preferable to provide each of them with a quiet weapon if you wish to adopt this method.

Taking up the proper positions is another important aspect of turn-based fighting. When the character obtains half-cover or full-cover benefits, the game highlights this. Despite the fact that the adversary may fire through cover, it is vital to assume a stance behind a wall or rock to gain the hit and critical hit boost. Gaining the high ground in combat improves the characters’ chances of hitting, hence taking shelter on the high ground is typically the best bet.

Mutant Year Zero Guide: Use grenades

Though the major pillars of Mutant Year Zero’s turn-based strategy are weaponry and player skills, there is a third aspect that is equally essential to winning battles: grenades. Prior to a conflict, each character can equip two grenades, thus players should make good use of these slots. 

Change things up by using two different objects, such as a Molotov cocktail and a grenade, or a grenade and a smoke bomb. To maximize damage, throw these while adversaries are clustered together. Remember to have those smoke bombs on hand for when your heroes suffer burn damage; they cancel out the consequences.

For more Guides, Tips, and Tricks

Check out our Video Games Guide Section for more dedicated guide

A full Shenmue 3 Trophy Guide and how to unlock them

We brought you a Shenmue 3 Trophy Guide in detail so that you would not have to face trouble in unlocking them.

This trophy guide is divided into phases based on when you obtain the few story-related awards. You play normally until you achieve the next story-related trophy, then you pause and focus on certain subquests. What is a subquest? A subquest is when you go to a certain individual and accomplish a minor chore for them; they’re always extremely brief and simple to complete. 

Subquests are similar to missable trophies in that they may only be completed at specific moments in the game, and you must finish all subquests in one play to get the trophy Good Karma. Only a few subquests can be active at the same time. If you go too far in the plot, the previous subquests will be removed when the newer ones are unlocked.

Before starting, we recommend you to read Shenmue 3 Beginner’s Guide – Best tips and tricks.

Shenmue 3 Trophy Guide: Stage 1: Bailu Village 

You will be situated in Shenhua’s hometown throughout the first stage of the game, gathering clues to assist in the search for her father. As you advance through the tale here, more villages will become open to you, and the entire town will be explorable by the conclusion.

There are several trophies you must earn in this stage, which will be unlocked in the following order:

  • Babysitter
  • Verdant Bridge’s Secret
  • Fat Cat 
  • Gon

Good Karma is the one trophy you must keep an eye on during this level (and throughout the game). This is required for finishing all subquests in a single game. Each subquest has a limited time frame in which it may be completed, making it easy to overlook them, thus keeping this trophy open in a separate tab.

Shenmue 3 Trophy Guide
Shenmue 3 (Image credit: Steam)

If you have any free time during the plot, it’s a good idea to work on these extra trophies (you don’t have to get them at this stage):

  • Extraordinary Angler (once you have unlocked the recommended fishing spot, which will happen as part of Bronze Good Karma).
  • Chopping Master (to earn money after fishing rentals are closed for the day).
  • Wild Wild Plant Hoarder (for something to do after fishing rentals close, once you have achieved the above trophy).

You may also want to spend some time practicing at Martial Hall to ensure that you are sufficiently leveled to continue through the plot bouts when they come. The precise level required will depend on the difficulty level you choose and your skill with the fighting mechanics.

Shenmue 3 Trophy Guide: Stage 1: Stage 2: Bailu Village 

This section discusses the trophies you must get and the acts you must complete to obtain later trophies before leaving Bailu Village. There is no way to return here once you leave (except via New Game +), so don’t go until you obtain all the trophies listed below. When you are ready to depart, you will be notified and asked to confirm your decision. Before you do anything, be sure you’ve completed all the steps below. First, ensure that you have acquired the following two trophies:

  • Wild Wild Plant Hoarder
  • Rumored Rodman

As much as possible, you should complete all Bailu subquests for Good Karma. If you have missed any subquests prior to this point, you will have to try this trophy again on a second playthrough if you have missed any.

In the Panda Market, proceed to Hi-Tech Land Panda. You can find information on which machines you need a high score on, as well as how to achieve these high scores, by visiting High-Score Master. To play this arcade, make sure you have all the required scores on each machine.

Bailu is the best place to spend most of your time when fishing for Angler Extraordinaire. Therefore, it is recommended that you catch all the fish for Niaowu now and leave 100-200 for Niaowu.

Finally, make sure you have the following goods, which will be required later on to gain Technique Master:

  • Magnification Glass (Prize Exchange, Panda Market)
  • Radio Red (Kong Mei Goods, Panda Market)

To unlock Scenic Point and Bailu Village, head to the bell tower after completing the previous steps.

Shenmue 3 Trophy Guide: Stage 3: Niaowu

Shenmue 3 Trophy Guide
Shenmue 3 (Image credit: Steam)

This part will focus on the beginning of the tale in Niaowu, before you have access to the majority of the town. For the time being, it is advised that you concentrate on plot advancement because you will not have access to the finest means for gaining money and other resources. The trophies you need to obtain in this level, like in Stage 1, are all unmissable and will unlock in the following order:

  • Dan
  • Inseparable

Keep Good Karma open in a separate tab so you don’t miss any of the subquests. You should also make sure you don’t miss out on the chance to get a rare skill book in Niaowu at this level, as it will be necessary for Gold Technique Master. Working one forklift shift for Hong Dejing in the Ferry Terminal is required, followed by a meeting with him to get the skill book. On the same day as the second subquest in Niaowu, this will be accessible. For further information, see Gold Technique Master.

Shenmue 3 Trophy Guide: Stage 4: Niaowu

Shenmue 3 Trophy Guide
Shenmue 3 (Image credit: Steam)

Once you’ve unlocked the main regions of Niaowu, you’ll have access to a much faster way to make money, ensuring that you’ll have enough for all the prizes that require it. You’ll need to go a little farther in the tale past the two trophies above until you reach Senary Road.

The first stage is to collect a big sum of money using the approach explained in City Magnate. The trophy is merely 10,000 yuan, but you’ll need 50,000 to unlock King of Gamblers. Because this approach will necessitate a huge amount of purchases, you should first unlock Regular Shopper (if you haven’t previously), Super Shopper, and Shopkeeper.

After you’ve unlocked all of the above, it’s a good idea to start collecting skill books. While you won’t be able to get them all at this time, you will have enough money to get a lot of them. This will assist you in leveling up and making tale battles simpler.

Shenmue 3 Trophy Guide: Stage 5: Niaowu

Now that you’ve accumulated enough money and skill books to help you level up, it’s time to return to the tale in Niaowu. The trophies you need to achieve in this level, like the ones in Stages 1 and 3, are all unmissable and will unlock in the following order:

  • Yi
  • VIP
  • Jie

As with the previous levels, keep Good Karma open in a separate tab to avoid missing any subquests. If you have time during this stage, it is advised that you practice in Wu Shen Hall (turn right out of the Niaowu Hotel) or work on the prizes in Stage 6.

Shenmue 3 Trophy Guide: Stage 6: Niaowu

Trophy
Shenmue 3 (Image credit: Steam)

This section discusses the prizes you must obtain before proceeding to the Castle area. There is no way to return to the main town of Niaowu after you leave (except via New Game +), thus you should not leave until you have obtained all the trophies listed below. When you are ready to depart, you will be notified and asked to confirm your decision. Before you do anything, be sure you’ve completed all the steps below.

You will not be able to acquire the trophy at this level (unless you are playing New Game+ and have already gotten all capsule toys in the Castle region on a prior session). However, 29/30 capsule toy sets should be acquired at this point.

Those interested in obtaining DLC trophies will now have access to all the Story Quest DLC. It is advised that you either build a different save or take the time now to complete the Story Quest and Big Merry Cruise DLC trophies. Finally, make sure you’ve adequately leveled up your kung fu, and that you’ve loaded up on food and Snake Powers in preparation for the final confrontations.

It is important to note that after you confirm your readiness to go, you will be informed that the boat will be ready the next morning. As a result, you may want to leave a tiny bit of work to perform to cover the waiting period. If you want to do this, you must be careful to just allow enough time to finish what has to be done in the time available, since you will automatically move on the next morning.

Shenmue 3 Trophy Guide: Stage 7: Old Castle

This is the game’s last phase, and it’s quite simple and linear in advancement as you make your way through the Castle. There are several moments along the journey to the summit where you can no longer turn back. Keeping this in mind, you should complete the trophies in the following order:

  • Old Castle
  • Capsule Hero
  • Niaowu

After you’ve accomplished the above tasks, you should also get Shenmue Hero. If you find that you’ve missed any trophies, you’ll need to replay the tale on New Game+. This is because when you start New Game+, you have the option of starting from the beginning in Bailu or skipping right to Niaowu.

old castle
Shenmue 3 (Image credit: Steam)

Keep in mind

Good Karma is the most essential prize to watch out for in this game. This is for finishing all subquests and is very likely to be overlooked for three reasons. To begin, each subquest has a time restriction within which it may be performed, and it must be finished within that time frame. Second, unlike many other elements of the game, your progress on subquests does not transfer over to NG+. 

Third, you can fail subquests if you do not satisfy the necessary prerequisites or chat to the quest provider too frequently. For these reasons, it’s best to open this trophy in a separate tab and keep track of when the next subquest becomes available.

For more Guides, Tips, and Tricks

Check out our Video Games Guide Section for more dedicated guide

How to select a good Crosshair for Valorant?

You can be perplexed at times about how to choose a nice crosshair for Valorant. Let us help you with our guide.

First-person shooter veterans will tell you that tinkering with your settings is the first step to mastering a competitive shooter. While sensitivity is important when it comes to clicking heads, so is the crosshair you employ – and mixing it up might be the key to ascending the Valorant rankings.

A default dynamic crosshair is offered to all new Valorant gamers, which takes up a lot of retail space in the middle of the screen. While this may suffice for recreational gamers, it is insufficient for competitive play. Whether you choose a static or dynamic crosshair, making it smaller will result in a better overall aim.

What is the best crosshair for Valorant? Well, you’re about to learn more about it. Our guides will help you understand some of the most popular Valorant crosshairs used by some of the biggest Twitch streamers of all time.

How to set up Crosshair for Valorant?

In the settings, you’ll find a variety of options and sliders for customizing your Valorant crosshair. Each one has a unique function, which is described as follows:

Crosshair color

You can select from eight different colors. The color should be bright, vibrant, and stand out from the map’s design.

Center dot

This allows you to place a dot in the center of your crosshair. While not required, people who like larger crosshairs will appreciate having a center point for lining up headshots. If you activate it, you’ll be able to modify the opacity and thickness of the dot.

Outlines

The black contour of the outside borders of your Valorant crosshair is readily visible. If you don’t want your crosshair to stand out against similar-colored items, you may turn it off. By leaving this on, you will be able to alter their opacity and thickness, just like you do with the Center dot.

Teammates’ Crosshair

Do you want to go window shopping? This option allows you to see your teammates’ crosshairs during a match. If you like theirs, you may change it in the options.

Crosshair for valorant
Valorant Chamber (Image credit: Valorant)

Firing error with faded crosshair

If you enable this, the top half of your crosshair will fade if the spray of the automatic weapon you’re shooting is turned off. When you cease firing, this line will return. As a beginner player, this option might serve as a visual reminder to keep an eye on the recoil pattern of weaponry.

Outer and Inner lines

You’ll find a lot of sliders for both inner and outer lines farther down the crosshair settings menu. You may customize the opacity, length, thickness, and distance of the crosshair here. You may also configure each to respond dynamically to both movement and firing.

When choosing crosshair for Valorant, keep these things in mind:

If you want to have the greatest crosshair in Valorant, one of the most important factors to consider is the color. This is significant since a decent hue makes it easier to see your crosshair. The majority of professional players favor green, white, or cyan. Given that your crosshair will always be surrounded by a map item or a player, the aim is to pick a color that generates the appropriate contrast. Most of the time, that color will be green. However, you are free to experiment and find what works best for you on each map.

Another factor to consider is your agent’s ability. Some of them generate effects that take up a lot of areas, encircle agents, and have a certain hue. For example, if you frequently play Viper, you might want to avoid selecting a green crosshair in favor of a white one. Otherwise, the agent’s powers may impede your ability to see where you intend to target.

If you want Character guides, then read Valorant Chamber Guide — Tips and Tricks, Valorant Killjoy Guide – Best setups for every map.

Top gamers use these crosshairs for Valorant

Creating the perfect Valorant crosshair might take some time, so if you’re stuck for ideas, looking at what the greatest Valorant players are doing can be a good approach to tweak your gameplay. They are not suggested if you are a newbie with minimal FPS expertise.

Shroud

  • Crosshair Color: Cyan
  • Center Dot: off
  • Movement Error: off
  • Firing Error: off
  • Outer Line Opacity: 0
  • Outer Line Length: 0
  • Outer Line Thickness: 0
  • Outer Line Offset: 0
  • Inner Line Opacity: 1
  • Inner Line Length: 7
  • Inner Line Thickness: 3
  • Inner Line Offset: 4
  • Outlines: on
  • Outline Opacity: 1
  • Outline Thickness: 1

TenZ

  • Crosshair Color: Cyan
  • Center Dot: off
  • Movement Error: off
  • Firing Error: off
  • Outer Line Opacity: 0
  • Outer Line Length: 0
  • Outer Line Thickness: 0
  • Outer Line Offset: 0
  • Inner Line Opacity: 1
  • Inner Line Length: 4
  • Inner Line Thickness: 2
  • Inner Line Offset: 2
  • Outlines: off
  • Outline Opacity: N/A
  • Outline Thickness: N/A

ShahZaM

  • Crosshair Color: green
  • Center Dot: off
  • Movement Error: off
  • Firing Error: off
  • Outer Line Opacity: 0
  • Outer Line Length: 0
  • Outer Line Thickness: 0
  • Outer Line Offset: 0
  • Inner Line Opacity: 0.754
  • Inner Line Length: 5
  • Inner Line Thickness: 2
  • Inner Line Offset: 4
  • Outlines: on
  • Outline Opacity: 1
  • Outline Thickness: 1

These players are also on our list of Top 5 Valorant Streamers of 2021.

For more Guides, Tips, and Tricks

Check out our Video Games Guide Section for more dedicated guide

Shae Loya Shrine Guide – Zelda: Breath of the Wild

We have brought you a Shae Loya Shrine Guide, so you can complete the puzzle quickly without any problem.

Link may explore a large open environment in Breath of the Wild. The majority of Hyrule Kingdom’s landscape may be reached by walking, paragliding, or climbing. While there are still obstacles in the game (such as weather impacts, hostile locations, or strong foes), many of them may be handled by utilizing Food, effective weapons and armor, or discovering other paths. The environment also has a complex physics system that allows for innovative interactions.

With the exception of completing the initial duties on the Great Plateau, Breath of the Wild does not impose a certain order in which missions or dungeons must be completed, unlike many prior Zelda games. Although the game encourages exploration in order to solve Ancient Shrines (and so acquire more Hearts or Stamina). 

Locate important and strong equipment, and face the game’s own version of dungeons, the Divine Beasts. It is possible to challenge Ganon straight after leaving the initial region. In addition, many of the game’s puzzles may be solved in a variety of ways, with Link being rewarded for innovative solutions.

The Legend of Zelda: Breath of the Wild features a massive open world to explore, with several areas of interest strewn throughout. Shrines are one of the most famous sorts of locales in Breath Of The Wild since each one has the challenge to complete and offers great rewards. There are shrines in every location of Hyrule, so even if you aren’t a completionist, you may find a number of them along your quest.

Shae Loya Shrine Guide

The Legend of Zelda: Breath of the Wild features 120 shrines in its base game. There are many of them that are nearly impossible to defeat. There are several shrines in Breath of the Wild, including Shae Loya Shrine located in the western part of the map.

While there are dozens of shrines to explore in the game, the Shae Loya shrine is one of the easier ones to complete. How to assemble the puzzle within the shrine and where to find it is revealed in this Shae Loya Shrine guide.

You might like Loop Hero Beginner’s Guide – Tips and Tricks you need to know, Remnant From the Ashes Guide – Everything you need to know

Shae Loya Shrine Guide: Location

The Shae Loya shrine is located in Hyrule’s western region, southwest of the Ridgeland Tower location. You may glide from the Ridgeland Tower to the shrine, and there are numerous nearby mountains that you can jump off of for more gliding height.

Because there are no adversaries within the Shae Loya shrine, you don’t need to carry any weapons. Arrows, on the other hand, are necessary for completing the riddle within the shrine. Armor, high health, and strong stamina are not necessary to complete the Shae Loya shrine.

Shae Loya Shrine Guide: Getting the first chest

Shae Loya Shrine Guide
Zelda: Breath of the Wild (Image credit: Nintendo)

As soon as the player enters the Shrine, the first treasure chest in Shae Loya is positioned high up on the wall behind them. Look up along that wall until you reach a wooden shelf with the first of the treasure boxes. Regular, ice, or BotW’s shock arrows may be fired at each of the ropes keeping the shelf in place, or a fire or bomb arrow can be used to set fire to the shelf. A metal treasure box will fall to the ground if the ropes are severed or the shelf is burned. A Falcon Bow may be found within.

Head back

As soon as you return to the starting platform, look to the right of Link’s starting point. During the game, a ball should be thrown repeatedly into the air. It is necessary to get the ball to fall from the platform into the bowl below to solve the shrine. 

If you want to do this, attempt to freeze the ball using Link’s Stasis rune, then use an arrow to push it off its normal trajectory. Additionally, well-placed bomb arrows may help dislodge the ball. However, the Breath of the Wild Rune power Stasis appears to be the quickest way to knock the ball into the bowl.

The platform underneath Link will begin to glow after the ball has dropped into the bowl. It’s now turned on, and it’ll fling Link into the air at random intervals. Link from Breath of the Wild should first move toward the ball, as there is a treasure box beyond the bouncing ball. A Topaz may be found within this chest, which can be used to improve Link’s armor or sold to harvest Rupees in Breath of the Wild.

Shae Loya Shrine Guide
Zelda: Breath of the Wild (Image credit: Nintendo)

Shae Loya Shrine Guide: Final Puzzle

The ball will then lead players to the platform where the ball was unlocked. However, instead of looking at the ball this time, players will want to look at the wall to the left of the ball, facing the same way they did when they initially entered the shrine. There will be a crystal in a hidden nook in the wall once the platform launches them into the air.

Turn the orange crystal into blue by shooting an arrow while in bullet time, and the door to the shrine’s owner will open. Breath of the Wild players might think this is a difficult trick shot, but with the slowed bullet time when they pull out their bow, it is quite easy.

For more Guides, Tips, and Tricks

Check out our Video Games Guide Section for more dedicated guide

Second Extinction Beginner’s Guide – Top 10 Tips and Tricks

If you are having problems with playing Second Extinction, do not worry. We are here with a Second Extinction Beginner’s Guide with 10 tips and tricks to help you. 

Second Extinction is all about using your hybrid firearms to kill ravenous dinosaurs. The continuous waves of savage dinosaurs that keep coming at you until you’re cut to bits may make it seem challenging at times. They don’t allow you much room to unwind. However, we’ve included some pointers in our beginner’s guide that will help you get a better hold of the game.

Players must ensure that they have enough time set aside to fully enjoy the game. Missions will reward players generously depending on the number of accolades received, the number of dinosaurs slain, and the number of tasks fulfilled.

To advance, one must put in the necessary man-hours to harvest resources and update equipment. In terms of in-game missions, you can finish them independently. However, it has the potential to make the game very tough and irritating. To kill these animals, you should always bring some pals or join a random lobby. It simply adds to the enjoyment of the game.

Second Extinction Beginner’s Guide: Before picking up new items, finish the ones you have

This is a tough habit to break since, after clearing an area of foes, everyone’s initial instinct is to scan the area for the hard-won riches. Consider it a hint for maximizing item utilization efficiency. Spending an hour on the map with supplies running low may be frightening, especially since a dino encounter might go tragically wrong at any moment. It’s better to be ready for anything at all times and to appropriately cycle things and reserves. After all, this is a survival game.

Read ARK Survival Evolved Beginner’s Guide – Tips and Tricks, Remnant From the Ashes Guide – Everything you need to know if you like survival games.

Second Extinction Beginner’s Guide: Prioritize The Watchers

In Second Extinction, there is a gigantic raptor-like dinosaur known as “The Watcher.” When you come across one, kill him as soon as possible because if you don’t, he’ll send a swarm of his lesser companions to combat you. For that, go after the Spitters to take down the ranged danger that may cause massive damage over time. When you come across one, the character who senses it initially will say something along the lines of “a Watcher is nearby.” 

The dinosaurs aren’t just brainless pixels in need of a good assault rifle spray, as players will shortly discover. There are several that are designed to prolong fights and cause annoyance through poke damage and crowd management.

Second Extinction Beginner’s Guide: Customize weapons

Second Extinction Beginner's Guide
Second Extinction (Image credit: Steam)

Weapons in this game may be customized in a variety of ways, from SMGs to mini-guns. To spice up the dino massacre, players can ultimately add elemental attacks like poison, lightning, and fire.

It’s crucial to know, though, that certain dinosaurs have been modified with the same materials and will be particularly resistant to weapons of the same sort when assaulted. On solo runs, it’s best to avoid equipping numerous weapons with the same element.

Second Extinction Beginner’s Guide: Character selection

In Second Extinction, you may pick from four different characters. We recommend choosing the character that best fits your playstyle.

Second Extinction Beginner's Guide
Second Extinction (Image credit: Steam)

Rosy

Rosy is the best choice if you want to play the strong attack style. Her default weapon is a Minigun, which spins like a hot knife through butter and slices through hordes of dinosaurs. She can also give you a defensive boost and help you regenerate your health. She can also set up electric fences to hold adversaries at bay while using her minigun to annihilate them.

Ortega

If you prefer a slash-and-dash style of play, Ortega is the way to go. She possesses a peculiar dash ability that allows her to leap in the direction of motion, something that other characters do not have. She also has a unique perk called “Combat High,” which may be activated once the damage meter has been depleted. It puts her in a heightened battle condition and increases her rate of fire once triggered. As long as she’s inflicting damage to an adversary, she can stay in this state.

Jürgen 

Jürgen is your man if you enjoy stealth or long-range warfare. His primary weapon is the Scout Rifle, which has a large range and can do a lot of damage to foes. His “low profile ability” allows him to perform sneak strikes on his opponents, and while crouching or still for a short period, he becomes incredibly difficult to detect. He has the ability to use Satchel Charges, which do massive damage and are excellent for crowd control. In addition, his unique ability “Mask Scent” may cause adversaries to get disoriented while he moves away.

Amir

Last but not least, Amir is a really solid all-rounder if you want the best of all the other characters. The Grenade Launcher is his primary weapon, and it’s ideal for swiftly shifting the tide in your favor. His skills aren’t the flashiest, but they’re the most effective.

He may efficiently serve the squad by providing equipment boxes to fellow teammates so that they can heal when required. His orbital observation also illuminates any nearby foes, avoiding ambushes. He may also use a precise attack to thin out a throng or take down a large foe.

Second Extinction Beginner's Guide
Second Extinction (Image credit: Steam)

Second Extinction Beginner’s Guide: You need to master hero

The many characters differ not just in appearance, but also terms of weaponry, talents, and attributes. It’s OK to test them all out at first, but players are best off selecting one and sticking with it. Ortega is a good choice for those who are mechanically inclined since her kit focuses heavily on churning out DPS from her primary weapon. Every character in this team-based game has incredible potential, and it’s up to the player to bring it out.

Second Extinction Beginner’s Guide: Use Amir In Co-Op

Amir is the support class, and while he isn’t the prettiest character in the game, the devs took care to give him some fantastic powers to make playing Amir a pleasant experience.

He can scout locations for opponents, giving the team an advantage in more difficult terrain, and he can call down a “Hammer of Dawn” orbital strike that converts dinosaurs into quick barbeque. But be aware of his lack of survivability, since he possesses the game’s lowest health pool.

Second Extinction Beginner’s Guide: Complete objectives

There are a variety of extra missions and side activities that can help you earn more money and obtain more riches. Keep an eye out for drones and shoot them down if you come across one. After that, you may grab its black box, which will indicate items of importance on the map, such as supply containers and camps, that you can destroy. These small extracurricular activities add up to a lot of treasure, Research Points, and an excellent star rating after the quest.

Second Extinction Beginner’s Guide: Focus on weak points

Second Extinction Beginner's Guide
Second Extinction (Image credit: Steam)

In Second Extinction, nearly all the large dinosaurs have a weak area where they are particularly vulnerable. These areas can be targeted for efficient damage and quick deaths. The blue hue highlights the weak points.

These aren’t simple targets, but they’re worth pursuing when the opportunity arises. The smaller ones can be quickly killed by pumping lead into them or blowing them up with a grenade launcher, but the larger ones can endure a lot more damage, thus targeting the weak points is only reasonable and important.

Second Extinction Beginner’s Guide: Loadouts

Before being dropped onto the area, players, and their squads can fill a limited number of equipment loadout slots, which is an important aspect of the survival experience. Coordination of these item builds with the team may make or break a mission’s success.

The most critical piece of advice here is to be adaptable and not fall in love with a particular loadout at the expense of the team’s greatest loadout. Because supplies will undoubtedly become an issue in higher-level zones, make sure your team has ammunition and item drops somewhere in their arsenal.

Second Extinction Beginner’s Guide: Dogging the attacks

Second Extinction Beginner's Guide
Second Extinction (Image credit: Steam)

Like every other game with enormous adversaries wandering about, the dinosaurs in this game have precise attack patterns and moves built into them. In this game, it may be tempting to get up close and personal and mow down the enemies, but one should protect their health pool.

Kite your opponents away from you and fire from a safe distance. Make full use of the seven-direction leap dodge mechanism, and concentrate on the dinosaur’s striking patterns. It’s also possible to jump dodge while healing, which is something that players will have to perform in the heat of combat.

For more Guides, Tips, and Tricks

Check out our Video Games Guide Section for more dedicated guide

How to Beat Professor Evil in Bloons TD Battles – Guide

In Bloons TD Battles, are you unsure how to beat Professor Evil? Don’t be concerned! With our guide, we are here to assist you. Follow the instructions to defeat Professor Evil in the game.

Professor Evil is an artificial intelligence that appears twice a week (used to be weekly) in Bloons TD Battles Mobile and Bloons TD Battles Steam since version 6.8. Random towers, abilities, and maps are utilized every week. You will receive a set amount of medallions if you defeat him (which is currently impossible) or survive until a particular round number. 

On Fridays and Tuesdays, the amount of medallions is alternated between 500 and 1000. Professor Evil’s challenges are a wonderful place to start for novice players looking to earn medallions. The challenge lasts three days on average, and it takes three days for it to materialize. He has 100,000 health, but if you survive a specific number of rounds, you can defeat him. His top hat, monocle, cape, and curly mustache make him look like a monkey.

Professor Evil is a ruthless individual. He would frequently send massive surges. He can transmit bloons before you can and has endless money since he is an A.I. He used to have 150 lives, like a regular player, but his enormous number of lives makes it very hard to kill him. To defend his pushes, it’s critical to gain a lot of eco early on. It’s a frequent misunderstanding that he sends bloons during specific rounds. He delivers rounds at specific times, so procrastinating won’t help him. It’s important to remember to employ your abilities when they’re needed.

Bloons TD Battles

In 2012, Ninja KIWI released the popular game Bloons TD Battles. Currently, the game is rated 9/10 on Steam. A popular free-to-play mobile game for iPhone and Android smartphones, Bloons TD Battles is a strategy-based multiplayer game. You can also access that game through steam, web browser, windows phone, and fire ops! Monkey and Bloons have a real-time battle in this game!

How to Beat Professor Evil?

Defeating Professor Evil in BTD Battles has proven to be one of the game’s most difficult trials thus far. It’s not impossible, even if it’s challenging. In BTD Battles, here’s how to beat Professor Evil.

  • Begin the game by placing a ninja in the bottom center and sending red, blue, and green ninjas to construct an eco.
  • To clear the quick surge of bloons, use mortars at the first two bends.
  • Before round 12, make sure you have a flash bomb or a signal flare. This may be used in conjunction with a bloonjitsu.
  • Start your environmental boost power when the camo lead rush is gone.
  • To disrupt supply lines, use helis with razor rotors and ninjas.
  • When Professor Evil delivers the final push, build up your eco and employ the sabotage power.
  • Then sell everything to raise enough money to hire an Apache to complete the challenge.
Professor Evil (Image credit: Steam)

How to Beat Professor Evil: You can go with this Loadout

In order to survive a series of strong bloon attacks, such as blues, yellows, and ceramics, you’ll have to protect your tower. Use this loadout to beat Professor Evil:

Dartling Gun

This is the tower that has the most rapid ascension. It can be used in multiples because even the standard Dartling Gun can easily get you through round 5 and doesn’t need to be upgraded.

Dart Monkey

Because you can move the bloons themselves much closer to them, this is a great follow-up to the Dartling Gun.

Juggernaut

This is heavy artillery, which would be very beneficial in the final phases of the challenge. Once you’ve put up these three types of towers for your Professor Evil challenge, you’ll move on to the step-by-step strategy.

How to Beat Professor Evil: Surprise attack

Bloons TD Battles (Image credit: Steam)

This challenge is deceiving since the first half of each round is quite simple, but the second half is when most players fail due to a sudden rush of Bloon assaults soon after Round 17.

To win this challenge, complete the following tasks:

  • Beginning with Round 1, place one Dartling Gun on the map’s bottom edge.
  • Because the number of Bloons doubles in Round 8, the second Dartling Gun is placed exactly next to the first at the start of Round 8.
  • At the beginning of Round 12, place 5-6 Dart Monkeys along the Bloons path.

Thanks for reading, we hope you complete the challenge successfully. Please let us know if you have any questions or suggestions down below, and subscribe to get the latest guides faster!

For more Guides, Tips, and Tricks

Check out our Video Games Guide Section for more dedicated guide

How to beat Shiva in SMT V – A Complete Guide

We’ll show you how to beat Shiva in SMT V in this guide. Shiva is a super boss in Shin Megami Tensei V who is battled as part of the A Universe in Peril subquest.

Powerful bosses await players in Shin Megami Tensei V to challenge their strategy and strength. But none are as tough as Shiva, regardless of how difficult they can be. Shiva is SMTV’s ultimate boss, unspeakably powerful, outclassing even the game’s normal endgame bosses. To properly take on, you’ll need a party with equal power and strategic insight. Let’s talk about how to beat Shiva in SMT V.

How to beat Shiva: Plan

In SMTV, there is no such thing as a “correct party,” however, the demons that you bring along with you need to be capable of a few things. It’s crucial that no member of your party has any weaknesses, and you should be able to block, reflect, and drain multiple elements. 

The fact that Shiva already hits hard enough isn’t going to help you, and giving him bonus damage and additional Press Turn Icons won’t help you either. Boss Shiva also has one weakness, Ice, so prepare a few heavy-hitting spell casters to face off against the god.

Shiva is a Level 96 monster, and your squad should be at least Level 95-99 to take on Shiva. Shiva may also summon adversaries to aid him, with a total of five distinct opponents to choose from. These demons will have a variety of vulnerabilities, but Ice, Force, and Dark are the most frequent. Including these three aspects will be beneficial. There’s also an adversary that is solely vulnerable to Fire, so carrying a Fire move with you can help you target that vulnerability. Bringing the appropriate Shards/Gems will be beneficial as well.

Shiva can utilize Fire and Electric moves that affect the whole party. It is strongly encouraged to have demons that absorb/repel Fire and/or Electric because denying the other team of all of its actions is worth even the slightest chance of it happening. Light Absorbing/Repelling is also encouraged, but not required.

Shiva can call allies

 Shin Megami Tensei V
Shin Megami Tensei V

Shiva summons 2-3 demons in this order when there are no other enemies on the field using Tandava and then Call Allies:

  • Kali
  • Ganesha
  • Parvati
  • Dakini
  • Ananta

Every demon has its own unique moveset, which focuses not only on supporting Shiva, but also inflicting status ailments or debuffing your team.

The key to winning this war is reducing the number of times Tandava is administered and minimizing the effects of Tandava. You can’t stop Shiva from summoning Kali and Ganesha the first time he uses Tandava. You can, however, leave one opponent alive to prevent Shiva from summoning more monsters and utilizing Tandava for the time being.

When it comes to choosing which adversary to keep on the battlefield, Parvati is the simplest to deal with, while Ananta is the most difficult. Mahamaon is Parvati’s attacking move, which may be canceled, absorbed, or repelled with the correct resistances to work in your favor. Parvati’s support abilities don’t interfere with your team’s offense (i.e., she can’t debuff your team).

Keep any adversary you select on the battlefield for as long as you can. Hit Shiva with Ice assaults and use the extra turns to enhance or debuff your squad. Even if your squad is relatively healthy, don’t be scared to heal; Shiva is always one move away from causing major damage to your team.

How to beat Shiva: Buffs and debuffs

How to beat Shiva
Shin Megami Tensei V

Buffs and debuffs are strongly advised. The spells you should carry are Debilitate and Luster Candy; the other buffs/debuffs won’t be as beneficial. Shiva can lower your defense to its bare minimum, and Dekunda is your sole reliable means of eliminating it.

Bring your most powerful healing spells and equipment to this fight. Nothing should be off the table; Chakra Pots, Bead Chains, Balms of Life, and Somas should all be utilized because this is one battle they were made for. Anything other than Mediarahan and Samarecarm is probably not a good idea. Amrita Sodas, Showers, and Me Patra are also advised.

Bring no Dampeners; enticing though they may be, you can’t risk it against Shiva. It is significantly more trustworthy to rely on your inherent resistances. If you have the Glory, using Miracles to enhance your elemental proficiencies can save you a lot of MPs throughout the battle, which will come in handy. Sutras may be used to raise the proficiency of your demons similarly.

How to beat Shiva: Take advantage of the Passive Null Phys skill

Ongyo-essence Ki’s may be harvested for the Null Phys passive skill. Because Shiva frequently employs Physical assaults, equipping demons with Null Phys is a fantastic technique to reduce the enemy’s turn time. You can also utilize Sandalphon’s essence on Nahobino or other demons to inherit his affinity for naturally nullifying Physical damage.

How to beat Shiva: Ice and Force Skills

Use Ice-type abilities as much as you can on Shiva, but as soon as you see an Ananta appear, use Force-type talents to wipe it out before it can cure Shiva. Make sure you load up on Ice and Force Gems at Gustave’s shop ahead of time so you can strike these two weak places when they’re needed.

How to beat Shiva: Make use of Mediarahan and Energy Drain

It’s best to have many demons who are familiar with Mediarahan in your party or stock. If a healer doesn’t have enough MP to cast Mediarahan, make sure they know Energy Drain so they can replenish it when the opportunity arises. If not, you can replace your healer with another demon who has healing skills. Farming the essence of Nebiros near the Shinobazu Pond Leyline yields Energy Drain.

You can use these members in your team:

  • Zeus
  • Vishnu
  • Metatron
  • Beelzebub
  • Nahobino

How to beat Shiva: One at a time

How to beat Shiva
Shin Megami Tensei V

You can regulate Tandava’s usage and only have to worry about it on rare occasions if you use the “one-demon-at-a-time” technique. You can reduce Shiva’s danger by removing the other team’s remaining actions if you have Fire/Electric immunity/absorbing/repelling resistances. Megidolaon and the Physical Moves remain a menace, but they can be cured.

It’s never a bad idea to restore MP. Chakra Pots and Somas should only be utilized when absolutely required; running out of MP can put victorious combat to a halt. If you’re unlucky and develop a status condition, treat it as soon as possible using Amrita Soda/Shower.

Also, don’t be overconfident. Shiva has the ability to turn a battle around even if he is only one hit away from defeat. Play it cautiously and prioritize your team’s health before offense. Overextending oneself might quickly lead to a predicament from which you will be unable to recover.

Take your time and stick to your game plan. Never cease exploiting opponent flaws, boosting and debuffing them, and then healing and replenishing MP as required. You can win the battle and eventually bring Shiva down if you can fight Shiva with one other adversary on the field.

For more Guides, Tips, and Tricks

Check out our Video Games Guide Section for more dedicated guide