Salt and Sanctuary Guide – Best Tips for Beginners

We have brought you a Salt and Sanctuary Guide so that you can improve your gameplay. Follow our best tips if you are a beginner.

If you’re coming from the Souls games, many of the concepts will sound familiar. If you’re new to the ‘soul-like’ genre, things may seem a little confusing, or at least, you may not realize how much there is to this game. The depth of this information is impressive, and while you could learn through painstaking experience, you’ll be better off if you know what you’re dealing with when you’re dealing with it. We have put together this Salt and Sanctuary guide to help you understand the game better.

You may also like to read: Skyrim Survival Mode Guide for Skyrim Anniversary Edition, Dark Souls 3 – A guide for this nightmarish hellscape, Vampyr Guide – Best Tips and Tricks for beginners.

Be careful when choosing your build

In contrast to Dark Souls, where you just need to pass the first weapon requirements to use a weapon, Salt and Sanctuary need you to earn a specific skill from the skill tree to use various weapon classes. This applies to spells, prayers, and armor sets as well. 

So think about what type of build you want to go for on your first run and write down the locations of crucial skill points on the tree before you start leveling. This will save you from having to spend a long time grinding to achieve a weapon skill you forgot to include in your character’s build.

Salt and Sanctuary Guide: Farm Salt

Salt and Sanctuary Guide
Salt and Sanctuary (Image credit: Steam)

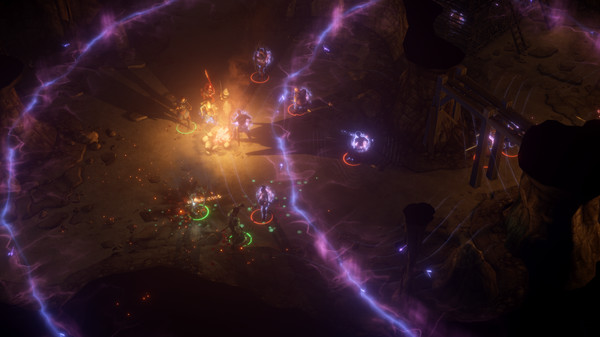
Do you always seem to hit a wall with a boss or just get killed haphazardly a bit too often? You don’t have to be afraid to fight some of the same enemies over and over again to gain salt. In Salt and Sanctuary, farming for salt early on can give you an advantage over your rivals and help you through some of the game’s opening areas.

Furthermore, once you’ve amassed a substantial amount of salt, don’t be afraid to return to your sanctuary to cash it in. Many times, I’ve discovered that instead of returning to a sanctuary, I’ll continue progressing further into an area, and before you know it, I’m dead and have lost everything I had on me. If you believe you are about to die and believe it would be better to return to your sanctuary to level up, don’t be afraid to do so.

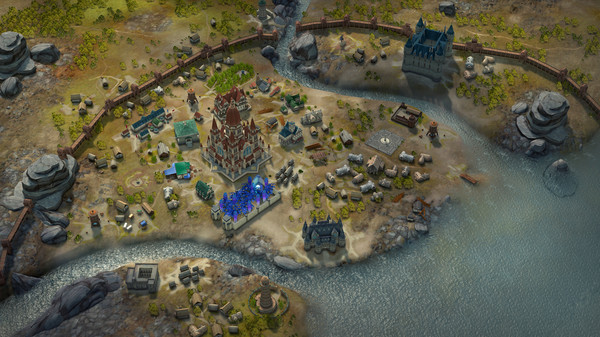
Salt and Sanctuary Guide: Idols

Salt and Sanctuary Guide
Salt and Sanctuary (Image credit: Steam)

You only have four spaces for NPCs when you find a Sanctuary or convert one to your creed, so choose wisely when constructing a new base. You don’t need to utilize the Stone Sellsword idol if you’re playing alone, as it’s only required for co-op play. 

We recommend always using a Stone Guide at every Sanctuary feasible as a utility and to construct a helpful warp network. This not only allows you to teleport between Sanctuaries with a Guide, but it also improves item drops for the zone in which you are currently located. You only need one Stone Leader at a Sanctuary because her tasks don’t seem to alter until you finish the ones she has active.

Blacksmiths and merchants are usually useful for upgrading new weapons and selling overflow products, so keep them near an agricultural area. By roughly five hours into the game, you’ll have every type of NPC at a Sanctuary, so as long as you have Guides at each Sanctuary, you’ll be covered.

Salt and Sanctuary Guide: Calling Horn

A ‘calling horn’ is a tool that allows you to travel quickly from any location to any Sanctuary with a Guide. You can utilize the calling horn, go to the Sanctuary with a Guide, and then use the guide to go wherever you want because a Guide allows you to fast travel to any Sanctuary. Even better, calling horns are only 100 gold each, so you can stock up on them every time you use this technique of fast travel.

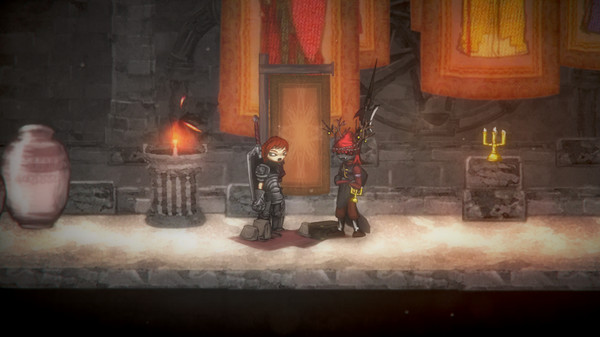
Salt and Sanctuary Guide: NPC and Weapon

Salt and Sanctuary Guide
Salt and Sanctuary (Image credit: Steam)

Each NPC serves a certain purpose. Some are self-evident, such as the Merchant or Blacksmith. These let you buy various consumables or enhance your equipment, as the case may be. Others, such as the Sellsword and the Alchemist, have a less obvious function. The Sellsword allows you to play local co-op because the second player controls the NPC directly. You can ‘transmute’ your weapons with the Alchemist. This isn’t an upgrade like at the Blacksmith, but rather a complete transformation of one weapon into another.

When you convert a weapon, the new one takes the place of the old one, therefore you lose the old one. As a result, don’t convert a weapon you like to use or that you’ve enhanced. A weapon of any type can be transmuted into another weapon of the same type. So, if you like a certain spear and want a better one, transmute a spear you don’t use into the new one.

Salt and Sanctuary Guide: Class

Game on steam
Salt and Sanctuary (Image credit: Steam)

Once you’ve progressed past the first few hours of a Souls-like game, classes usually don’t matter all that much. With the amount of experience you’ll gain in Salt and Sanctuary, you’ll be able to swiftly switch your playstyle if you don’t like one of the classes. That said, I always recommend that newcomers to Souls-like games avoid choosing anything too bizarre.

We recommend deciding on a class early on, such as Paladin, Knight, or Cleric, and staying somewhat in line with the skills that each of those classes specializes in as you level up. While deciding on a class like Chef may appear to be fun, new players will most likely run into trouble very fast. Keep things basic at first, and don’t pick a class that will cause you too much trouble until you’ve figured out how the battle mechanics work.

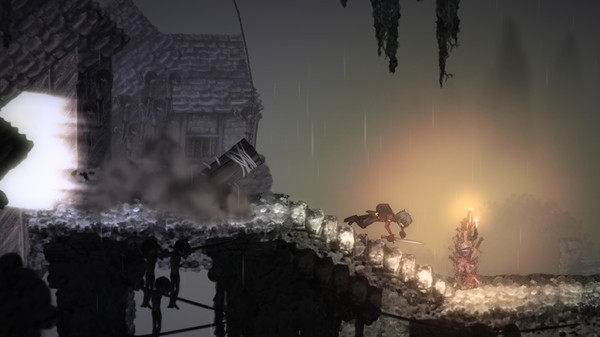
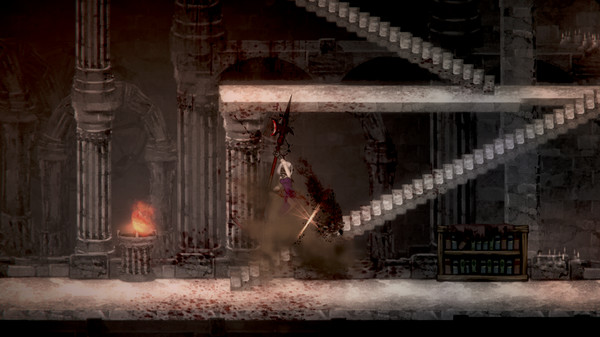
Dodge roll, and Parry play important role

important factors
Salt and Sanctuary (Image credit: Steam)

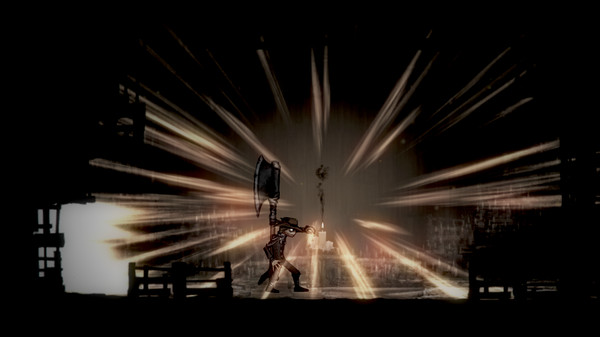
A good defense is the best offense, and this is especially true in Salt and Sanctuary. While it’s tempting to just hack and slash your way through every adversary you come across, being patient and understanding when to strike can undoubtedly help you out in the long run. You have the choice of using a dodge roll or a parry maneuver in Salt and Sanctuary. Learning how to roll away from opposing strikes should be one of your first goals in the early game, as it will serve you well throughout the game.

Parrying is a little harder to perfect, but once you do, you’ll be able to take down adversaries with ease. After landing a parry, you can unleash a devastating assault. You’ll be better off if you can learn to use these maneuvers as soon as possible.

For more Guides, Tips, and Tricks

Check out our Video Games Guide Section for more dedicated guide

Moving Out Guide – Things to know before you start playing

We have brought you a Moving Out Guide so that you can start the game with ease. Follow it correctly so that you don’t make any mistakes.

Moving houses is apparently so enjoyable that Team 17 decided we all needed a digital version of the experience and created the Moving Out game. The Moving Out sees one to four players assume the role of a newly certified Furniture Arrangement & Relocation Technician. In this over-the-top physics-based moving simulator, the busy town of Packmore is in desperate need of someone with your skills to help move items from one location to another.

The idea behind Moving Out is to get things done as quickly and efficiently as possible without worrying about minor details like mayhem and destruction. As it turns out, this can be a little more difficult than it appears. So, if you’re thinking of playing for the first time, you might need some pointers. We’ve put together a Moving Out Guide for you.

You might also like these guides: Dark Souls 3 – A guide for this nightmarish hellscape, Skyrim Survival Mode Guide for Skyrim Anniversary Edition, Beginner’s Guide for Control – Best Tips and Tricks

Moving Out Guide: Co-op is fun and very helpful

Moving Out
Moving Out (Image credit: Steam)

Moving Out can be played solo, but it can also be played with up to four friends in couch co-op mode. You’ll face challenges in a variety of settings, including farms, suburban homes, offices, and even haunted houses. To achieve your objectives, you will need to grab and move objects of varying sizes and fragility. 

Each level’s unique challenges range from narrow corridors and busy roads to water hazards and narrow corridors. Don’t overlook the sheep and chickens! Collect TVs, beds, lampshades, and cookers. There’s no doubt about it: this isn’t your typical house-moving experience.

Give priority to two-handed furniture

Moving Out Guide
Moving Out (Image credit: Steam)

It’s worth mentioning that this isn’t an issue in single-player because solitary movers can raise two-handed furniture. Moving the heavier furniture should be your top priority if you’re playing co-op.

Make sure to concentrate on larger things, such as beds and sofas. Those goods will take up the majority of your moving truck’s capacity, so make sure you don’t have to squeeze in between all the smaller stuff. Even if something is loaded onto a truck, it is not guaranteed to remain there. It’s entirely feasible that something will spill out of the physics system in Moving Out. You should stack as elegantly as possible.

Moving Out Guide: Time limit

Moving Out Guide
Moving Out (Image credit: Steam)

Each level will need you to acquire specific things from the map while also having a time constraint to meet. You’ll be judged on how quickly you can gather all the things, with Gold, Silver, and Bronze rewards are given out depending on how quickly you complete the task. You’ll be able to pick up and carry a few items on your own, but larger items will take two or more persons to handle and transport to the delivery vehicle. 

Furthermore, you can also modify the difficulty to present yourself with different levels of challenge. The more difficult the stage, the more goods you’ll have to move in shorter amounts of time to earn those Gold medals.

Shortcuts are important

There is no penalty for destroying objects in Moving Out. There are several references to it in the game, as well as jokes about it. Yes, players are urged to seek out as many shortcuts as they can. If you have the ability to break through windows, go for it! Do it if you can smash down a flimsy wall! You can utilize the new passageway to break into the house or to hurl tiny goods at your companion.

Just keep in mind that taking a shortcut isn’t always an option, so plan as much as possible. Have a strategy in place for getting those mattresses and sofas to the truck as quickly as feasible. If you and your companion have perfected the art of tossing, you may try flinging the bulkier beds and sofas to more advantageous locations. However, your timing must be perfect, so make sure you practice together.

Teamwork and getting items out of the way

Teamwork
Moving Out (Image credit: Steam)

This is where having one or more partners is quite beneficial. You’ll eventually come across stages with greater obstacles, such as swimming pools. You’ll even be moving objects in the middle of busy traffic later in the game. As a result, teamwork will be critical.

You’ll want to relocate the smaller items by safely tossing them to one another after you’ve gotten the bigger items out of the way. Throw boxes or smaller pieces of furniture across perilous gaps, such as those aforementioned swimming pools, using your throwing function. Make a hot potato game out of it. Someone should be stationed near the moving truck, ready to receive the smaller things. This person should be your greatest organizer, capable of clearing space in the vehicle and stacking smaller items on top of the bigger items.

Moving Out Guide: Stacking items

Stack the items
Moving Out (Image credit: Steam)

It is possible to stack some objects on top of one another. However, you won’t be putting a bed on top of something fragile or on top of a smaller box. That isn’t how moving works. You do, however, have a tossing function, which you should use after loading in the larger things.

Make sure to practice throwing items before moving on to the next step. Change your preferences as often as you like in the options menu. Changing your throw’s toggle allows you to choose how you want it to behave. Success in Moving Out depends on getting the most out of your throws.

Use your tossing feature to fling a smaller item on top of the bed, sofa, or table. Smaller boxes and equipment, such as your toaster or computer, will fit neatly on top of the larger items. Additionally, this will save space in the moving truck. That extra space will come in handy, especially for yard goods like that annoying barbecue or other single-person items that can’t be thrown away. To decide what can be thrown, the eyeball test should suffice. Simply avoid throwing anything fragile, as indicated by the red icon. Throwing a fragile item will cause it to shatter and respawn in its original location, wasting valuable time.

For more Guides, Tips, and Tricks

Check out our Video Games Guide Section for more dedicated guide

The Chi of Yore World Quest – Genshin Impact Guide

Genshin Impacts should not worry anymore. We have brought you The Chi of Yore Quest guide so that you can complete it with ease.

The Chi of Yore is a long mission that Genshin Impact players must complete in Liyue. It’s known for having a difficult boss encounter at the end of the quest, which features three waves of relatively powerful monsters. Not only that, but participants must also prevent the destruction of a Qingce Cache. Players must first obtain some quest items before they can do anything else.

Yore’s Chi was once known as Guyun’s Chi. In Genshin Impact 1.6, its name was altered again. Its original name had nothing to do with the Guyun Stone Forest, but it did have something to do with the Chinese phrase for old stories. There is no need to replay the original version because nothing has changed.

The Chi of Yore Quest: Location

Speak with Yan’er at the area marked on the map below (a fast travel point is also nearby). Yan’er does not have a blue mission icon over her head like the other quest givers. Simply go through all of her dialogues to begin the quest. This can be done at any time, including during Act 1.

You might also need, Prey Beginner’s Guide – Best Tips and Tricks, Beginner’s Guide for Control – Best Tips and Tricks, Vampyr Guide – Best Tips and Tricks for beginners.

The Chi of Yore Quest: First Fragment 

The Chi of Yore Quest
Ruins (Image credit: Genshin Impact)

Go north-east of the quest giver to the ruins. After finding and interacting with three stone statues, a chest with the first fragment spawns in the middle of the area. There’s also a large flying enemy in the middle called “Ruin Hunter” and a light beam on the floor called “Incomplete Writing,” but those are optional and you can go right to the statues. They’re all at the search area’s edge, where some orange glowing crystals can be spotted. You’ll simply find it if you look for the orange crystals. The three statues are listed below:

  • First Statue – Located south of the search area.
  • Second Statue – A Level 18 Geo Slime guards this statue in the northeast section of the search area.
  • Third Statue – Located northwest of the search zone, protected by Level 18 Hilichurls.

A chest will appear in the search area after all three statues have been activated. To progress the mission, open it. If you haven’t yet defeated the large Ruin Hunte foe, now is the time to do so, for he’ll be in your way if you don’t. Ranged attacks are simpler to hit him with. A ranged character with a level of 18+ is strongly advised. The next quest objective can be found by opening the chest. 

Then you must travel to Qingce Village and speak with some of the locals. They’ll eventually speak with Granny Ruoxin. For The Chi of Yore, they must now locate two more Collected Fragments.

The Chi of Yore Quest: Second Fragment 

The Chi of Yore Quest

Because there is no waypoint on the in-game map, searching for the fragments near the Geo Statues is one of the most difficult sections of the mission. The fast travel point in the west of Qingce Village is where you need to go. A hill with a shrine place sits just south of the quick travel point. Interacting with the Incomplete Writing (glowing beam) shows the order in which the statues must be activated. By interacting with the five statues, you can access the chest containing Fragment #2. See the statue order below:

  • North
  • South-East
  • North-West
  • North-East
  • South-West

The Chi of Yore Quest: Third Fragment 

Genshin Impact
Third fragment map (Image credit: Genshin Impact)

‘Go to the highest point in Qingce Village,’ says the third section. The location is on the eastern side of Qingce Village, on the top of a mountain. Before you start climbing, make sure you have enough stamina and don’t do any fast jumps (just keep climbing slowly, it consumes less stamina and gets you further). At the very top are eight statues, four of which must be activated and the remaining four must not be touched. 

  • The first statue has a modest northeasterly inclination.
  • A big amber crystal is near the second figure, which is pointing southeast.
  • The third statue is the one immediately to the right of the previous one.
  • The final statue stands alongside Decode the fragment another enormous amber crystal, pointing west.

If done correctly, players should now be 3/3 with collected fragments after collecting the loot from the precious chest. To decipher the fragments, speak with Granny Ruoxin. An entry can be found to the right of the waterfall. Enter it and proceed down the trail. Use all three pieces on the gate when instructed, and the player will reach the end of the Chi of Yore quest.

You must defeat the wave of enemies

Genshin Impact enemies
Enemy waves (Image credit: Genshin Impact)

You must now fight five opponents in three waves. It’s a difficult battle. Everyone on your team should be at least level 20. 1-2 characters should have freeze elemental skills (e.g., Kaeya, who you should have by this stage in the story) and 1 ranged attacker who can hit the enemy’s eyes with precision zoomed shots (Amber, with her charged burning arrows, works well).

You can’t let the opponents destroy the altar that launched the challenge in addition to defeating them (also called Qingce Cache). The percentage of HP will appear in the left corner of the screen. If it reaches 0%, the battle will end and you will have to restart all waves from the beginning! If your entire squad dies, you will be transferred out of the cave and will have to kill all opponents all over again.

Wave 1

One Ruin Guard of Level 18. To keep him frozen, for the most part, lure him to the water and employ freeze elemental abilities.

Wave 2

Ruin Guards (three) (Level 18). You are fighting three Ruin Guards at the same time in this game. To divert their attention away from the Qingce Cache, rush up to each of them and strike a few times. Then, to keep them frozen in place for the majority of the fight, attract them all to the center of the pool and employ freeze elemental skills to keep them there. Lisa’s Electro strikes, on the other hand, deal good area damage because the sparks leap between all three foes if they’re close enough together.

Wave 3

One Ruin Hunter of Level 25. You’re down to one opponent now, but it’s a formidable one. He’s Level 25, and with a few moves, he can instantaneously kill a Level 20 character. You’ll want to entice him to the pool’s edge, away from the Cache. Then try to keep him as frozen as possible! He can’t attack while frozen, so you can keep doing damage while he can’t hurt the Cache. If he floats in the air, use a charged arrow from Amber to shoot at his eye – a single eyeshot will bring him crashing down.

Then freeze him again and continue until he’s dazed and just lying on the ground. If he launches missiles at you from the air, circle the arena, and hide behind a wall where the homed missiles can’t hit you (they can kill a level 20 character in one hit with 3000+ damage). Before the explosives he tosses on the floor land, a red circle will appear on the floor, so keep an eye on it and get out of there before they impact.

After the enemies are destroyed, a cave area becomes available. It houses a lavish treasure chest. Open it to receive the next objective as well as some 3- and 4-star loot: Martial Artist’s Feather Accessory, Traveler’s Handy Sword, Hero’s Wit, and Mystic Enhancement Ore.

For more Guides, Tips, and Tricks

Check out our Video Games Guide Section for more dedicated guide

Who is Hasan Piker? — Net worth, Age, Height, and more

We are going to give you all the information about Hasan Piker. You will get to know about his personal and professional life as well.

The year Hasan Dogan Piker was born is July 25, 1991. HasanAbi is another name for him. He is both a Twitch streamer and a political commentator. Furthermore, he has also been a broadcast journalist and producer for The Young Turks, as well as a columnist for HuffPost. His Twitch streams cover the news, he plays video games, and he discusses politics from a socialist perspective. HasanAbi is currently the most-viewed and most-subscribed streamer.

Early life and Education of Hasan Piker

Having grown up in Istanbul, Turkey, Hasan Piker was born to Turkish parents in New Brunswick, New Jersey. When he was a student in Turkish public schools, he was bullied because he was not physically fit and had an unfriendly attitude. After returning to the United States, Piker enrolled at the University of Miami before transferring to Rutgers University and earning a double major in political science and communication studies in 2013.

Hasan Piker Facts

Full NameHasan Doğan Piker
Birth PlaceNew Brunswick
Father’s NameNA
Mother’s NameNA
Zodiac SignLeo
Net WorthNA
Age30
Date of BirthJuly 25, 1991
Height 6 ft 3 in
WeightNA
NationalityAmerican
AchievementstheScore esports Awards 2020, 10th Streamy Awards
Girlfriend/WifeNA
ChildrenNA

Professional Life and Career 

Hasan Piker
Hasan Piker (Image credit: Wikipedia)

Piker interned at The Young Turks (TYT) in 2013 as part of his senior year of college. His uncle, Cenk Uygur, co-founded the progressive news show and network. Upon completing his degree, Piker was hired by the business and advertising department of the network.

The Breakdown was created and hosted by Piker in 2016. The series is a TYT Network video series that airs on Facebook and offers left-leaning political analysis aimed at Bernie Sanders’s millennial supporters. The show was nominated for the 10th Shorty Awards in the Best Web Series category. Prior to joining HuffPost in 2018, Piker also contributed political content to the publication.

Also, read Who is Samara Redway? — Net worth, Age, Height, and more

Twitch

In a Twitch stream in January 2020, Piker announced his departure from The Young Turks. He is now an active Twitch political streamer on the left. He chose Twitch because he felt shut out of other platforms where conservatives had a large say. Hasan has also been featured in mainstream political media outlets and podcasts.

In addition to his work as a political streamer, Hasan also does gameplay and commentary on various video games on his Twitch channel. On his YouTube channel, he also posts some of the highlights from his Twitch streams. The journalist has also written for Buzzfeed and TMZ.

Hasan Piker Net Worth

Hasan Piker’s salary and net worth are unknown, so it is hard to estimate his wealth. In spite of this, it is certain he makes a good living as an online commentator and Twitch streamer.

For more stories

Check out the Entertainment section for more stories.

Assassin’s Creed Valhalla – How to Beat the Walloper

We have brought you a guide on how to beat the Walloper. Read till the end as we have also given some fighting tips.

Aside from the main story, the world of Assassin’s Creed Valhalla is full of little events and trinkets that will keep anyone occupied for hours. “World Events,” which are essentially side quests, are included in these non-essential activities. Players will be assigned a variety of activities, ranging from ordinary fetch missions to the weird.

Some of the objectives in Assassin’s Creed Valhalla involve small mini-bosses, such as the Legendary Animals, which can be difficult to defeat no matter how strong Eivor is. Then there’s The Walloper, a man with such a powerful punch that just one touch will put even the most ferocious fighter to sleep. Those are his grandchildren’s words. The goal of this guide is to teach you how to beat the Walloper.

How to beat the Walloper: Location

The Walloper is located in Grantebridgescire’s southern section, about northwest of the town of Walden. On the map below, his exact location is circled in red. Players will see two children arguing in front of a well as they approach a small group of huts. The kids would brag about their grandfather and his massive punch, claiming that no one can stand up to him. When you speak with them, a cutscene will play. They’ll summon their granddad after talking about him for a bit.

The Walloper will attempt to persuade Eivor not to engage in a brawl. After a while, a prompt will appear, giving players the option of fighting The Walloper or walking away. The only way to finish the world event and gain the prizes is to fight him.

You might also love games like Control, Vampyr, Skyrim, and Dark Souls 3

How to beat the Walloper

Assassin’s Creed Valhalla (Image credit: Epic games)

The Walloper, despite the reputation, isn’t quite as difficult as the aforementioned Legendary Animals, and his attack isn’t nearly as devastating. The only problematic portion of the fight comes at the start when The Walloper will try to punch Eivor just after the cutscene stops.

His punch is soft and sluggish, making it easier to avoid. Parrying one of his attacks, which will stun him, is the best way to defeat him. While The Walloper is stunned, Eivor can use a stunning strike to completely deplete the walloper’s health bar, effectively ending the fight. When a player defeats him, the Walloper expresses gratitude for being liberated from his curse and hands over the key to a closed door.

There’s some regular loot inside the room behind the closed door, as well as a “Bag of Adorned Teeth” that may be sold to a merchant for a tidy sum of silver. Completing the World Event will also grant players experience.

Other attacking tips in Assassin’s Creed Valhalla

When a major boss appears, conservative players tend to store their ability points. This further exaggerates the game’s already lengthy runtime. In order to save time, use at least one ability point in each fight scenario. The game liberally rewards you with ability points, generally at least one for every fight. Furthermore, some mushrooms help to replenish this reserve. Keeping up with this resource is a complete waste of time.

A parry is an act of redirecting an opponent’s hit, however, it isn’t always effective. They can deflect mild melee assaults (which turn an opponent’s weapon gold), but they can’t stop a strong melee attack (which makes their weapon red). The usage of this talent can shock an opponent, and many weapons have perks that provide you with extra abilities if you parry successfully. You could try to get out of a fight by avoiding it, but your stamina bar will only allow you so much time.

Playing defense is a war of attrition that Eivor can’t win because of the way stamina works. Parrying, blocking, and avoiding are all important aspects of the game, but they must be done swiftly. When an enemy isn’t assaulting, wildly swiping away on offense brings even the toughest foes down quickly. After a while, a talent will slow down the dodge, allowing Eivor to do massive damage at certain times.

How to beat the Walloper
Assassin’s Creed Valhalla (Image credit: Epicgames)

Weak points

All opponents have weak places that are highlighted in yellow, and here is where you should concentrate your efforts. If you hit certain points on their bodies, they will fall faster and may be stunned, which is one of the most enjoyable aspects of the game.

This is easier to perform with a bow and arrow, but it’s also something to keep in mind when fighting the game’s numerous bosses. If you follow this advice, it will be much easier to take down these opponents.

Last but not least, if you want to win a fight, start with a hard strike, especially if your opponent is unaware of your existence. It will deal more damage, and you can then stun them with a succession of mild attacks and parries. As you beat down your opponents one by one, they will fall faster than ever before.

For more Guides, Tips, and Tricks

Check out our Video Games Guide Section for more dedicated guide

Valorant Cypher Guide: Best Setups for Every Map

We have brought you a Valorant Cypher Guide with all the best setups you can use on maps. Read it carefully and follow the instructions.

Cypher is one of the most adaptable and distinctive characters in the VALORANT universe. Cypher is one of the most powerful agents in the game when it comes to pure reconnaissance, thanks to his ability to gather unrivaled amounts of information through his many traps and tripwires, as well as his famous SpyCam. We’ll go over the three mandatory setups that every Cypher player should know in order to acquire a basic sense of how the character should operate—especially on defense—in this guide. Cypher’s skillset will flourish when your squad has more time to set up a defense plan since he identifies as a Sentinel.

You may also like, Valorant Killjoy Guide – Best setups for every map, Top 5 Valorant Streamers of 2021, Valorant Chamber Guide — Tips and Tricks.

Valorant Cypher Guide: Setup for Split B Side

Valorant Cypher Guide
Valorant Cypher (Image credit Valorant wiki fandom)

Split’s B-site is likely the most basic, yet rewarding, configuration for Cypher players, as you can see each entry point into the site in detail. You can not only put your cages around the garage to slow the opposition team’s push and give your squad more time for a retake. But you can also set up your camera in B-heaven to ensure as much visibility as possible.

By positioning your camera in B-heaven, you’ll be able to determine whether the opposing team rushes towards B-site or A-ropes from their mid-push – just in case your fellow defenders lose a gunfight in the middle. You’ll also want to have wires put up near the rope under B-heaven, as well as near the green box on the site itself if you see them on your cam heading to your site.

With this configuration, you’ll provide your team enough knowledge and time to rotate from A-site to B in a decent manner while also delaying the opposition team to a certain extent. You can also position your wires near the back-site in case the attacking team decides to hold down the site from a different angle when your squad rotates from B-heaven. Because B-site on Split is rather small, attacking players will have limited space to dodge Cypher’s gadgets and traps.

Valorant Cypher Guide: Setup for Haven

Haven will undoubtedly be the most difficult map in VALORANT due to the fact that the attacking team has three alternatives. As a Cypher (or a Sentinel in general), you should ideally be playing A-site or C-site, as these are the easiest sites for the other side to retake in the event of a numerical disadvantage.

In comparison to A-site, winning a gunfight in C is a lot easier. If you’re under pressure to surrender the site to the other team, a retake situation may be forced upon you. You’ll want to position your camera so that you can see all of the site’s access points. Because there are only two very clear entry points for A-site on Haven, Cypher players will normally position their camera near heaven in the corner, giving them a view of both short and long potential entries.

Valorant Cypher (Image credit Valorant wiki fandom)

It is best to place your wires at strategic points of the site, especially in areas where players plant spikes. The best and safest places are directly in front of the main building and the exit from short. Traps should be situated on the site, behind that same main structure, so they cannot be seen from beneath. In the event that the attacking team occupies such a predictable spot, your cage can force them from the field when your team retakes. Additionally, you should have another cage blocking short’s view of the field.

In most cases, your team will reclaim the defenders’ spawn, and having short blocked off will provide cover as your squad makes their way onto the site for a possible gunfight. Essentially, you’ll have completed your task on this site if you’ve covered the critical sightlines that will allow your crew to return to A in a safe and timely manner.

Valorant Cypher Guide: Setup for Bind

Bind is one of the more straightforward maps in VALORANT, particularly its A-site, because attacking players only have two basic routes for getting to the site. While they can reach mid from two different angles, a pushing team’s only (non-rotating) access points onto the site are out of the toilets and straight out of mid. As a Cypher player, you can simply lock down both of these entries with a simple camera setup and a few basic traps and tripwire placements.

To begin, set your camera beneath the pipe close to the boxes at the restroom exit. By positioning the camera here, you’ll be able to see the attackers’ feet as they exit the restrooms, as well as anyone entering the area from the middle. You’ll usually have another player watching midfield, so you won’t need to keep a close eye on that aspect, but having a view of both entry points is obviously advantageous to your cause.

Valorant Cypher guide
Valorant Cypher (Image credit Valorant wiki fandom)

Furthermore, when it comes to cages and wires, you’ll want to set up your traps so that they not only slow the pushing team’s spike plant but also give your team ample time to retake the area. Wires should be placed on the usual plant places to allow your team a few extra seconds, and cages should be placed in between natural boxes and buildings on the site so that when your team returns to the site, they have some cover between them and the attacking team.

It’s best to avoid planting cages right on top of sightlines and entrances like “U-haul” or “heaven,” as you don’t want your teammates to have to return to the location blindly through your own smoke.

Valorant Cypher Guide: Setup for Ascent

Valorant Cypher
Valorant Cypher (Image credit Valorant wiki fandom)

Ascension is an excellent map for initiators and sentinels. The large space provides plenty of opportunities to make complicated moves and deceive opponents. This Cypher wall bang lineup is a great illustration of one of Cypher’s numerous rewarding tactics.

To draw adversaries into the trap, you’ll need Tripwires and a Spycam. Stand near the control button and place the first wire along the edge of the boat. Set up the second wire so that it forms a perpendicular angle with the first. Once this is completed, opponents will be unable to enter critical locations at point B. After that, mount the Spycam on top of the B entrance to gain a clear view of adversaries in the vicinity of the control shelter.

As soon as adversaries step inside point B, they will be caught in the trap by the two wires. If they manage to avoid the first trap, the second, which leads to the catwalk, will undoubtedly knock them out. Turn on your camera and acquire intel on vulnerable enemies whenever you get the cue. Make use of the knowledge to spam the neighboring paper-thin walls.

Through the walls, enemies will take a lot of damage, making it easier for your allies to finish off wounded opponents. Even if you miss your wall bangs, your friends near the defender’s spawn and in the mid-market may be able to take advantage of the setup by picking off a concussed enemy. 

When you have enough creds to spend on utility and a heavy-duty weapon like Odin or Vandal, this combo works best in full-buy rounds. The best guns for causing damage with wall bangs are these two. When it comes to deterring attackers from attempting to hit the A site, this setup will be extremely effective.

Valorant Cypher Guide: Setup for Fracture

Valorant Cypher Guide
Fracture map (Image credit Valorant wiki fandom)

Fracture favors the attacking side entirely. Defenders, on the other hand, can use strategic play to reverse the tide in their favor. While taking possession of a site, players can choose Cypher, which can help them hold it using tripwires and cages, as well as block off opponent rotations. Apart from that, Cypher’s Spycam can be used to find out where the opponent is.

Cypher gamers may acquire information from the entire A-site, as well as A-rope, A-Link, and A-Main areas, using this spycam set-up at A-drop Area. Over the Planting Area on A-site is another spycam placement. In the A-rope, A-Link, and A-Main areas, Cypher users can gather information using their surveillance tools.

Cypher players can set their cameras to the default location on the B-Site, which will allow them to see the entire site as well as the B-Canteen, B-Tower, and B-Generator sections. Another ideal Spycam site to capture information about the entire B Site is over the B Generator area. This Spycam Location allows players to obtain information from the B-Arcade, B-Link, and B-Main locations.

Valorant Cypher Guide: Setup for Breeze

Breeze map (Image credit Valorant wiki fandom)

Breeze is one of the most powerful maps in the game. It’s tough to take care of all the places at once when a site has two-way doors, a one-way mid-chute, and various entrance paths.

When defending, a good Spycam position is on the middle tank next to the Mid Door, as it allows the players to gain a comprehensive view of the A site. Knowing where the adversary is will be extremely useful while retaking the spot. Cypher players can position their Spycam in the Double Green box on the Double Green box. This will allow the players to see the attacking team’s aggressive pushes from both the A-main and mid positions.

The finest spycam site in mid is on Mid-Stack. Players will be able to gather information about the enemy’s location in mid-pillar and mid-top sections as a result of this. There are very few Spycam positions on B site. Cypher players, on the other hand, can place their cameras over the ladder on the B-Back. They will be able to see the entire site as well as the mid entrance as a result of this. Another fantastic position to deploy Spycam to collect data from the entire B Site is on the B Wall area. The B-Wall section is where players can set their Spycam.

For more Guides, Tips, and Tricks

Check out our Video Games Guide Section for more dedicated guide

Mages of Mystralia Guide: Best Tips and Tricks

We have brought you a Mages of Mystralia Guide with all the best tips and tricks. Follow the guide so that you can improve your gaming experience.

Borealys Games’ Mages of Mystralia is an RPG dungeon crawler. The game features a lovely cartoony graphic style that offers an appropriate feeling of playfulness while juxtaposing the potential carnage inflicted by the player’s armory of spells. The game’s magic system is based on crafting principles, so all spells are customizable. The major meat of the game is experimentation. Aside from that, the game features a basic plot and isn’t especially difficult, making it ideal for someone trying to unwind.

Players assume the character of Zia, a young girl who finds she was born with magical abilities, in Mages of Mystralia. That would be fantastic if magic hadn’t been outlawed in her realm for so long. Zia’s skills lead her on an incredible journey as she tries to master her abilities and discover her ultimate potential. She encounters other exiled mages along the road, and she discovers ancient runes that can be combined to create a variety of new spells.

Mages of Mystralia Guide: Haven

Talk to the enchanter to get the task of finding 4 magical lily bulbs hidden around the world (and he gives you the first one for free). These bulbs are your mana potions (they fill mana from 0% to 100% for the cost of one bulb), and can be used when your mana pool runs out just before it starts to regenerate on its own.

The number of flowers in the garden indicates the number of bulbs you can carry at once. For now, you can only carry one, and you can resupply bulbs at a cost of 20 soul beads each time you use one in combat. Teleporters (there are three total: Haven, the Rise, and the Highlands) are located on the far left side and cost 10 soul beads peruse after unlocking at least two of them.

Two fountains, one for health and the other for mana, can be found on the south side of Haven. These fountains accept four purple soulbeads for each upgrade, and there are five upgrades in total for both health and mana. You will need a total of 40 purple beads to max out health and mana. In addition, the first seal puzzle may be found here, and completing it opens the path to Mystral Woods (to the right from crossroad).

Mages of Mystralia Guide: Mystral Wood

Mages of Mystralia Guide
Mages of Mystralia (Image credit: Steam)

Upon entering, you see a gang of goblins harassing a traveler, so show people you are a friendly mage by helping her. In the path, you may see unlit fireplaces. Lighting them up with a fire spell will reward you with 5 soul beads.

Next is a quick trip to Greyleaf where there is not much to do besides telling the father of the girl you saved what has happened. The road to Ratchel is now clear of broken wagons, and all of her wares can be found in mystral woods. However, the fourth bag is available only because it is in an unreachable section.

To lower the bridge, press the switch quickly and clear the goblins out. The road is blocked by a breakable boulder (marked with a fire sign), but you lack the rune needed to make spells erupt on impact. Fortunately, there are explosive barrels nearby, and all you have to do is strike them to set them off.

Mages of Mystralia Guide: Runes

Mages of Mystralia Guide
Mages of Mystralia (Image credit: Steam)

Zia can find runes while traveling across the land of Mystralia. Runes may or may not be available to a specific Focus, but they may be combined and utilized to create new Spells. The Detonate Rune, for example, can only be utilized by Immedi spells, but the Random Rune may be used by any spell. A variety of “links” exist in Runes that allow them to communicate with the basic spell or other Runes. In general, the more Runes you have, the more Mana you’ll spend.

Types of Runes

Behavior Runes have a big impact on how a spell works. In rare situations, Behavior Runes might take the place of a spell’s default function. Actus spells, for example, are immobile by default, but the Move Rune forces them to fly in a certain direction. The backbone of spells is Behavior Runes, which provide the majority of the ties that other Runes can bind to.

Augment Runes have an impact on other Runes as well as the main spell. Augment runes, unlike other runes, do not raise a spell’s Mana cost. Under the correct circumstances, the Inverse and Random Runes can even lower Mana costs. When specific criteria are satisfied, Trigger Runes cast an Immediate, Actus, or Creo spell. The Rune utilized determines the trigger conditions for a spell, such as Impact, which requires the spell to impact an adversary or surface. While spells can be activated by themselves, they still cost mana.

Trigger Runes can be used to trigger spells up to four times every manual spell cast. This trigger restriction applies to spells that are triggered by other spells as well. The combined spell stops triggering after the fourth trigger. This trigger limit is ignored by Periodic and Proximity.

Mages of Mystralia Guide: Spells

Mages of Mystralia Guide
Mages of Mystralia (Image credit: Steam)

A simple spell can take on a variety of shapes and essences. The Orb, which forms a ball of fire, water, wind, or earth, is the simplest shape to comprehend. But that’s all; you generate the orb and it floats in there ineffectively for a few seconds without any changes.

It becomes a traditional fireball (or waterball, or whateverball) when the motion modifier is applied; it goes ahead in a straight line until it collides with a wall or an adversary. To make it curve, even more, we may add the left or right modifier to the move instruction. This might be employed in warfare to hit an adversary hiding behind cover, or in puzzles to hit a target past a tricky wall.

Depending on whether Runes are connected directly or indirectly, spells might have drastically different effects. An Igni Actus spell with the Move and Right Runes, for example, can launch a straight-moving fireball starting to Zia’s right, or a fireball that bends to the right in front of Zia. The distinction is whether the Right Rune is related to Actus (the former) or Move (the latter) (the latter).

For more Guides, Tips, and Tricks

Check out our Video Games Guide Section for more dedicated guide

Pathfinder Kingmaker Guide – Best Tips and Tricks for Beginners

We have brought you a Pathfinder kingmaker Guide with all the best tips and tricks. This guide will help you to survive in the game for a longer period.

To begin, you should be aware that Pathfinder Kingmaker is based on the Pathfinder Pen and Paper rules. The rules are incredibly complicated, which may turn off some players right once. Pathfinder might be difficult for beginning players owing to its significant emphasis on team-building and city-building. Character creation is the first step in the game, followed by dungeons and inventory management.

After the tutorial and the simple first level, there are very few instructions in Pathfinder Kingmaker. Players must cope with a powerful RPG in addition to party management, city development, NPC recruiting, and other chores. This Pathfinder Kingmaker guide gives various tips and tactics to help flesh out certain less-stated features inside the game, allowing you to go further in the game.

Pathfinder Kingmaker Guide: Attack and Defense

Melee attacks utilize Strength for Attack Rolls, but ranged assaults, including spells other than melee Touch Spells, use Dexterity. Finesse is a feat that allows you to utilize Dexterity instead of STR for Attack Rolls. Finesse is typically used to Dual Wielding characters.

The Weapon or Spell you’re employing determines how much damage you take. 1d8, 2d6, and so on are examples of such numbers. 1d8 denotes a single eight-sided die to be rolled (possible outcome 1-8). Rolling two six-sided dice is known as 2d6 (possible outcome 2-12). If relevant, Strength provides an Attribute Modifier boost. Except for Thrown Weapons and Composite Bows, no Ranged Weapons can benefit from Strength bonuses. After then, the enemy’s Damage Reduction stat reduces the overall damage dealt.

If you are a Dark Souls fan, then read Dark Souls 3 – A guide for this nightmarish hellscape

Pathfinder Kingmaker Guide
Pathfinder Kingmaker (Image credit: Steam)

Diplomacy is Crucial

Diplomacy tests are mentioned several times in talks, but the mechanics of diplomacy are never explained. On a player’s character sheet, there is no direct diplomacy skill. Diplomacy is regulated by persuasive skill, which explains why. Because the main character will be getting a lot of diplomacy tests when the rest of the party isn’t with them, it’s critical to invest some skill points in them.

Diplomacy will be crucial in managing the kingdom’s political administration both inside and beyond the country. It also gives for some excellent dialogue options throughout the game. On their voyage, players should surely consider keeping a reasonable level of persuasion.

Pathfinder Kingmaker Guide: Kingdom management

Kingdom
Pathfinder Kingmaker (Image credit: Steam)

Being a leader isn’t simple, and players will have to negotiate both international and home politics throughout the game. The kingdom map is used to administrate the kingdom. The map may be found on the table in the throne room or on the overworld map that connects the places. Because the mission giver requests an audience, several kingdom actions need the player to be in their throne room. 

Some of these activities can be performed by delegating responsibility to one of your leaders. The more essential objectives, on the other hand, will need the player to solve the situation on their own, whether by diplomacy or direct action. Players will be able to access their construction options from within the kingdom map. To achieve success, you must construct structures and purchase additional territories. Keep a watch out for instability inside your kingdom; if the settlement falls into disarray, the game is ended.

Pathfinder Kingmaker Guide: Combat

Pathfinder Kingmaker Guide
Pathfinder Kingmaker (Image credit: Steam)

Combat may be harsh at times, and if your team isn’t properly set up, some confrontations might be too difficult to handle. That’s why the Difficulty Option is always available to tweak these parameters to make the experience more enjoyable. Reloading encounters is an important part of the learning process, so expect to do it a lot. Sometimes that’s the only way to figure out what you’re up against.

For good reason, the Spider Swarm adversary is a popular obstacle for inexperienced players at the start of the game. Weapon Damage has no effect on the Spider Swarm. It is vulnerable to Fire abilities and Alchemist Fire, both of which are difficult to get by the time you encounter this foe. In this instance, deferring the meeting until you have the necessary tools to cope with it is the best option.

Combat Log is very helpful

Check the Combat Log periodically to see how high your opponents’ AC and DR (Damage Reduction) are, especially when fighting with difficult adversaries. This will help you decide who to prioritize and whether or not it’s worth it to try the encounter right now.

Preparing for warfare and recognizing your priorities go a long way toward surviving a conflict. Scouting ahead with a stealthy character and then sending in your Tank first when the fighting starts is a wonderful strategy to encourage many foes to attack the Tank, allowing everyone else to focus on their roles.

Buffs and Spells

Pathfinder Kingmaker Guide
Pathfinder Kingmaker (Image credit: Steam)

Every combat requires buffs and crowd control abilities. Buffs like Bless may be performed outside of battle, so start buffing your team with longer-lasting spells anytime you see an adversary. That way, you won’t have to perform it in the fight, giving you more time to strike your adversaries.

Use spells like Sleep on adversaries you don’t want to focus on straight away as soon as the conflict starts. Because one or two adversaries are unable to operate for an extended period of time, there is less incoming damage and more emphasis on those that pose a greater threat.

Flanking is a crucial part of battle since it grants +2 to Hit and activates Sneak Attack. Flanking benefits are activated when two or more adjacent characters attack it, therefore focusing on adversaries for speedier kills is a smart idea. If there is an adjacent adversary, ranged assaults, casting spells, and drinking potions all-cause Attacks of Opportunity. You may take advantage of this by dispatching someone like Amiri to deal with Ranged and Spellcaster foes. She generally dispatches them quickly, making the remainder of the fight a breeze.

Pathfinder Kingmaker Guide: Inventory management

In Pathfinder Kingmaker, keeping track of your inventory is a continual challenge, but there are a few things that can assist. There will be a shared inventory available while the group is together, which will serve to evenly distribute the weight among the players. A bag of holding, which will increase 200 pounds to the player’s weight limit, is one of the most important goods that players should obtain as soon as feasible. These bags are available for 25,000 gold from your kingdom’s merchants.

The game is free on Epic games. Go grab it quickly.

For more Guides, Tips, and Tricks

Check out our Video Games Guide Section for more dedicated guide

Prey Beginner’s Guide – Best Tips and Tricks

We have brought you a Prey Beginner’s Guide that will help you with the best tips and tricks so that you can have a better gaming experience.

A lot of this game will feel familiar to you, as it contains elements from a dozen well-known titles. But it doesn’t guarantee you’ll be able to figure out how everything works right away. If you play Prey for the first time, you’ll discover that it’s not a simple game. In the early hours, when you figure out how the game works, it can be downright nasty. 

But don’t worry; Prey’s gameplay design allows you to use a variety of workarounds and tactics to make the game a lot simpler to play. That is why we are here. Our Prey Beginner’s Guide will help you with the best tips and tricks.

Using Psychotronic scanner as night vision

Your high-tech scanner does a lot more than simply detect imposters, provide you benefits, and investigate Typhons. Okay, so that’s a lot already, but still. To some extent, putting it over your eyes provides you night vision. So, if your flashlight battery dies, just press the R3 button and use the greyscale of your psychotronic scanner to traverse Talos-1’s treacherous surroundings. As long as the laser lines don’t become too distracting, it’s a terrific technique to avoid being taken off guard when your torch goes out.

Prey Beginner’s Guide: Recycler

Prey explore
Prey (image credit: Steam)

All of that rubbish, those flowers, and those used cigars in your pockets are food for the recycler. Recyclers collect all of that garbage (along with anything else you throw in there, such as additional weapons) and transform it into raw material. Exotic (Typhon components), mineral (metal), organic (flowers and food), and synthetic materials are available (plastics).

Because your inventory capacity is limited, as your armory of weapons grows, so does the space in your pockets for rubbish. This is why we recommend knowing the location of the nearest (operational) recycler. When you convert rubbish into raw materials, it will stack in your inventory and take up less space.

If you like Shenmue 3, we have A full Shenmue 3 Trophy Guide and how to unlock them, Shenmue 3 Beginner’s Guide – Best tips and tricks

Prey Beginner’s Guide: Gloo Canon

The Gloo Cannon will be one of your most powerful weapons, despite its appearance as a simple means to hold mimics and phantoms immobile. Its primary function is to freeze foes in place, but it also provides a damage boost when struck. One of the most effective strategies to take down foes in the early game is to freeze them and then attack them.

The Gloo Cannon’s second secret function is to travel through space. If you’re having trouble going past a barrier, consider utilizing the Gloo Cannon to erect some temporary steps so you can entirely bypass it. It’s a little difficult to get accustomed to at first because it doesn’t always attach to all surfaces, but it’s a fun way to explore Talos I.

Keep stock of ammo

Prey ammo
Prey (image credit: Steam)

Ammo conservation may seem like a no-brainer in any game, but it’s extremely crucial in Prey. In this game, ammo runs out quickly, and some later-game adversaries may behave as bullet sponges for the unwary.

Trying to utilize your wrench as much as possible is a wonderful method to save ammunition. It’s a smart idea to use the wrench against tiny opponents like Mimics, but it’s also useful for sneaky confrontations. You’ll forget you ever needed ammunition after you put some Neuromods into stealth damage.

Another smart strategy to save ammunition is to use objects found in your surroundings. Adding Neuromods to your ability to lift heavy objects also allows you to toss those things at any foes in your way. To quickly wipe out Typhon, consider striking explosive canisters and enticing foes towards electricity. As you explore Talos I, you’ll discover production blueprints for several sorts of munitions, which will make stockpiling a sufficient quantity much simpler before the larger foes arrive.

Prey Beginner’s Guide: Read Emails

This point is connected to the previous two: Examine any and all computers you come across. You’ll start to find optional objectives and keycodes to rooms you didn’t have access to after enough prying through other people’s correspondence. Aside from emails, certain computers — generally those in remote locations — will have a detailed map of the area available for download. This will assist you in discovering even more chambers to investigate.

Prey Beginner’s Guide: Mimics

Prey Beginner’s Guide
Prey (image credit: Steam)

The Mimics are one of the most dangerous adversaries in Prey, although being quickly replaced by even more dangerous foes. They may imitate things in the surroundings to conceal before attacking the player, as their name suggests. This may appear strange, but there are several telltale signs that may help you spot and cope with them.

To begin, keep an eye out for items that shouldn’t be in your area. There’s a good probability that a random trashcan on the floor or an inverted cup is a mimic ready to attack you. When you’re dubious of anything, it’s also a good idea to whack it with your wrench. If you’re sure it’s a mimic, a fully charged wrench hit will knock them out in a single hit.

Mimics also produce a skittery noise when they’re close by, so if you remain motionless and listen to the environment, you’ll be able to detect one. The Psychoscope also features a Mimic Detection 1 chipset, which allows you to see disguised Mimics.

Do not miss any room

Prey Beginner’s Guide
Prey (image credit: Steam)

At any point in Prey, you’ll have a rather simple destination to reach, and the way to get there will be (relatively) easy as well. However, taking the straight route isn’t always the best option. There are rooms, doors, and diversions all throughout the place. There are good reasons to examine each one. Behind each door might be new (or more) weapons, ammo, valuable rubbish, blueprints, or even keycards and door passwords. Peeking in whatever area you can is the greatest way to get ahead.

For more Guides, Tips, and Tricks

Check out our Video Games Guide Section for more dedicated guide

Beginner’s Guide for Control – Best Tips and Tricks

We have brought you a Control Beginner’s Guide with the best tips and tricks. Follow these steps properly and win the game easily.

Remedy Entertainment continues to improve, following up the fantastic Quantum Break with the even superior Control. Control’s mix of gunplay and telekinetic skills creates some of the greatest action gameplay in recent memory, and the game expands on that fighting system with Metroidvania-style exploration.

Control, on the other hand, isn’t like typical third-person shooters. To help you get started with Control, we’ve compiled a list of the top 10 tips and techniques.

Control Beginner’s Guide: Heal

This one should be done first because it is very crucial but not very obvious. When you visit a Control Point, our main character Jesse will replenish her health. This means that if you’re in the middle of grueling combat and need to take a brief break, simply check your map and run to a nearby Control Point. 

The adversaries will not respawn, and you will be in fighting shape once again. If a battle is proving too difficult, it’s also worth hurrying, disregarding combat, and forcing the animation to unlock a Control Point, since even if you die, you’ll be able to Respawn and utilize it to fast refill HP.

Control Beginner’s Guide: Dialogue

Control Beginner’s Guide
Control (Image credit: Steam)

There are various NPCs dispersed around The Oldest House, and many of them are eager to chat to you and offer you vital side missions that will help you increase Jesse’s talents and lead you to fascinating mysteries. Aside from that, the dialogue in this game is fantastic, and if you enjoy the world you’ve been dropped into, you’ll want to return to Emily at the main hub as well. You’ll find NCPs scattered throughout the sectors on a regular basis to catch up on new topics and unravel the mysteries behind the FBC. 

Also, when you’re chatting to a key character who is locked in a cage later in the game, keep talking to them until they start repeating themselves. I know, it’s a little hazy, but trust me on this one: there’s a big reward.

Control Beginner’s Guide: Aggressive Gameplay

Control Beginner’s Guide
Control (Image credit: Steam)

Above all, it’s critical to maintain your aggressiveness in Control. Instead of automatically regenerating life or health packs, foes drop little blue shards when killed, which refill your health. The solution is straightforward: Killing foes fast helps you to refill your health more quickly.

This is significant since Control normally does not provide enough health to finish a fight. Although employing your numerous skills and ducking undercover is crucial, the most important thing is to keep the combat moving. Consider lesser adversaries to be health packets. Focus on the weakest adversary first, rather than the strongest. Take note of where they landed after they’re down and circle back there when you need some additional health.

Control Beginner’s Guide: Launching ability

Launch ability
Control (Image credit: Steam)

You gain the Launch ability early on in Control. This allows you to use telekinesis to pick up objects or chunks of rubble and fling them at foes. Despite the fact that you have a shape-shifting rifle, Launch is your most potent strike. Objects thrown at enemies deplete opponent shields and may gravely harm bigger Hiss monsters. For telekinesis, you only have a limited quantity of rechargeable energy, so don’t use it all at once. However, tossing a few boxes at the start of a battle can make things a lot simpler.

Control Beginner’s Guide: Abilities

Because the Service Weapon uses a cooldown rather than a regular reload, excessive fire may cause the weapon to overheat. Make sure to save your ammo and instead use your abilities when your ammo runs out. Launching things at foes causes the same amount of damage as a clip of bullets. So you’ll want to start incorporating the abilities into your playstyle as soon as you have them.

Do not stop moving

Control Beginner’s Guide
Control (Image credit: Steam)

Without any indication of difficulty levels, every player will have a comparable fighting experience. Enemies enjoy rushing you, getting in your way, and generally bothering you – not to mention the fact that some varieties can fly. As a result, you must be constantly on the move. Because Control lacks a cover mechanic, the easiest strategy to avoid being shot at is to avoid being in the same area as your adversaries.

Use your Evade ability to move fast and effectively across the battlefield, preserving your health and gaining ground on adversaries. Remember that while the Shield power is active, you can still walkabout, but you won’t be able to perform any aggressive maneuvers.

Control Beginner’s Guide: Hidden areas

Control has a number of Hidden Areas that are tough to locate and don’t always display on your ostensibly comprehensive map. So when you have the all-important Levitate ability, make sure you return every single place (really) and float about up above looking for nooks and crannies. This is especially true in the multi-story Research industry. 

No surprises here, but the Hidden Areas are where you’ll find Control’s greatest Easter Eggs and ability points, which are essential if you want to maximize Jesse’s ability tree and supercharge her abilities.

If you are fighting, take cover

Control Beginner’s Guide
Control (Image credit: Steam)

Control’s boss encounters may be as cruel as its design, and getting used to them takes time. As a result, the game is often fairly difficult and necessitates rapid thinking, quick escapes, and energy conservation in order to avoid a swift death. As a result, when Control traps you in a room with a hulking beast, you’ll need strategies. 

There is no guilt in exploiting the environment. Maintain a shattered environment between yourself and the monster, and appear regularly to toss rubble at him, diving under cover when you need to heal. This method can help to level out the odds of checkpointing being difficult.

Control is free on Epic Games currently. Grab it quickly.

For more Guides, Tips, and Tricks

Check out our Video Games Guide Section for more dedicated guide