Brothers A Tale of Two Sons Guide – How to Setup Multiplayer and More

We have brought you the Brothers A Tale of Two Sons Guide. We have also mentioned how to setup multiplayer and also how to start the game if you are new.

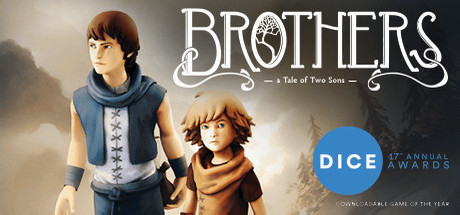
Starbreeze Studios developed Brothers: A Tale of Two Sons and 505 Games published it for iOS, Android, Xbox 360, PlayStation 3, PlayStation 4, Microsoft Windows, Xbox One, Windows Phone, and Nintendo Switch. Fantasy creatures such as orcs and trolls populate the world of the game. This plot revolves around two brothers who are on a quest to find a cure for their father’s illness. The game received excellent reviews.

Brothers: A Tale of Two Sons is told from the perspective of a third-person observer looking down on the two brothers. Two thumbsticks on the controller are used to maneuver the brothers separately. The controller triggers force the appropriate brother to interact with the game world, such as conversing with a non-player character or grasping a ledge or item. The older brother is the more powerful of the two, able to pull levers and lift his younger brother to higher places, while the younger brother can pass through tight bars.

The player advances by controlling both brothers at the same time to solve numerous puzzles, which frequently need the player to control both brothers to fulfill different roles. The game will restart at a recent checkpoint if either brother falls from a considerable height or is hurt. The tale is told through movements, gestures, and emotions because all the in-game conversations are spoken in a fictitious language based on Lebanese Arabic. Below, we have provided a small Brothers A Tale of Two Sons Guide and also explained how to set up multiplayer.

Brothers A Tale of Two Sons Guide: Explore

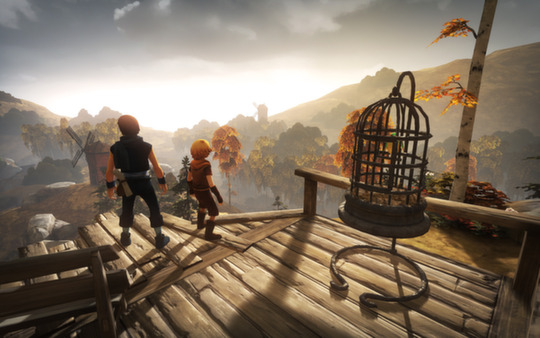
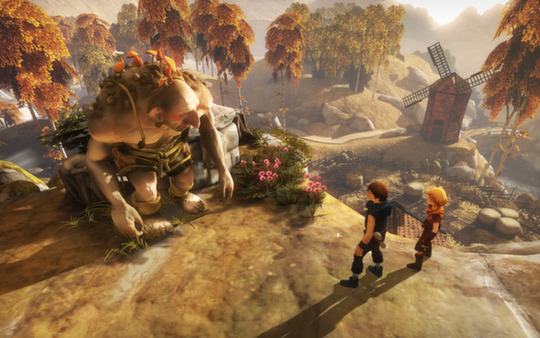
Despite the fact that the game is simple in many aspects, the player who wants to engage with the world will find much to see and do. It’s vital to keep in mind that there are no treasures, upgrades, or other bonuses available through exploring. It’s enough to see their interactions with one another and how they react to their surroundings.

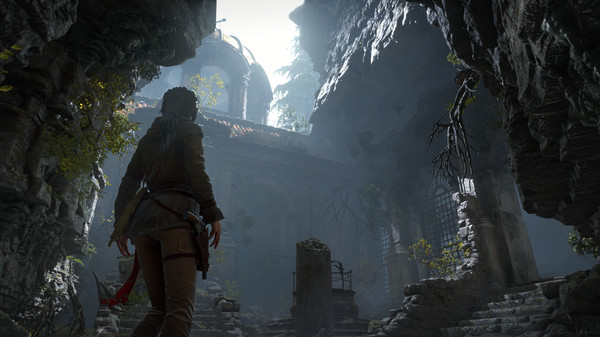
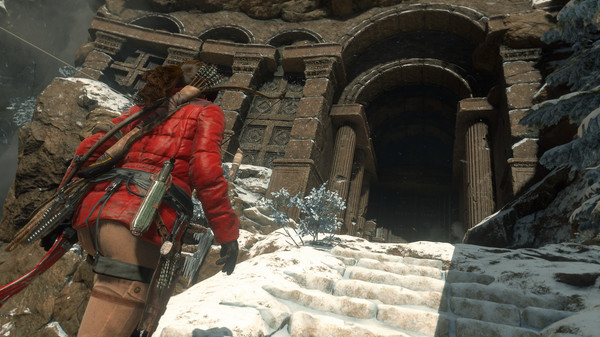
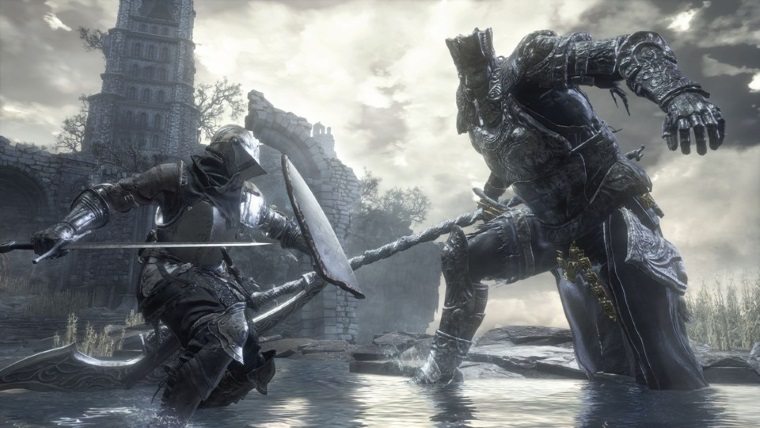
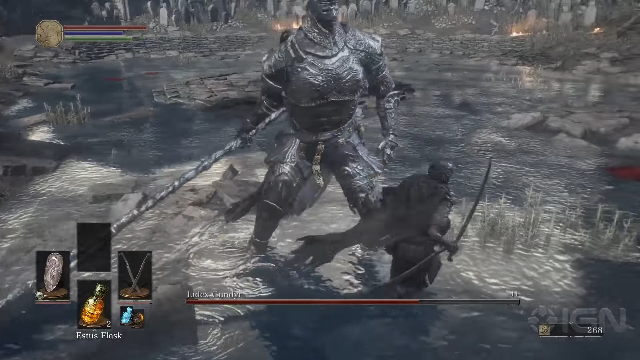
You might like Rise of the Tomb Raider Guide – Best Tips to Get Started, Demon’s Souls Weapons Guide – Best Weapons in the Game.

Brothers A Tale of Two Sons Guide: How to start?

Brothers A Tale of Two Sons Guide
Brothers a tale of two sons (Image credit: Steam)

Do not worry if you face difficulty at the starting of the game. We will help you so that you can begin the journey with ease.

The walk starts in the main plaza of the hamlet. When the old lady in the rocking rocker sees the scroll, she will point down the way. Those that take the time to explore the game will have a good time, but there isn’t much else to do but walk down the road.

Follow the walk down to where the man is working on the shrubs beside the well and adjacent to the house. Push the gate to his right open and pass through. Cross the bridge or walk down to the right to have some fun with the harpist, then wade through the shallow water and up the hill on the other side of the gate. Follow the way down and around to the ledge immediately above the hay field that was just harvested.

How to cross the Hay Field?

Brothers A Tale of Two Sons Guide
Brothers a tale of two sons (Image credit: Steam)

The hay field is guarded by a dog, so getting across safely will require some cooperation. Make a baited brother run across the field to the next rock ledge or hay bale. Have the other brother cross to another ledge or hay bale while the dog is focused on one brother, then activate that brother to draw the dog to him. Back and forth until both brothers are safe across the field, with one brother distracting the dog while the other runs.

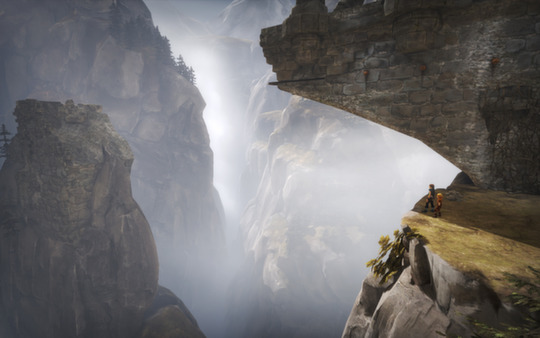
After the brothers have waded through the field, climb up the branches near the waterfall. Cross the rocks and jump onto the ledge when you reach the top. Play alley-oop with little brother and have him jump on the ladder before big brother releases the rope. On the rock wall, climb the grassy ledges (hold the activate button for two seconds, then release it to leap).

How to cross the Raised Bridge?

Little brother can lower the bridge by putting him in the large hamster wheel. Put a sheep in a hamster wheel and have big brother carry the sheep back across the bridge. Now that the sheep have been displaced, the brothers can continue up. You can climb the rocks to a point where you need to make your way around a corner to the right, with your back against the wall. From here you can continue your journey and enjoy the game. Do not forget to read the multiplayer setup below.

Brothers A Tale of Two Sons Guide: Multiplayer setup

Brothers A Tale of Two Sons Guide
Brothers a tale of two sons (Image credit: Steam)

Are you interested in playing this game with a friend or a partner? Unless you enjoy sharing a controller, that’s the only approved method. To play together, however, you can use two controllers!

  • Turn on two controllers and sign in to distinct profiles on each of them.
  • Go to the Xbox Accessories app on your phone or tablet.
  • Turn on co-pilot for the controller associated with the profile you’d like to earn achievements for (the first player is the only one to receive achievements). Turn on the co-pilot by clicking the three dots under the controller portrait.
  • Take part in the game!

Both players, of course, have control over both characters. So, one of you controls the big brother with the left stick + LT, while the other controls the younger brother with the right stick + RT. It’s ideal to hold the controller in one hand (the left or right hand, depending on whom you control). It prevents you from resisting the impulse to utilize both sticks.

For more Guides, Tips, and Tricks

Check out our Video Games Guide Section for more dedicated guides.

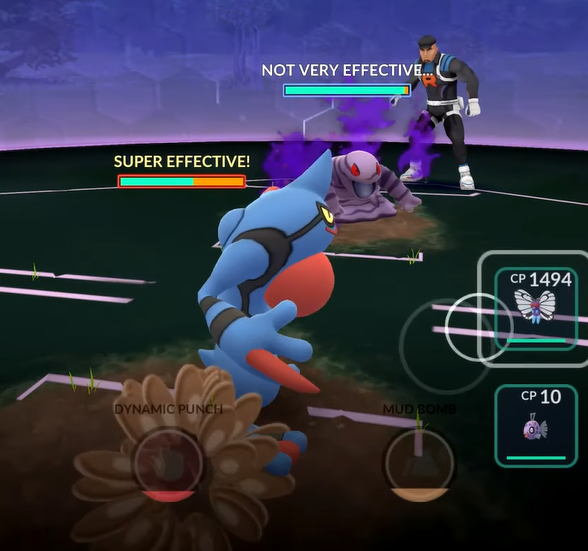
How to beat Cliff in Pokemon Go?

We have brought you a guide on how to beat Cliff in Pokemon Go. Follow the steps carefully so that you can win with ease.

Cliff, the leader of Team Go Rocket, will be a difficult opponent for Trainers in January 2022. With the right counters, he is much easier to beat than Grimer, Venusaur, and Charizard. Trainers who defeat six Team Go Rocket Grunts in Pokemon Go and collect their Mysterious Components can make a Rocket Radar by collecting those components. 

After that, either Cliff, Arlo, or Sierra will be pitted against Team Go Rocket. Leaders like these are much harder to take down than your average PokeStop Grunt. You won’t know what Pokemon you’re going to face until you start battling, which makes matters worse. We have a tip on how to beat Cliff in Pokemon Go. You’ll discover directions for taking down Cliff, getting some nice goodies, and perhaps catching your own Shadow Grimer.

Other Pokemon game guides:

How to beat Cliff in Pokemon Go: First Pokemon

Cliff, like all Team GO Rocket trainers, always begins a fight with the same Pokemon. This is his trademark Grimer, a Poison-type with a vast list of resistances. Grimer is immune to Fighting, Poison, Bug, Grass, and Fairy moves, and is only vulnerable to Ground and Psychic.

Grimer in the anime (Image credit: The Pokemon Company)

Grimer is best countered by a powerful Psychic Pokemon. Exeguttor with Extrasensory and Psychic, Mewtwo with Confusion and Psystrike, and Alakazam with Psycho Cut and Future Sight are all viable options. Players can also use a Pokemon like Groudon with Mud Shot and Earthquake to take the Ground path.

How to beat Cliff in Pokemon Go: Second Pokemon

Cliff’s second Pokemon will be one of three high-tier Pokemon: Venusaur, Crobat, or Machamp. Venusaur is a Grass/Poison-type Pokemon that is vulnerable to Flying, Fire, Psychic, and Ice attacks. Crobat is a Poison/Flying-type Pokemon, which means it’s vulnerable to Rock, Electric, Psychic, and Ice-type attacks. Machamp is a Fighting-type Pokemon who is vulnerable to Flying, Psychic, and Fairy-type attacks.

Players with keen eyes will notice that these three have a similar vulnerability, which happens to be the same as Grimer’s. Grimer and any of Cliff’s second Pokemon will be easily defeated by a competent Psychic Pokemon such as Mewtwo, Alakazam, or Exeguttor.

How to beat Cliff in Pokemon Go: Final Pokemon

Pokemon Go (Image credit: Youtube)

Cliff’s final Pokemon will mark yet another increase in difficulty in his encounters. He can utilize Tyranitar, Charizard, or Arcanine, all of which are final evolution Pokemon that will need a strong squad to defeat. Tyranitar is a Rock/Dark Pokemon that is vulnerable to Fighting, Ground, Bug, Steel, Water, Grass, and Fairy-type attacks. Charizard is a Fire/Flying-type Pokemon that is vulnerable to moves of the Rock, Water, and Electric types. Arcanine is a Fire-type Pokemon that is vulnerable to Ground, Rock, and Water attacks.

There are no simple counters to Cliff’s last Pokemon, but that doesn’t imply there aren’t any good choices. Charizard and Arcanine will be easy prey for a tough Rock-type Pokemon like Rampardos, Rhyperior, or Therian Landorus. Tyranitar also suffers a lot more damage from Fighting than from its other vulnerabilities, therefore Fighting-types like Lucario, Machamp, and Conkeldurr are ideal for taking it down.

How to beat Cliff in Pokemon Go

Kyogre, Metagross, and Mewtwo are three of the finest Pokemon Go teams for defeating Cliff. Because Mewtwo is one of the strongest Legendaries in the game, it will always come to your aid, especially against Cliff’s Phase 1 and 2 Pokemon.

In Phase 3, Kyogre takes care of Charizard and Arcanine with its Water-type attacks. Metagross, with its emphasis on Psychic-type attacks, will be formidable against Phase 1 and 2 Pokemon, but will also hold its own against Tyranitar in a pinch.

Cliff has no prior knowledge of what you’ll receive in the second and third rounds of the Team Go Rocket battle until you enter it, so you can’t plan ahead. When you lose, you have the option of rematching, so you can select a stronger lineup.

Additional tips for Combat: Part 1

In combat, the Fast Attack will be your closest buddy. Tapping the screen causes your Pokémon’s Fast Attack to attack the other, as well as charging up their Charged Attack. More damage is dealt when you tap quickly, and your Pokémon’s Charged Attack charges up faster so it may be utilized. It’s a common misconception that damage done is what powers up the Charged Attack, however, this isn’t the case.

Trainers are given two Protect Shields, which may be used to negate an opponent’s Charged Attack. Although most trainers would use them straight away to counter the first two Charged Attacks, it’s worth debating if this is the best strategy. Do you wish to employ a barrier to defend a Pokémon with one HP from a Charged Attack when the following Fast Attack would cause it to faint anyway?

Pokemon Go (Image credit: Youtube)

When your Venasaur is up against an Arcanine in a fight, it’s tempting to switch out your Pokémon right away. However, there is a time limit before you may swap out again, and if you switch out first, the other trainer is likely to follow suit. If you switch to Blastoise, the opposing trainer may send out Raichu, trapping you in the same situation. Only swap out if it’s really essential. Before you join the battle, choose your Pokémon and practice using TMs until you’re comfortable with their attacks.

Additional tips for Combat: Part 2

Pokémon may have several Charged Attacks if you’re willing to invest the stardust and sweets. Despite the fact that when one is used, they both power down to zero and must be recharged, having two is highly recommended due to the type advantages.

Combat points are an important indicator of how effective your Pokémon will be in combat, but they don’t tell the whole story. Advantages of type are far more effective. A Gyrados with 2100 CP will be more effective than a 3000 Venasaur versus a 2600 Arcanine. People are too concerned about CP, but type advantages are far more important to remember.

It’s also worth noting that your Charged Attacks should be timed. Why utilize a Charged Attack on a trainer who has used up all of their Protect Shields on their current Pokémon, who will perish in a few more Fast Attacks anyway? Unless they’re preparing to launch a Charged Attack of their own. Waiting until the next Pokémon is released is typically the greatest tactic because you’ll be able to take away more HP.

If you’re having a hard time, scroll to the bottom of the fight page and train with the team leaders. This is an excellent concept since it gives you the opportunity to practice Charged Attacks (since they require a minigame to see how effective they are). It also allows you to learn about other types of benefits you may not have considered.

For more Guides, Tips, and Tricks

Check out our Video Games Guide Section for more dedicated guides.

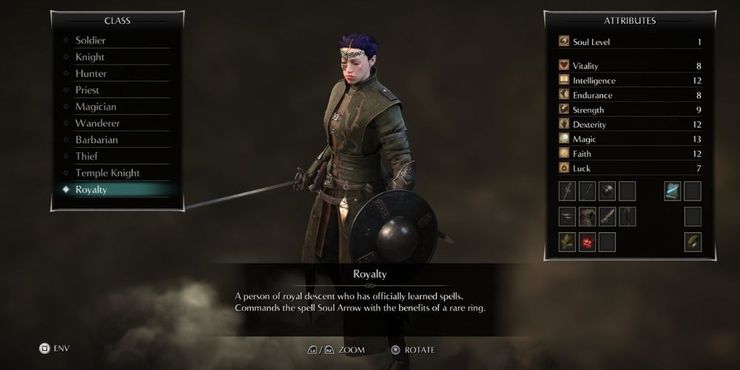
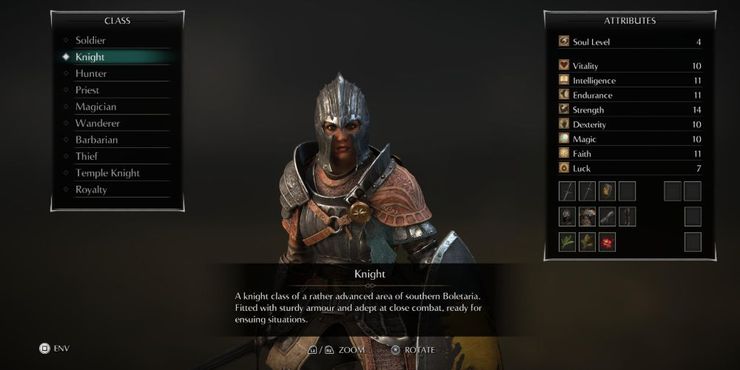
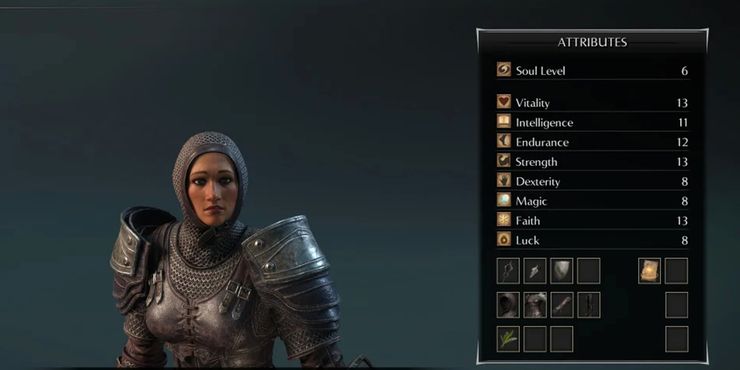
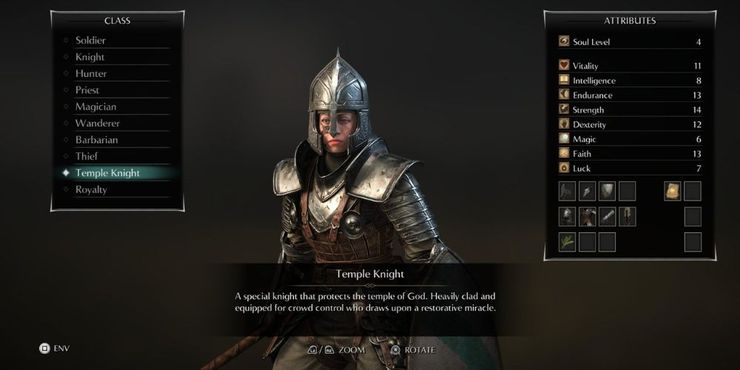
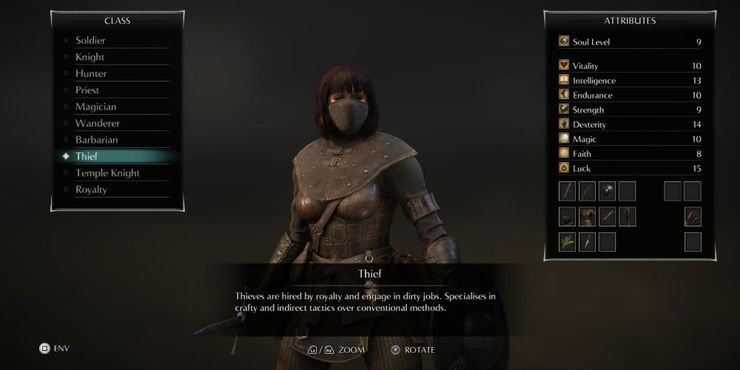
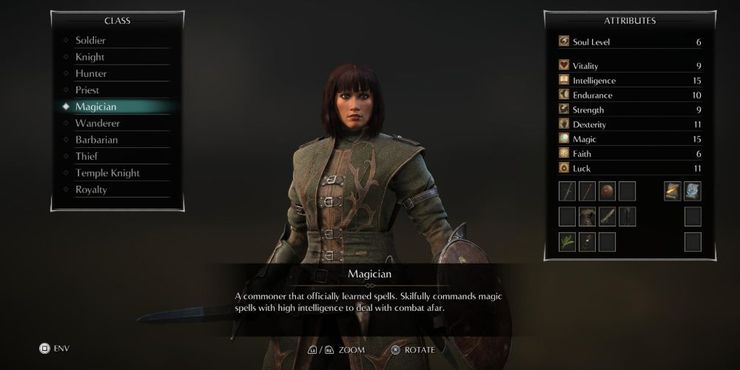
Demon’s Souls Guide – Best Weapons and Class Combinations

We have brought you a Demon’s Souls Weapons and Class Combinations guide. Read it carefully for a better combat experience.

Demon’s Souls Remake may be a launch title for this generation, but anyone who has played the original PS3 copy of this incredible RPG will know that Demon’s Souls is one of the most difficult games available. This high degree of difficulty is also not due to difficult levels or being surrounded by too many adversaries. But rather, because Demon’s Souls fighting needs expertise, which is why it is critical that you become familiar with Demon’s Souls combat as soon as possible.

In Demon’s Souls, your character’s positioning is crucial in combat. Every adversary in the game has a certain assault pattern. Some have distant attacks, some have melee attacks, and some have a combination of both. When I say character placement, I mean being at the right place at the right moment. For example, a boss may wield a melee weapon, yet that assault may land many feet away from the monster, leaving the region nearest to the boss unaffected. For a better combat experience, we have provided a guide on the best weapons and class combinations.

For detailed guide on class and weapons, read: Demon’s Souls Weapons Guide – Best Weapons in the Game, Demon’s Souls Class Guide – Best Class to choose

Demon’s Souls Weapons and Class Combinations: Royalty and Bastard Sword

Demon's Souls Weapons and Class Combinations
Demon’s Souls Royalty class (Image credit: Sony)

After playing the game multiple times, many people forget to begin at the beginning. They are able to start each attack with magic ranged strike called a Soul Arrow, which is one of their biggest advantages. In Demon’s Souls, you can create a proficient fighter in the fashion of a battle mage despite the lack of established classes. When you level them up this way, particularly when you employ weapons that cause magical damage.

One of the best weapons for beginners is the Bastard Sword. In the beginning, the weapon is short and easier to control, but it does the same amount of damage. In terms of weight and speed, we consider this a mid-tier weapon, making it a good pick for learning the intricacies of the game’s various attack animations.

Demon’s Souls Weapons and Class Combinations: Temple Knight and Great Club

Demon's Souls Weapons and Class Combinations
Great Club (Image credit: demonssouls.wiki.fextralife)

The main advantage of the Temple Knight class is that it comes with some powerful armor, as well as the healing miracle and the talisman needed to execute it. This allows you to regenerate health wherever you choose, as long as you have enough MP to cast it, and it also grants you early access to miracles in general.

This is a more utility-focused kind of magic that helps the player or modifies the world, rather than fighting adversaries. It also comes with and can use the Meridian Set of armor, which will get you almost all the way through the game but is heavier than the Fluted Set that the Knight obtains.

The Great Club is a gigantic hammer that can deal immense damage. The blows are slow, but they have the ability to break through barriers and deplete stamina. The Great Club requires a high level of Strength to use, but it has some incredible scaling. Look for the crystal lizard scampering around the lowest level to find the Great Club in World 2-1.

Demon’s Souls Weapons and Class Combinations: Knight and Falchion

Demon's Souls Weapons and Class Combinations
Knight (Image credit: Sony)

The main benefit of the Knight class is a set of well-rounded stats. It doesn’t excel in any one area, but it does give numerous helpful starting skills without forcing you to purchase souls to level up. Choosing this choice will allow you to quickly handle many heavier weapons and armors. It also features the Fluted Set armor, which, when combined with a high physical defense rating, means you can take a beating straight away. If you have a high magical stat and the required equipment, this is also an option.

The Falchion is one of the faster weapons in Demon’s Souls, featuring a light strike that can be quickly combined and powerful attacks to compliment it.

While its range is less than that of a Greatsword or Ultra Greatsword class weapon, it will give you a fighting chance if you choose a faster weapon that won’t totally deplete your stamina in a single stroke.

For more Guides, Tips, and Tricks

Check out our Video Games Guide Section for more dedicated guides.

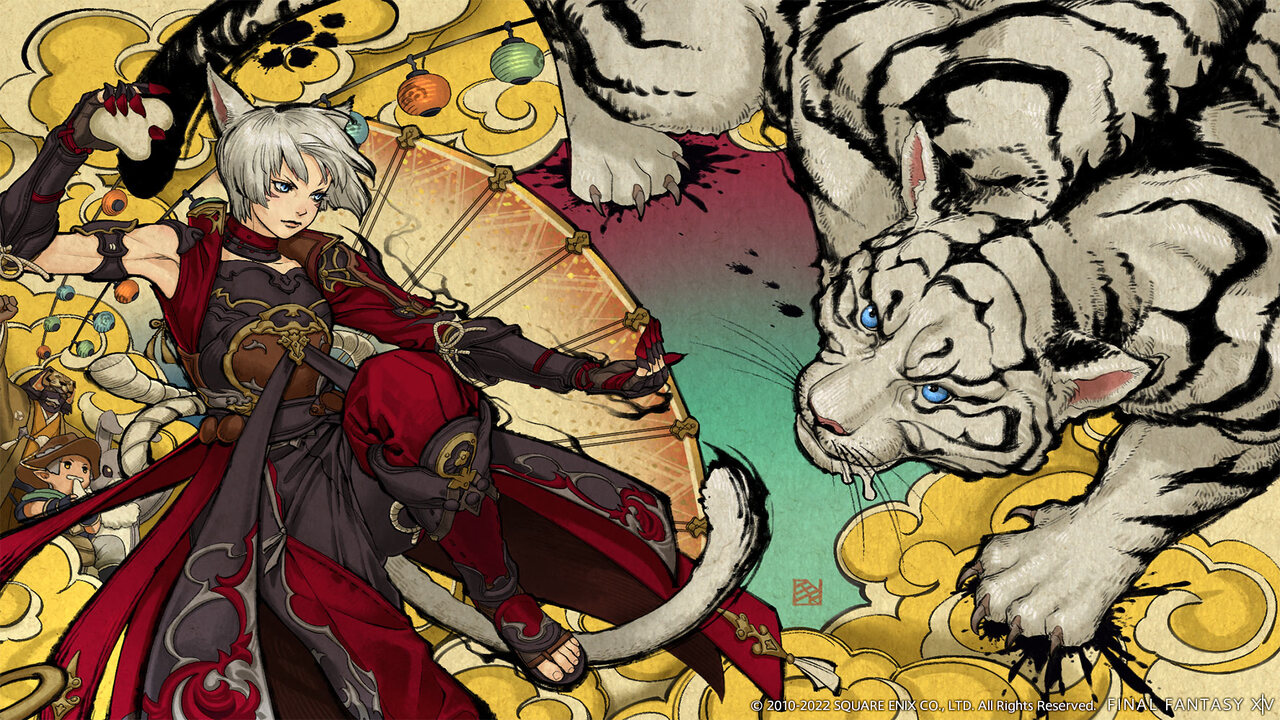
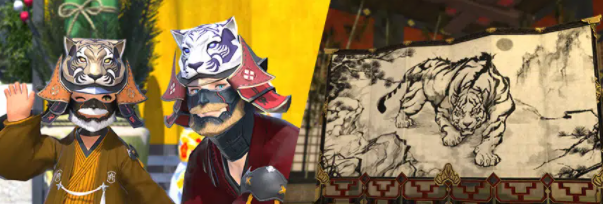
FFXIV Heavensturn Rewards and Complete Guide

We have brought you FFXIV Heavensturn rewards and quest guide. There is a limited amount of time. Read carefully and unlock the rewards.

Final Fantasy XIV‘s Heavensturn 2022 event has finally arrived, allowing players to ring in the new year with free goodies. While Heavensturn decorations have been up to in game since New Year’s Eve, the real event has been started on Wednesday, January 5 due to the slight delay in Endwalker’s release. 

You’ll simply have to complete a brief questline to obtain your free gifts, like with most seasonal FFXIV events. This year, there are two helmets and a piece of furniture up for grabs. Here’s everything you need to know about Heavensturn 2022 in Final Fantasy XIV.

You might also like Final Fantasy XIV different classes and playstyle, FFXIV Reaper Guide – How to play Reaper in Final Fantasy XIV.

FFXIV Heavensturn Rewards and Quest: How to start?

To begin, players should go to Limsa Lominsa at the Upper Decks. To begin the Heavensturn questline, the player must talk with Ushi Bugyo. Here are the missions in which players can take part in this event. To accept this quest, you must be at least Level 15. 

At approximately (X:24.0, Y:26.1), you’ll be required to fulfill the FATE ‘Tora Tora, Burning Bright’ in Middle La Noscea. Using the Limsa Lominsa Aethernet to go to the Zephyr Gate is the quickest path to your destination. The FATE does not appear to be a common occurrence, so you may have to wait a little longer. After finishing the event, you’ll receive some Heavensturn of the Tiger tickets. You’ll need them later.

Return to Tora Bugyo in Limsa Lominsa Upper Decks at (X:11.5, Y:13.9) to finish the quest and get either the Golden Tora Kabuto or the Silver Tora Kabuto. You’ll also gain access to the ‘Feline Fun’ achievement. Don’t worry about only receiving one kabuto; you may buy the other once the event is over. For further information, see the section below.  Completing the task will also open Tora Bugyo’s repeating ‘Let Them Eat Cake’ seasonal quest if you want to earn some Magicked Prism (Advent Cakes).

FFXIV Heavensturn Rewards and Quest: White Tiger Furnishing

FFXIV Heavensturn Rewards and Quest

Once you’ve finished the ‘Tangle With A Tora’ seasonal quest, you’ll be able to buy things from the Tora Shonin Festival Supplier at (X:11.3, Y:13.6) in Limsa Lominsa Upper Decks. This is where you may buy the fresh new tiger screen furnishing, as well as the other kabuto you missed out on.

You’ll need Heavensturn of the Tiger tickets to buy these things, but you may repeat the ‘Tora Tora, Burning Bright’ FATE as many times as you like while the event is running to get extra tickets.

  • The White Tiger – 3 tickets
  • Zoni – 1 ticket
  • Magicked Prism (Advent Cakes) – 1 ticket
  • Golden Tora Kabuto – 5 tickets
  • Sivler Tora Kabuto – 5 tickets

FFXIV Heavensturn Rewards and Quest: Time

Heavensturn 2022 will run for two weeks, beginning on Wednesday, January 5, 2022, at 12:00 AM (PST) and ending on Wednesday, January 19, 2022, at 6:59 AM (PST). Make careful to finish the objectives and acquire the free prizes before the event expires, because the things will no longer be available for free once the event is over.

However, this year’s awards will most likely be available for purchase in the Final Fantasy XIV Online Store for actual money next year, so you may theoretically obtain them after the event. Speaking of real money stuff, prior Heavensturn awards are now available on the Final Fantasy XIV Online Store, so you can pay to get any items you missed out on last year.

After finishing this year’s Heavensturn tasks to ring in the new year, there’s still plenty to accomplish in Final Fantasy XIV. Patch 6.05 was released in conjunction with the event, and it included the Savage version of the Pandaemonium: Asphodelos raid, among other things. There are other things to catch up on that you may have missed since the original launch of 6.0, such as obtaining your Level Checker mount and beginning your hunts.

For more Guides, Tips, and Tricks

Check out our Video Games Guide Section for more dedicated guides.

Demon’s Souls Weapons Guide – Best Weapons in the Game

We have brought you a Demon’s Souls Weapons Guide. Read carefully about the weapons so that you can use them to their full power.

The greatest Demon’s Souls weapons significantly alter your survival experience. There are several attributes that, depending on your character build, may make weapons either awesome or worthless. In many situations, the ‘best weapon’ is totally dependent on where you’ve invested your points, with attack values that level up with magic, strength, defense, and so on. A fantastic weapon for a high magic character will be rendered ineffective in the hands of a strength tank.

Before starting, read Demon’s Souls Class Guide – Best Class to choose

Demon’s Souls Weapons Guide: Bastard Sword

Demon's Souls Weapons Guide
Bastard Sword (Image credit: demonssouls.wiki.fextralife)

For novices, the Bastard Sword is an excellent choice. The weapon does equivalent damage (at first), but it is shorter and simpler to manage. In terms of weight and speed, we consider this a mid-tier weapon, making it a good pick for learning the intricacies of the game’s various attack animations.

The hefty, two-handed R2 assault of the Bastard Sword is its finest feature. This overhead swing is great for tiny passageways – and it does a lot of harm. It may also be improved to greatly scale with strength, although it can also be charmed to favor faith or magic. If you like the damage output of the Halberd but prefer something simpler to hold, the Bastard Sword is a good choice.

Demon’s Souls Weapons Guide: Claymore

Demon's Souls Weapons Guide
Claymore (Image credit: demonssouls.wiki.fextralife)

The Claymore is yet another excellent Strength-based weapon for those seeking harsh, yet reasonably quick assaults. The Dregling Merchant sells the weapon for 6,000 souls. Based on the plot, he travels between worlds 1-1, 1-2, and 1-3. Another alternative for those wishing to rescue a few souls is to combat the Blue Eye Knights that wander throughout the early game. This foe can drop a free Claymore, which is uncommon on the treasure table.

Demon’s Souls Weapons Guide: Great Club

Demon's Souls Weapons Guide
Great Club (Image credit: demonssouls.wiki.fextralife)

The Great Club is a massive hammer that can inflict massive amounts of damage. The strikes are sluggish, but they have the potential to shatter guards and deplete stamina. The Great Club demands a lot of Strength to use, but it has some amazing scaling. The Great Club may be found in World 2-1; look for the crystal lizard scampering around the lowest level. 

A Steel Shield will be at one end of the hall, and the Great Club will be at the other. From 5-1, you can also get an additional Great Club. There will be several foes in the Leechmonger boss area, one of which holds the Great Club. Last but not least, the Great Club is an uncommon drop from the Giant Depraved One opponent.

Demon’s Souls Weapons Guide: Uchigatana

Demon's Souls Weapons Guide
Uchigatana (Image credit: demonssouls.wiki.fextralife)

In the game, the Uchigatana is one of the first katanas available. In comparison with other weapons of its type, it deals less damage, but the one wielding it does not take any damage. According to players’ preferences, they should also consider the Sharp, Mercury, and Crescent upgrades. In area 4-1, you can find the weapon after beating the Vanguard. You can also access the area by following the underground secret passage through an illusionary wall. In addition to dropping from Black Skeleton enemies, the Uchigatana is also available.

Demon’s Souls Weapons Guide: Falchion

Demon's Souls Weapons Guide
Falchion (Image credit: demonssouls.wiki.fextralife)

The Falchion is one of the most powerful cured swords. The basic +10 may be quite effective, but you might want to try Tearing for even more bleed, or Mercury for a bleed-poison combo. Wanderer classes begin with a weapon, providing them with a significant edge. 

Grave Robber Blige, who will sell the weapon for 1,500 souls, may be relied on by other characters. In 4-1, players must first free Mary J. Blige, who is imprisoned. This is unlocked using a copper key discovered in the tower to the right of the first fog door. He’ll then go to 4-2 to sell his stuff.

Demon’s Souls Weapons Guide: Compound Longbow

Demon's Souls Weapons Guide
Compound Longbow (Image credit: demonssouls.wiki.fextralife)

There are few ranged weapons as versatile as the Compound Longbow. If the bow is being used as an emergency weapon, players should consider the Sticky upgrade path, or straight base +10. The use of bows is often seen as a circumstantial weapon, but a full archery build can also be deadly. It is still advisable for players to have a backup ranged attack in case distance overpowers power in certain situations.

Demon’s Souls Weapons Guide: Kilij

Demon's Souls Weapons Guide
Kilij (Image credit: demonssouls.wiki.fextralife)

Another excellent curved sword choice is the Kilij. It deals somewhat more damage than the Falchion and has a slightly longer strike motion. For its upgrading pathways, players should presumably select Tearing, Mercury, or Sharp. The Kilij may be located in Area 4-1, which is guarded by the Vanguard. 

After beating this boss, proceed to the slightly right side of the arena, where the weapon is located close to a well. Another method is to face the Golden Skeleton adversary right outside the boss fight, albeit it may be rather powerful and does not always drop the Kilij when defeated.

Demon’s Souls Weapons Guide: Estoc

Demon's Souls Weapons Guide
Estoc (Image credit: demonssouls.wiki.fextralife)

The Estoc is a lethal piercing thrusting weapon. It may deal considerably more damage when used for backstabs or riposte counters, making it an excellent choice for players that favor accuracy over overwhelming force. If choosing the critical route, consider the Fatal upgrade path, as Sharp offers superior base damage and scaling.

Players need to go to area 3-1 to obtain the true weapon. Go all the way to the first floor and search for a corpse wearing Fluted Armor and wielding a Kite Shield. Destroy the neighboring coffins to reveal a secret route. This will take you to a location where the Estoc is housed within a chest.

Demon’s Souls Weapons Guide: Dragon Bone Smasher

Demon's Souls Weapons Guide
Dragon Bone Smasher (Image credit: demonssouls.wiki.fextralife)

There are only a few swords that are as hulking as the Dragon Bone Smasher. Consequently, shields, catalysts, talismans, and off-hand weapons will not be possible to use. Although this weapon lacks defensive ability or versatility, the sheer power should make up for it. Despite having some extra fire resistance, it is only a straight base +5 upgrade path. 

Only during Pure White Tendency may you find the Dragon Bone Smasher. Start at the start and head straight forward until you come across a crystal lizard. If you turn left from here, you’ll find the sword within a short distance.

For more Guides, Tips, and Tricks

Check out our Video Games Guide Section for more dedicated guides.

What is Divine Bridle and How to obtain it – Genshin Impact Guide

We have brought you a guide on how to obtain Divine Bridle in Genshin Impact. We’ve also gone through sigils in-depth, so don’t miss that.

In Genshin Impact, the Divine Bridle was a symbol of a Sunchild’s authority. To get this item, users must complete a series of missions assigned by Aberaku. This astral projection is the manifestation of someone who used to be Enkanomiya’s rescuer. Aberaku built a gadget that imitates the force of the “sun” while the people were living in darkness and dread.

Unfortunately, the peace did not endure long. While monsters are no longer a menace in Enkanomiya, the presence of this artificial light has resulted in certain twisted individuals attempting to gain control of the area. They encourage the populace to worship Dainichi Mikoshi as a result of this. Following that, these adversaries would select a youngster to be the “Sunchild,” influencing the child to perform what they wanted. Aberaku, of course, opposes this notion. Finally, Helios Forger was charged with high treason and sentenced to life in prison.

Aberaku’s soul is now hollow since he can’t recall what occurred while he was living. As a result, he requests that the Traveler take three fragments of his soul. Aberaku, on the other hand, determines that the Sunchild Token is useless to him. As a result, he gives the item to the Traveler instead. Players can use this guide to complete Aberaku’s challenges and get the Divine Bridle.

How to obtain Divine Bridle in Genshin Impact

It is advised that you gather at least three sigils of each kind before undertaking Hyperion’s Dirge World Quest, as they are necessary to begin all of the tasks. To begin Aberaku’s mission, Hyperion’s Dirge, players must go to three different sites in Enkanomiya. 

Each of them will have a sigil configuration that may be unlocked using the Key Sigil. Once all seals have been unlocked, an afterimage will appear in the center of the structure. To begin the task and receive the offers, speak with the NPC.

For more Genshin Impact guides, read:

Before going further, take a look at all Sigil locations below, because sigils give you many things in the game.

Sigil Locations

Finding these uncommon Keys is necessary for moving through Enkanomiya, and they can award players with excellent prizes. Collecting all 59 of these Sigils will lead to a plethora of Primogems and other hidden treasures, so fans should keep a watch out. Enkanomiya is a significant addition to the game, with loads of hidden boxes and loot distributed over its various islands. Players have a lot of lands to travel over here, and there are things around every turn. Rare Key Sigils are one of the area’s newest features.

https://twitter.com/genshinBLANK/status/1464929685087952903?s=20

Key Sigil I and II

The first set of Key Sigils may be discovered in a variety of locations, including the Evernight Temple, Dainichi Mikoshi, The Serpent’s Heart, and The Narrows. There are sixteen of these sigils to gather, some of which come in pairs of two. Key Sigil II may be found largely in the same places, with one of them appearing at Kunado’s Focus. These Sigils have a crashing wave design and may be used to unlock the same symbols that can be found throughout Enkanomiya. There are a total of nine to gather.

Key Sigil III, IV, and V

The eight key sigils III scattered across Enkanomiya are much farther apart. Players should grab the Sigil they find on the open sea before they struggle to find it later on. You only need to find eight of them. 

The Key Sigil IV is found on every island of the first three. It is important for players to keep an eye out for another one in the ocean. All fourteen are required to unlock the hidden markings, so fans should collect them all.

As with the first few key sigils, the final set can be found in the same general areas. Getting the last set of seals requires you to find the final Sigils. In total, there are 12 Key Sigil V to find. 

Divine Bridle in Genshin Impact: First Challenge

Sigil locations
The Narrows (Image credit: Genshin Impact)

Start by teleporting to the waypoint west of The Narrows and heading northeast. Unlock each boulder’s seal using Key Sigils. Start a challenge with Aberaku once it appears. In less than 30 seconds, you must defeat three Primordial Bathysmal Vishaps. You can collect the Precious Chest to receive rewards after completing the challenge. You will then receive an ‘Offering of The Narrows’ from Aberaku once more.

Divine Bridle in Genshin Impact: Second Challenge

The second challenge is found in Evernight Temple. You may teleport to the waypoint north of Evernight Temple and walk northwest until you come upon the sigil boulder. To begin the task, as previously, open each sigil’s seal and interact with Aberaku. 

Divine Bridle in Genshin Impact
Genshin Impact (Image credit: Genshin Impact)

You will battle two Rockfond Rifthound Whelp and one Rockfond Rifthound this round. To accomplish the challenge, defeat all opponents in under 60 seconds. After completing the task, claim the Precious Chest and speak with Aberaku to get ‘Offerings of the Temple.’

Divine Bridle in Genshin Impact: Third Challenge

To complete the last challenge, teleport to the waypoint in The Serpent’s Heart and proceed east. You must beat Pyro, Hydro, and Electro Abyss Mage in under one minute in this exam. After completing the tasks, you will get ‘Offerings of the Serpent’s Heart.’

When you’ve collected all three offers, you’ll be able to enter a hidden area beneath the teleport waypoint in Dainichi Mikoshi. Light the torches using a Pyro attack to reveal the path. There will be three altars where all offerings can be placed.

Divine Bridle in Genshin Impact
Genshin Impact (Image credit: Genshin Impact)

After submitting three offerings, a cutscene will begin, and a Phase Gate will materialize in front of the altar. You may teleport to the summit of Dainichi Mikoshi by passing through the gate. To finish the World Quest and get the Divine Bridle item, you must speak with Aberaku one last time at the summit of Dainichi Mikoshi.

For more Guides, Tips, and Tricks

Check out our Video Games Guide Section for more dedicated guides.

Demon’s Souls Class Guide – Best Class to choose

We have brought you the Demon’s Souls class guide for every class. We have mentioned in detail about every class.

Demon’s Souls includes a plethora of playable classes that may be selected at the start of the game when creating a character. Whether a player decides to be a Thief or a Wanderer, class limits in Demon’s Souls are quite lax. The only significant distinction between classes is their starting equipment and stats. 

Choosing the appropriate class at the start, on the other hand, will launch a player into the game faster than if they spend time finding out their preferred playstyle. When first starting out in the game, it’s best to stick to the basic classes, while more proficient players may make excellent use of more specialized classes as well.

Demon’s Souls class guide: Priest

priest class
Demon’s Souls Classes (Image credit: Sony)

The Priest begins with good damage, as well as the necessary gear and Faith to perform the healing miracle. Because of the high Faith, many players base their characters on it, as well as weapons that scale damage with it. That includes employing sanctified weapons, such as the Blessed Mace +1 found early on in the Valley of Defilement region.

For more class guides of other games, read Best Class to choose in FFXIV, Final Fantasy XIV different classes and playstyle.

Demon’s Souls class: Royalty 

royalty class
Demon’s Souls Classes (Image credit: Sony)

The Royalty class, or Royal, is sometimes referred to as the ‘easy’ class. Usually by folks who have played the game multiple times and have forgotten they have to start someplace. The biggest advantage is that they begin with a ranged magic strike called Soul Arrow. Due to the lack of established classes in Demon’s Souls, you can easily construct a proficient fighter in the pattern of a battle mage. If you level them up in that manner, especially if you employ weapons that cause magical damage.

While it takes time to wind up, the bulk of early foes may be one-shotted with Soul Arrow. Royals also start with the Fragrant Ring, which recharges the MP power used by magic, removing the need for consumables. They also receive the Silver Catalyst (similar to a magic wand) and Silver Coronet, both of which increase maximum MP. The disadvantage is that they start with limited health and stamina. 

However, because they begin at Soul Level 1, you may level up and adjust the build for less money, as the cost of boosting a stat increases with Soul Level. Other builds may have better health at the start, but they will also have a higher level, therefore leveling up will be more expensive.

Demon’s Souls class guide: Temple Knight

temple knight class
Demon’s Souls Classes (Image credit: Sony)

The major benefit of the Temple Knight class is that it comes with some strong armor as well as the heal miracle and the talisman required to perform it. This allows you to regenerate health anywhere you choose as long as you have enough MP to cast it, as well as giving you early access to miracles in general. 

Rather than attacking foes, this is a more utility-focused style of magic that benefits the player or transforms the world. It also comes with and can utilize the Meridian Set of armor, which will go you almost the entire way through the game but is heavier than the Fluted Set the Knight receives.

This class isn’t quite as well-rounded as the normal Knight, with somewhat lower Intelligence and Magic – which it balances with one of the strongest Faith values in the game. Its beginning weapon, the long, pokey Halberd, is perfect for cautious rookie players who want to keep their distance, but it may pose issues in confined locations where you don’t have enough room to swing it.

Demon’s Souls class: Thief

thief
Demon’s Souls Classes (Image credit: Sony)

Because of its poor starting damage and protection, this is one of the most difficult builds to learn. This class is designed to rely on ripostes and backstabs for additional damage, as well as the bleeding effect of daggers, rather than direct assaults. It implies you’ll need some significant talents to employ a thief well, which is why many return players see it as a “challenge.”

Demon’s Souls class: Knight

knight
Demon’s Souls Classes (Image credit: Sony)

The major advantage of the Knight class is a set of well-rounded stats. It doesn’t shine in any one area, but it does provide several useful starting skills without requiring you to pay souls to level up. Choosing this option will allow you to immediately handle several heavier weapons and armors. It also has the Fluted Set armor, which, when paired with a high physical defense number, means you can take a beating right away. If you have a good magic stat, that is also a possibility if you have the necessary equipment.

Knights start with decent all-around stats, armor, shield, and sword, making them a solid overall starting that can take a hammering, dole it out, and hopefully live long enough to be molded into anything you wish. If you desire a class with different gear or more specialized beginning stats, don’t allow the Fluted Set armor to be a deal-breaker for you. This class has one of the lowest luck values, which means you may miss out on item drops.

Demon’s Souls classes: Magician

Demon's Souls Classes
Demon’s Souls Classes (Image credit: Sony)

Many believe the Magician class to be one of the most difficult classes to begin within Demon’s Souls. It has low numbers in almost every category except Magic and Intelligence, making it very soft throughout most of the game.

What the Magician loses in survivability, it makes up for with spell access. It all begins with the Flame Toss attack and the Water Veil self-buff, as well as the Short Sword, Leather Shield, Wooden Catalyst, and Wizard’s Armor set.

Demon’s Souls classes: Soldier

Demon's Souls Classes
Demon’s Souls Classes (Image credit: Sony)

In Demon’s Souls, the Soldier class is a jack-of-all-trades and master of none. It starts with average stats, a Broad Sword, Short Spear, and Soldier’s Shield, as well as a Plate armor set, and physical stats that are greater than magical numbers. The Soldier class has few drawbacks other than the fact that it isn’t particularly engaging. It’ll get you through the game, but it’ll be a little mundane for the first several hours.

Demon’s Souls class guide: Wanderer

Demon's Souls Classes
Demon’s Souls Classes (Image credit: Sony)

The Wanderer class is quite similar to the Thief class, except that it has a greater Dexterity stat instead of access to Magic skills. It all starts with a fast-swinging Falchion and Dagger, followed by a Wooden Shield, Leather Armor, and even a pair of Hard Leather Boots.

Demon’s Souls class guide: Barbarian

Demon's Souls Classes
Demon’s Souls Classes (Image credit: Sony)

Some Demon’s Souls fans see the Barbarian class as the game’s “deficient” class. As there is no class that begins with nothing, the Barbarian comes the closest in Demon’s Souls, beginning with only a club and a wooden shield.

The Barbarian, on the other hand, has the greatest Strength of any beginning class in the game. Barbarians are brutally destructive characters when coupled with Two-Handed weapons like Greatswords. Unfortunately, their lack of armor causes them to be squishy at the start of the game.

Demon’s Souls Classes: Hunter

Demon's Souls Classes
Demon’s Souls Classes (Image credit: Sony)

In Demon’s Souls, the Hunter class is similar to a ranger in that it has access to both close combat and ranged combat weaponry. The Battle Axe is a powerful one-handed weapon, while the Long Bow grants the Hunter access to ranged physical damage before any other class. It has minimal access to magic or miracles, but it compensates with outstanding fighting stats like strength and agility, as well as a very high luck score.

For more Guides, Tips, and Tricks

Check out our Video Games Guide Section for more dedicated guides.

Rise of the Tomb Raider Guide – Best Tips to Get Started

We have brought you the Rise of the Tomb Raider Guide. We have provided some great tips that you can follow and get started.

The reboot Tomb Raider franchise continues with Rise of the Tomb Raider, the second installment. Lara Croft discovers more about her late father’s background and looks for the riches he never discovered in this new adventure. Rise of the Tomb Raider is regarded as one of the series’ greatest games and is a fan favorite. 

Lara’s life is difficult. On her never-ending adventure to save humanity from itself, she’s always being shot at, set ablaze, and hurled from cliffs, and Rise of the Tomb Raider follows the series’ ever-violent course. Rise charts Lara’s transformation from the hesitant explorer seen in 2013’s Tomb Raider reboot to a globe-trotting treasure hunter, and it throws many instruments of agony in your path. With our Rise of the Tomb Raider Guide, you will get the best tips to get started.

Want more Tomb Raider guides? Read Rise of the Tomb Raider Multiplayer Guide – Easy way to play with friends, 10 Tips for Shadow of the Tomb Raider – Guide.

Rise of the Tomb Raider Guide: Skill points

After accumulating enough XP, you will have access to skill points, which you may use to improve Lara’s skills. These skill points should be used to match your desired playstyle, however, some are excellent early investments. The first is the Avid Learner talent, which grants you 20-30% more XP for discovering mysteries throughout the game.

If you earn this prize early, the XP increase will let you acquire another skill point faster. The Finesse talent, which grants you additional XP when you chain consecutive headshots, stealth kills, or death from above kills, is another useful XP increase. In summary, you should spend your Skill Points early so that you may subsequently acquire additional skills.

Keep an eye on colors when you want to stealth

Rise of the Tomb Raider Guide
Rise of the Tomb Raider (Image credit: Steam)

In Survival Instinct, enemies are now either red or yellow. Red signifies they can see each other, which means you’ll be triggered and alerted if you drop them because someone else can see them. If you get a headshot, yellow implies no one else can see them and they’ll die without additional incident. Simply kill them. Stay steady if you want Survival Instinct to stay active so you can notice the colored markers on each adversary. When you move, the game returns to its normal world mode.

If you want to clean out a bunch of foes without raising a fuss (or attracting reinforcements), take shelter, engage Survival Instinct, and then wait. The guards’ colors will shift from red to yellow as they move apart from each other. Choose your moment and squander it.

Rise of the Tomb Raider Guide: Supply shack

This hut may be found early on in the Soviet Installation hub region, where numerous pieces of equipment are for sale. You’ll need to earn Byzantine coins to buy them, so you’ll only be able to afford one item (if any) when you first come across it.

However, as you continue through the game, it’s easy to lose sight of the shack. Sure, it occasionally reminds you that new equipment is available for purchase, but you’re not going to stop what you’re doing and go there, are you? Actually, you should probably do it. You may fast travel from a campfire at any moment, so return frequently to increase your arsenal.

Rise of the Tomb Raider Guide: Bow is crucial

Rise of the Tomb Raider Guide
Rise of the Tomb Raider (Image credit: Steam)

Lara’s bow has become a franchise mainstay, as well as the most powerful and flexible weapon in the game. You’ll wield her bow for a variety of tasks, including puzzle solving and navigation. The bow is unquestionably a fantastic piece of equipment, but it is also a terrific stealth weapon.

One thing that these new Tomb Raider games make clear is that Lara Croft is not invincible, so you must approach combat situations with caution. The bow is the ideal weapon for picking out adversaries and giving you the upper hand in a fight.

Rise of the Tomb Raider Guide: Deadly Force

This perk can be found on the Brawler skillset’s second tier. When you first start the game, you may kill people from behind with your bow, but you must keep hitting the button to finish them. However, with Deadly Force activated, you may kill fast and efficiently. In addition, empty bottles are used to smack victims over the head.

Rise of the Tomb Raider Guide: Outfits

Rise of the Tomb Raider Guide
Rise of the Tomb Raider (Image credit: Steam)

Lara’s clothing may be changed at campfires (and only at campfires). Surprisingly, the option is concealed in the Weapons menu. Simply go to the Outfits menu and you’ll be able to change Lara’s appearance with the press of a button.

This feature isn’t just for the show. When you complete missions, you may be awarded new clothing, which can have an effect on Lara’s performance. For example, the Battle Worn coat is obtained by completing an optional Mission in one of the game’s primary map zones. It shortens the time between receiving damage and regaining health, making it visibly valuable in combat.

Hunt carefully

Whether you enjoy dropping deer and bears or not, if you want to progress in Rise of the Tomb Raider, you’ll need to channel your aversion to all things fluffy. You won’t be able to use your ice-ax as a melee weapon unless you collect enough skins.

The initial base camp is an excellent site to hunt deer. Before you begin, kill a large number of animals, at least enough to get you through the first several upgrades. Aim for ten skins. Rise’s animals must be treated with care. Wolves, for example, are extremely hazardous. They are capable of killing you. You must eliminate them with a ranged weapon before they reach you. Dropping an unusual animal, such as a bear or a huge cat, is also a severe matter. 

To bring down a grizzly, you’ll need to flee, employ various modes of fire, and be prepared to shoot a lot of arrows. They’re tenacious. Even employing an assault rifle isn’t going to solve the problem, so brace yourself for some furry rumble.

For more Guides, Tips, and Tricks

Check out our Video Games Guide Section for more dedicated guides.

Pokimane reveals she ‘regrets streaming on Twitch’

Twitch star Pokimane has shockingly revealed that she regrets streaming on the Twitch platform.

Many people like Twitch broadcasting. Pokimane is one of these streamers. The Twitch star is a prominent female streamer on the Amazon-owned site. She has, however, said that her time as a Twitch streamer was one of her biggest regrets. Why is this the case?

Pokimane admitted in her most recent broadcast that she regrets becoming a Twitch influencer, adding, “I don’t know myself anymore.” Pokimane believes that streaming is costing her her youth and early 20s, as she hasn’t traveled much or explored as a normal 20-year-old should.

Read What is the ‘Cracker’ Issue on Twitch? — Pokimane, HasanAbi, Nmplol, and more.

Pokimane regrets streaming on Twitch

The strange thing is that she just woke up one day and got this overwhelming emotion. Pokimane grew up streaming and began when she was 17 years old. And she never gave herself permission to live a regular life. She regrets that at 25 years of age, she hadn’t accomplished anything she set out to do.

“You’re meant to discover yourself, the world, everything in your twenties, and I felt like I’d been stuck.” That sort of thing. “F**k, when am I going to get to live my life?”, Pokimane said. The Twitch community attempted to cheer up an obviously lost and depressed Pokimane, but she proceeded with her honest diatribe. She also informed her admirers of her plans to take more vacations and travel in the coming months.

Pokimane also claimed to have “lost contact with everything that made her feel wonderful.” When I glanced at my closet, I said, “Yuck!” and threw everything away. It was just like that for everything. I took a step back and had to decide where I wanted to be emotionally and psychologically. This is why I’ve been streaming less and doing more stuff with people, attempting to figure out who I am.

Pokimane on Twitch

Pokimane (Image credit: Pokimane on Twitch)

The star has been a staple of Twitch broadcasting in recent years, and she is the platform’s third-most viewed female content producer.

The 25-year-old sensation burst onto the scene in the mid-2010s and rose to prominence via broadcasting League of Legends and Fortnite. Her fame continued to climb on the purple platform as she approached 2020 when she solidified her future with a lucrative multi-year contract to remain solely on the website.

Her victories, however, are also Imane’s greatest regrets. According to the Twitch broadcaster, devoting the previous eight years of her life to her business has left her “confused” and unsure of who she truly is.

For more stories

Check out the Entertainment section for more stories.

How to Beat Iudex Gundyr in Dark Souls 3 – Guide

We have brought you a guide on how to beat Iudex Gundyr in Dark Souls 3. Do not forget to read the extra combat tips we provided at the end.

The boss fights are the focus of Dark Souls 3. Sure, every encounter is risky, difficult, and potentially fatal, but the bosses are the ones who truly demolish you and challenge you to perform better. You’ll face one of these strong foes early on in the game, though he’s nothing like as difficult as the ones you’ll fight later on. Still, if you’re new to the game, you could struggle to kill him, so here’s our guide on how to beat Iudux Gundyr, the first boss in Dark Souls 3.

Iudux Gundyr will appear shortly after starting Dark Souls 3 as you leave the graveyard and walk toward the Firelink Shrine, which will serve as your home base for the rest of the game. He’ll be kneeling with a sword thrust through his shoulder. Approach him and draw the sword to begin combat. Begin hitting as soon as you take the blade off his shoulder and don’t stop until he appears ready to strike.

How to Beat Iudex Gundyr

This initial region is really little, and you’d have to be a complete moron to get lost in it. Head down the left route down the hill, where the game will educate you about jumping and falling, but a mile down, you’ll notice a large, damaged archway. After cleaning up a few skeletons, including one with a crossbow, proceed through the arch to see your old companion Gundyr kneeling in the middle of a shallow pool of water.

Unlike many bosses, you don’t have to be concerned about approaching Gundyr for the first time. He’ll stay in that posture until you remove the coiled sword from his chest, at which point you’ll discover a swarm of black tentacles sprouting out of his back. These will be important later.

You might also like Dark Souls 3 – A guide for this nightmarish hellscape.

How to Beat Iudex Gundyr: Firebombs

Dark souls 3 (Image credit: IGN)

Iudex Gundyr’s vulnerability is fire damage. How do you summon fire unless you’re a pyromancer? As you descend the hill from the first campfire, you’ll notice a road that continues down and to the left, neatly towards Gundyr (that you find after leaving the cemetery). 

There’s also a trail that curves to the right and up, almost behind you, before bending back down. If you choose the appropriate path, it will bring you to several skeletons and a dead end, with a lovely little packet of firebombs at the very end of this dead end. Because they do not equip automatically, make sure you have them in your inventory before the combat.

How to Beat Iudex Gundyr: Use Shields

If you have a shield, use it frequently to deflect his strikes until you are ready to strike back. Dodging, on the other hand, is absolutely recommended, so attempt to dodge and roll out of the line of attacks whenever possible. Both of them will deplete your stamina, so keep an eye on it and take a step back if necessary. Keep them in mind during all of your Dark Souls 3 battles.

First Phase of Iudex Gundyr

Dark souls 3 (Image credit: IGN)

Gundyr will begin fighting you once you have removed the blade from his chest. He’s not too difficult because he’s the first boss, and he’s supposed to ease novices into the Souls experience. So he shouldn’t cause you too much problem, and you should keep the firebombs for his second phase rather than squandering them now. Although his halberd has reach, it’s simple to roll out of the line of his assaults, whether they’re stabbing or horizontal sweeps.

He also enjoys vertically pounding it down on the ground, which is the optimum opportunity to run in and land a few mild attacks before backing off. Gundyr walks slowly, so his attacks are visible, but bear in mind that he may turn on a dime with any of them if you’re behind him. If you know how to parry, you may put it to good use here. When he reaches half health, those tentacles on his back will sprout and become an abyss beast.

Second Phase of Iudex Gundyr

This is the period to use the firebombs, assuming you still have them, because this is when he is most vulnerable to them (pyromancers should also make good use of their fireball spell). If you go too close to him, he may now leap impressively far across the arena, so if you’re a ranged or spellcaster, keep an eye on your spellcasting times.

If you’re a melee, the second phase includes 360 degrees of danger: the tail behind you, the enormous slug head in front of you, the halberd on his right, and a new giant arm on his left. In this state, his techniques are more difficult to predict, and getting a giant tremendous headbutt off him will harm you the most. So remain behind him and look for large slam strikes to hit, as they’ll provide you with more of an opening. You may now enter Firelink Shrine, congratulations!

More Combat Tips you should know

Dark souls 3 (Image credit: FromSoftware)

Keep a ranged weapon in your armory and use it on occasion. When combined with your regular combat repertory, it produces a far more effective battle method. Because many Dark Souls 3 foes do not employ long-range attacks, you have an edge against them. A long-ranged weapon should be kept in your backup weapon slot. When you combine ranged strikes with explosives, you may inflict tremendous damage on heavier opponents.

Magic might be a little tough to use because it requires more time than your ordinary strikes. Before you utilize magic, be sure you’re a safe distance away from your adversaries. Experiment with different spells.

Bosses are difficult to learn since their motions and animations alter when they know you are close to winning. There is a brief moment when they transform into a much more terrifying beast, during which you can launch a few attacks before returning to what you were doing previously. Allow them to attack and dodge, so you can study what they’re doing and use it against them.

Each adversary has a unique set of moves and animations. Even bosses are easier to beat once you figure it out. Remember that any adversary in Dark Souls 3 is capable of murdering you without remorse, so treat them with the utmost respect. Be patient and analyze their animations before attacking. You have an advantage in a fight if you can foresee their movements and movesets. You can efficiently evade, parry, and attack.

For more Guides, Tips, and Tricks

Check out our Video Games Guide Section for more dedicated guide